Let’s get started 🚀
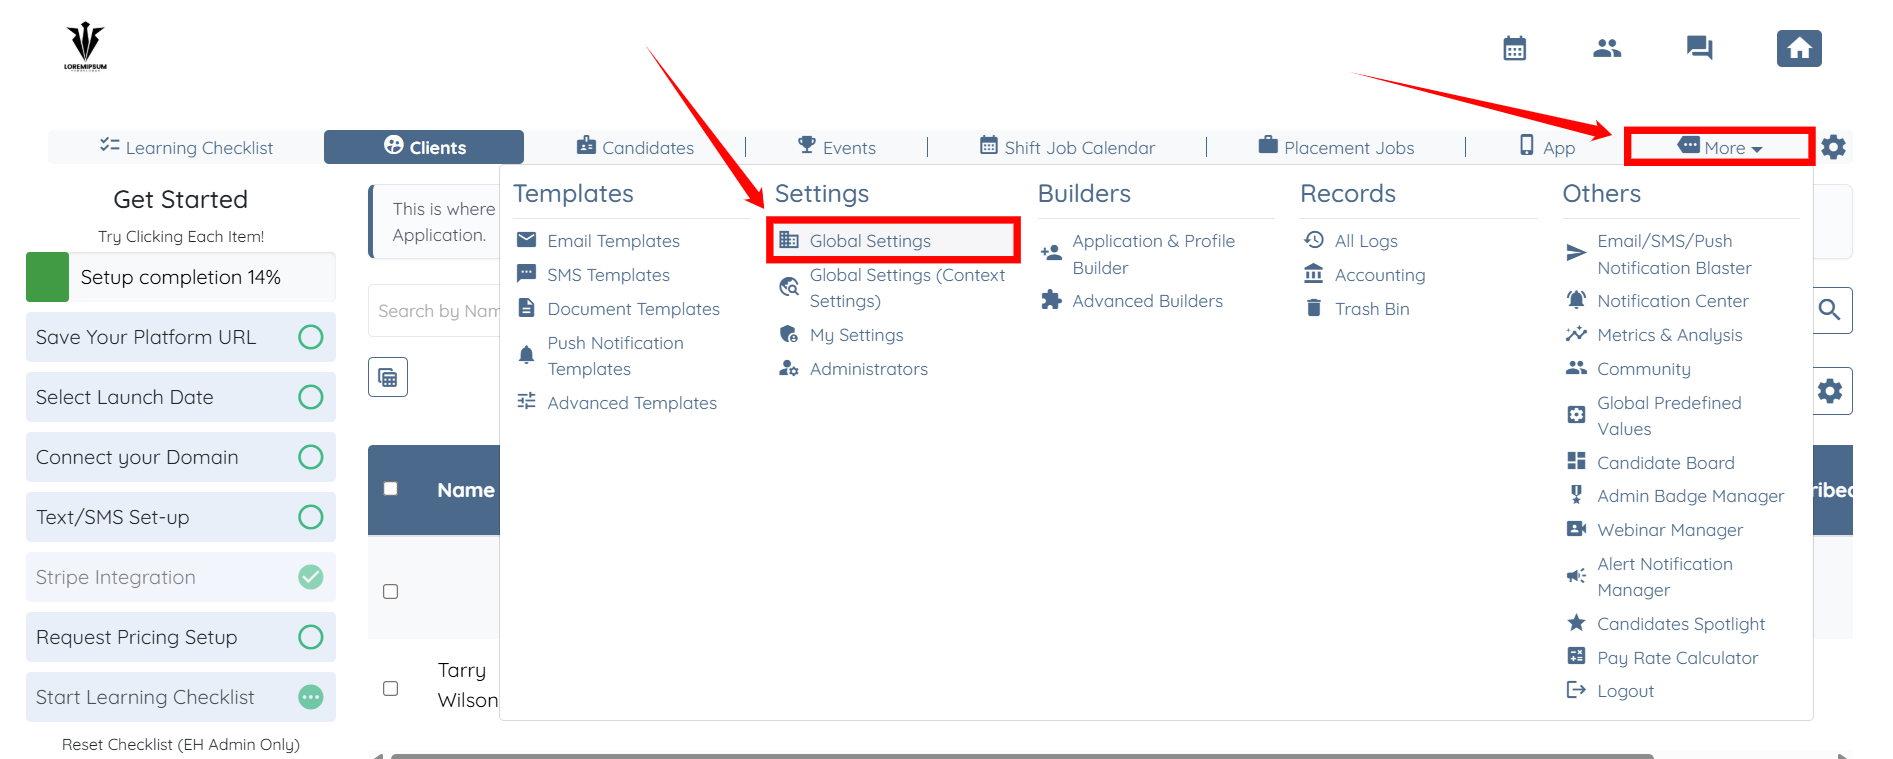
Step 1: Log in to your agent dashboard and click More > Global Settings, as shown in the screenshot below.
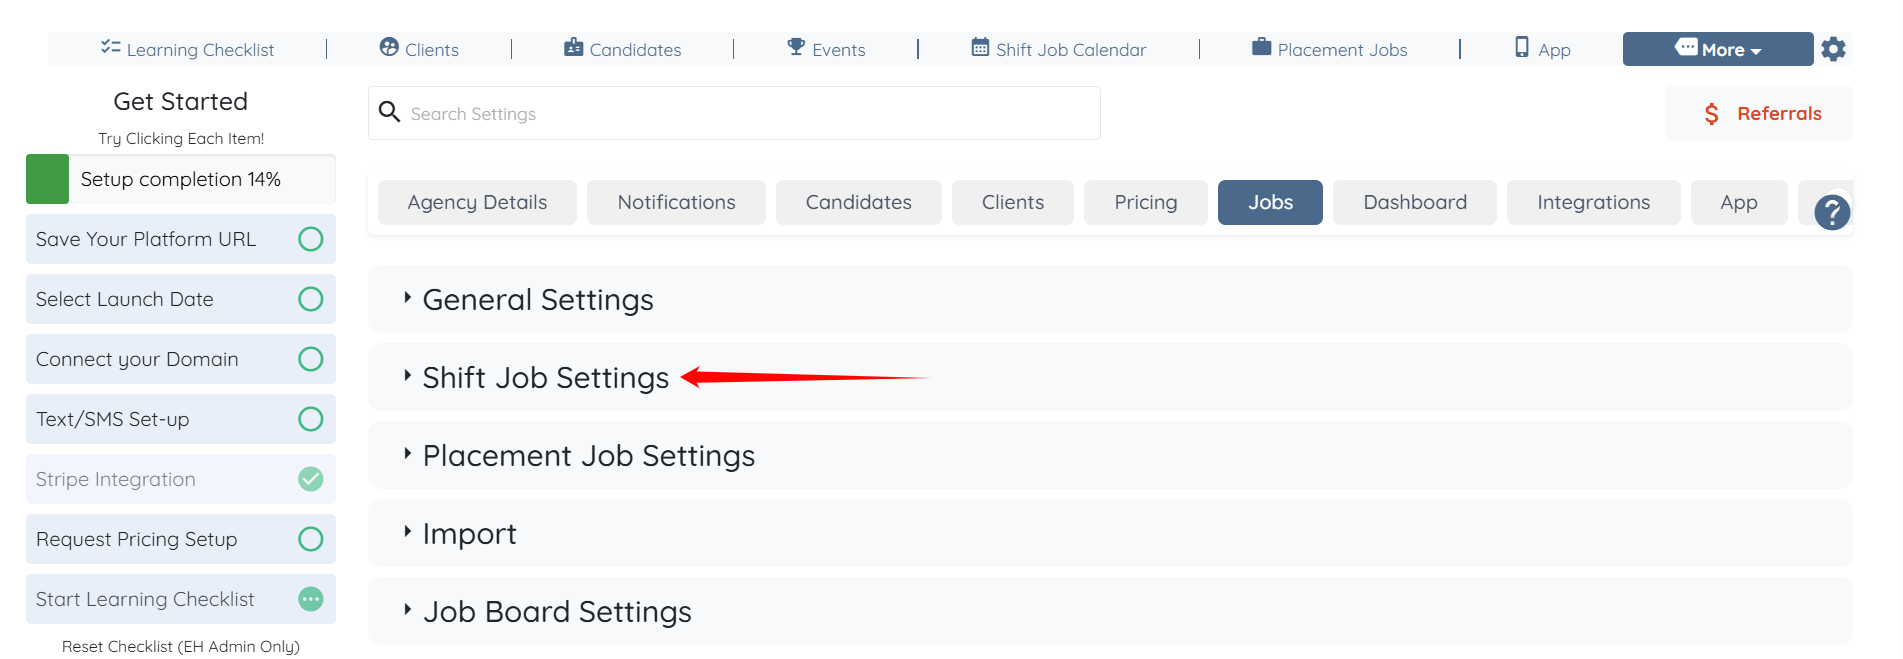
Step 2: From the list of available tabs, click the Jobs tab.

Step 3: Click the Shift Job Settings option to expand its details.
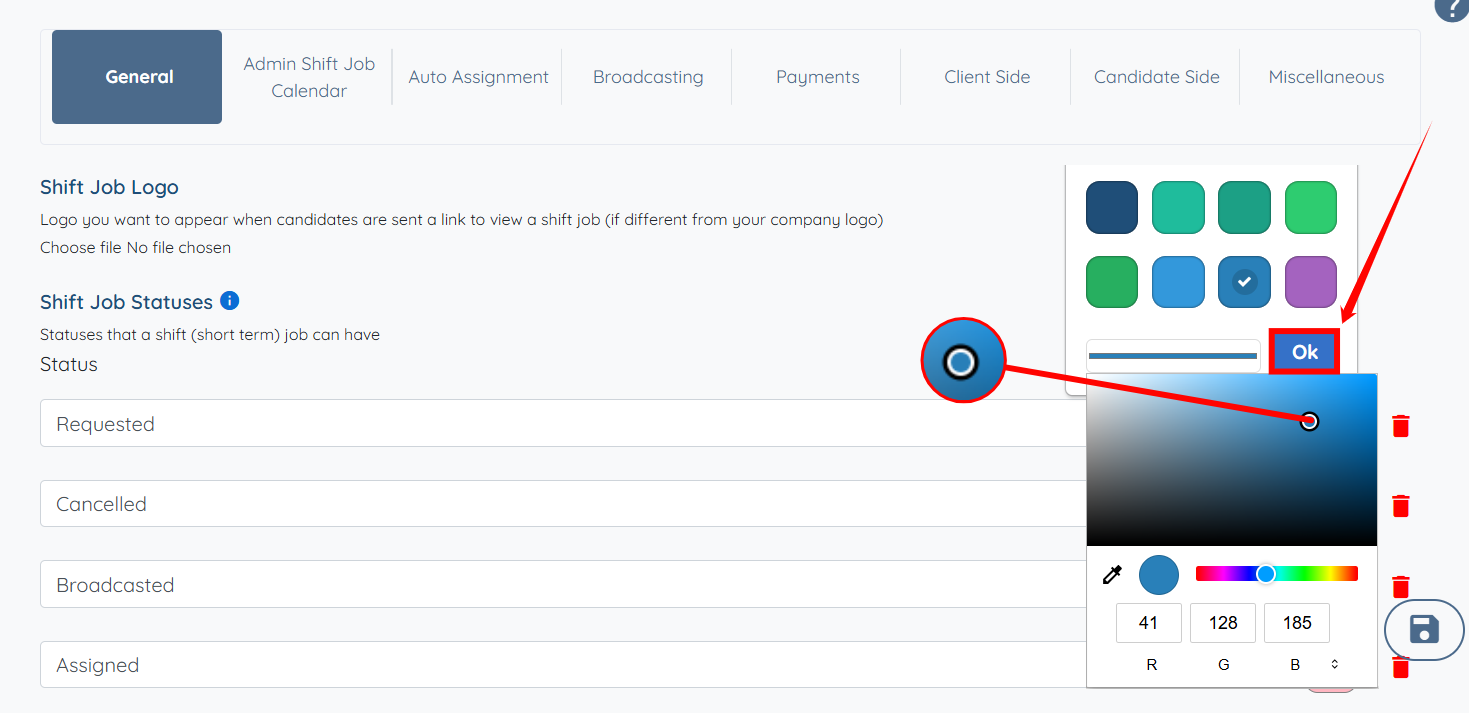
Step 4: In the General tab, under the Shift Job Statuses field, select the color tile that corresponds to the status whose color you want to change.

Step 5: Choose the new color for your status from the available options.
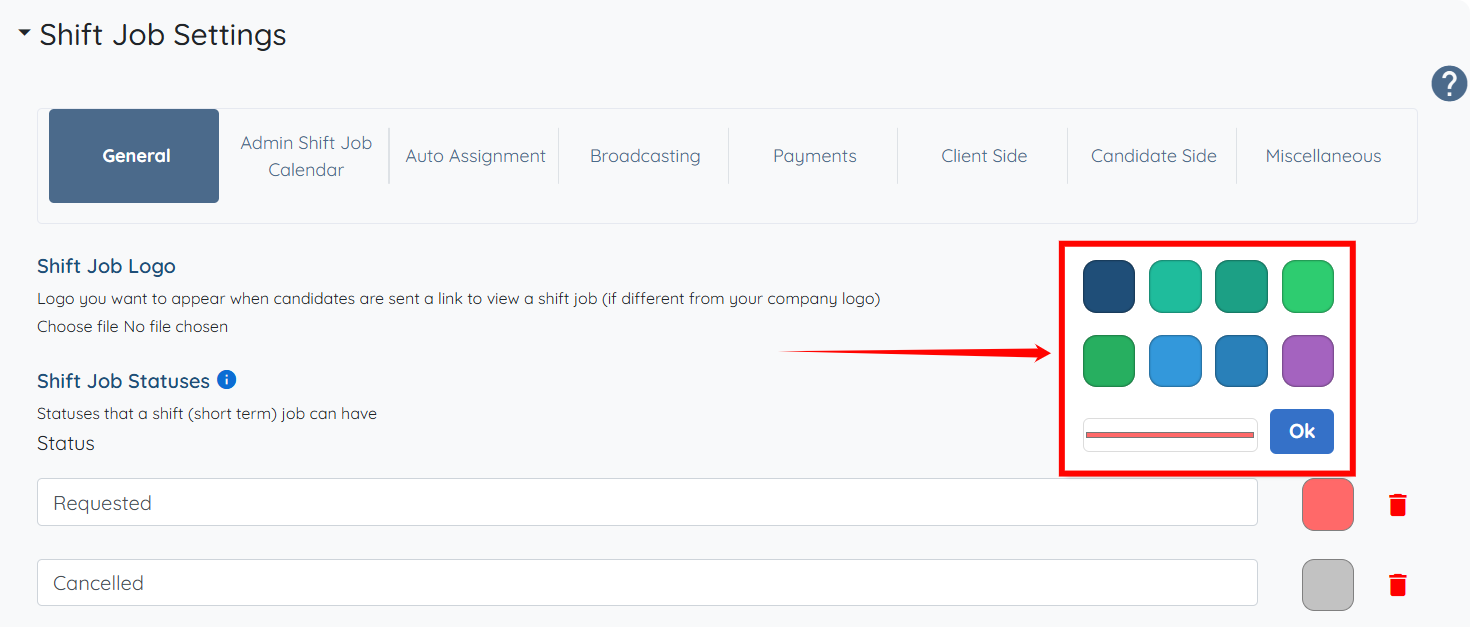
Step 6: Click on the line shown in the screenshot to customize the selected color as needed.

Step 7: Drag the pointer to make custom changes as needed. Then, click the OK button to confirm the changes.
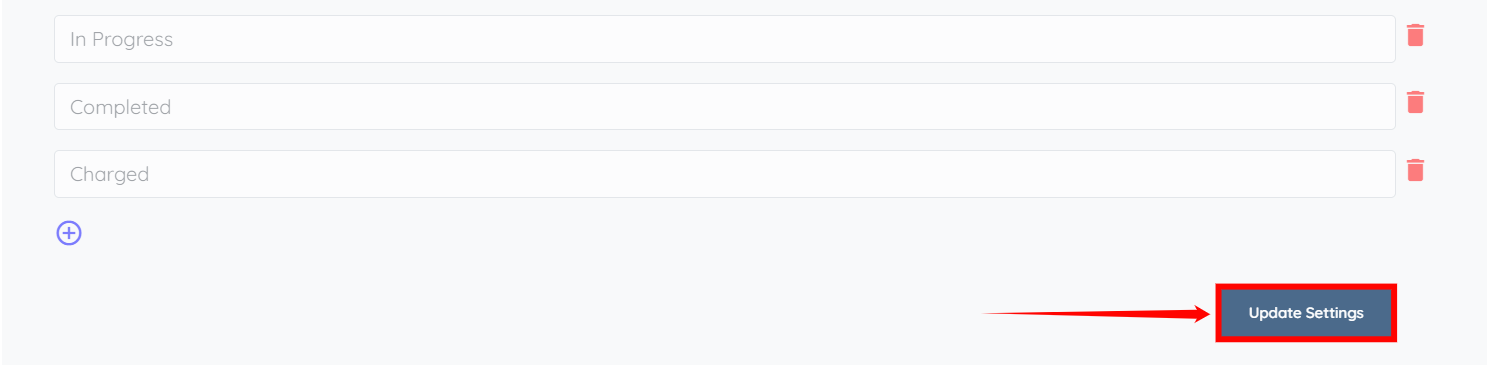
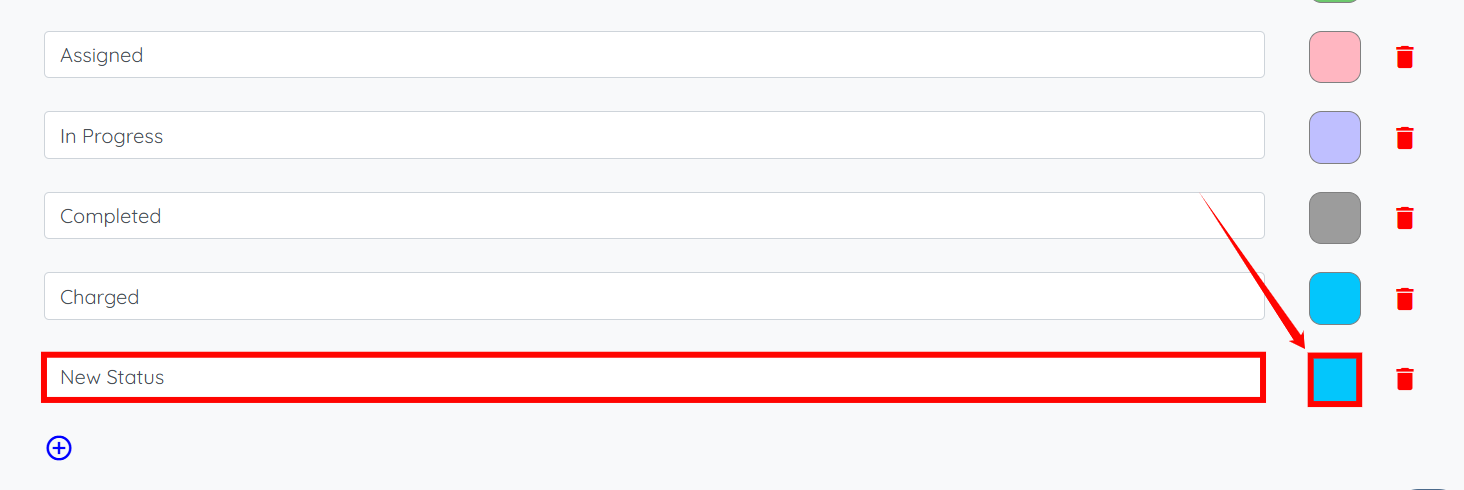
Step 8: You can also add a new status by clicking the + icon.

Step 9: Enter the required new status, and then choose a color for it
Step 10: Click the Update Settings button to save your changes.