Enter the Master Dashboard
Username and password can be found in the CX Dashboard →Internal Resources → Internal Logins.
Select "Agencies" from the dropdown menu:
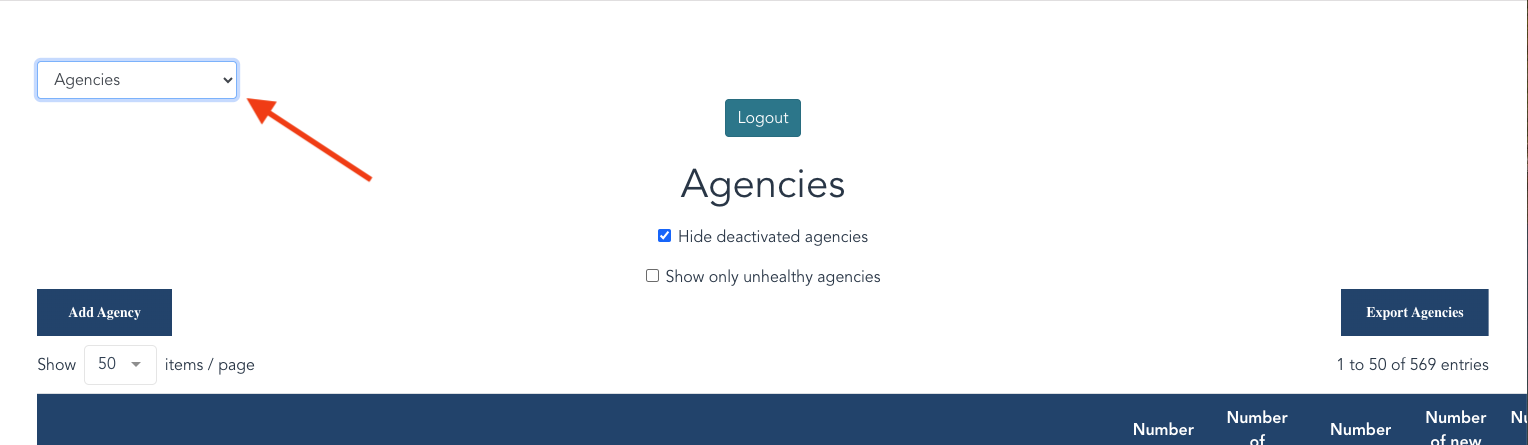
Select "Add Agency"

Enter the following information in the pop-up as follows:
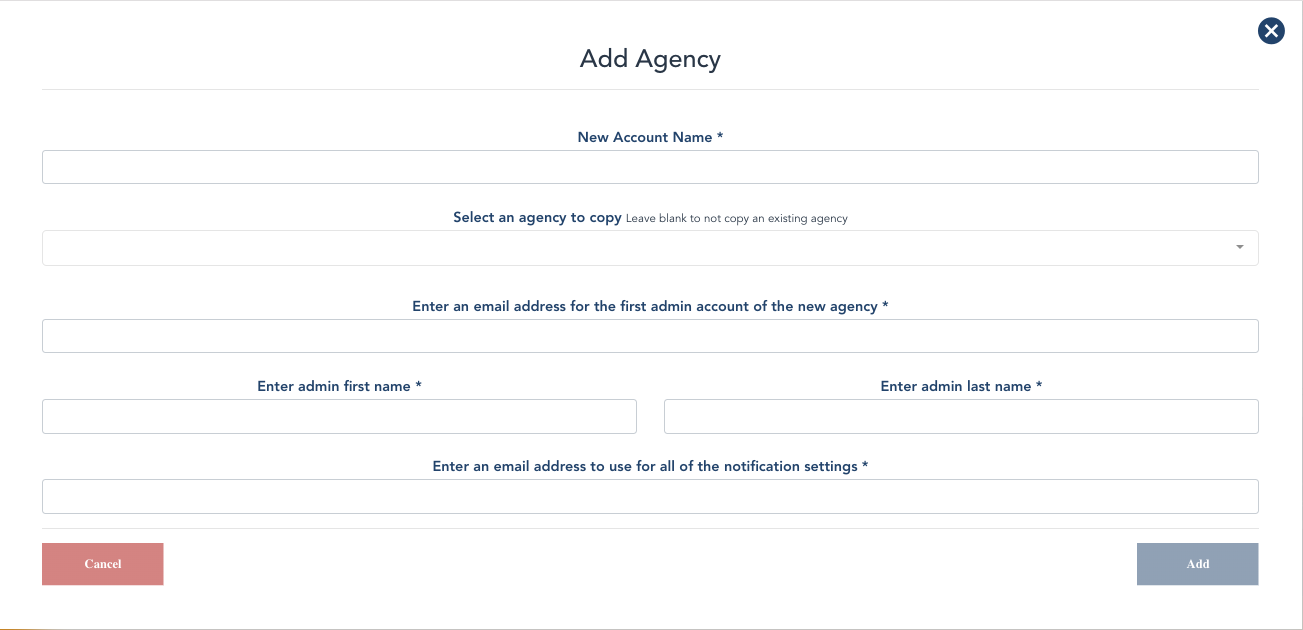
New Account Name = Enter the Agency Name
Select an agency to copy = Select the corresponding base agency to copy.
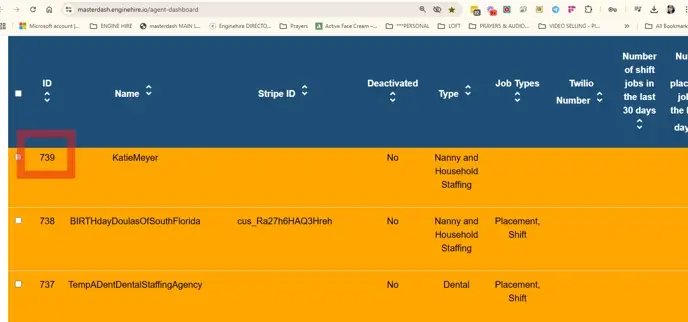
Placement and Sitter/Shift Jobs/On Call → Childcare Agency Base - ID 644
If a "care.com" type agency → Care.com Set Up Base - ID 753. Be sure to change the icon pictures so it's not the same for every Customer.
Placement Only → Placement Set Up Base (For Childcare Placement Jobs Only) - ID 752
AuPair → AuPair Set Up Base - ID 748
Dental → Dental SetUp Base - ID 750
Substitute Teacher → SubstituteTeacherBase - ID 870
Events/Weddings →
Virtual Assistant → Virtual Assistant Demo - ID 200
Medical → MedicalBaseSetup - ID 797
Doula Agency → Jade Doula Demo - ID 757
Newborn Care Agency →
Solo Operator/Solo Doula →
Staffing Agency →
Elder Care → Senior Care Base Set-up - ID 759
Bright Horizons Corp Care → BHcorpcarebase - ID 831
Enter an email address for the first admin account of the new agency
(Formatted like: Agencyname[email protected]) = This should be the Enginehire Admin email not the client's email, so we can access the dashboard. After the dashboard is built, the client's email can be added in as an admin.
Enter Admin First Name & Last Name = First name should be Enginehire & last name Admin.
Enter an email address to use for all of the notification settings = Enter the client's contact email.
Click "Add" and be sure to grab the Agency # at this point. This will be important when updating the agency's URL and adding to the CX Dashboard.
Enter the Stripe ID: This information can be found in the Customer Review Slack - when the new customer information is posted by the sales team.
There are 2 ways you can add the stripe id - In the master dashboard or in the global settings. Adding in the master dashboard is typically easier.
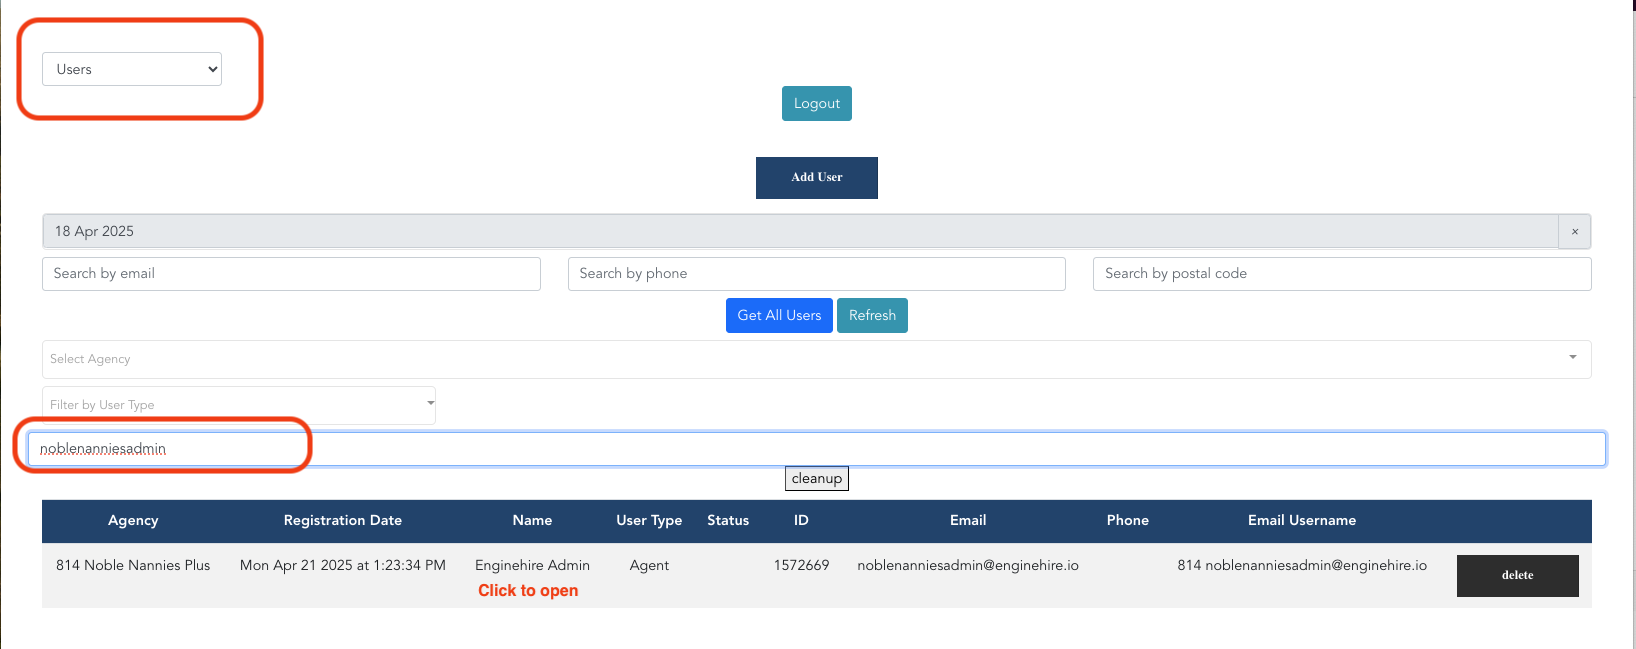
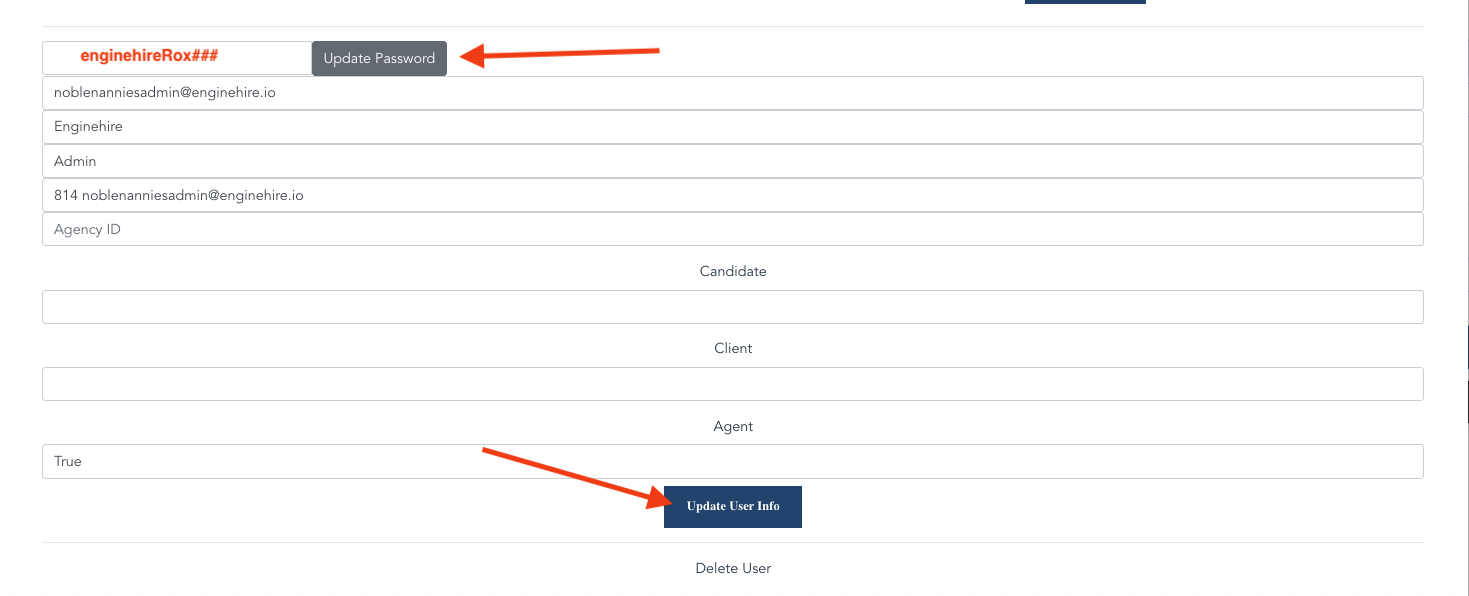
Navigate to the Users tab and search for the Admin Email that you just created. Click on the email:
In this window, scroll down (beyond the codes) until you see the new Admin email. Update the password using the standard EH Admin password format: enginehireRox(agency#), ex: enginehireRox797 and click Update Password. Lastly, click Update User Info:
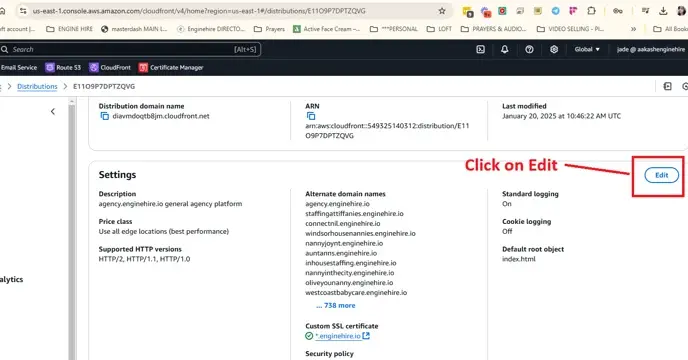
Navigate to CloudFront Distributions.
Log in using your provided Username & Password. Note: you will need to be given access by Aakash.
Once logged in - within the Settings menu, select "edit" and scroll to the very bottom of this screen:
Once at the bottom of the list, you should see a button to "Add Item" - click this:
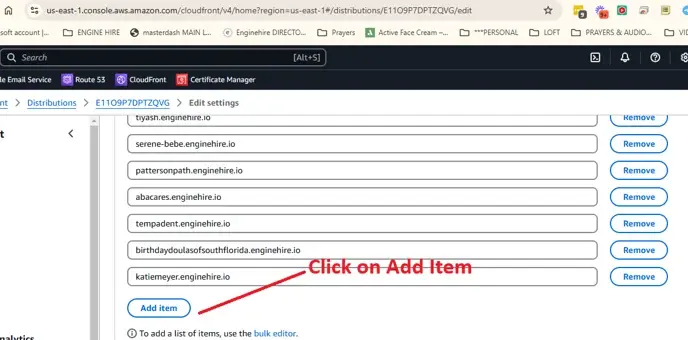
Enter the Agency Domain with ".enginehire.io" (example: medicalbasesetup.enginehire.io), scroll to the bottom and click Save Changes when done

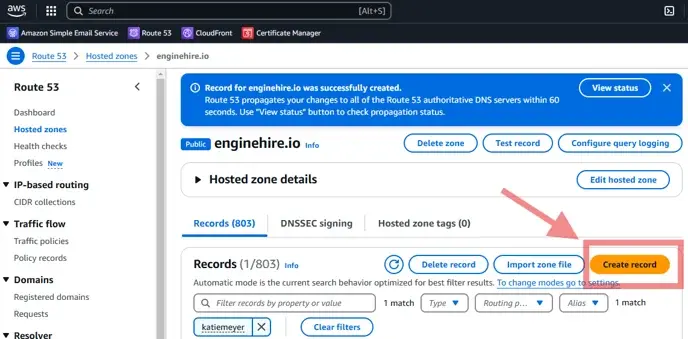
Next, navigate to Route 53.
Within the Records menu select Create Record
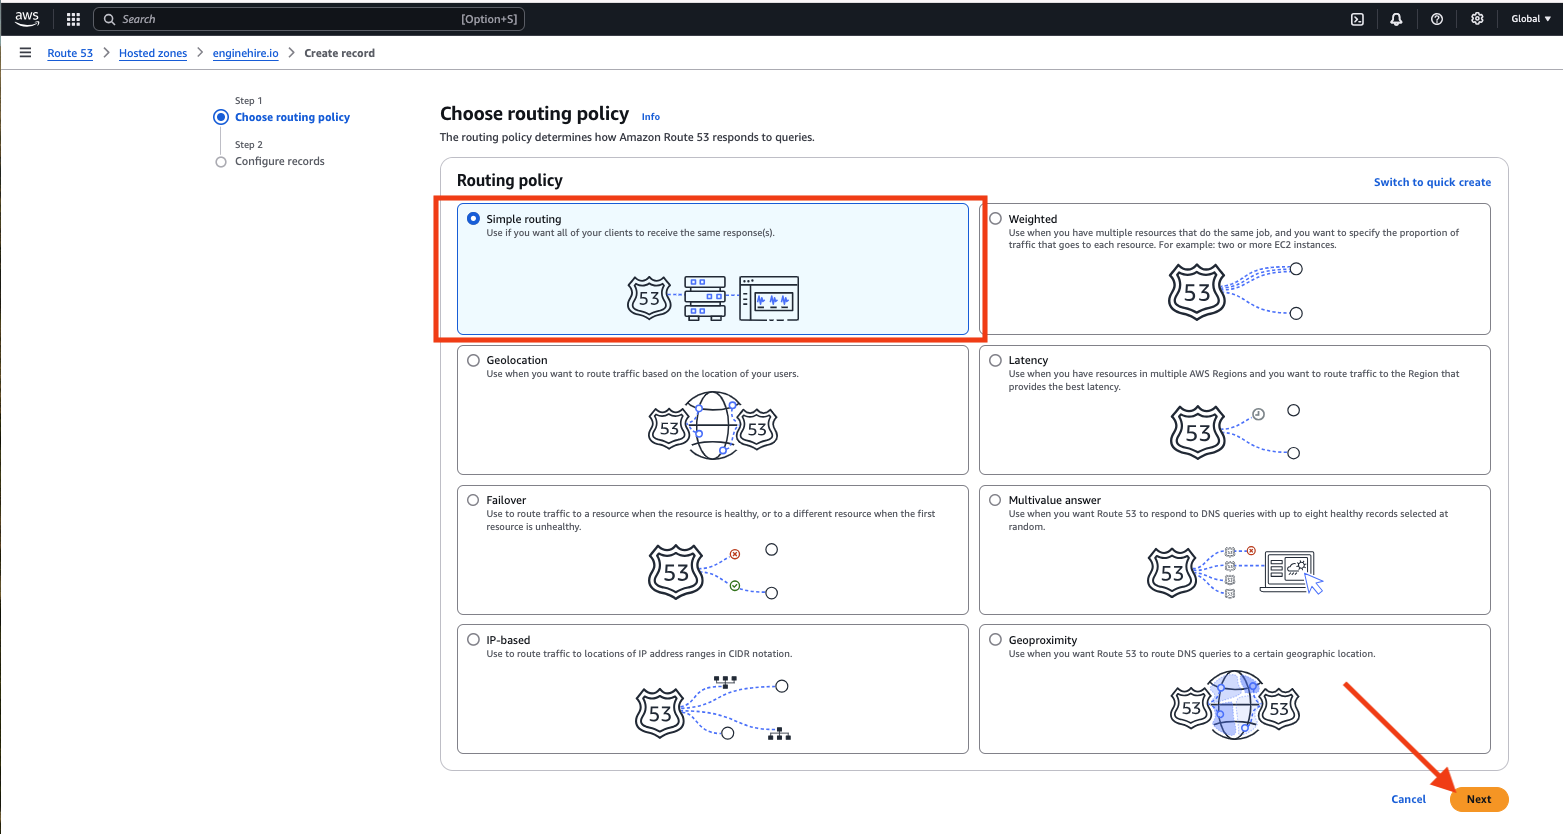
Keep the Routing Policy as Simple Record and click Next
In the Configure Records menu, select Define Simple Record

Reenter the Agency Domain in the Record name field.
Record type = A - Routes traffic to an IPv4 address and some AWS resources
Value/Route traffic to = Alias to CloudFront distribution
Lastly, click the choose distribution field and select the information that populates below it.
Click Define Simple Record

Then, select Create records

Search for the agency you just created, and Copy the URL

Paste the URL into a new window and add "/login/agency#" (see example):

Once the dashboard is built, enter the CX Dashboard and, with the section labeled "Administrative Information," update the client's profile with the Agency ID, Platform URL, and Enginehire Admin information.
Log into the Agency's dashboard and Update the EH Administrator Permissions level to Super Admin. Then add in the Agency Admin User. Additionally, upload the client's logo and brand colors.
Note - when creating the Customer's Administrator within their own dash, the Agency Owner should always be set to Super Admin access level (unless instructed otherwise). Any additional administrators that the Customer has asked us to add should be set at a Global level. The agency owners will not be able to see any Enginehire Admin's.
