Let’s get started 🚀
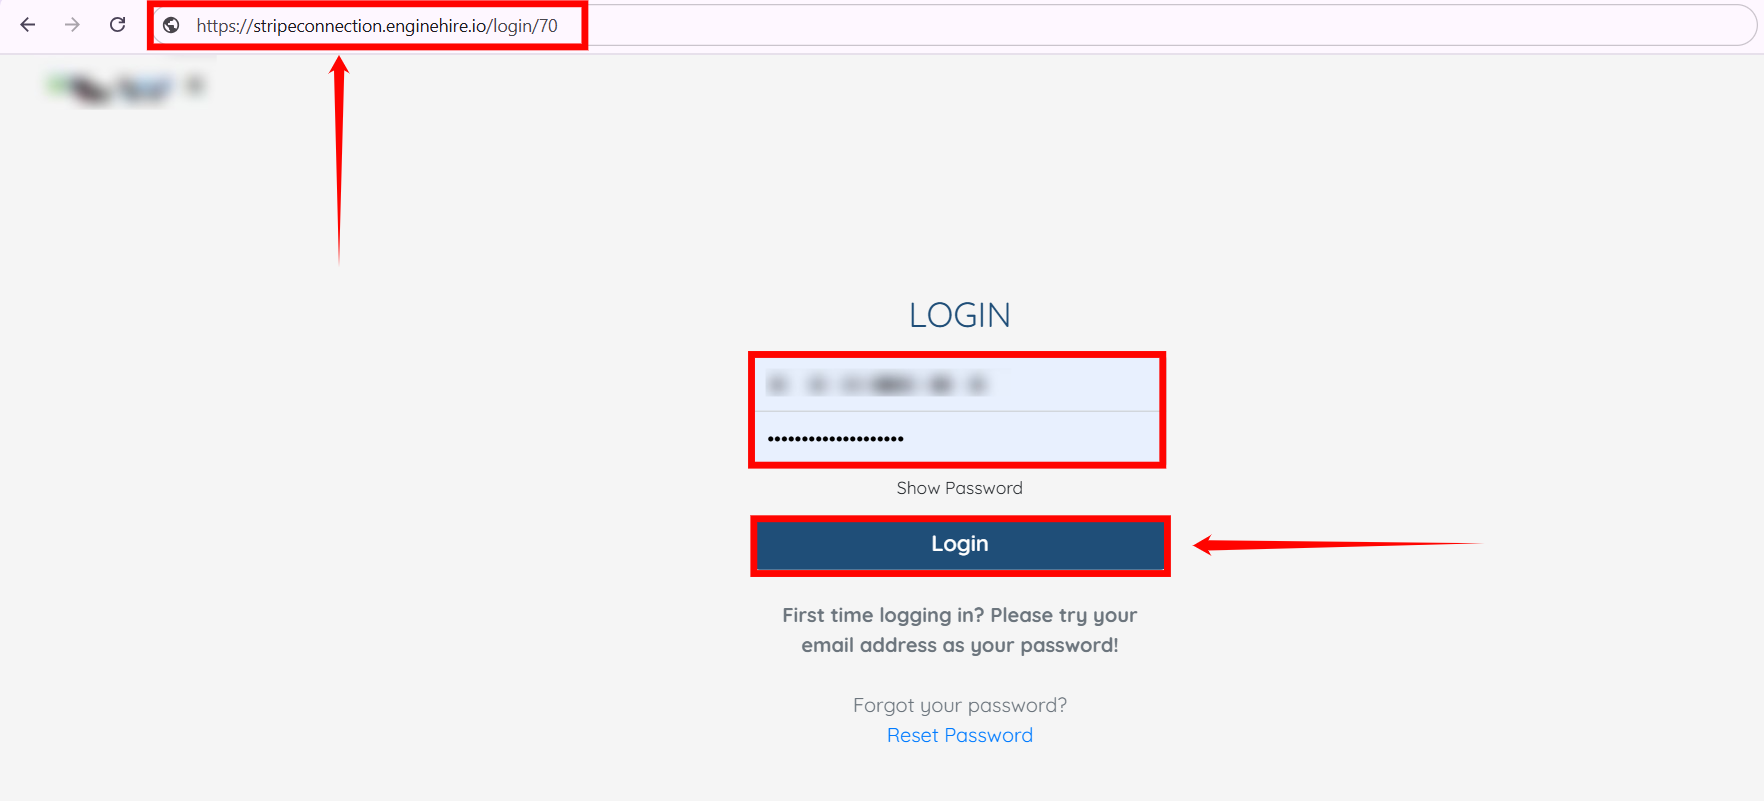
Step 1: On the login screen, change the URL from AGENCYNAME.enginehire.io/login/NUMBER to stripeconnection.enginehire.io/login/NUMBER. For example, https://stripeconnection.enginehire.io/login/70.
Step 2: With the updated URL, proceed to log in using your agency credentials.
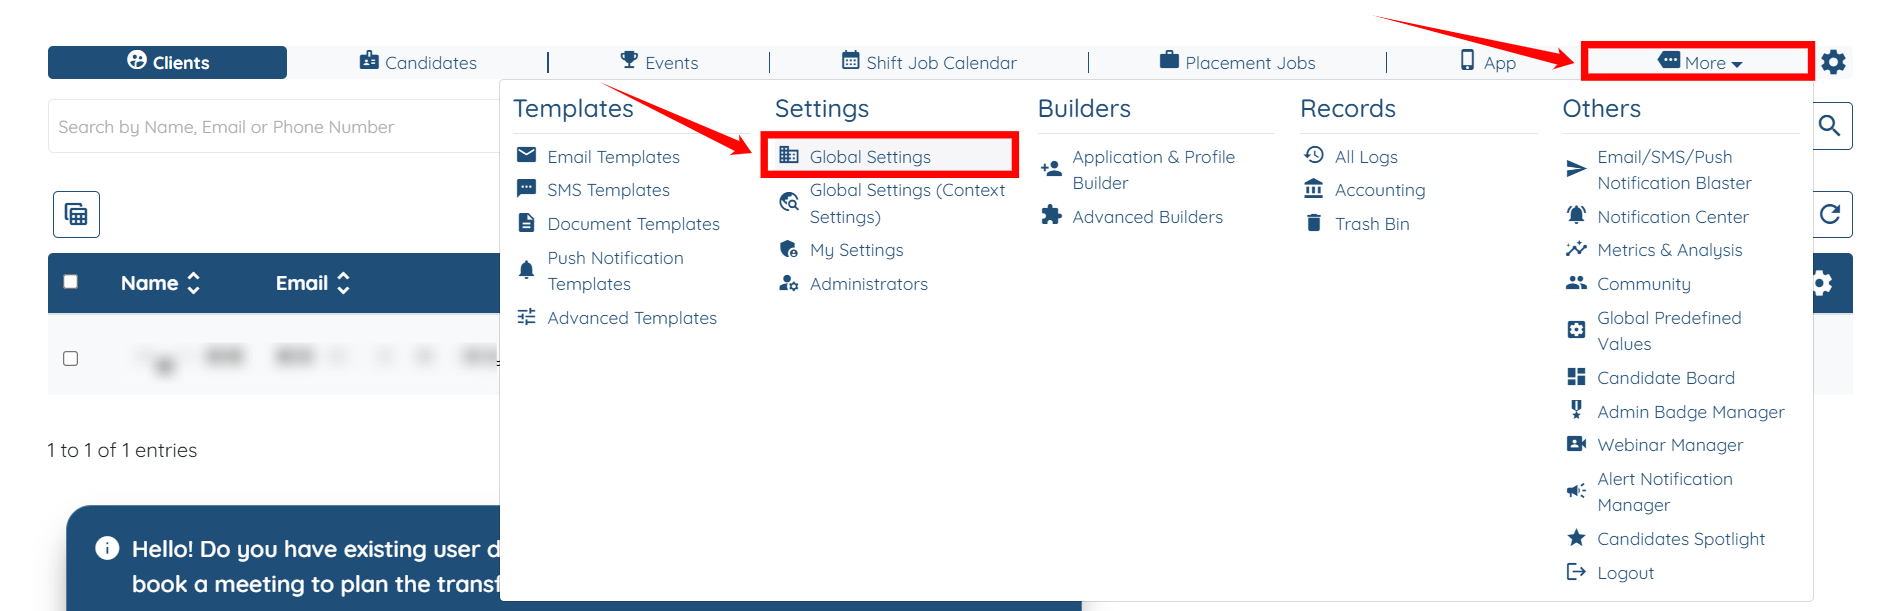
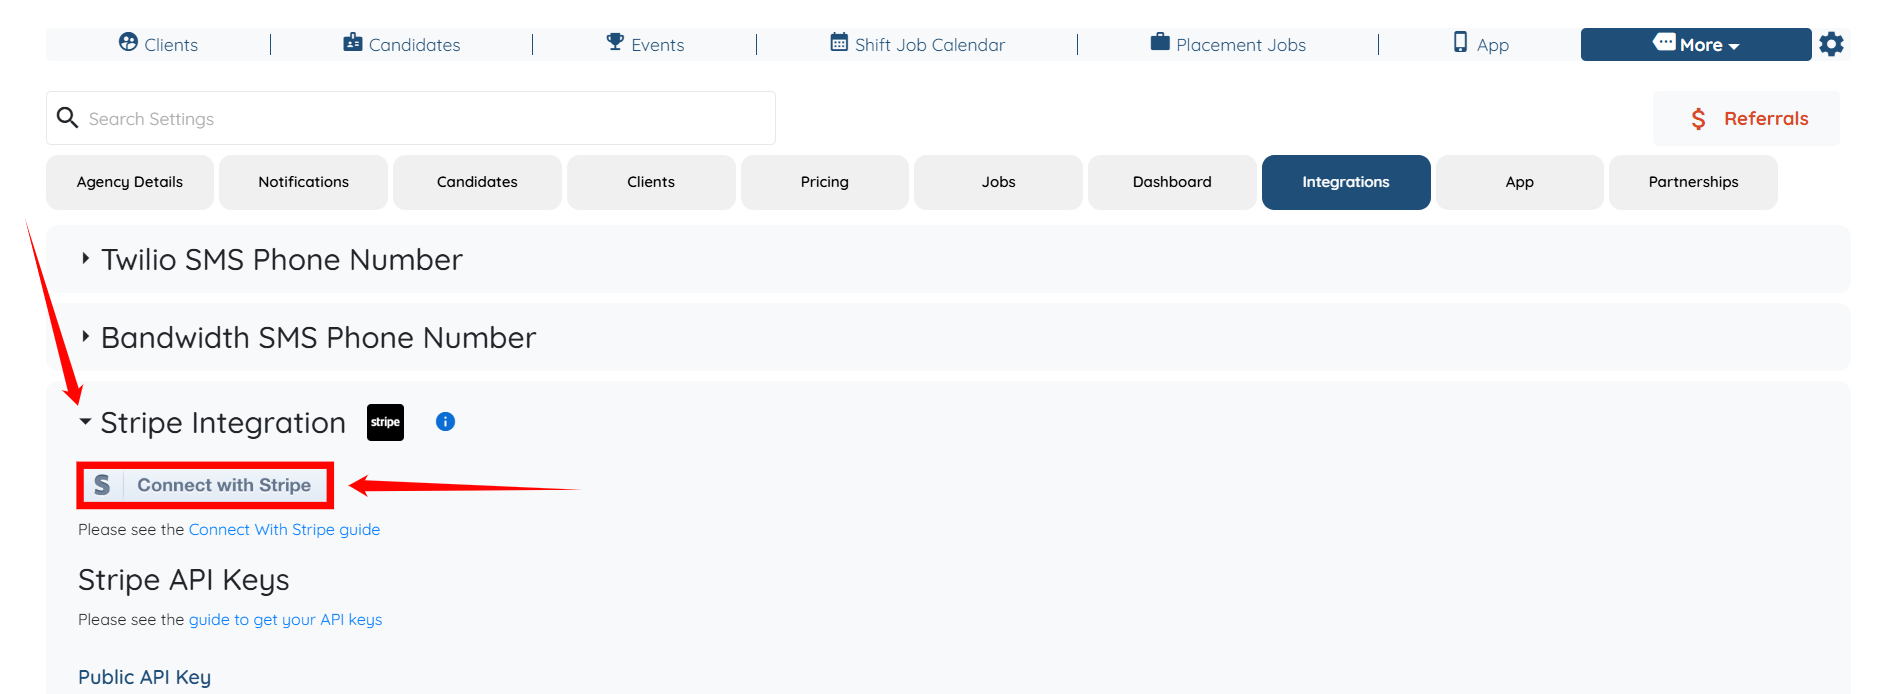
Step 3: Navigate to More > Global Settings, as shown in the screenshot below.
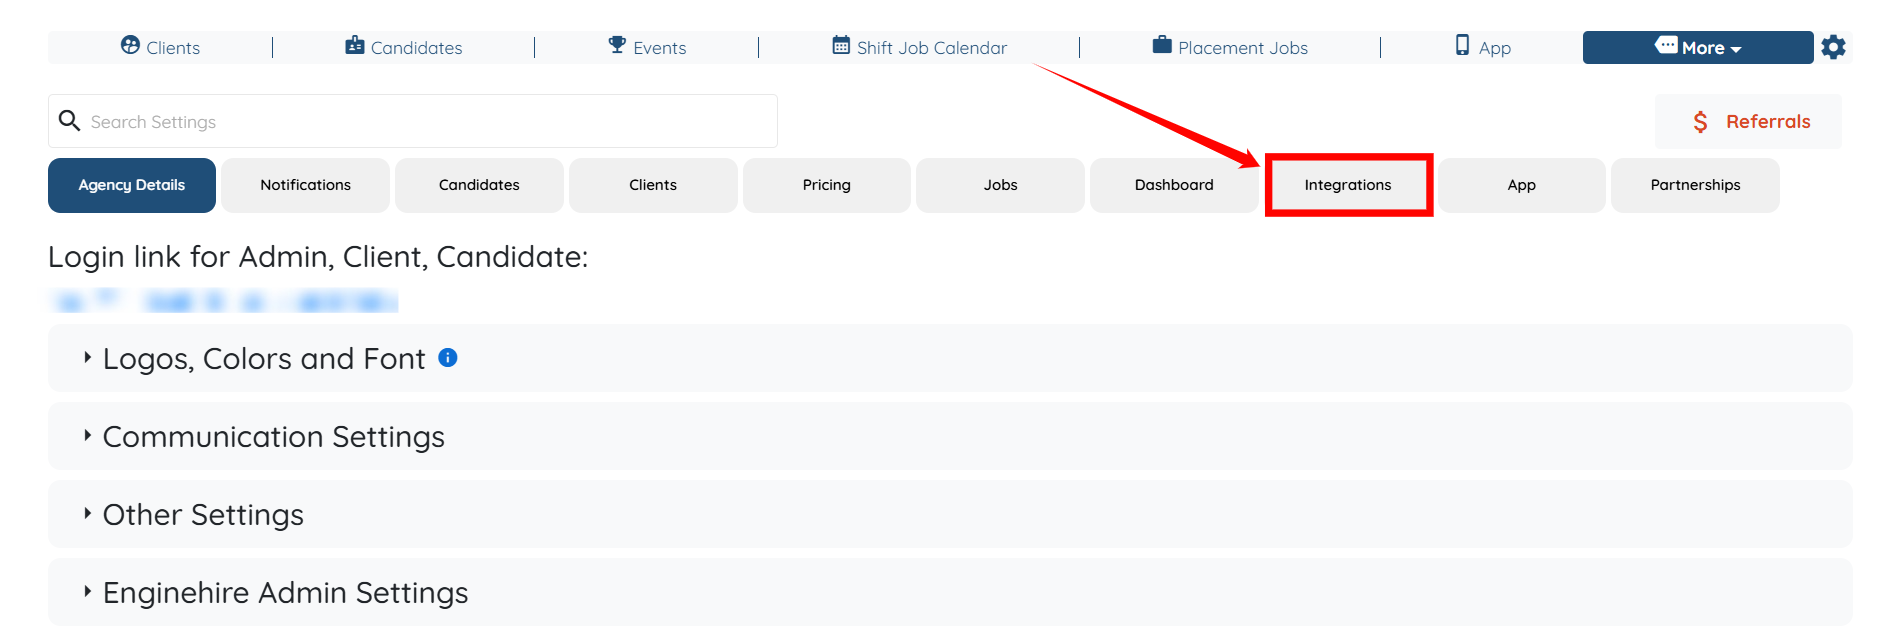
Step 4: Click on the Integrations tab from the list of tabs available.
Step 5: Locate and expand the Stripe Integration option from the list of available integrations. After that, click on the Connect with Stripe button to continue.
Step 6: Enter the Email address linked to your Stripe account, and then click on the Continue button to proceed.
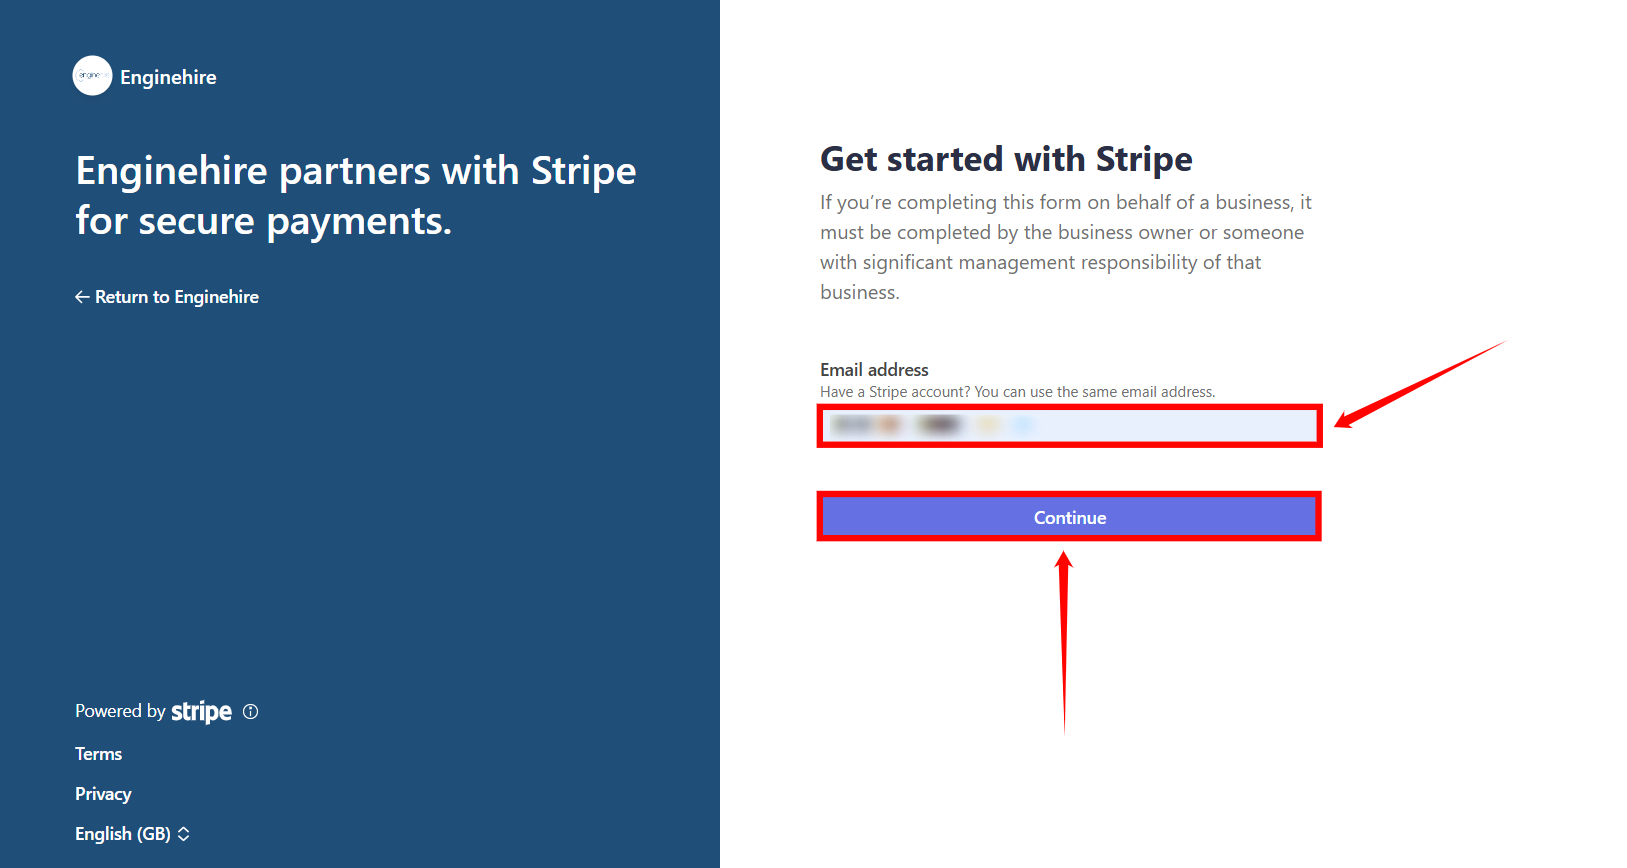

Your Enginehire account will be successfully connected with Stripe. Click on the Return to Dashboard button to continue.

After successfully integrating your stripe account with the Enginehire dashboard, you will also need to add the Stripe API keys to access Stripe information within your Enginehire dashboard. To do this , refer to the How to Get and Use Stripe API Keys document.
If you see an error such as: “Invalid request: Invalid redirect URI. Ensure this URI exactly matches one of the URIs specified in your application settings.”
It means the redirect URI used by Enginehire has not been whitelisted in your Stripe settings. Stripe only allows the integration to continue if the redirect URI matches exactly with a URL you’ve added to your allowed redirect list.
To fix this issue, follow the steps below:
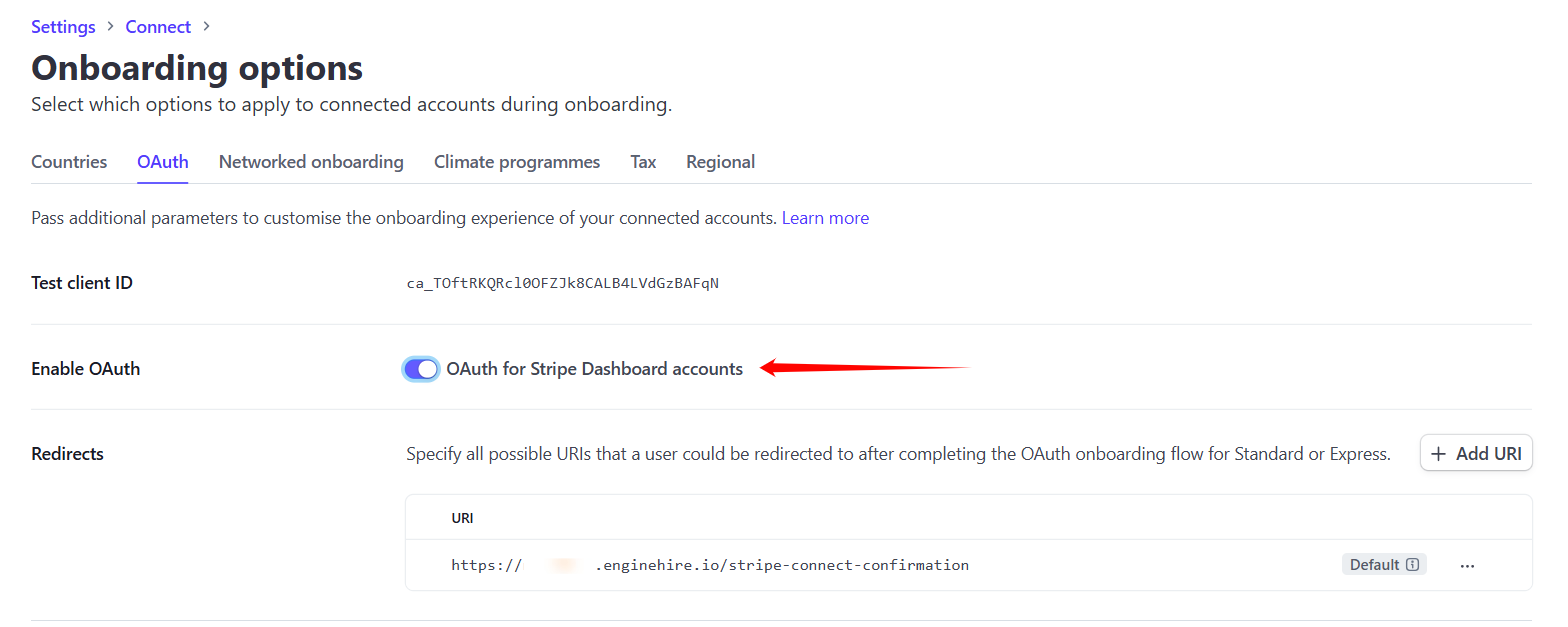
Step 1: Copy the URI as indicated in the screenshot below.

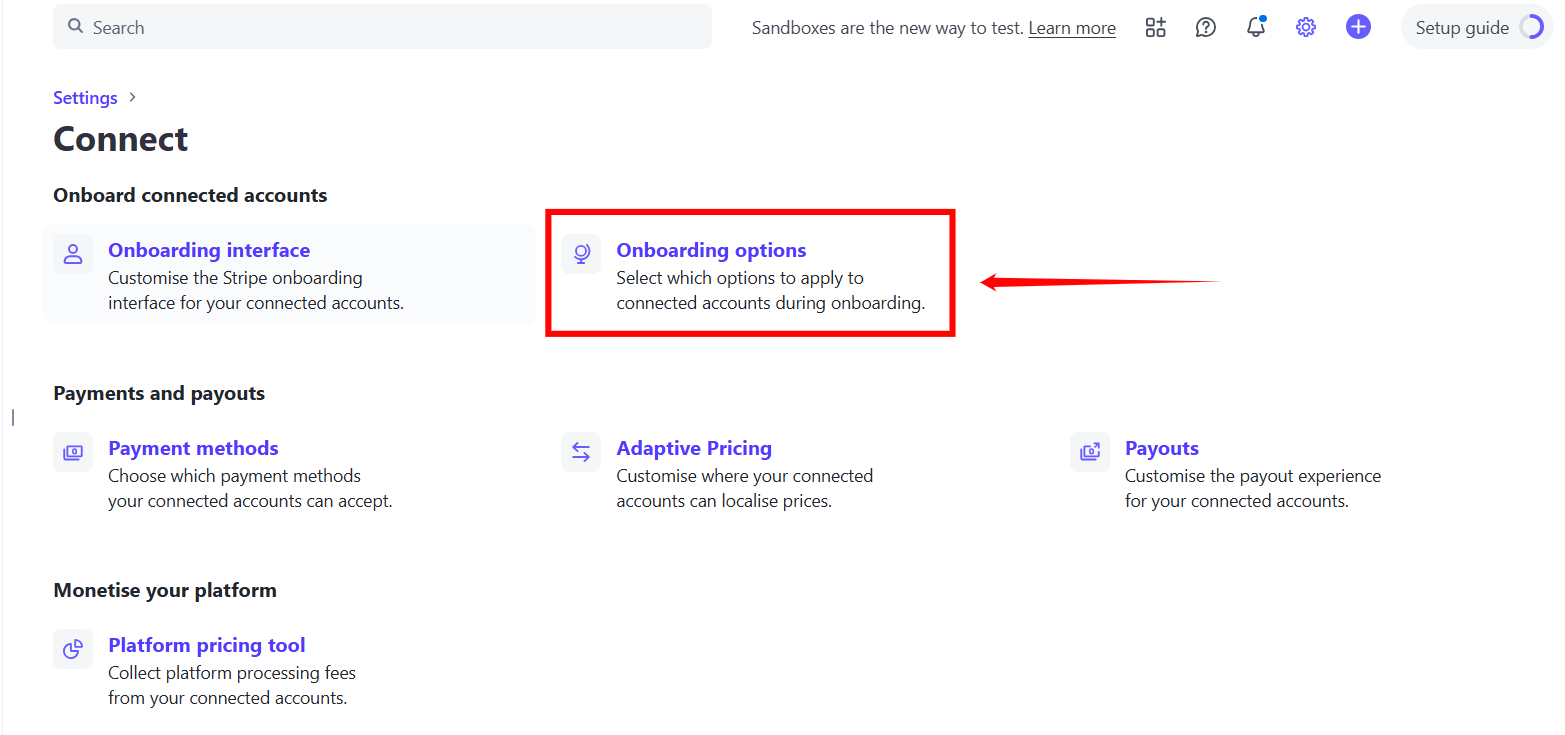
Step 2: On Stripe, click the Gear icon (Settings) located in the top-right corner of the interface.

Step 3: Click on Connect located under the Product Settings section.

Step 4: Select Onboarding options to proceed.
Step 5: Under the OAuth tab, enter the URI you copied in Step 1 into the Redirects field.
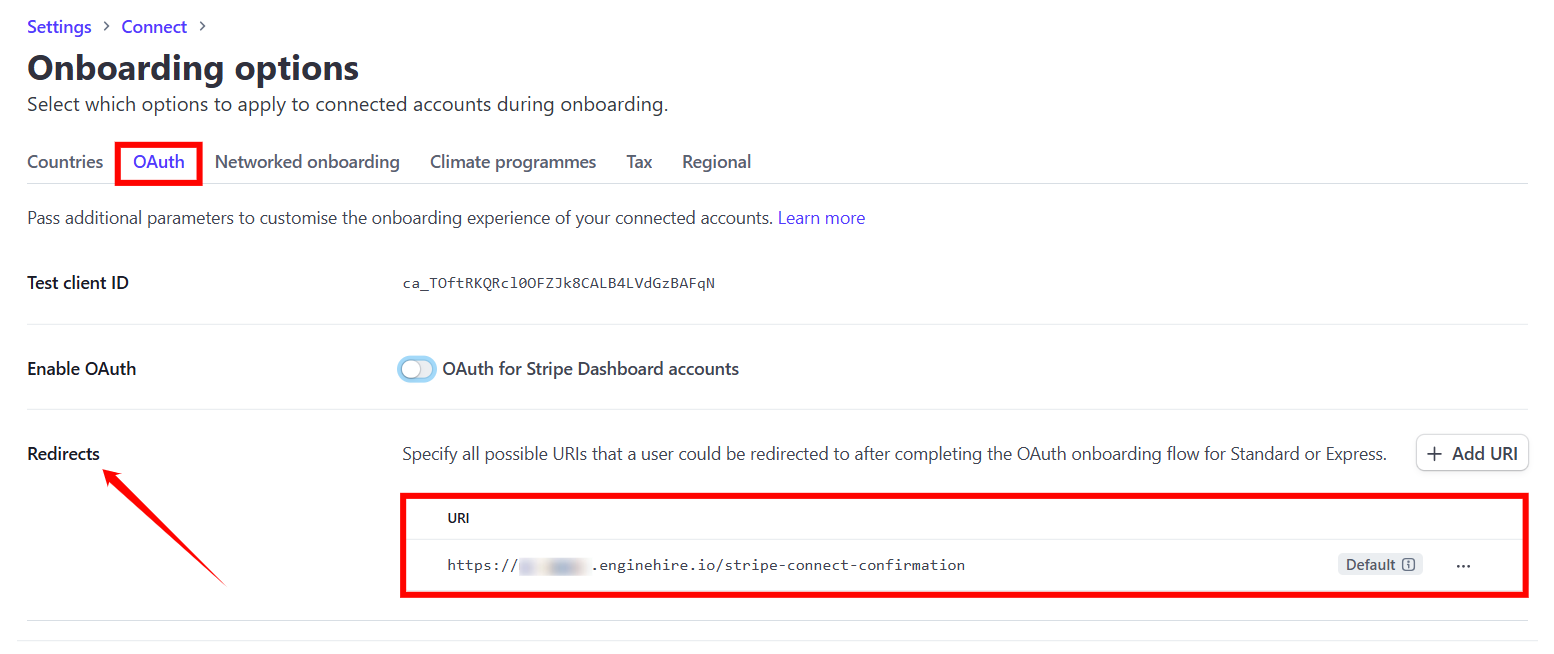
Step 6: Toggle the Enable OAuth switch to ON.