Let’s get started 🚀
Download your customer records from Stripe by exporting them as a CSV file.
Step 1: Log in to the Stripe dashboard, and click the Customers option on the left-hand side of the dashboard.

Step 2: Click the Export button as shown in the screenshot below.

Step 3: Select the All radio button option from the Date range, and choose the Custom option from the Columns dropdown.
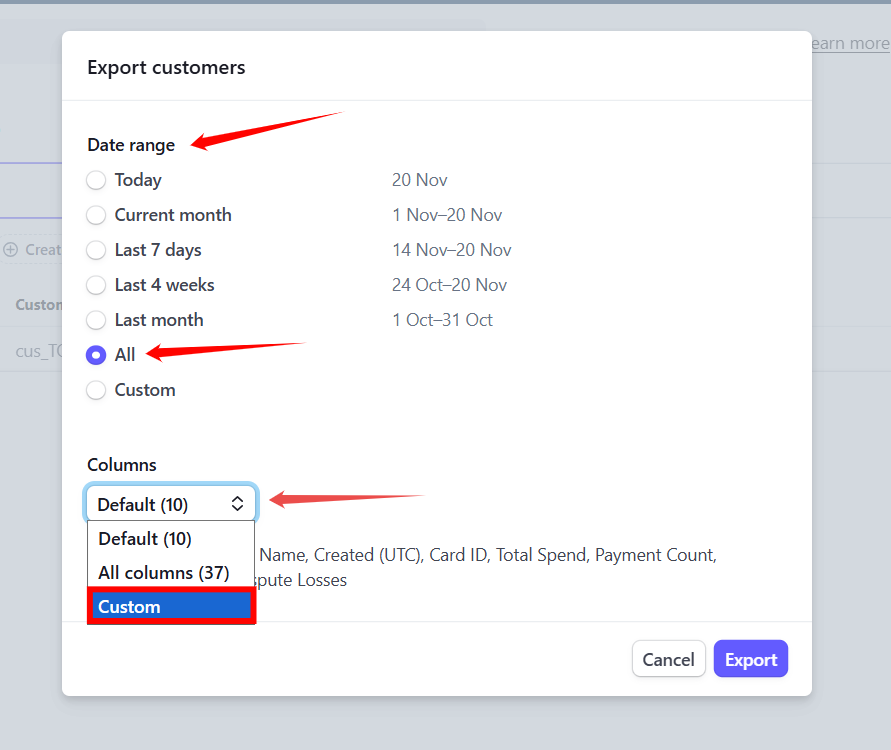
Step 4: Check the ID and Email checkboxes, and then click the Export button. A CSV file that includes the ID and Email of all the customers will be downloaded successfully.

Import the exported CSV file into Enginehire to bring your Stripe customer data into the platform.
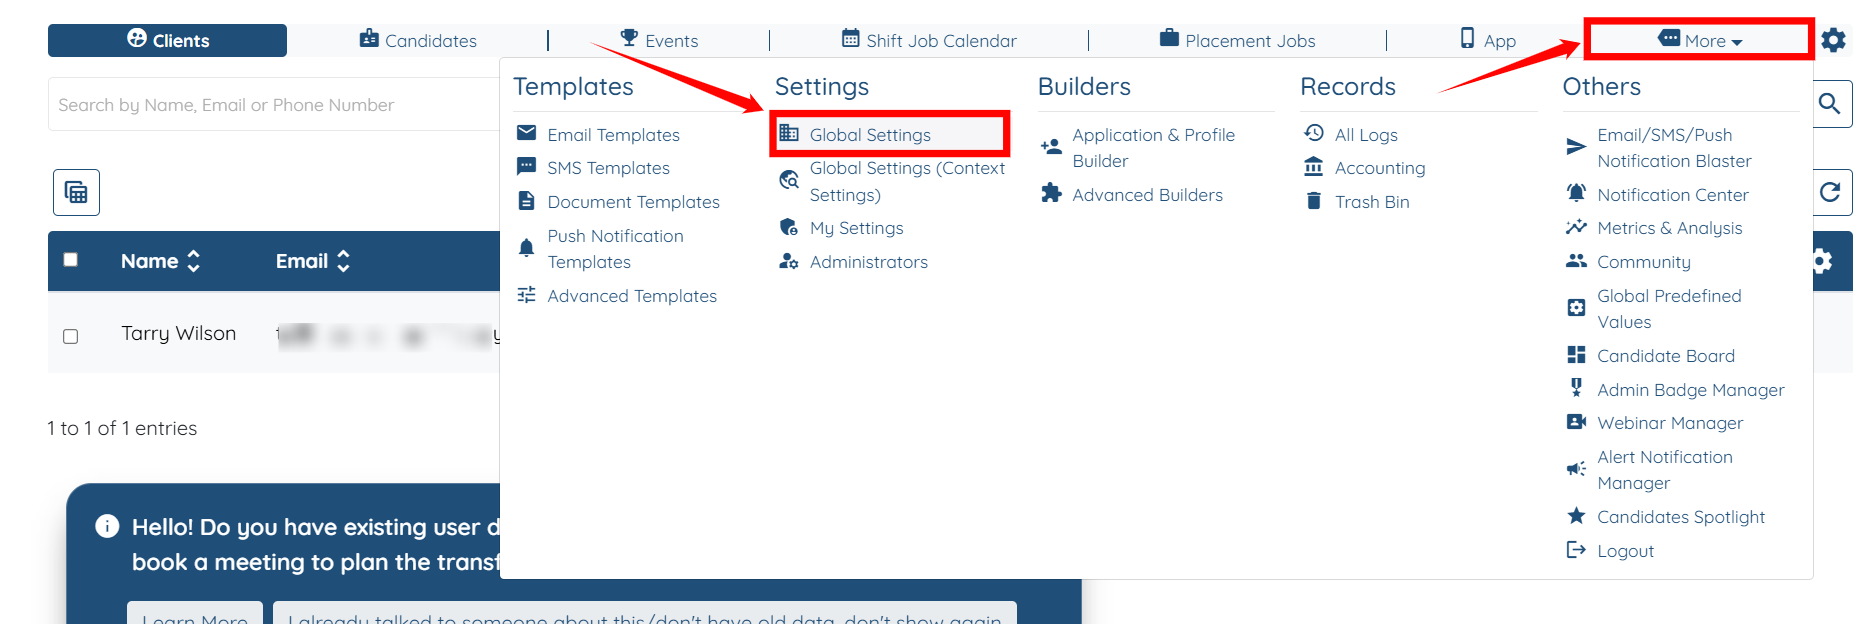
Step 1: On your agent dashboard, navigate to More > Global Settings, as shown in the screenshot below.
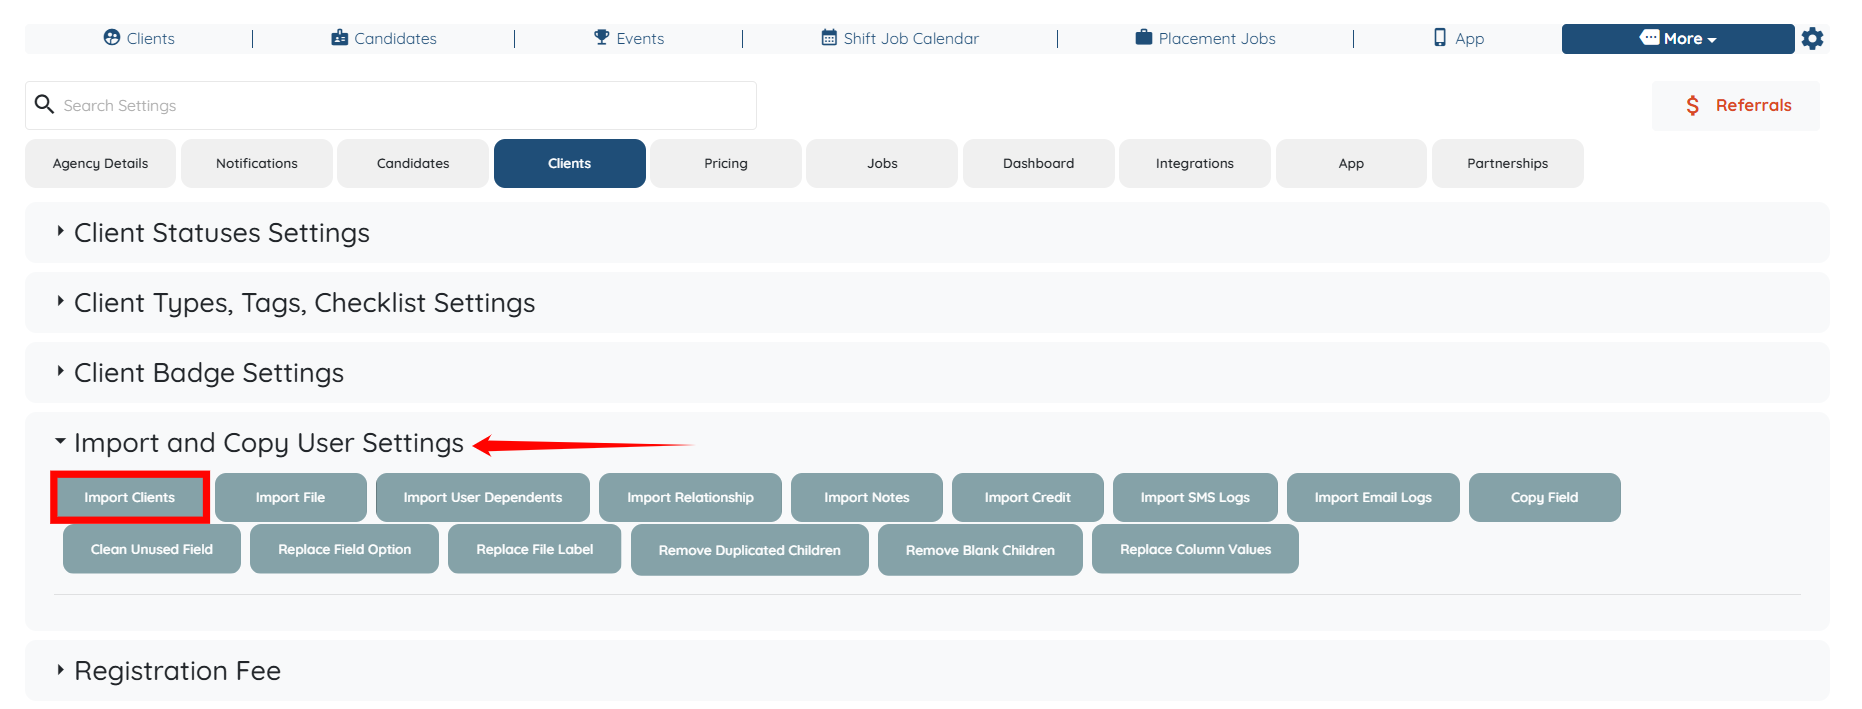
Step 2: Click the Clients tab from the list of all the available tabs.

Step 3: Click the Import and Copy User Settings option to expand it, and then click the Import Clients button.
Step 4: Choose the exported CSV file, and then click the Open button to continue.

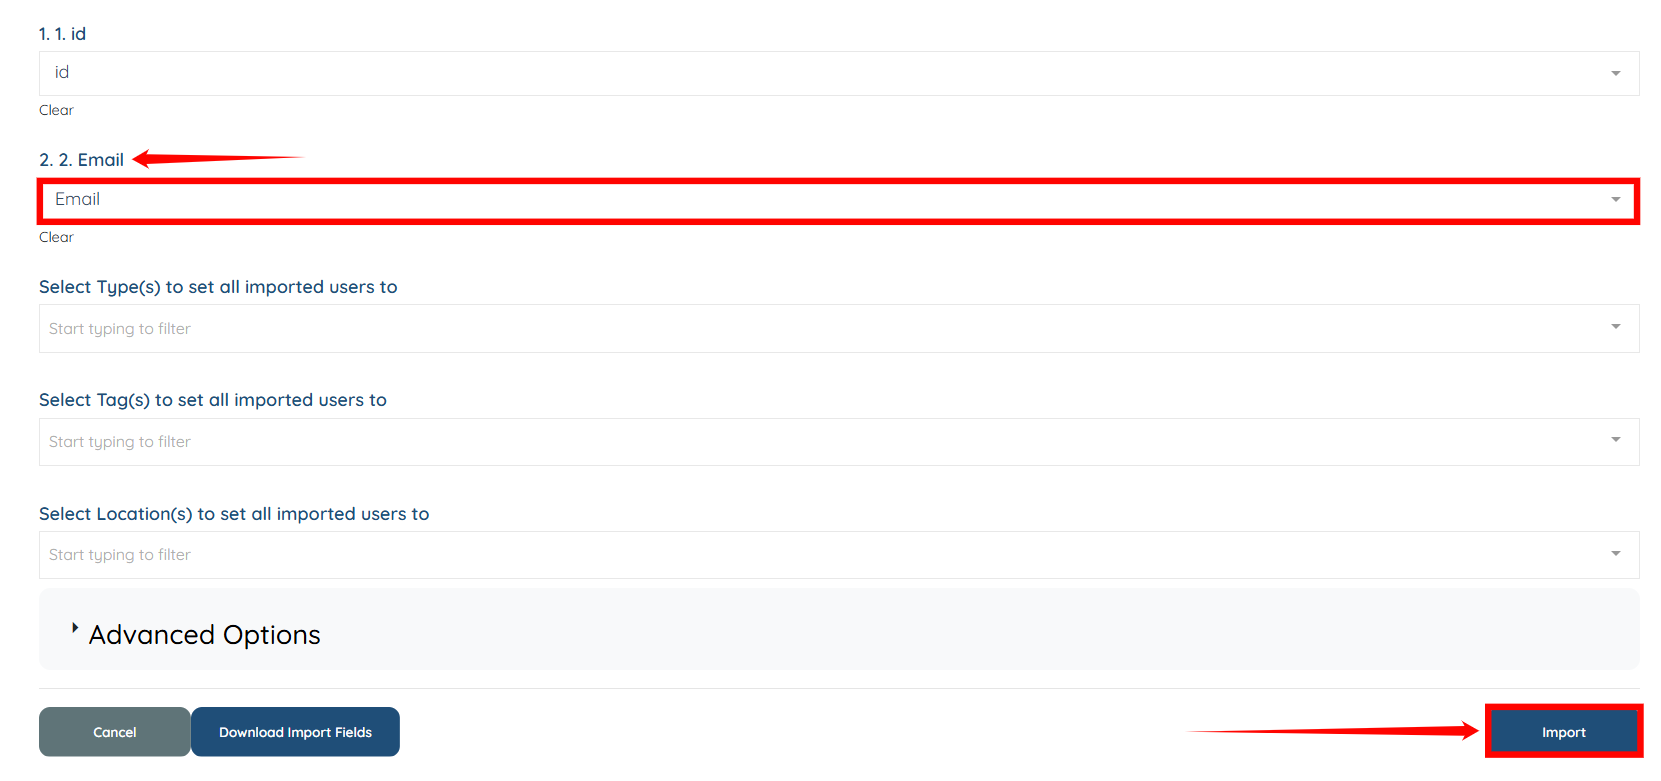
Step 5: Select the id field from the dropdown for the label id. The id label then maps to the selected id field in the Enginehire system.

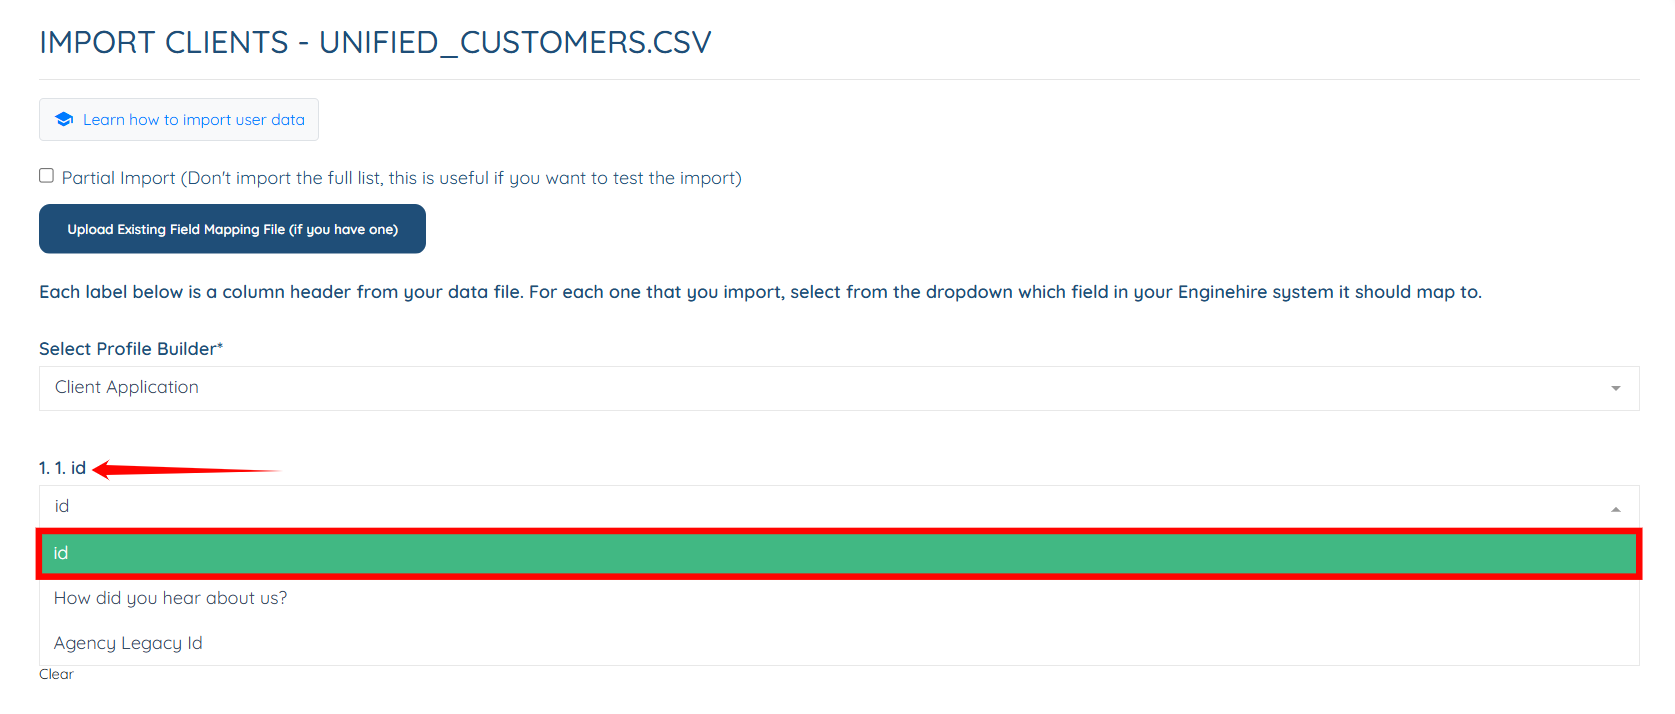
Step 6: Similarly select the Email field for the Email label. Then, click on the Import button to import the data into Enginehire.
The Enginehire will successfully import the customer data from the selected CSV file.
Add the required fields in the Profile Builder so the imported data can be mapped and used across the platform.
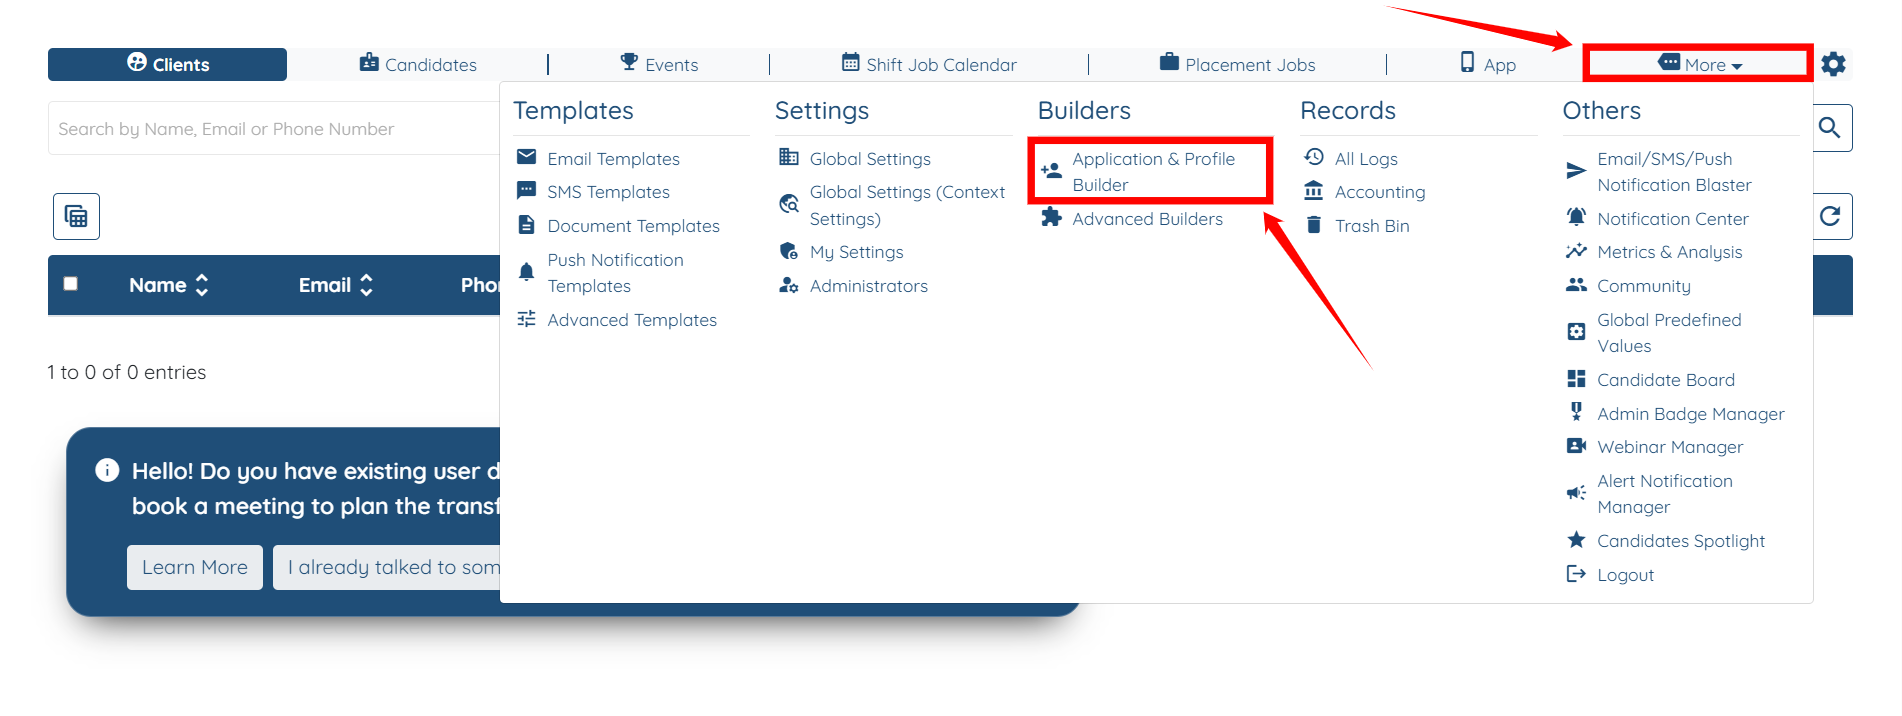
Step 1: On your agent dashboard, navigate to More > Application & Profile Builder, as shown in the screenshot below.
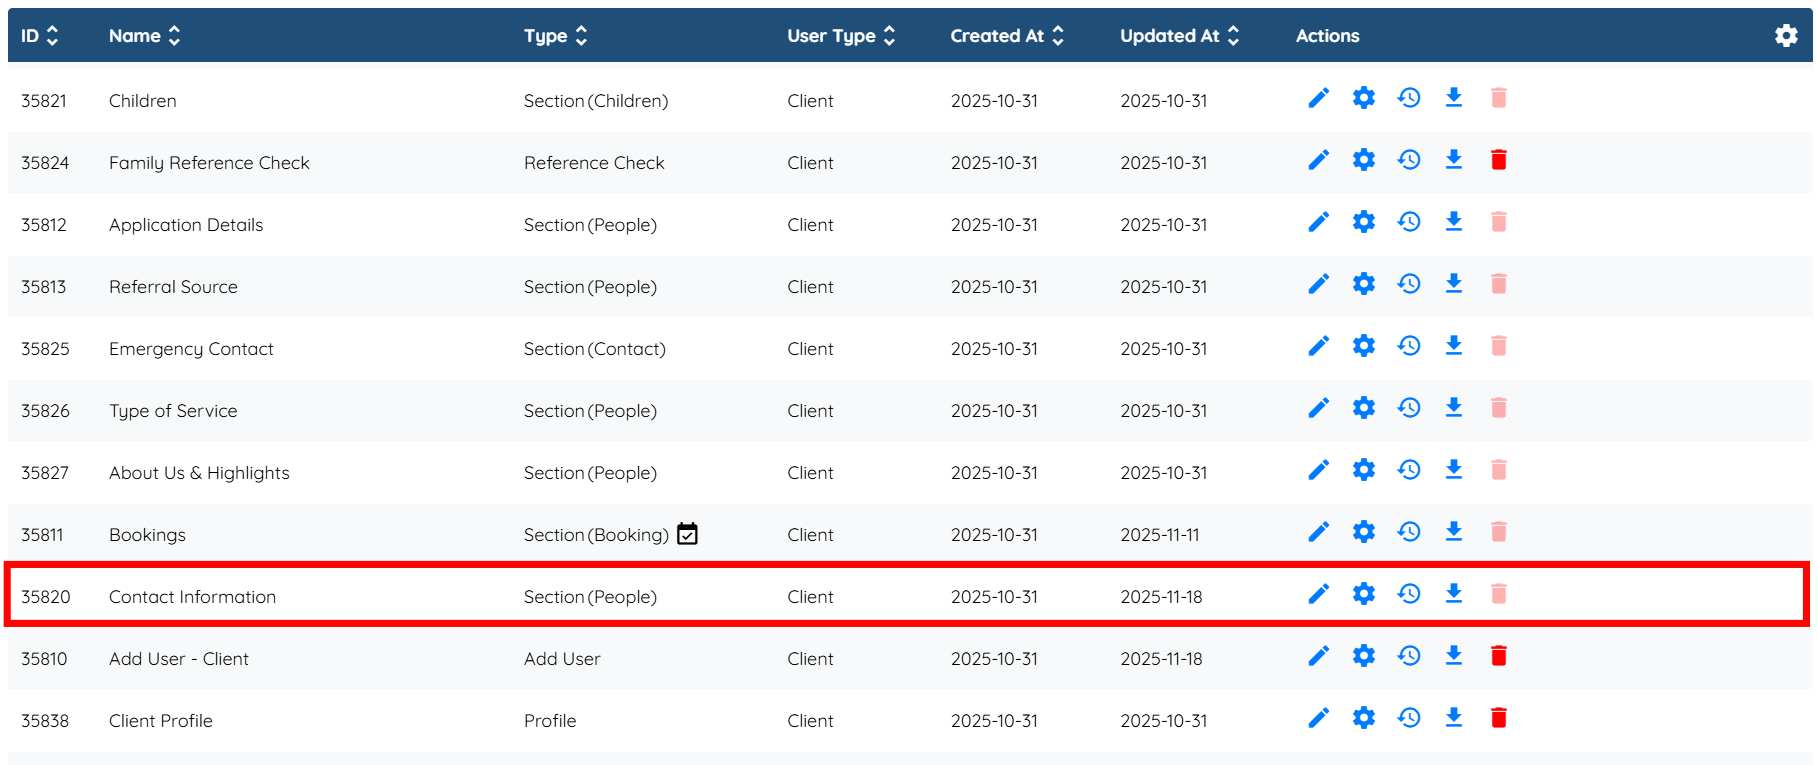
Step 2: Click and open the section where you want to add a new field, and map it to the imported customer data.
Step 3: Scroll down and click the Add Field button to begin adding a new field.
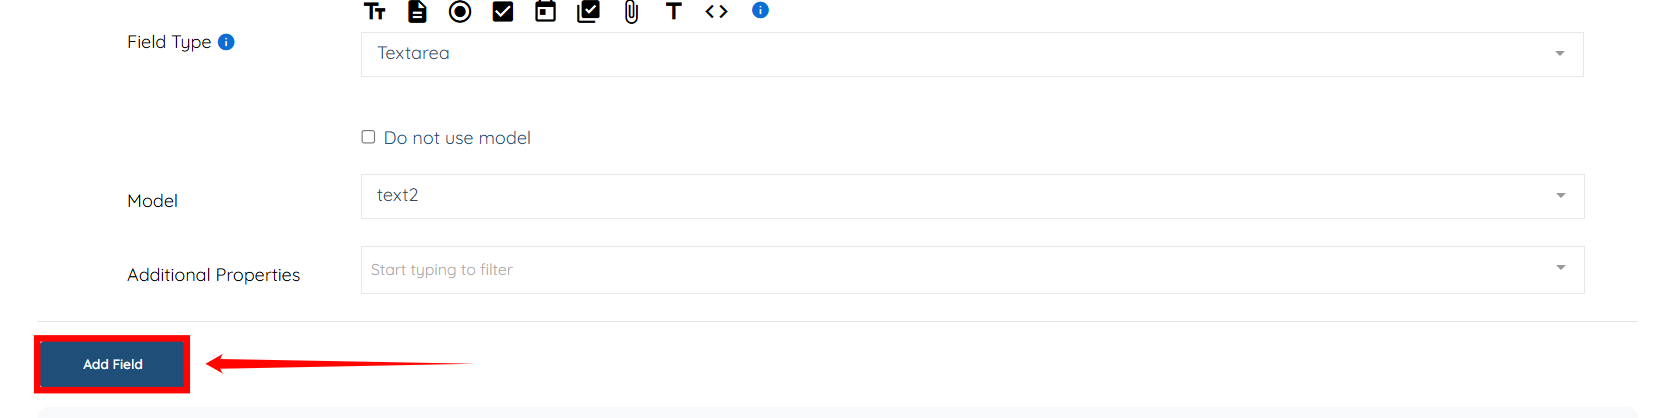
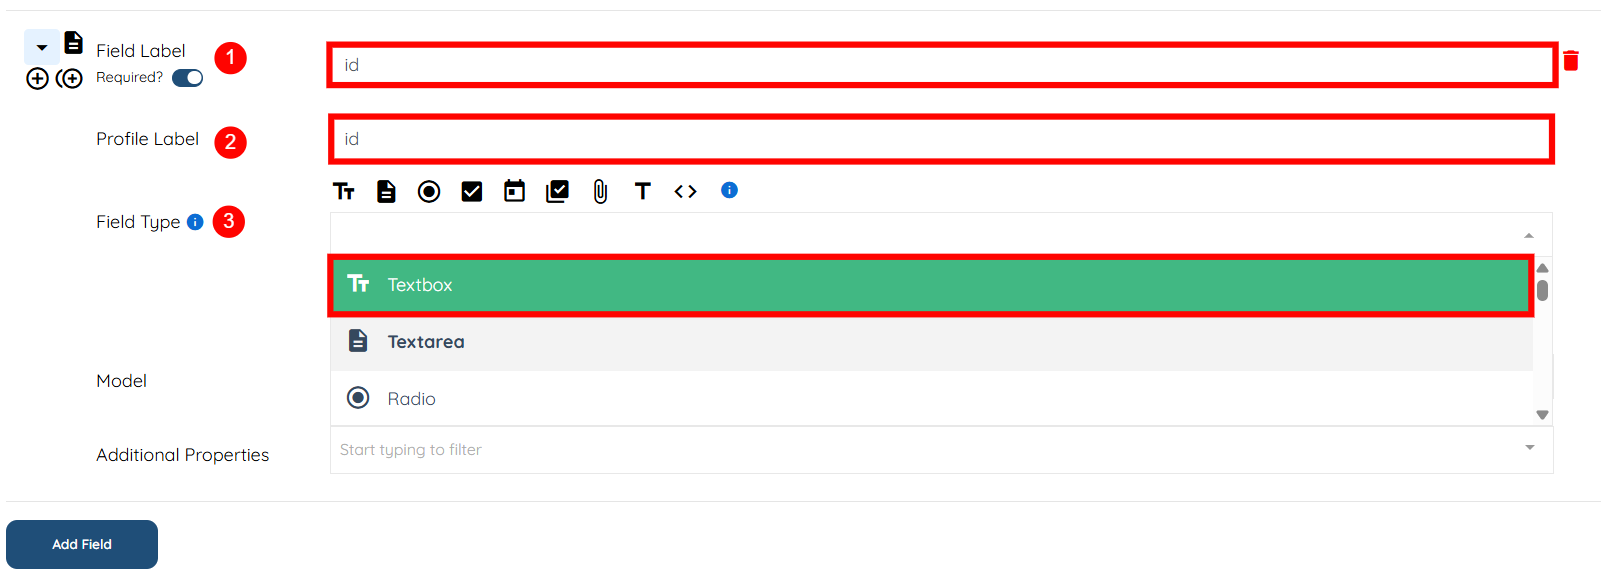
Step 4: Provide all the required details necessary to add a new field. For demo purposes, we add an ID field label, set the Profile Label also to ID, and choose Textbox as the Field Type.
S. No | Field | Description |
1 | Field Label | It is the text shown to candidates/clients when they are filling out the form. For example, "Do you have anything else to add?" |
2 | Profile Label | It is the text that appears when viewing the profile after the question has been answered. It provides clarity for what information has been provided. |
3 | Field Type | The field type dropdown determines how the answer is captured (e.g., multiple choice, text input, checkbox). It allows you to customize how the question is structured for maximum flexibility. |
Step 5: Select “stripe_customer_id” from the Model dropdown. This maps the customer ID in the exported CSV file to the id field.
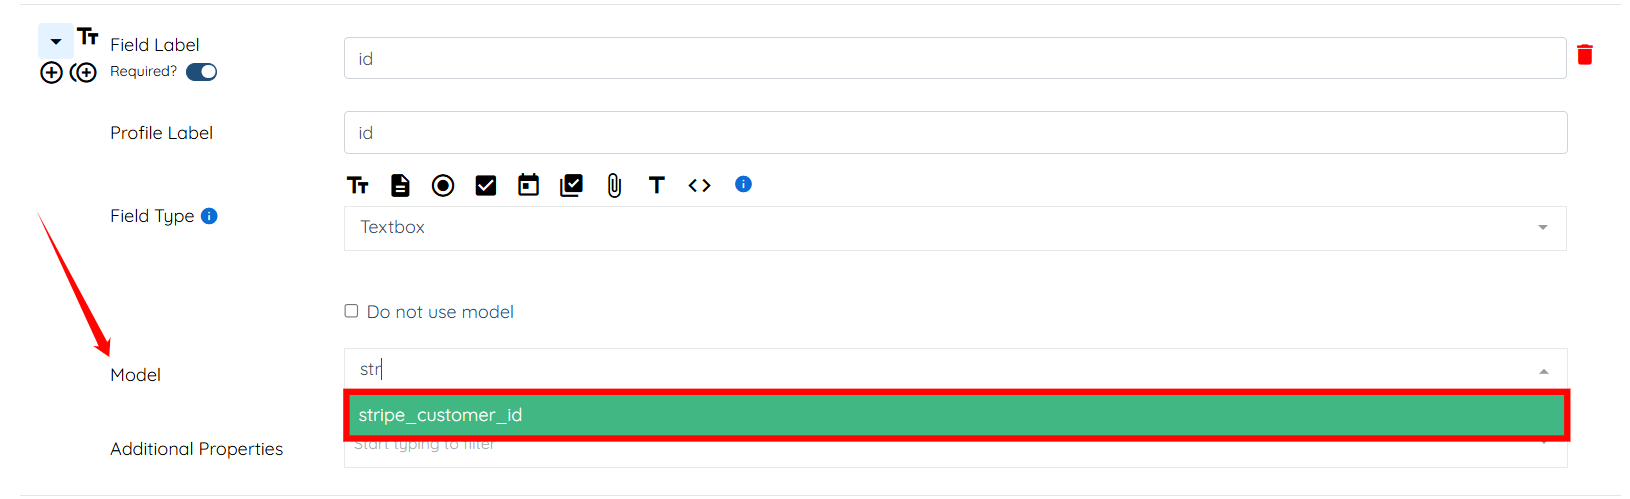
Step 6: Click the Save button to confirm the changes.

Step 7: Scroll up and navigate to Clients from the navigation bar as shown in the screenshot.

Step 8: Click any client in the list to open its details.
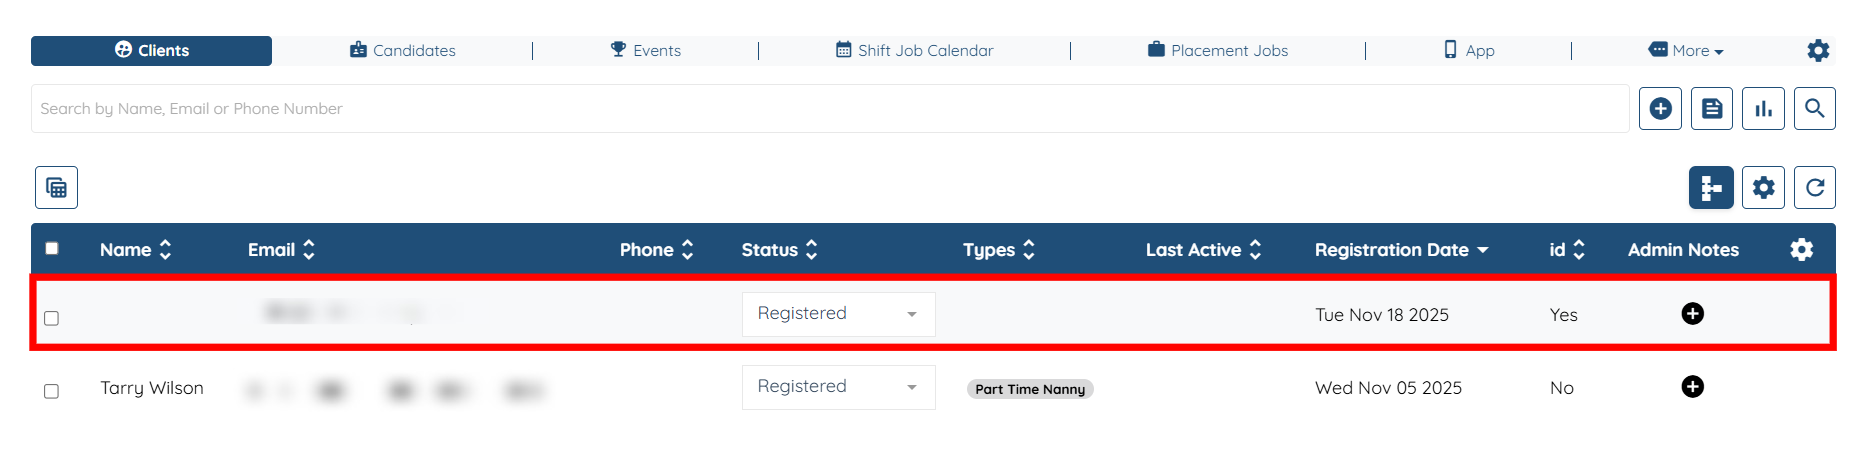
Step 9: Click on the Profile section and you will see that the customer ID (as in Stripe) successfully maps to the id field.

