Let’s get started 🚀
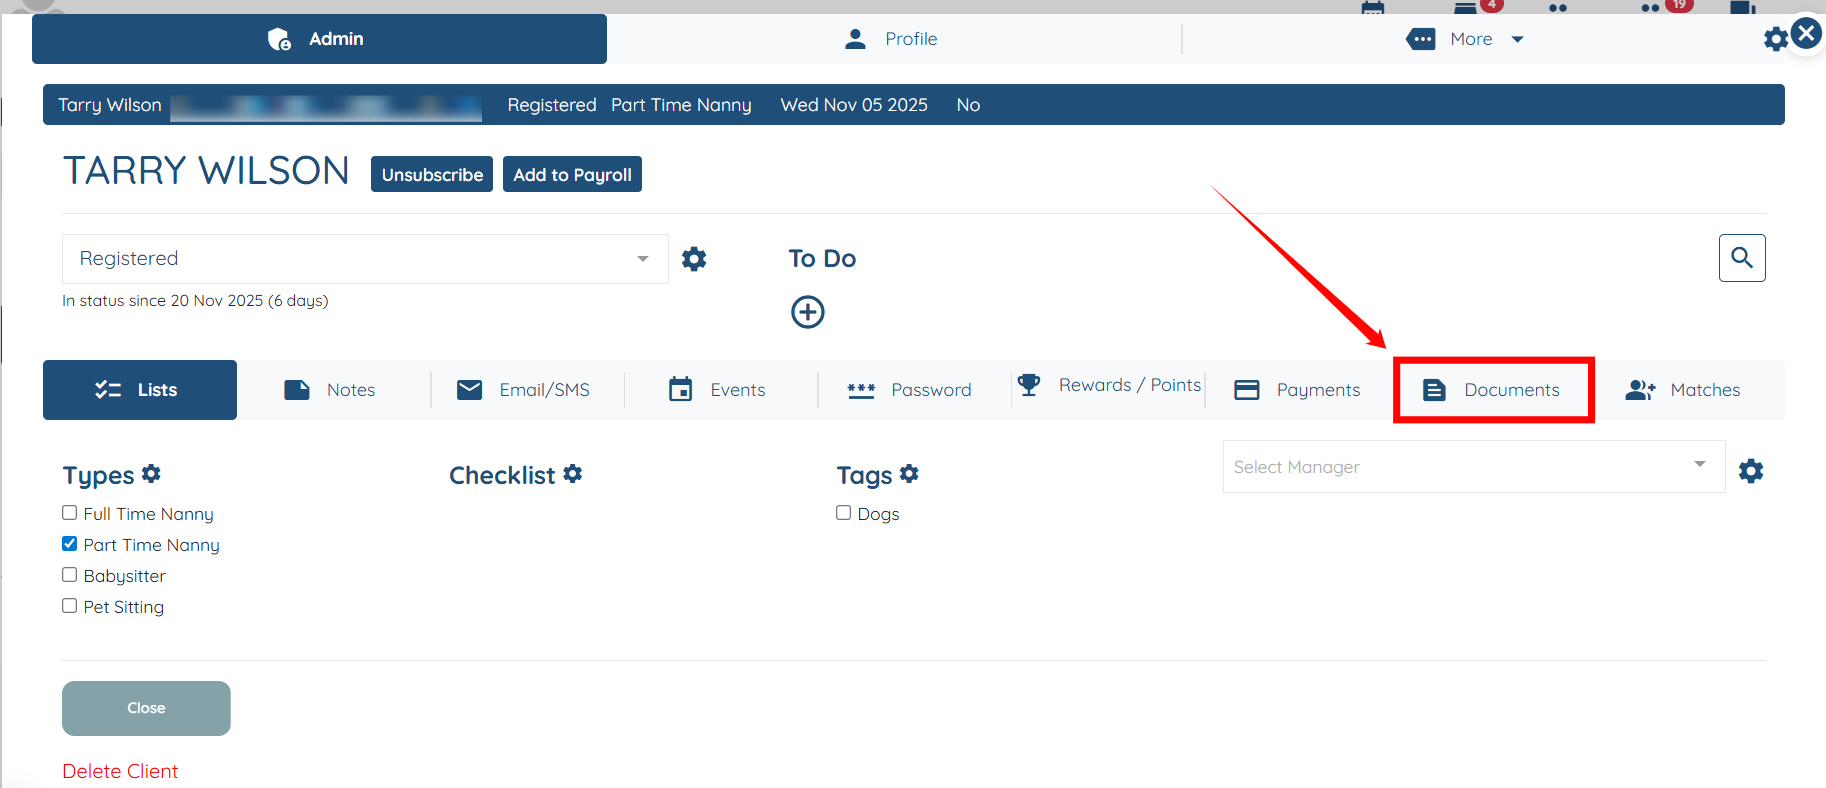
Step 1: On your agent dashboard, click any client in the list to open that client’s details.

Step 2: Click the Documents tab as shown in the screenshot below.
Step 3: Under the Document to Sign heading, select the document you want to add from the dropdown.
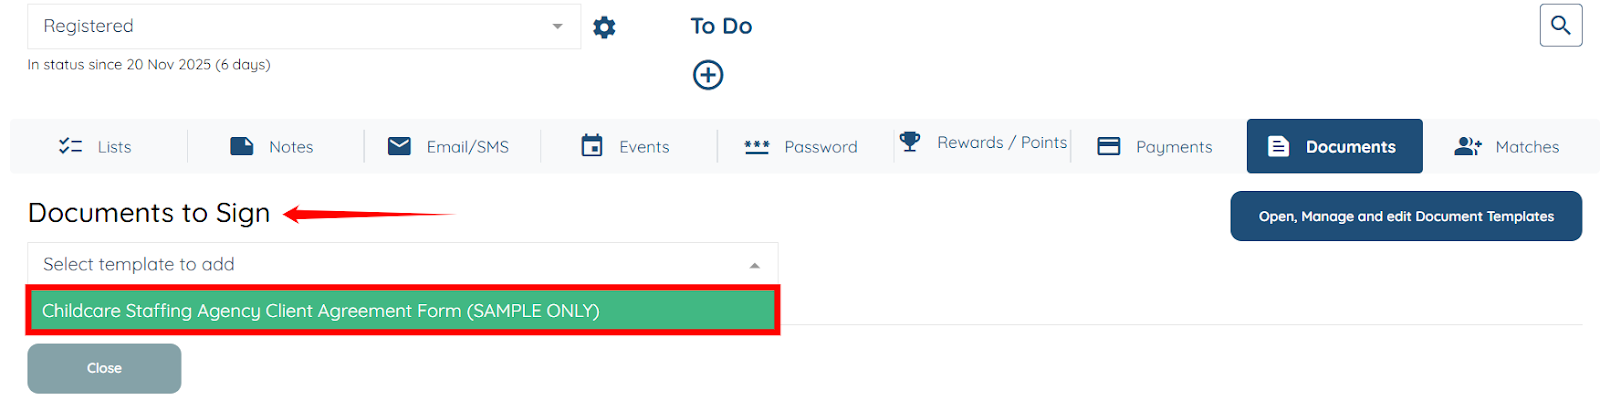
Step 4: Click the Add button to proceed.

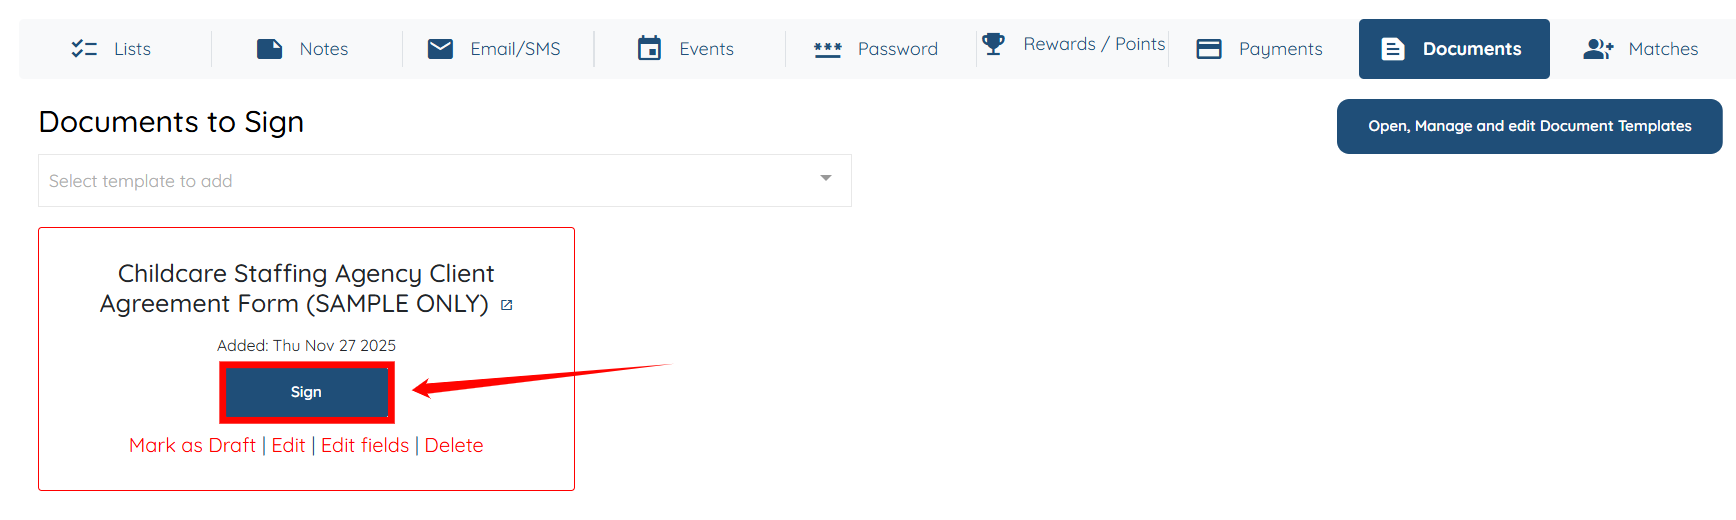
Step 5: Click the Sign button to open the form.
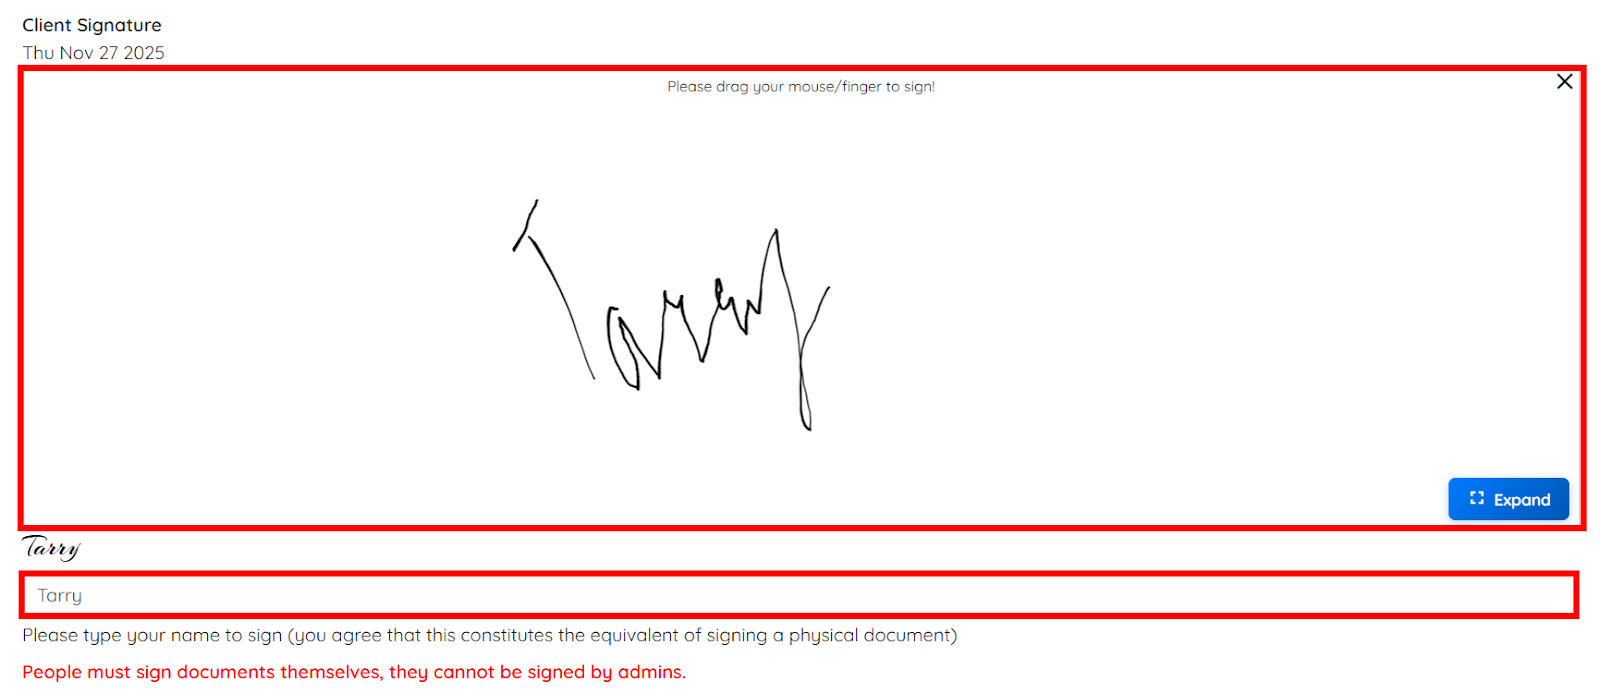
Step 6: Sign the document by dragging your mouse or, if you are using a mobile phone, your finger.
Then enter your name in the field at the bottom, exactly as shown in the screenshot below.
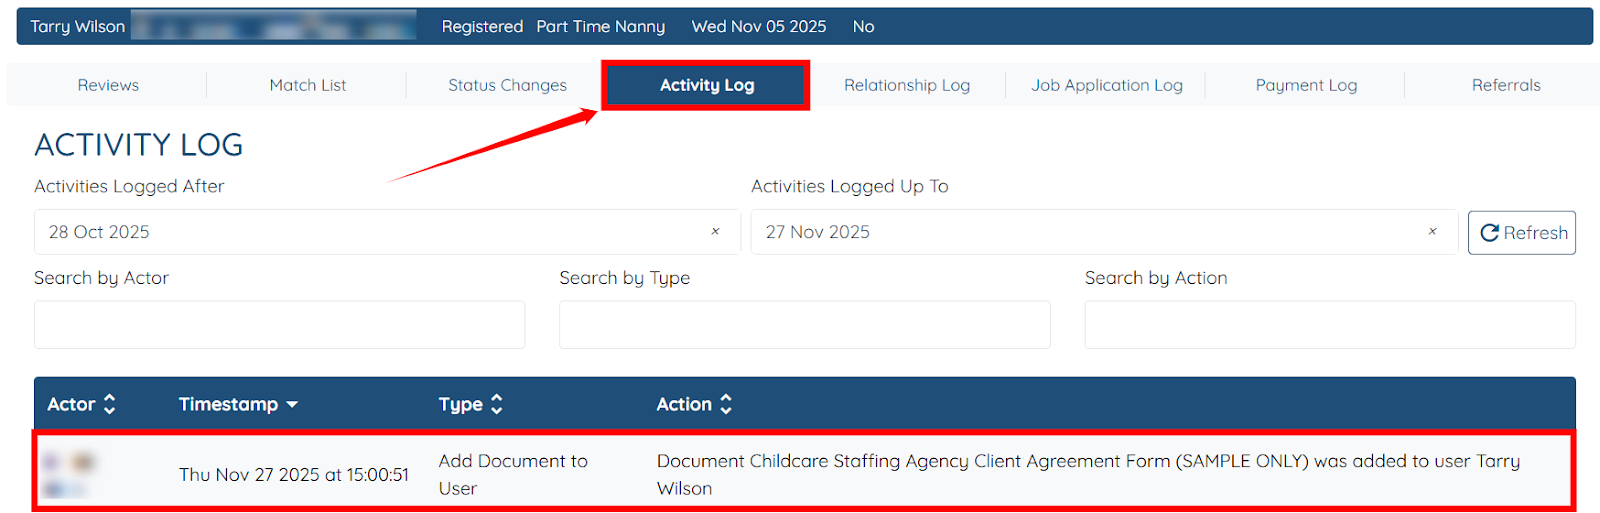
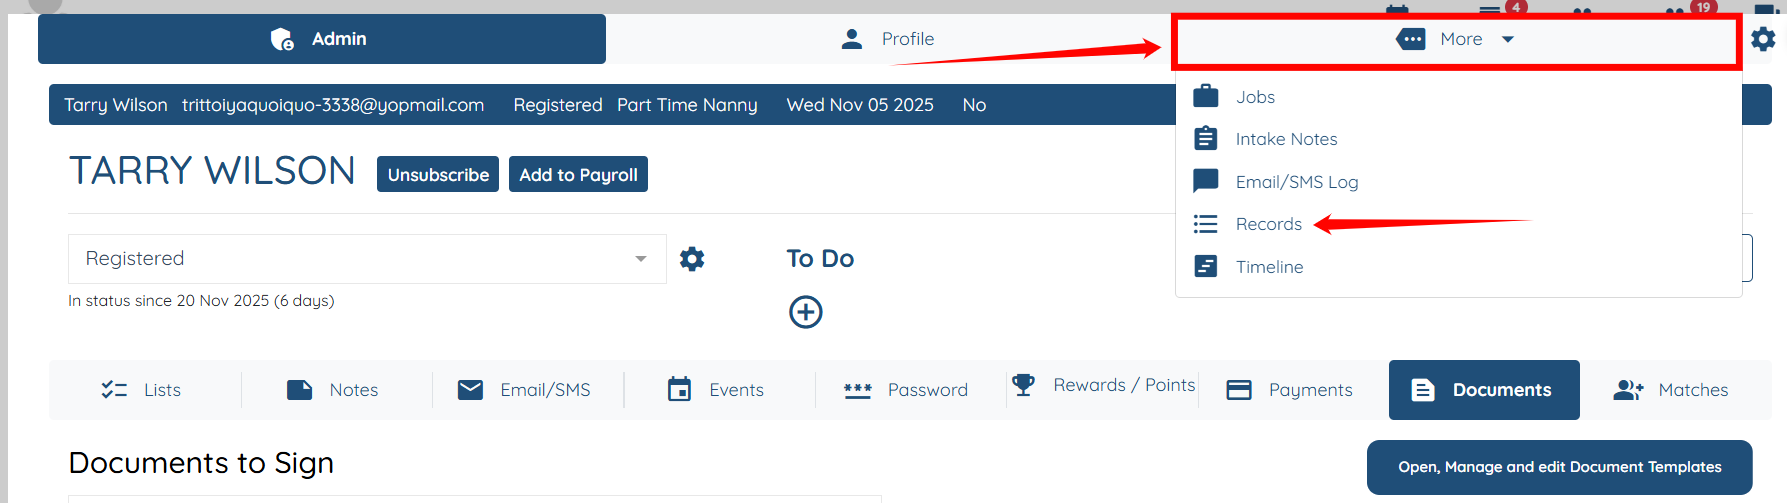
Step 7: Click More > Records to open the records.
Step 8: Under the Activity Log tab, you will be able to see the log for the document you recently added.