Let’s get started 🚀
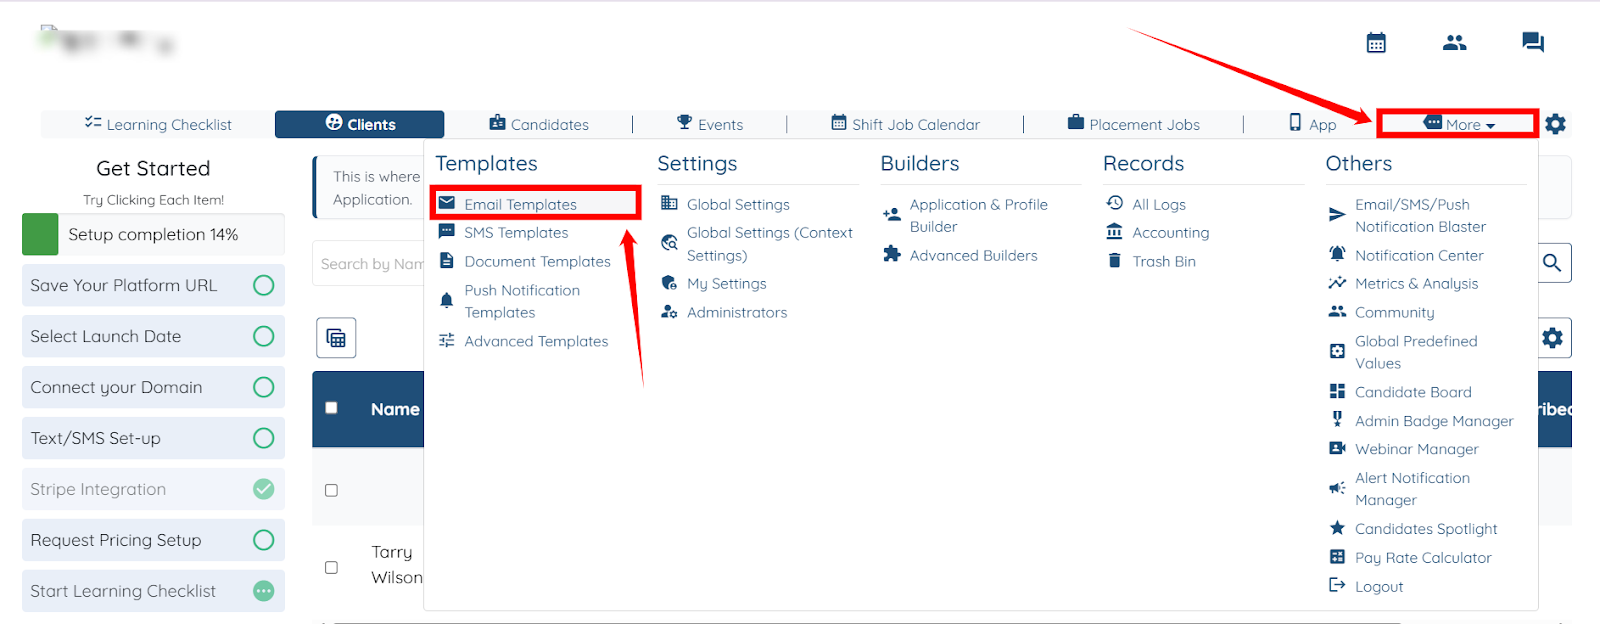
Step 1: Log in to your agent dashboard, and click More > Email Templates as shown in the screenshot.
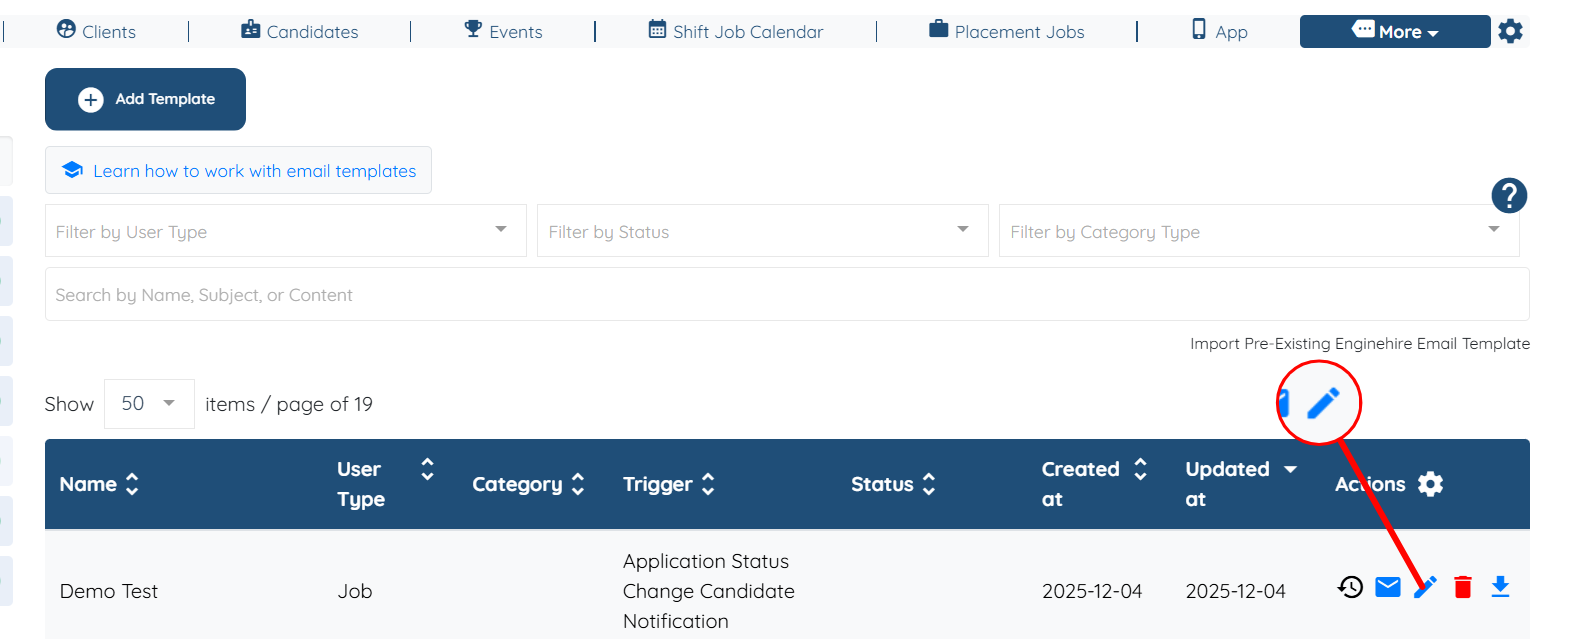
Step 2: Locate the Application Status Candidate Notification Template where you want to add the placement job tags, and click the corresponding pencil icon in the Actions column to edit it.
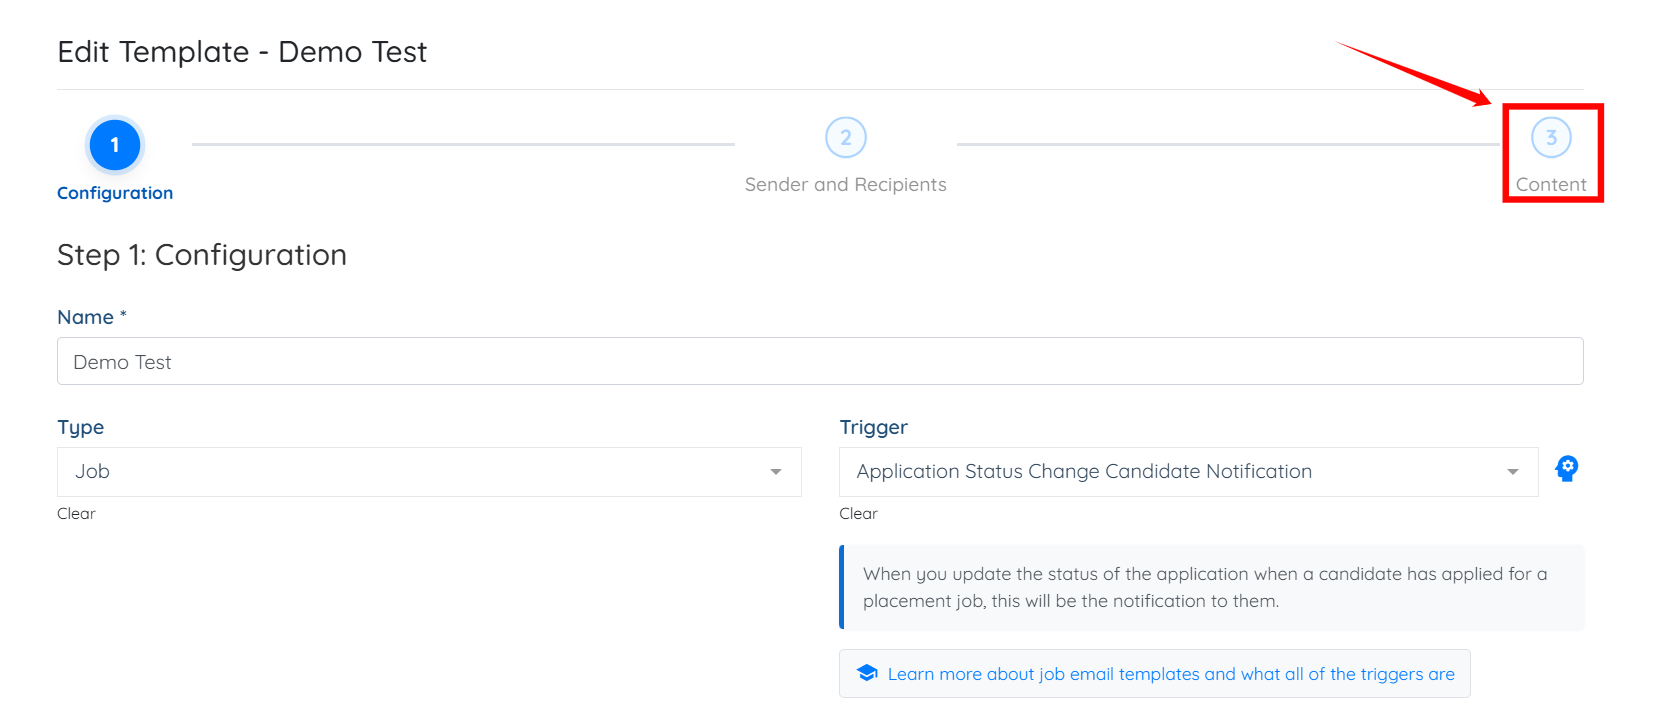
Step 3: Click the Content option in the email template to open it.
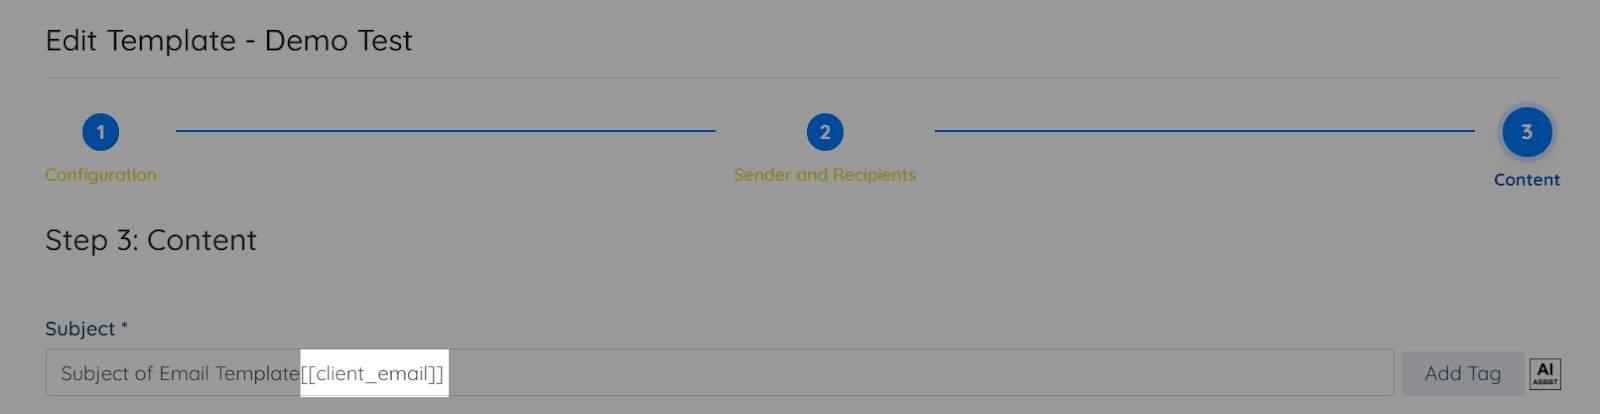
Step 4: Click the Add Tag button to add a new tag.

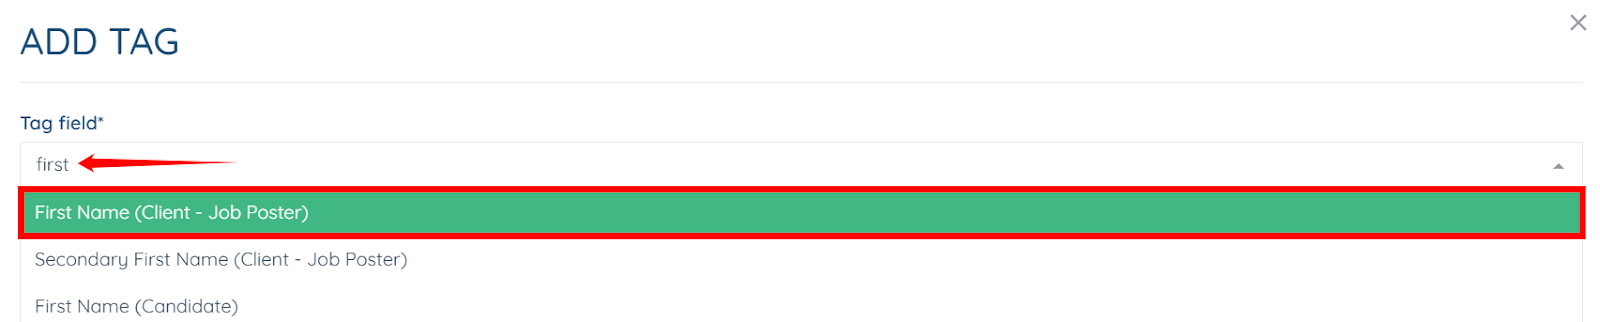
Step 5: Start typing and then select the suggested placement job tags you want to add from the dropdown.
You may add other placement job tags as needed.

Step 6: Click the Submit button to add the tag.

The selected placement job tag will be added successfully.