Let’s get started 🚀
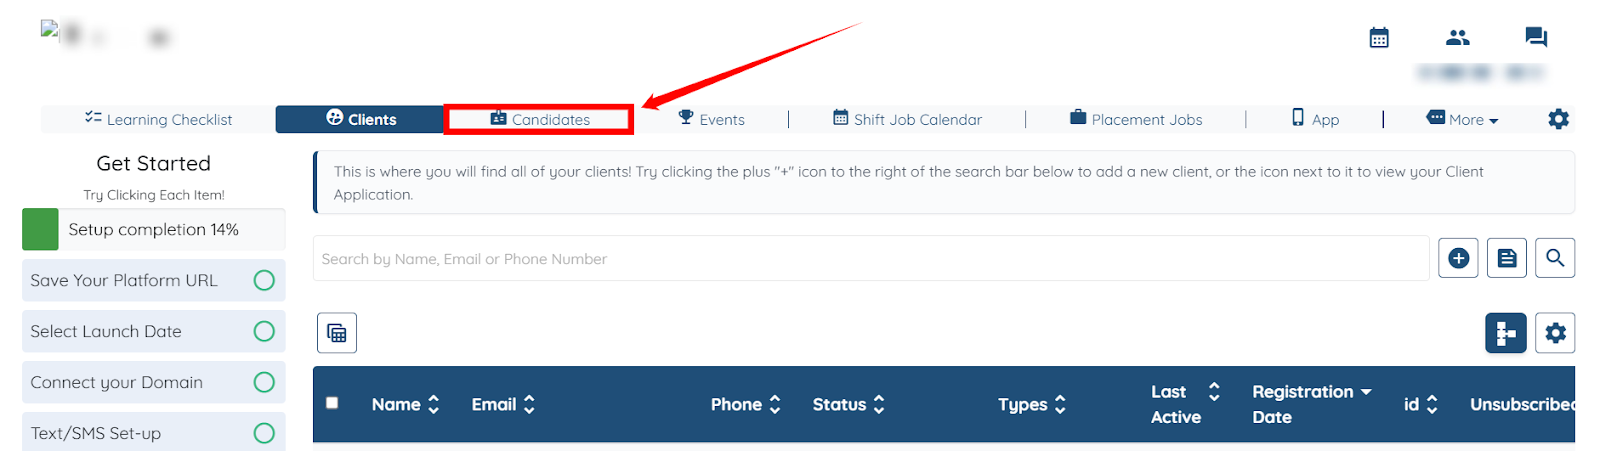
Step 1: Log in to your agent dashboard and click Candidates in the top navigation bar.
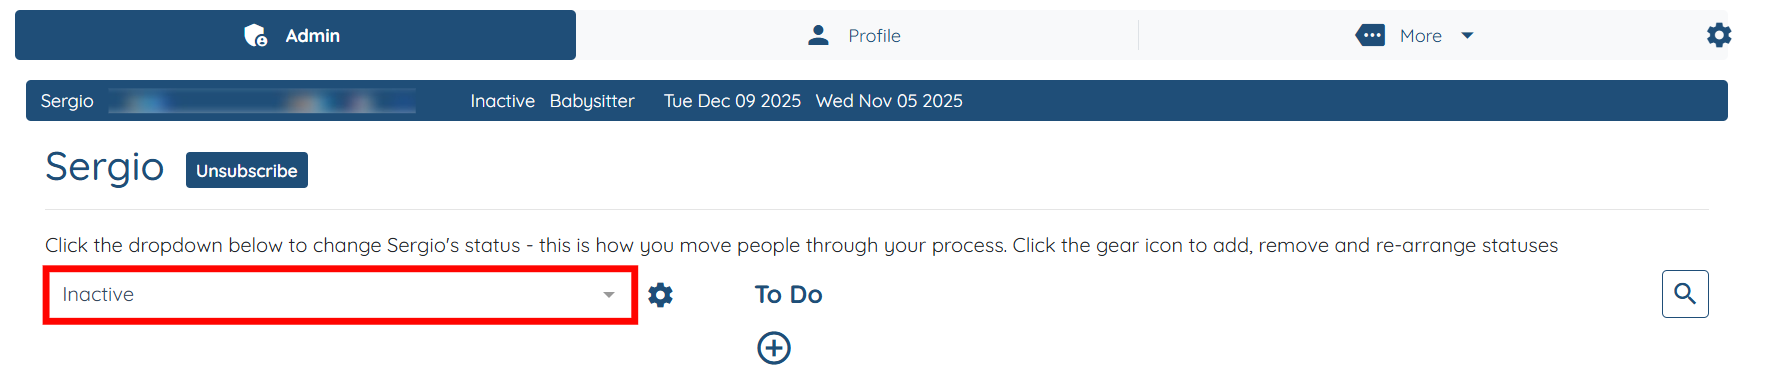
Step 2: Click the candidate in the list that you want to mark as Inactive.

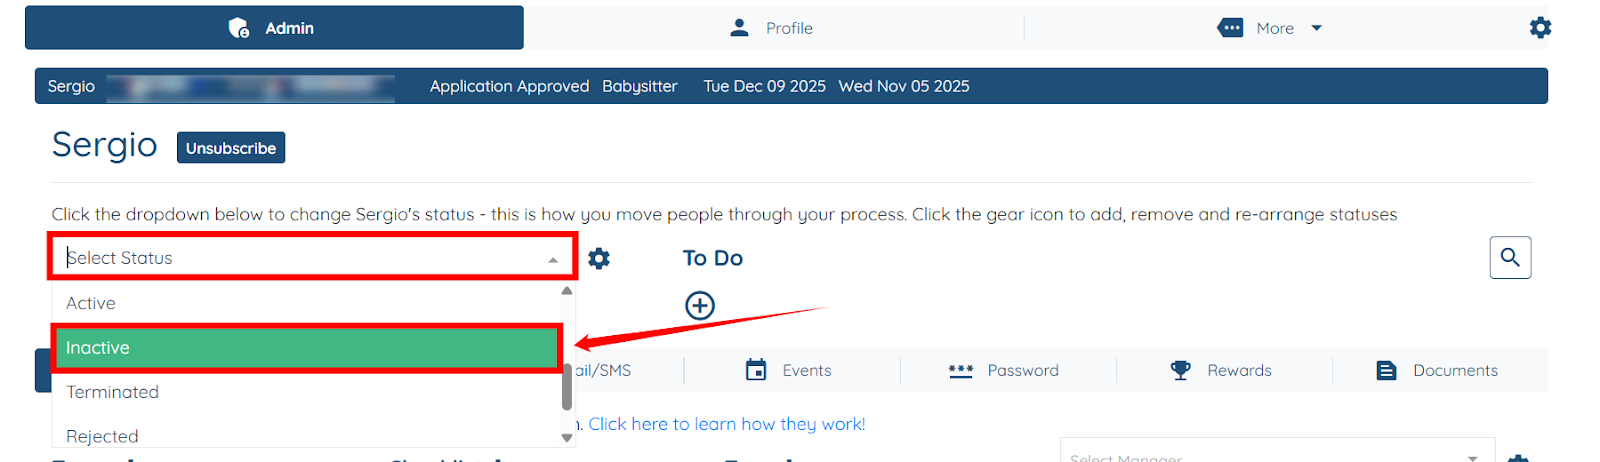
Step 3: Click and open the dropdown as shown in the screenshot, and then select the Inactive status from the dropdown.
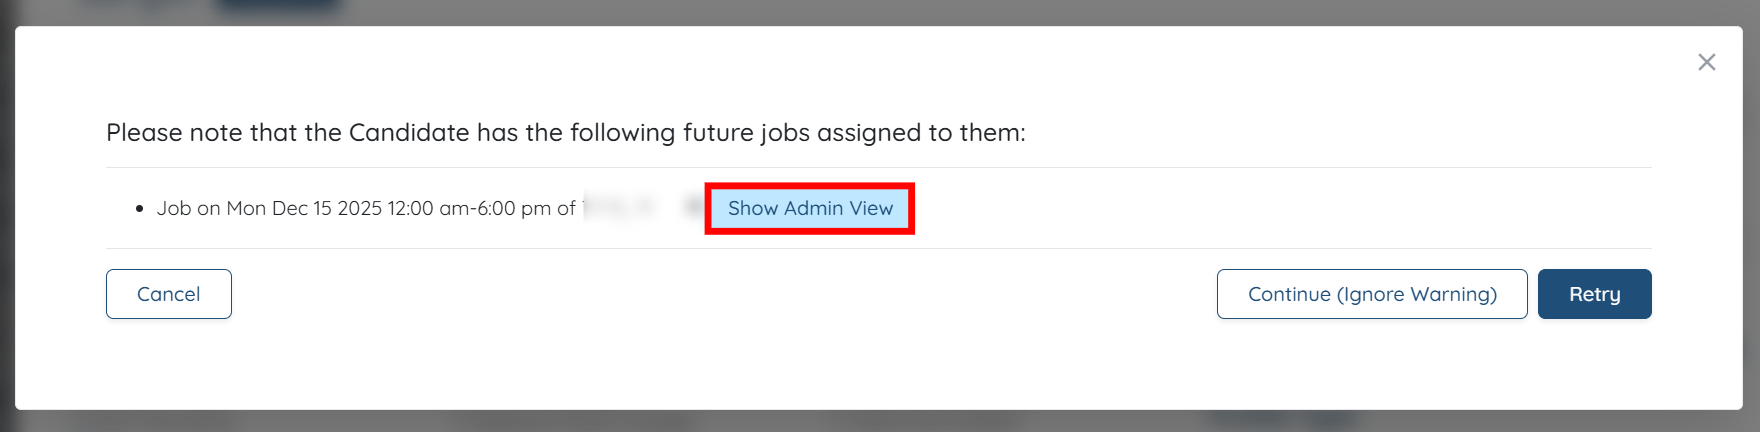
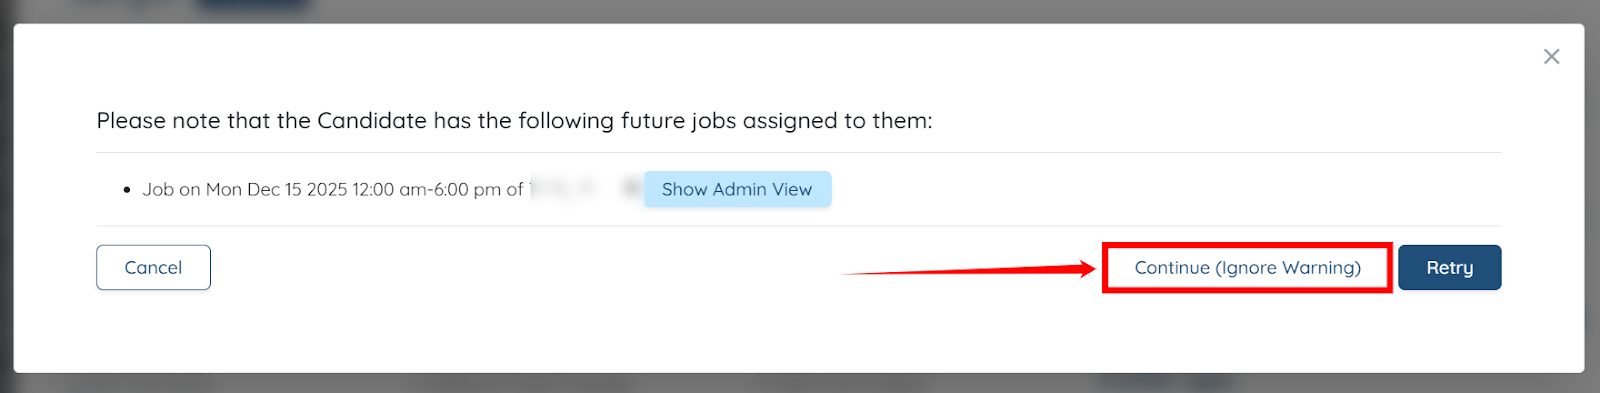
Step 4: You will receive an alert stating that the candidate has the following future jobs assigned to them. Click the Show Admin View button to check more details on the assigned future jobs.

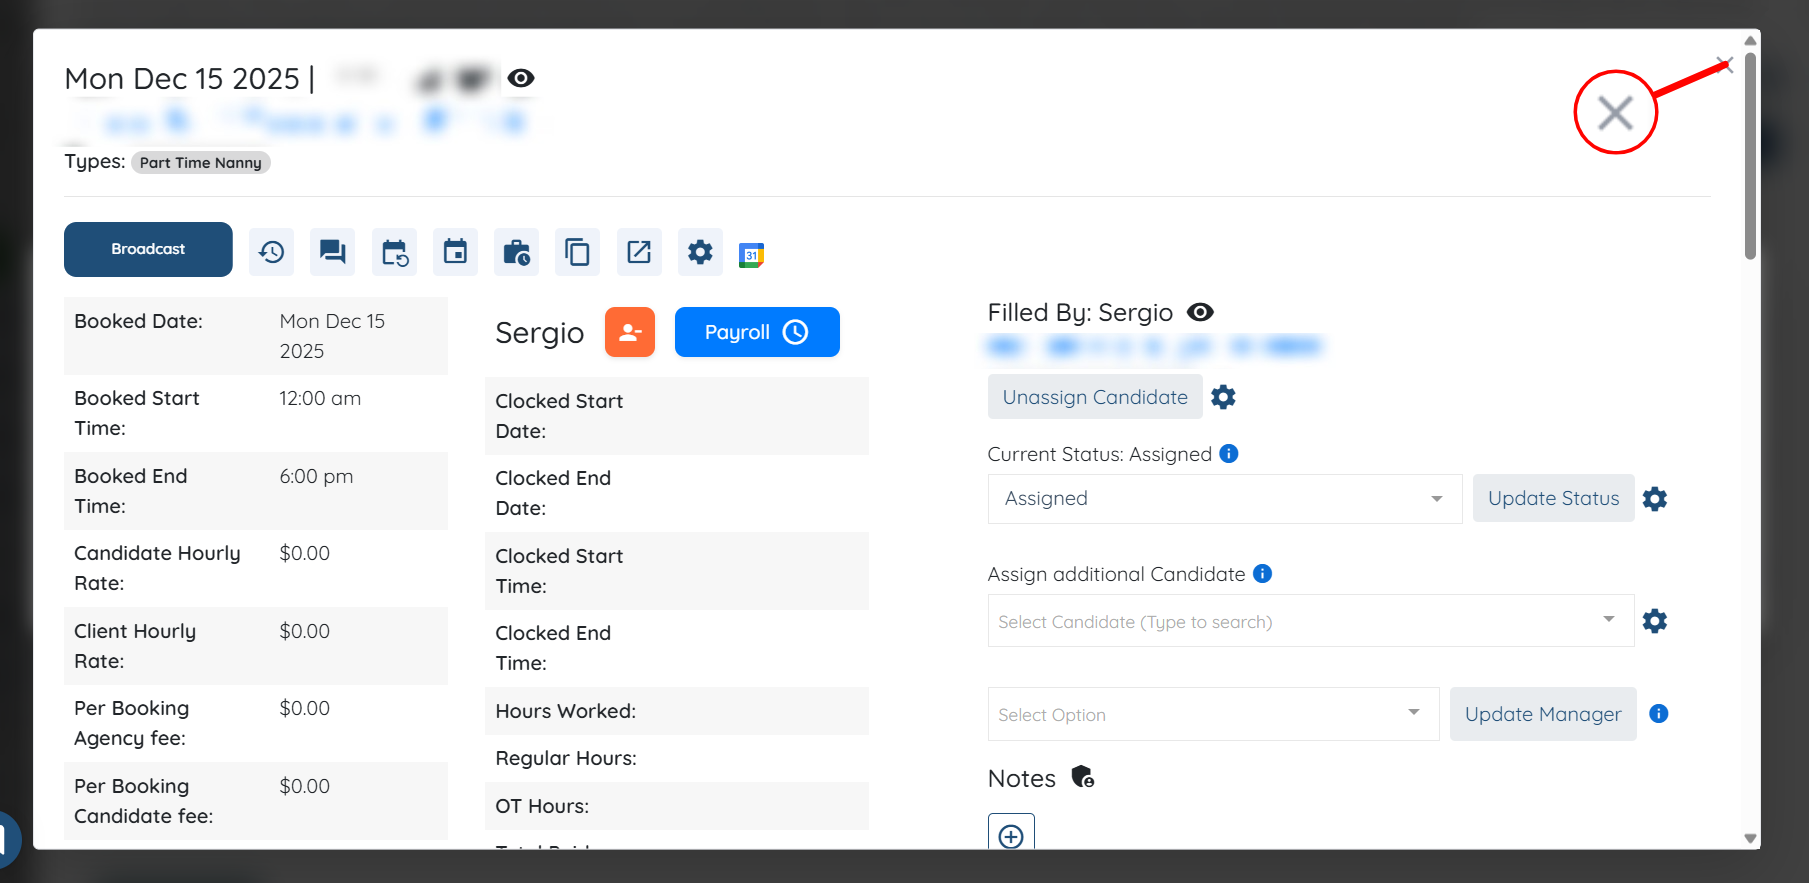
Step 5: Check all the details of the jobs assigned for future dates, including the Booked Date, Booked Start Time, Booked End Time, and other relevant information.
Then, click the cross icon at the top right corner of the interface to close the Admin View.
Step 6: If you still want to change the candidate’s status to Inactive, then click the Continue (Ignore Warning) button to proceed.
The candidate’s status will be successfully changed to Inactive.