Let’s get started 🚀
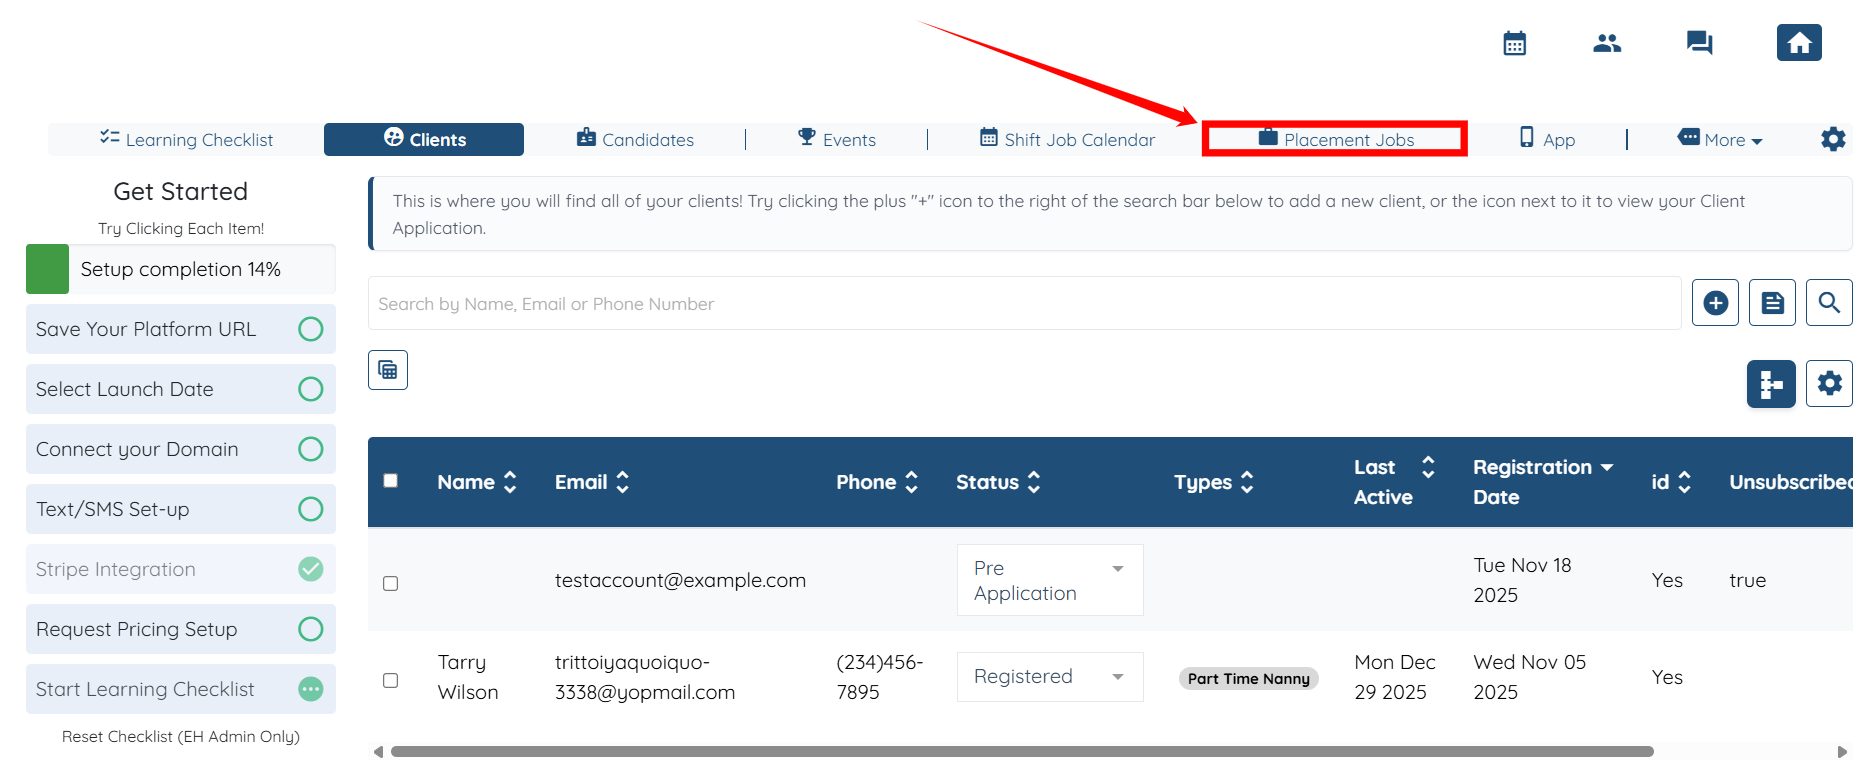
Step 1: Log in to your agent dashboard and click Placement Jobs in the top navigation bar.
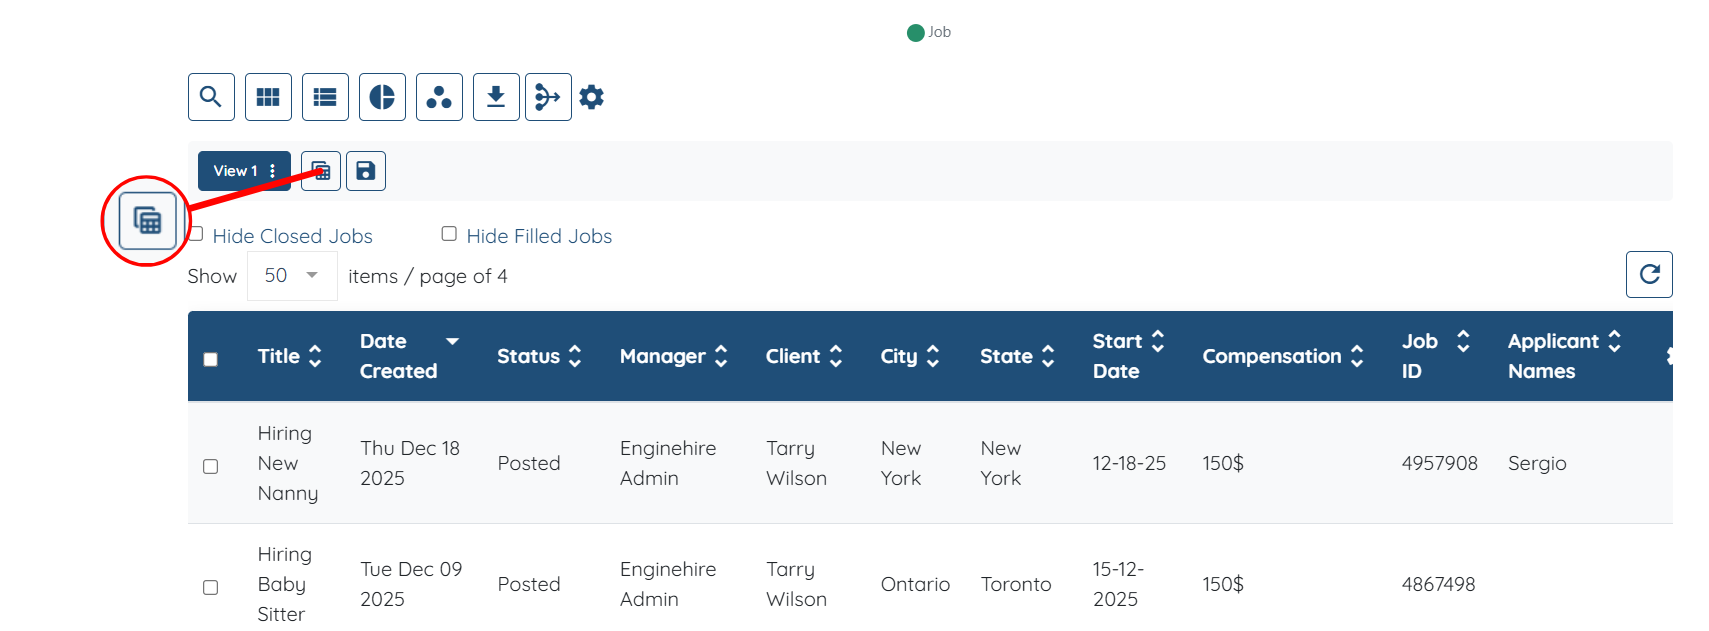
Step 2: Scroll down and click the Create View button, as shown in the screenshot.
Step 3: Click the Got it button to continue.

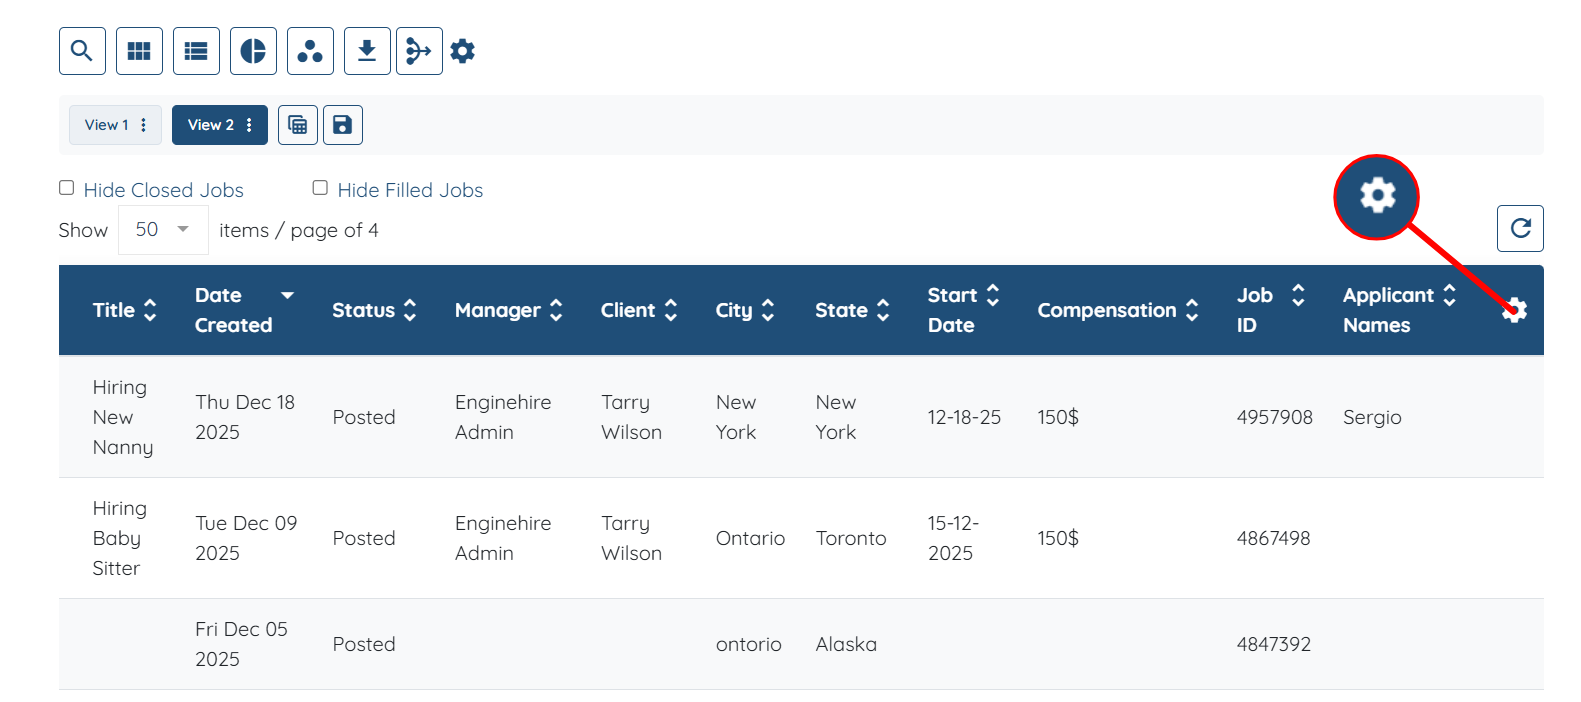
Step 4: Click the Gear icon located on the right-hand side of the table.
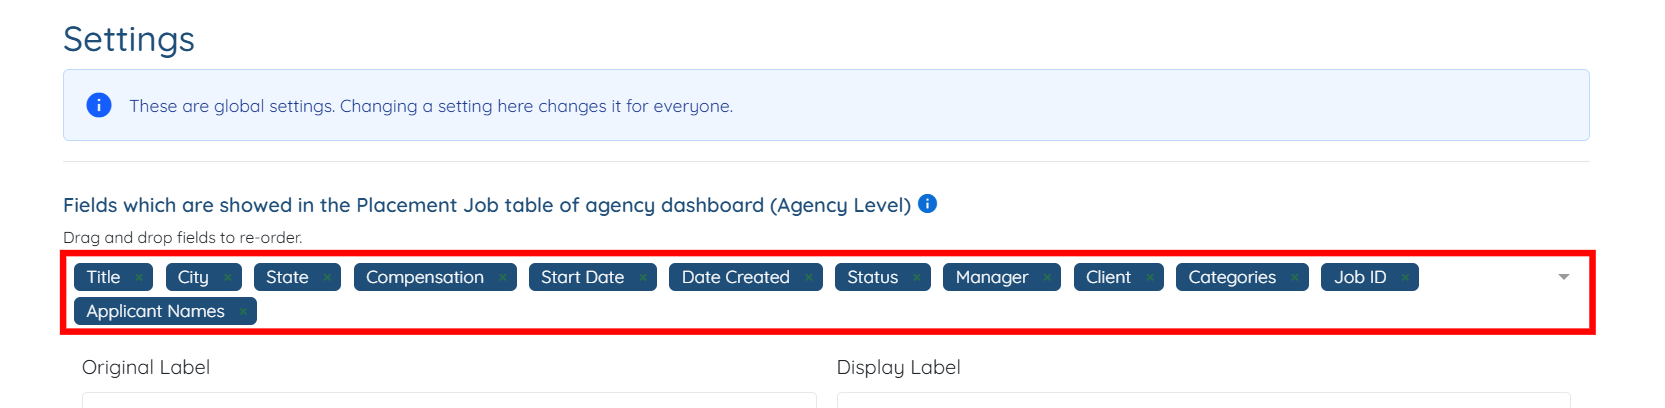
Step 5: You can click on the box shown in the screenshot below and begin adding new columns (fields) to the table, if needed.
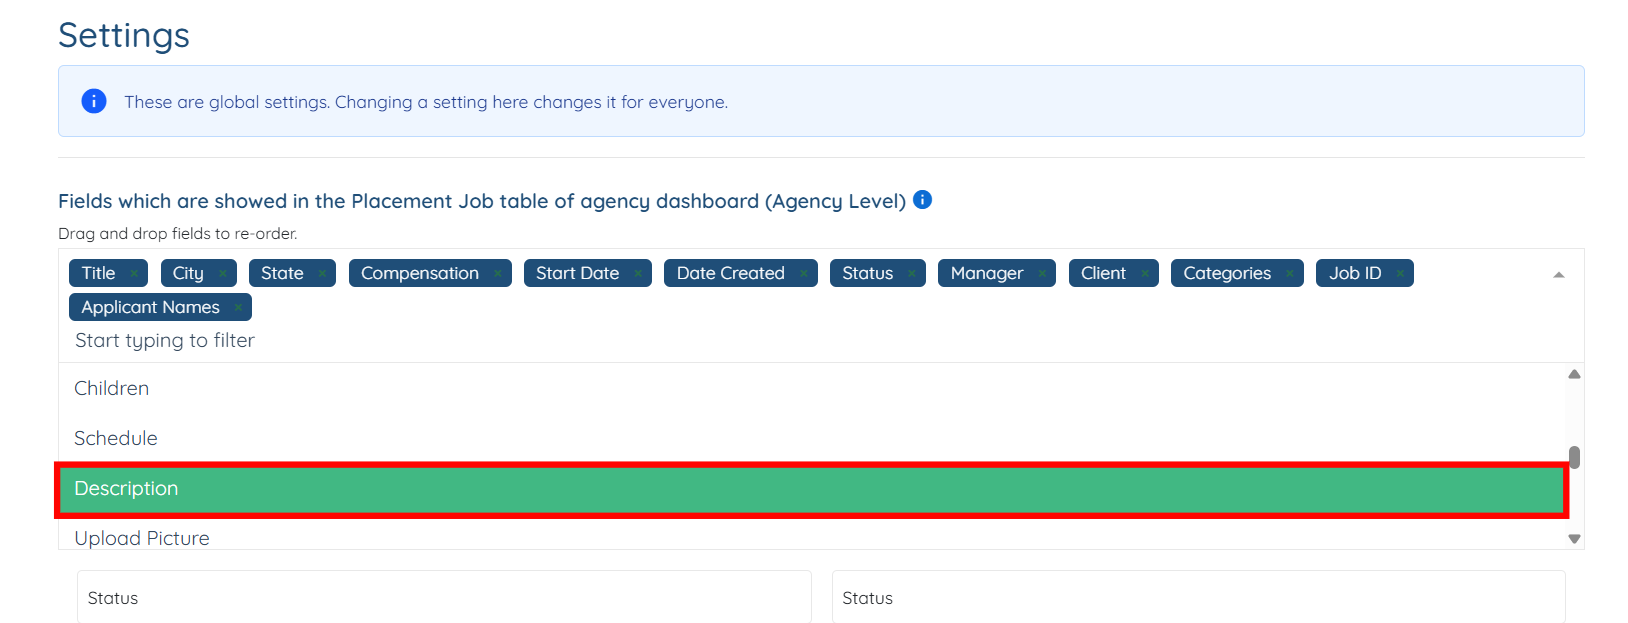
Step 6: For example, you can add a Description column to the table if it has not been added previously.
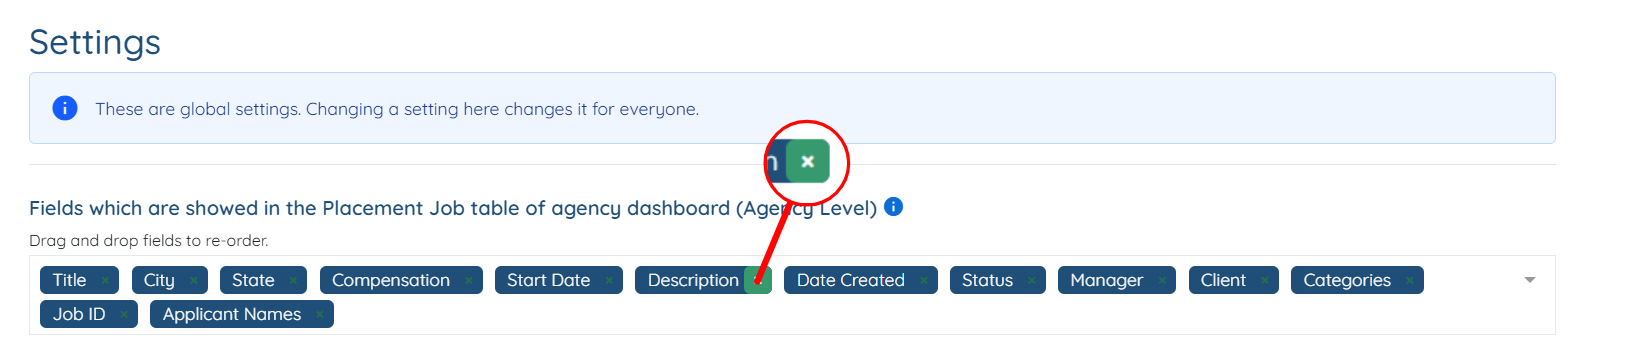
Step 7: You can remove any column in the table by hovering over the column name and clicking the cross icon when it appears.
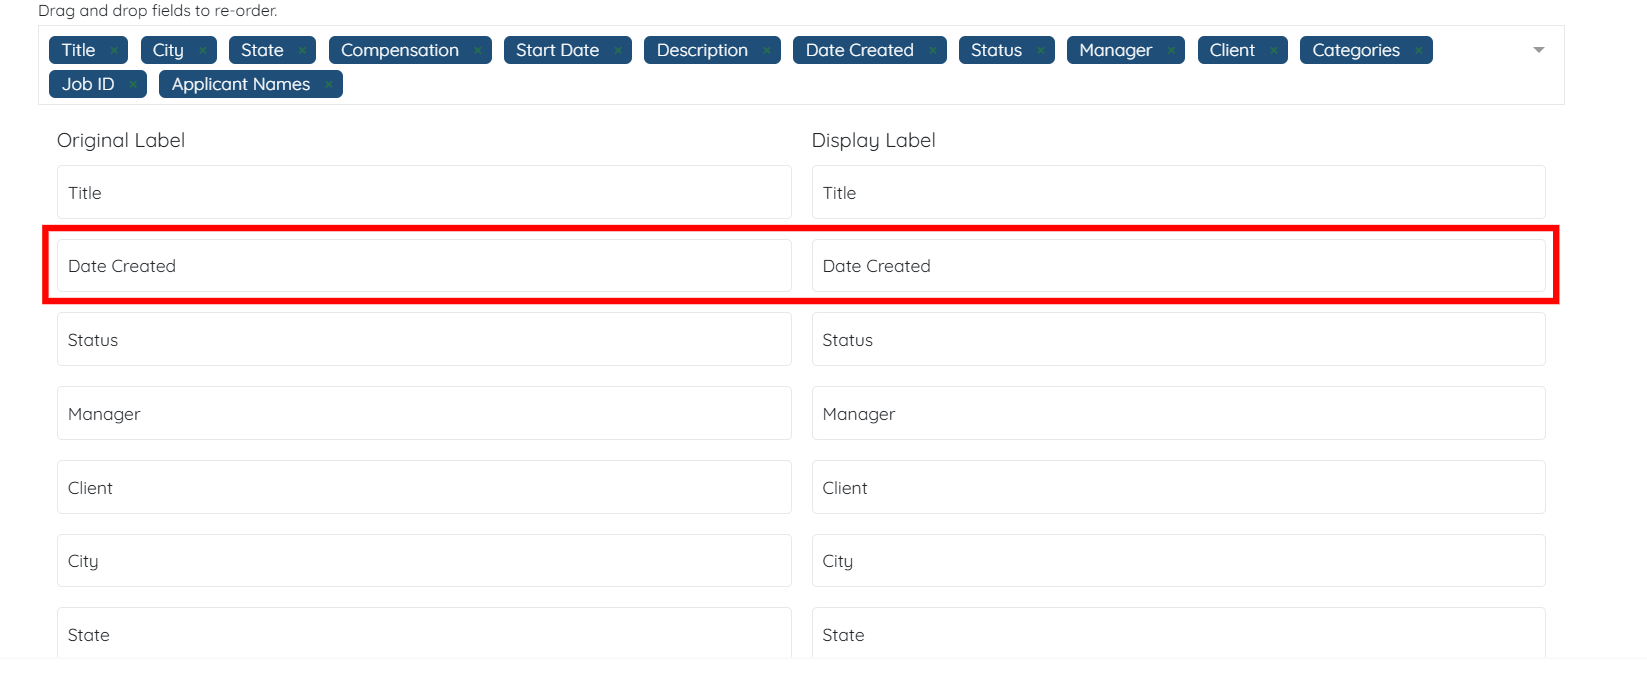
Step 8: You can reorder fields by dragging and dropping them as needed. For example, you can drag and drop the Date Created field so that it appears before the Title field.
Step 9: After you have completed all the required changes, click the Submit button to proceed.

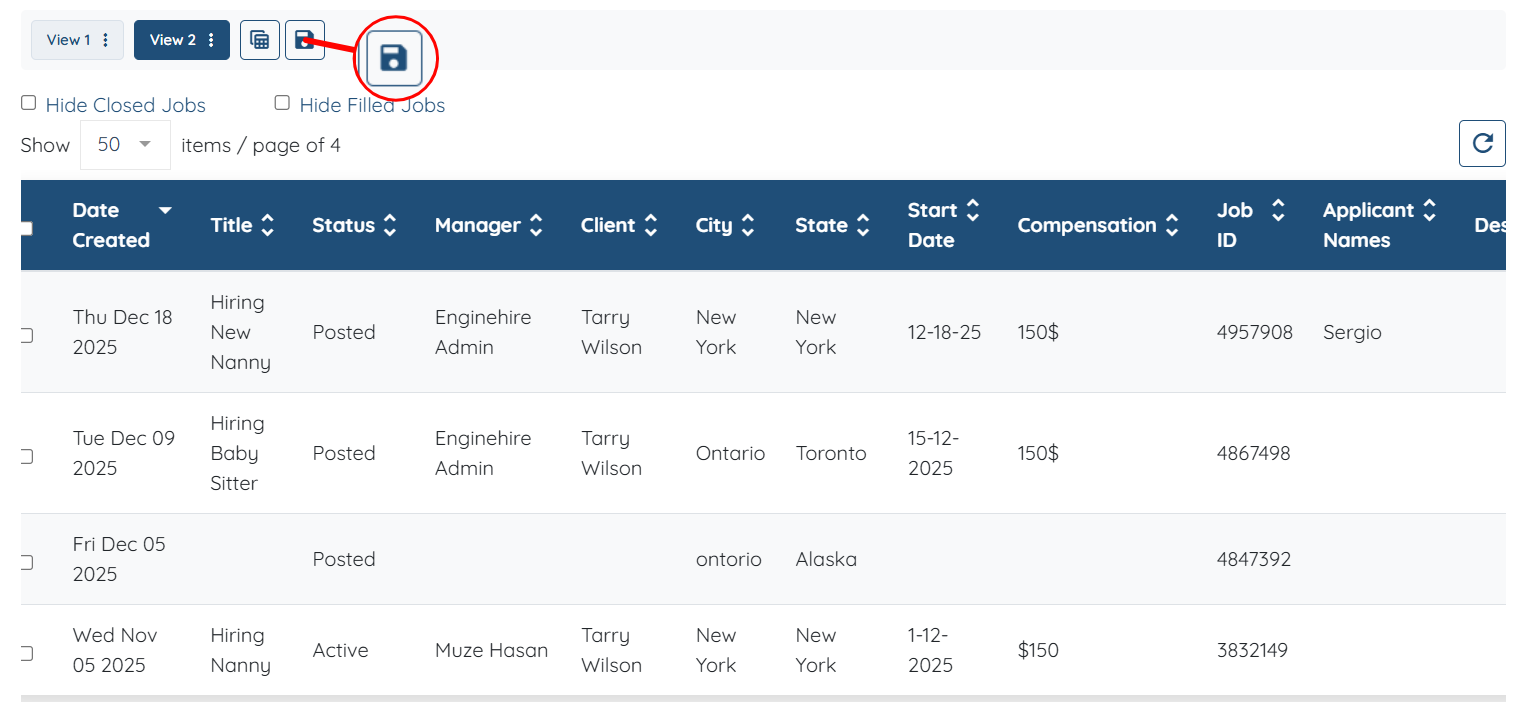
Step 10: Click the Save View button to store the view you have created.