
Let’s get started 🚀
Use the steps below to send the weekly job summary to candidates through the Repeat Email Blaster.
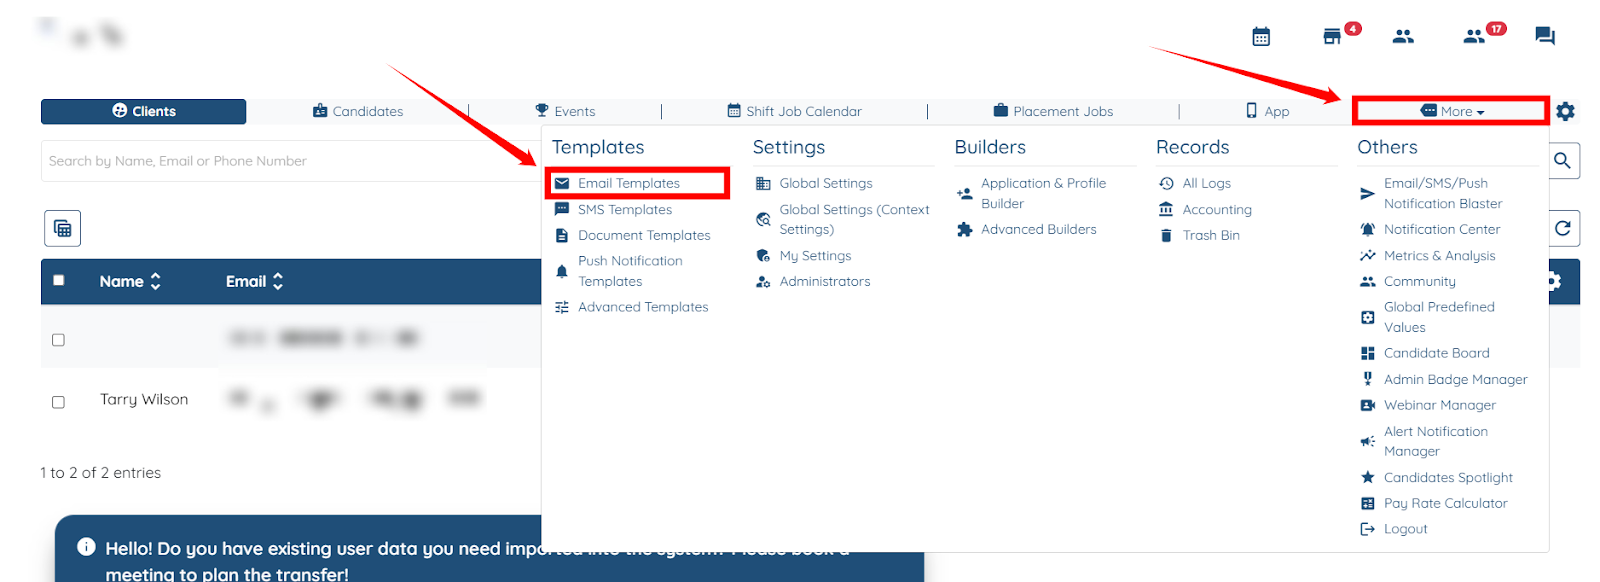
Step 1: Log in to your agent dashboard, then navigate to More > Email Templates, as shown in the screenshot below.
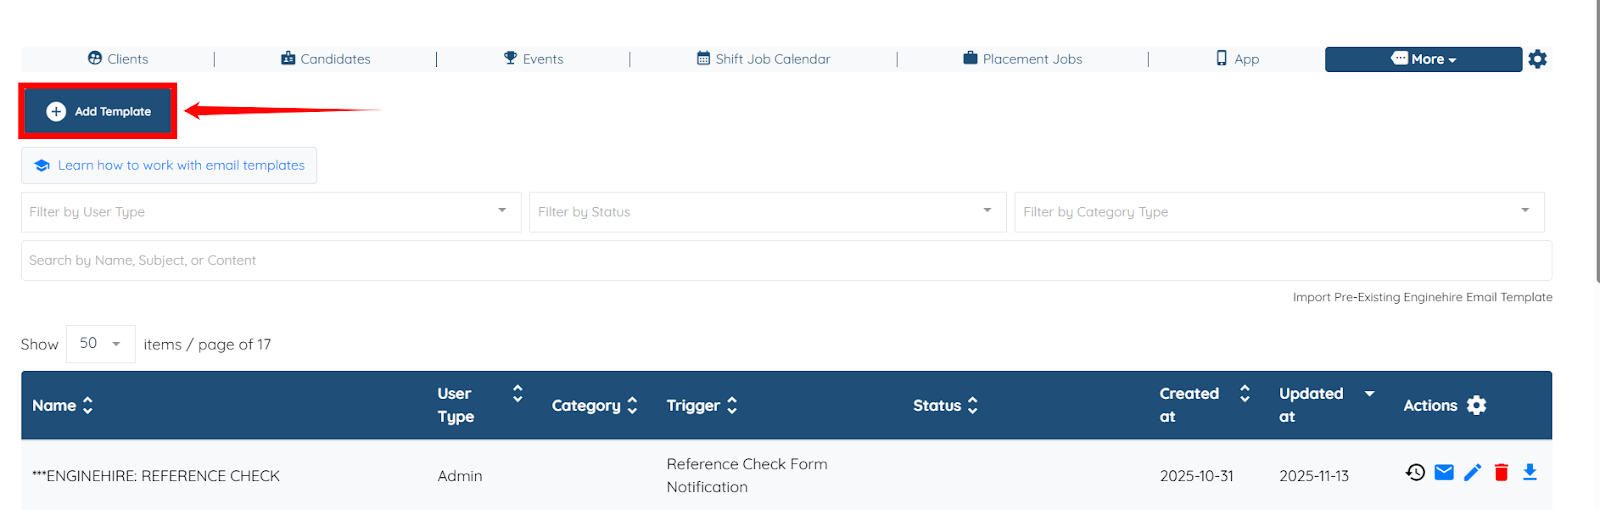
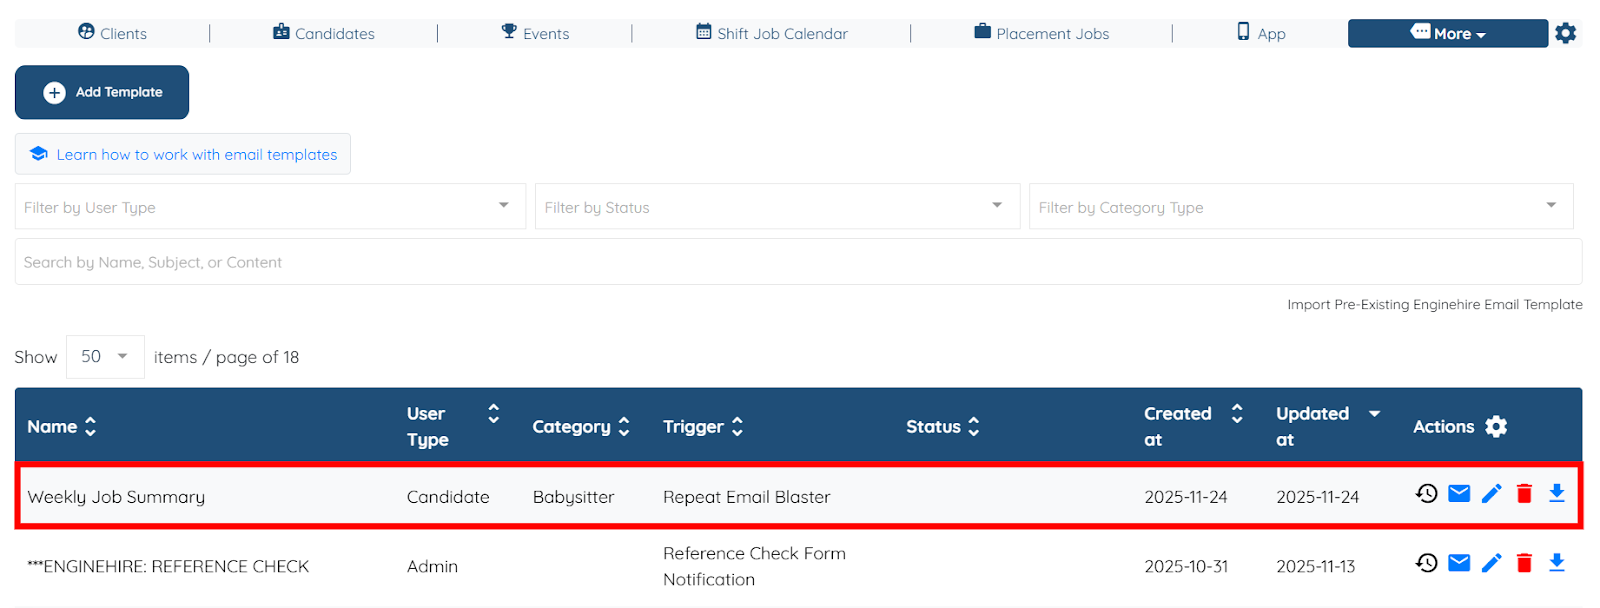
Step 2: Click the Add Template button to begin adding a new template.
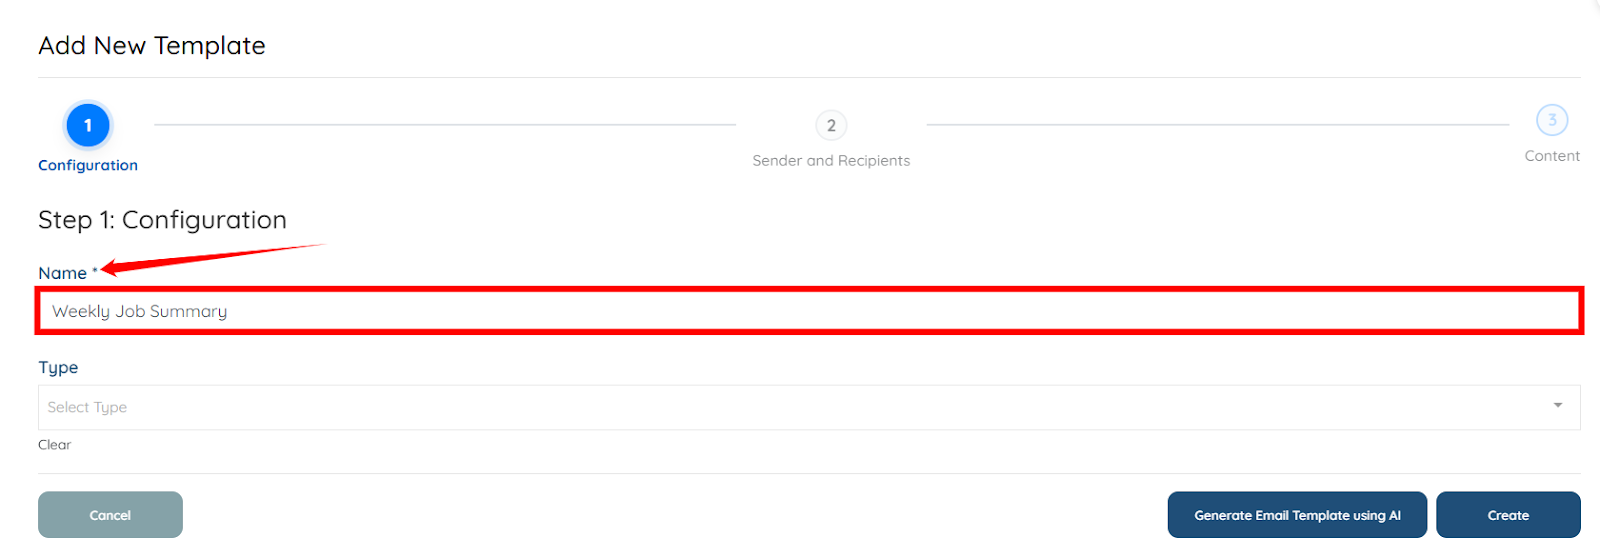
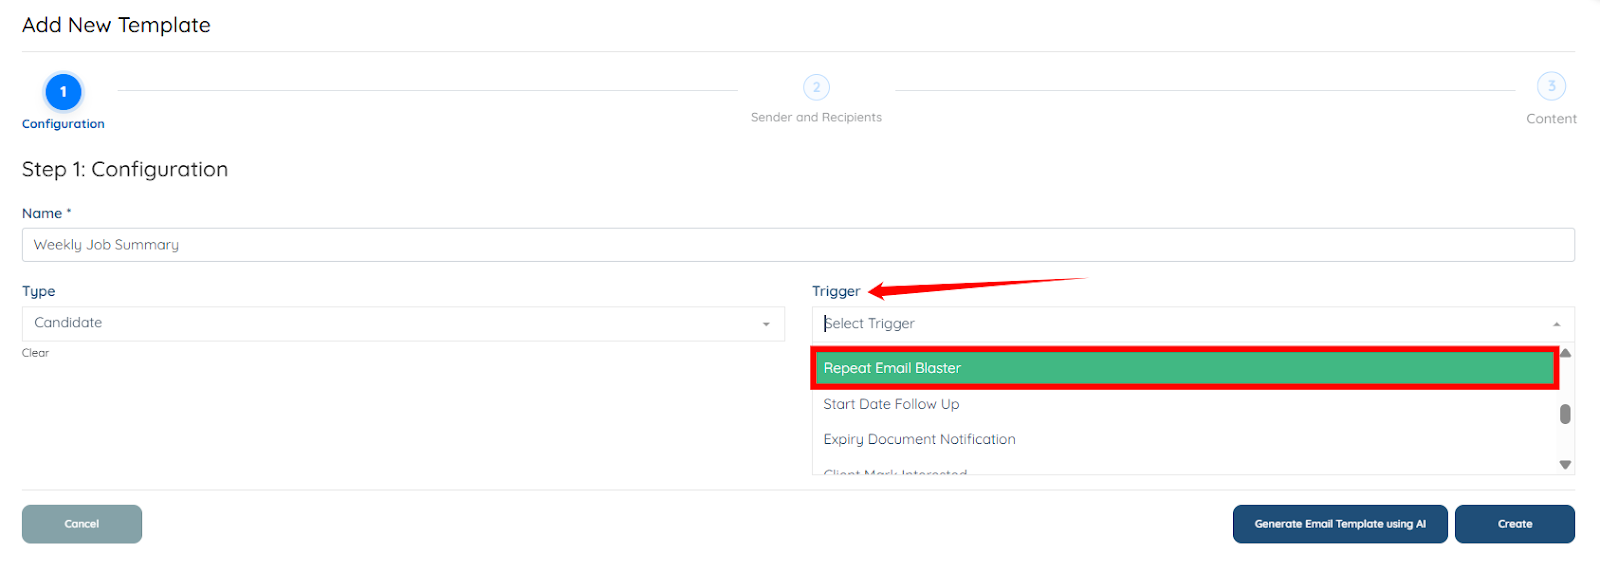
Step 3: Enter a name/label for the template for your reference. For example, Weekly Job Summary.
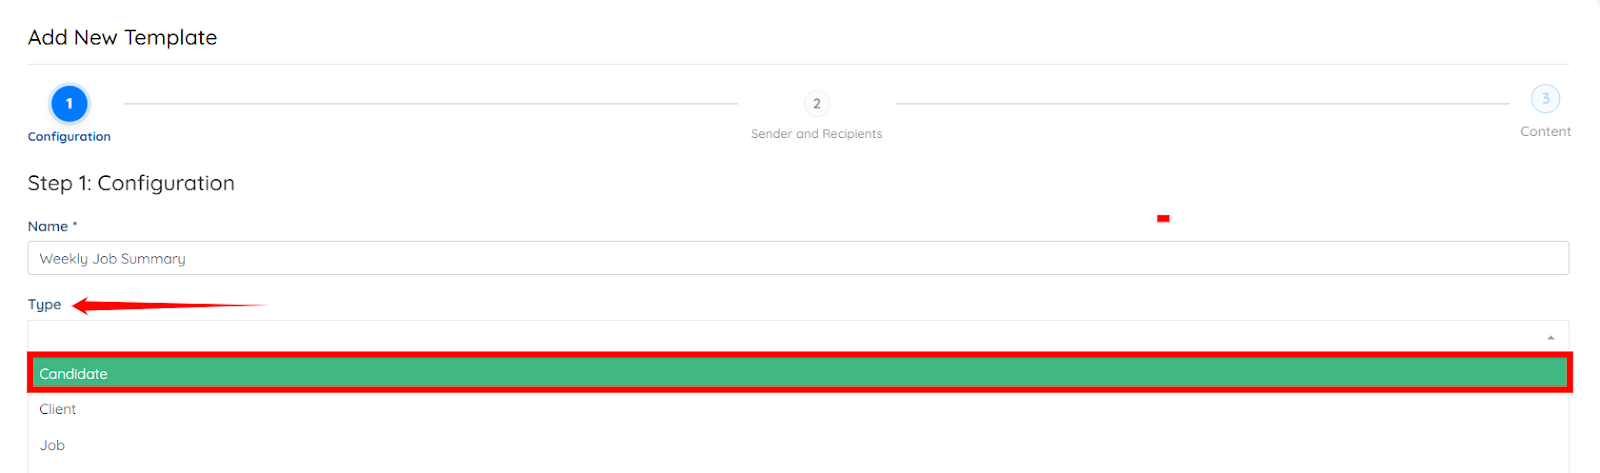
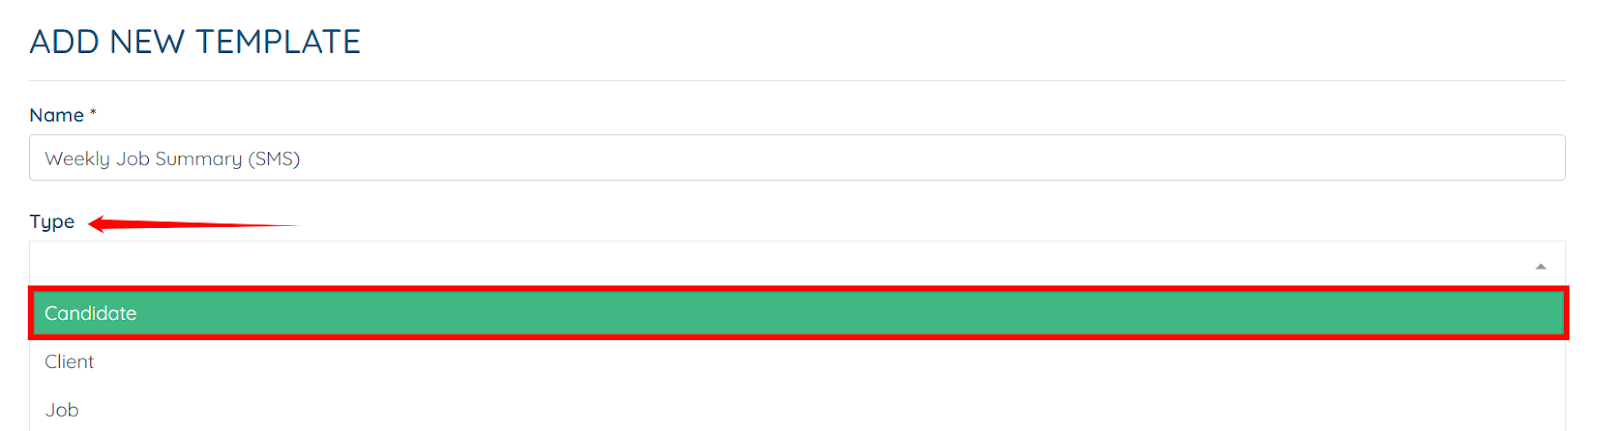
Step 4: Select the type of user you want to target in the email blaster from the Type dropdown.
Step 5: Select the Repeat Email Blaster trigger from the Trigger dropdown.
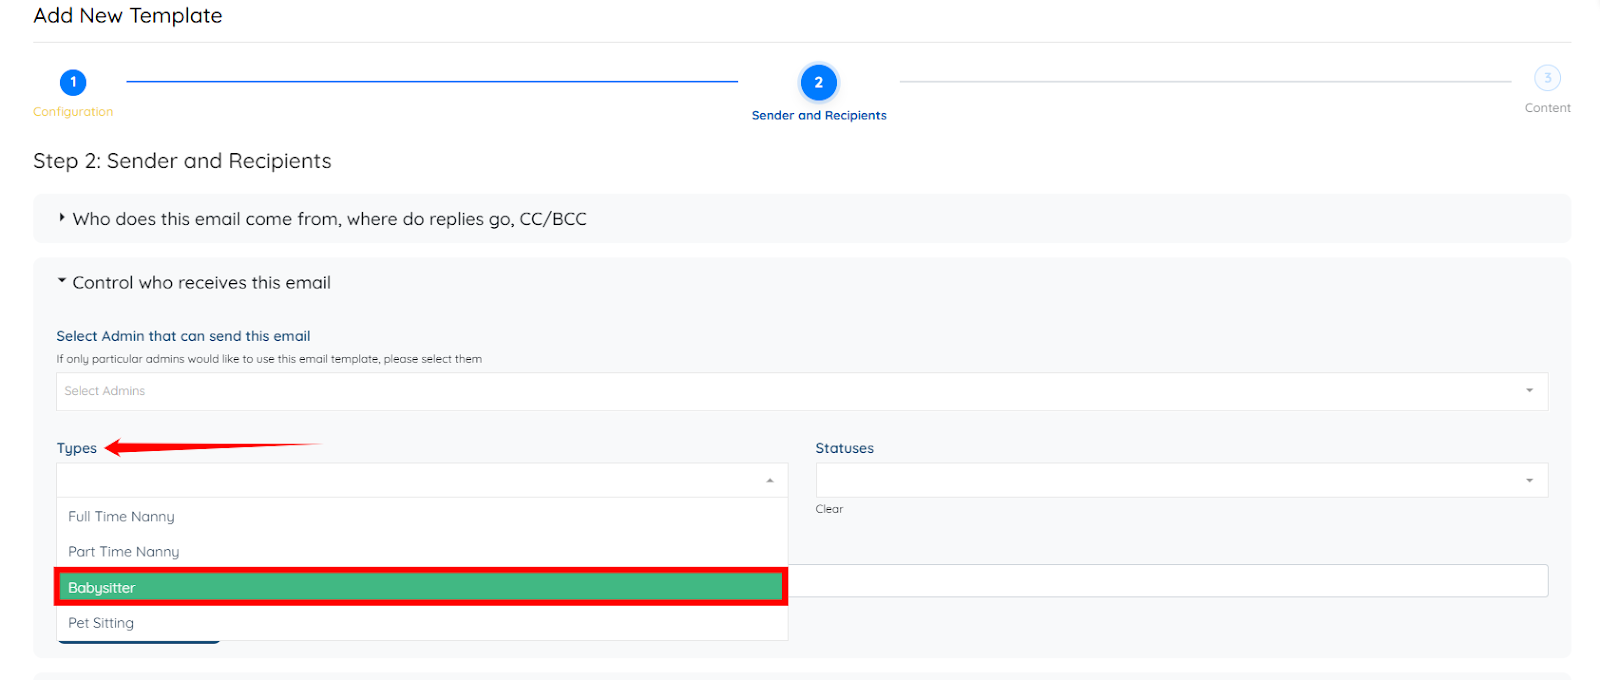
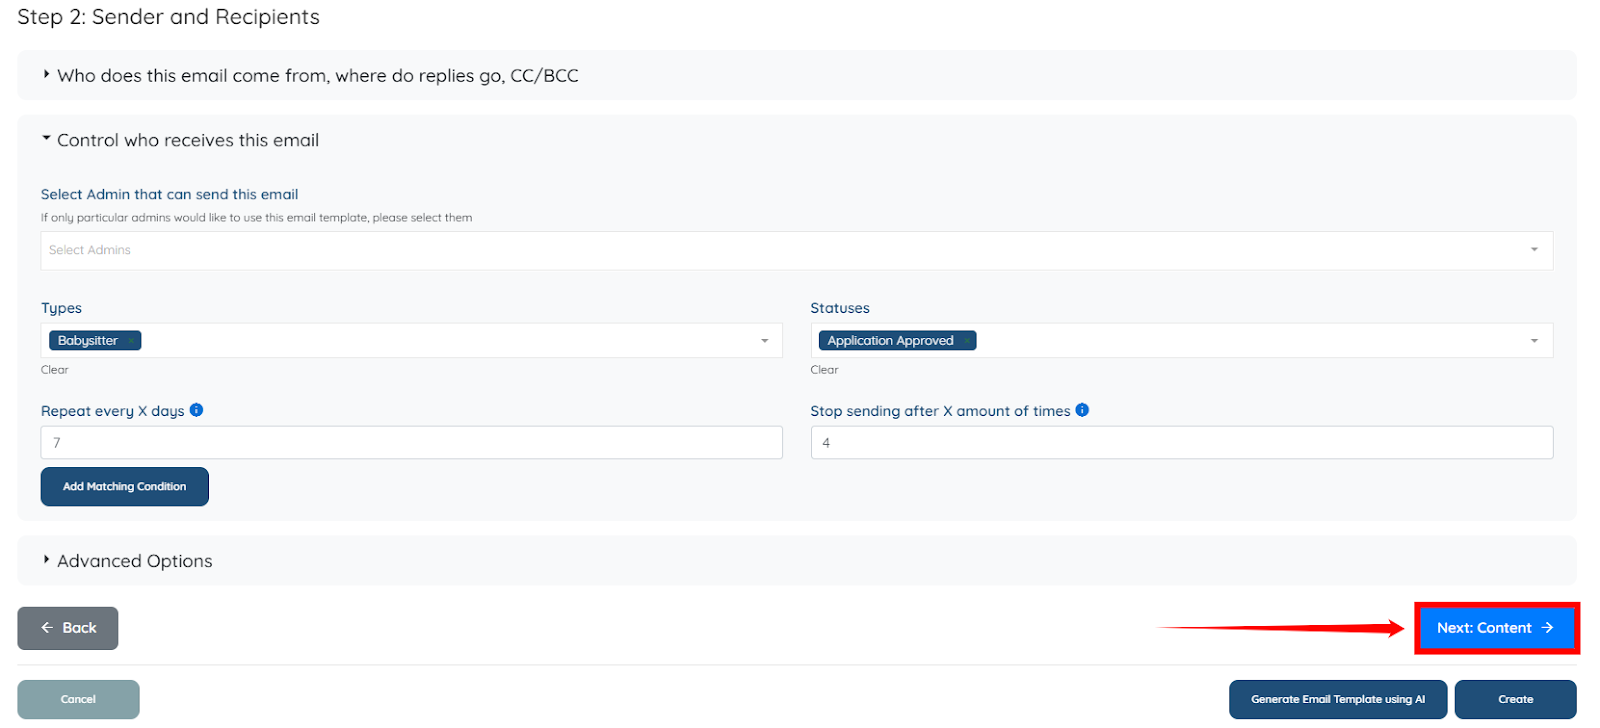
Step 6: Click Next: Sender and Recipients to select the candidate category along with the statuses you want to target in the Email Blaster.

Step 7: Select the type of candidate you want to target in the Email Blaster from the Types dropdown—for example, Babysitter.
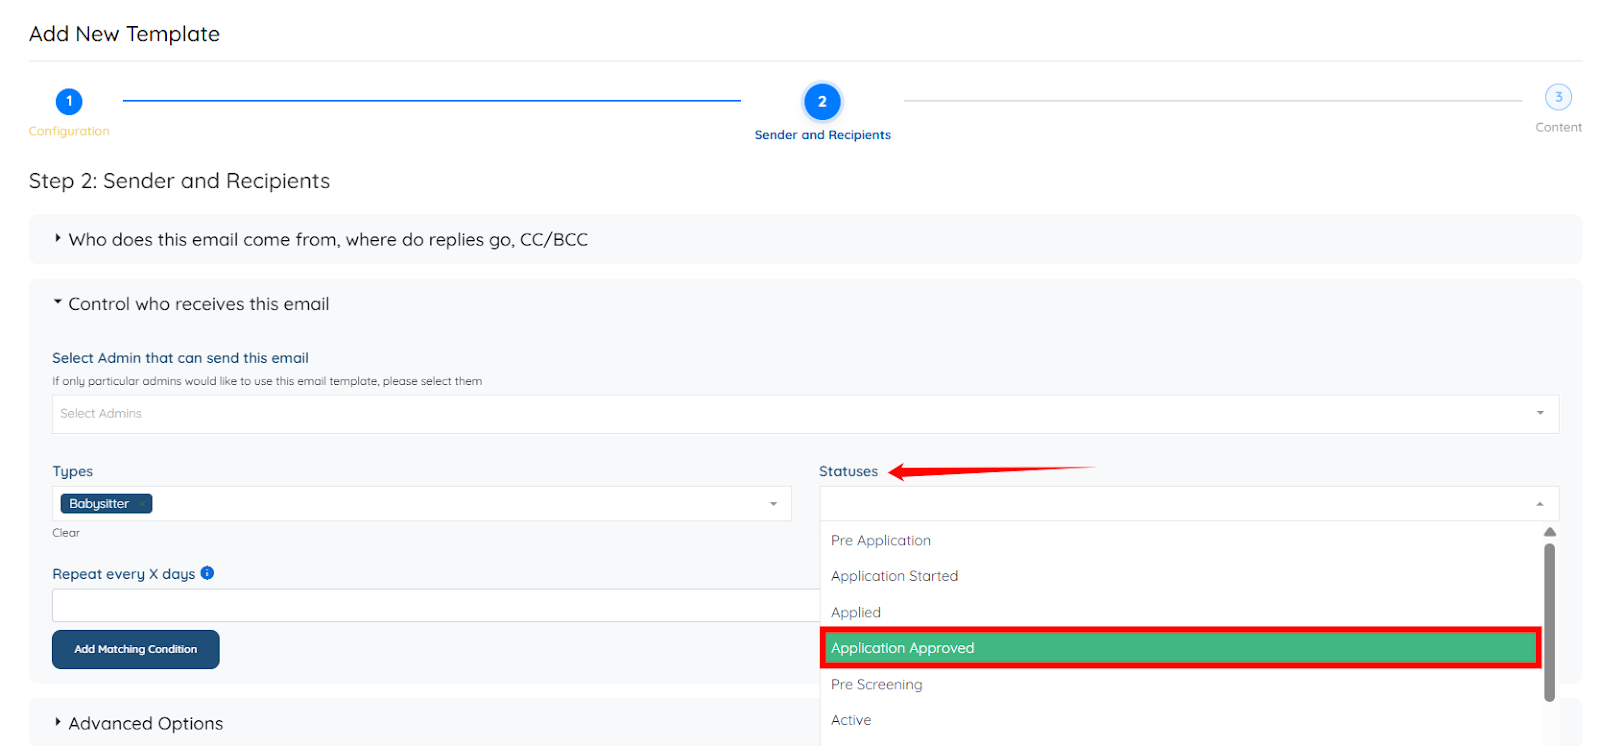
Step 8: Select the statuses for the candidate category you chose in the previous step to target more specific candidates within that category in the email blaster. For example, Application Approved.
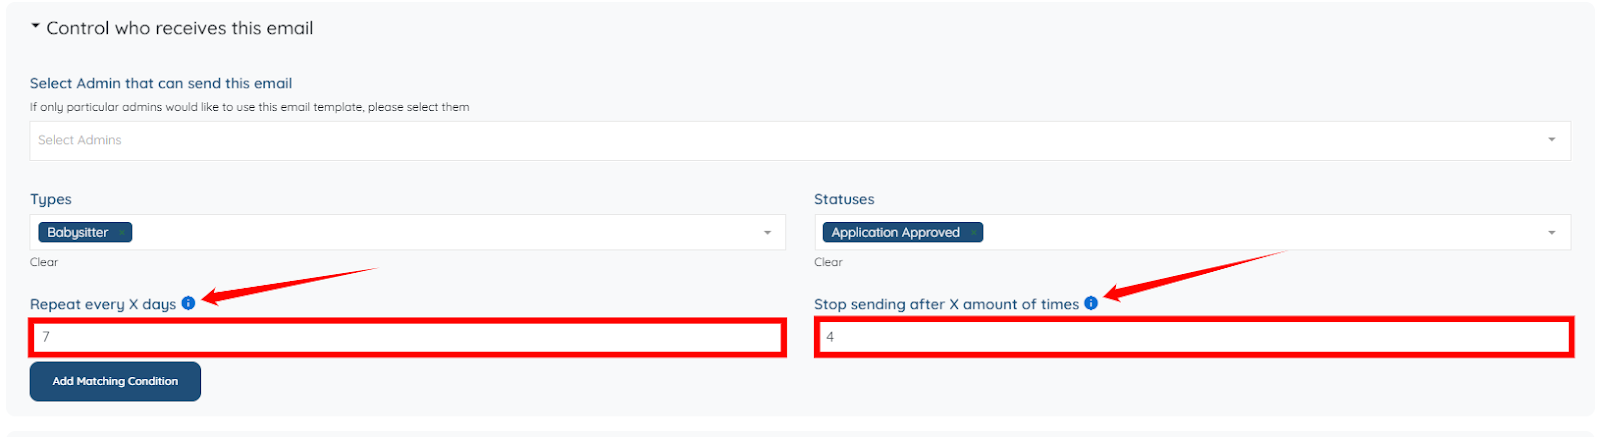
Step 9: Enter the number of days in the Repeat every X days column to control how frequently the weekly summary sends.
Then, use the Stop sending after X amount of times column to specify how many times the email sends before the schedule automatically ends.
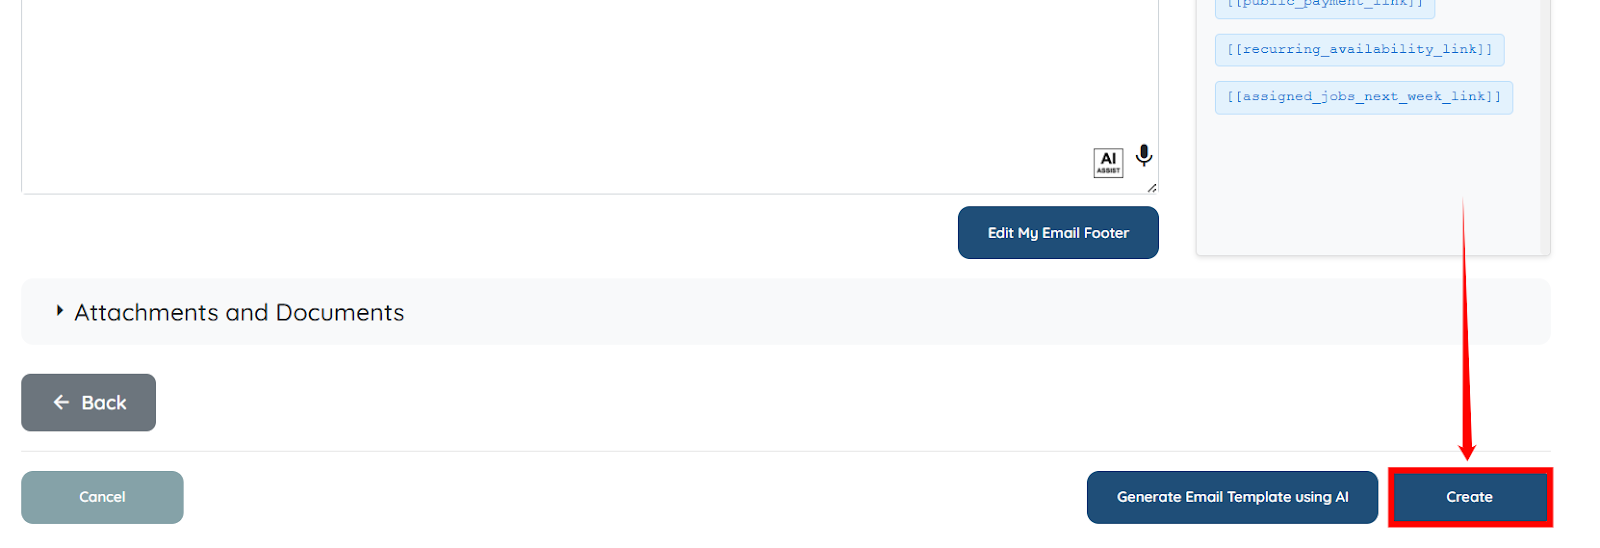
Step 10: Click the Next: Content button to begin preparing the email blaster’s body, which includes all the required information that will be sent to the specified candidates.
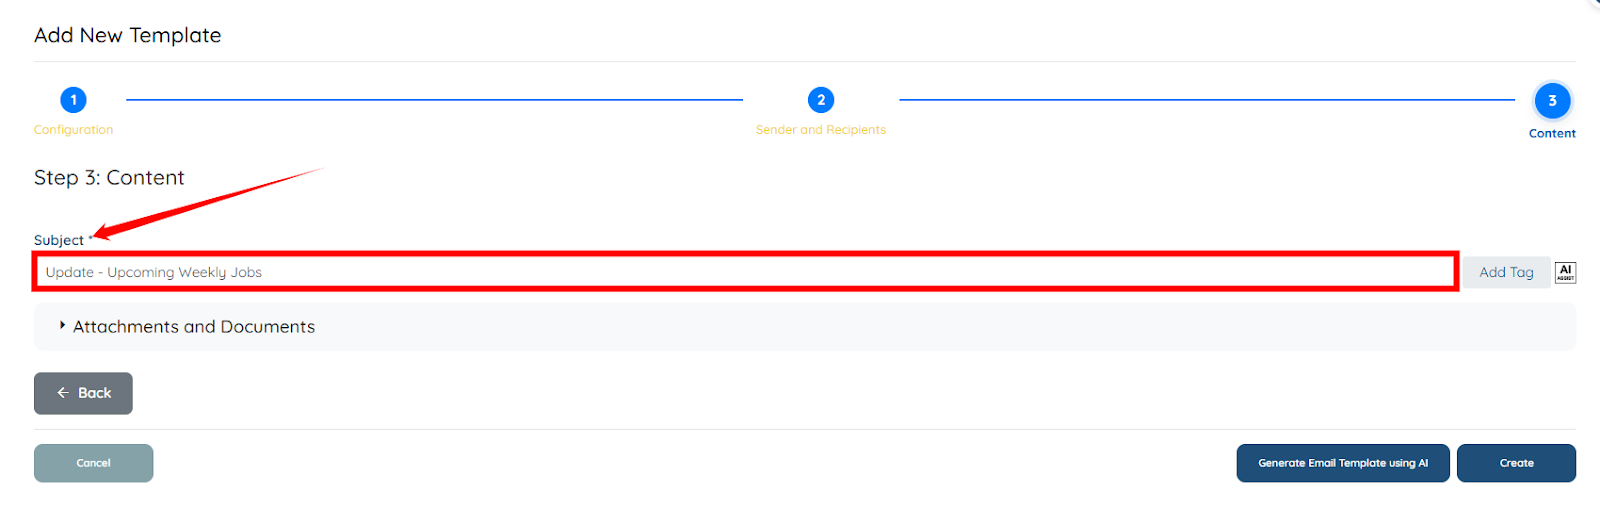
Step 11: Enter the subject for your email. For example, use “Update – Upcoming Weekly Jobs.”
Step 12: Prepare the email body to include all the required information you want the specified candidates to see regarding the upcoming jobs.
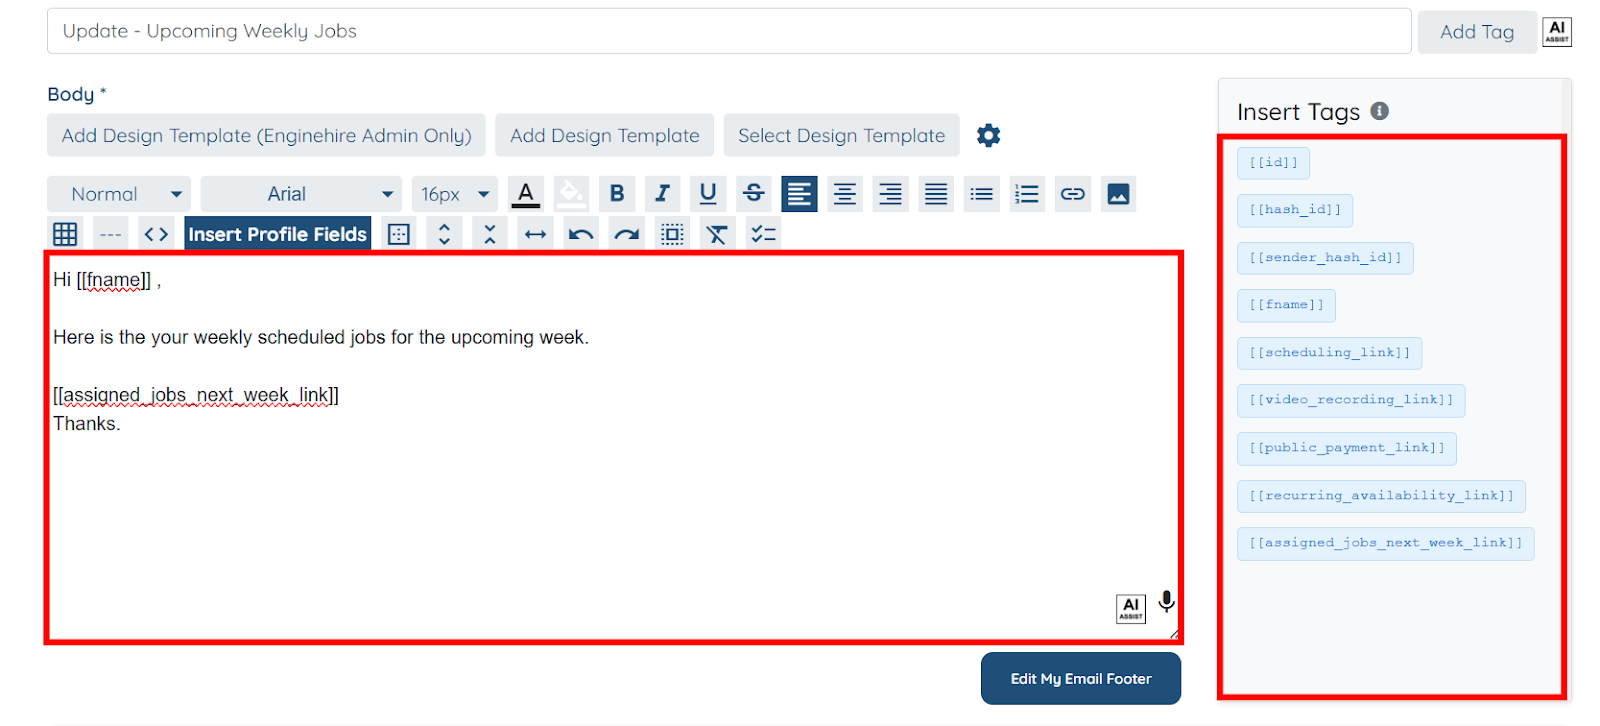
For instance, the email body you created will appear on the candidate side exactly as shown in the screenshot, with all the tags automatically populated with the correct information.

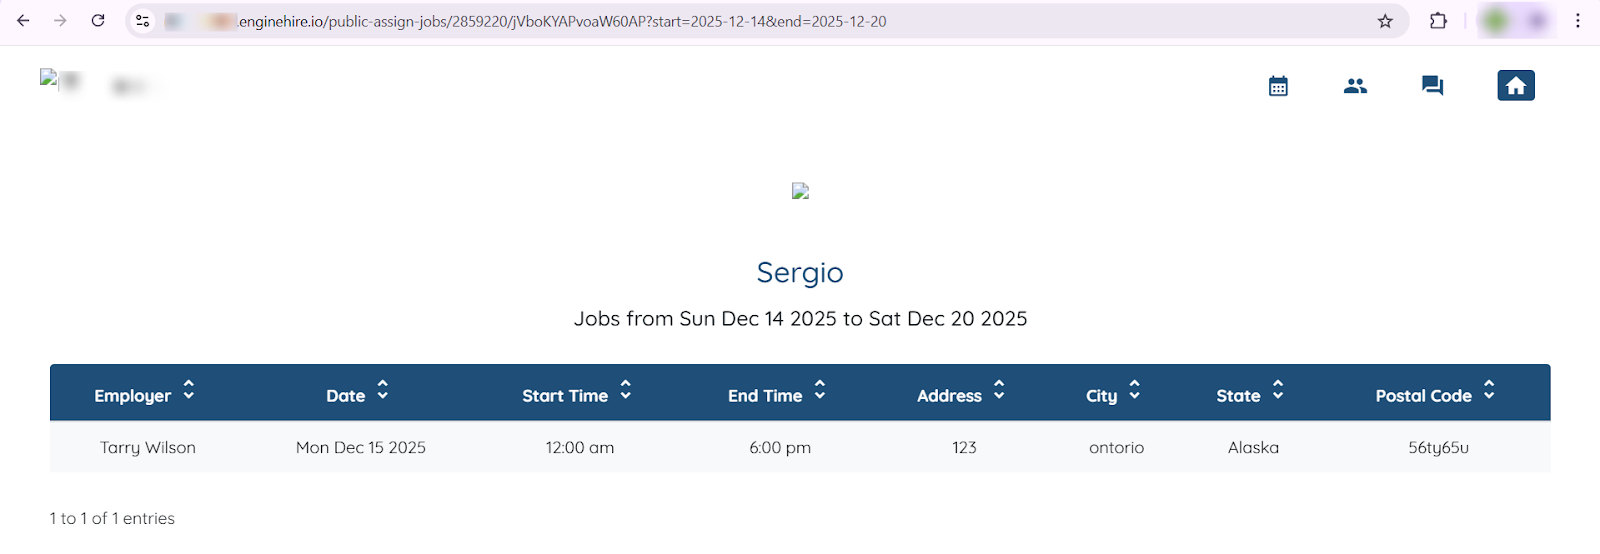
And the weekly calendar link received in the email will display the upcoming jobs for the next week as follows:
Step 13: Scroll down and click the Create button to save the Email Blaster.
Your Weekly Job Summary Email blaster will be created successfully.
Use the steps below to schedule the weekly assigned job summary using the email blaster you created in the Use Repeat Email Blaster section.
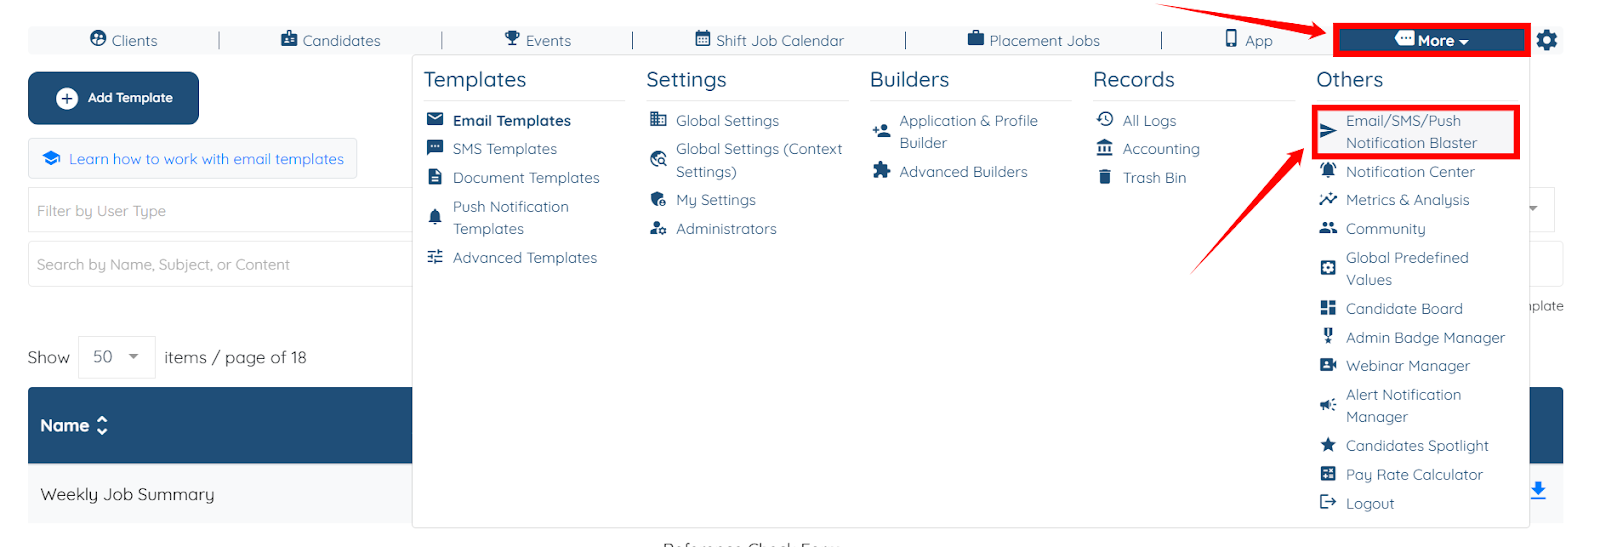
Step 1: On your agent dashboard, navigate to More > Email/SMS/Push Notification Blaster, as shown in the screenshot below.
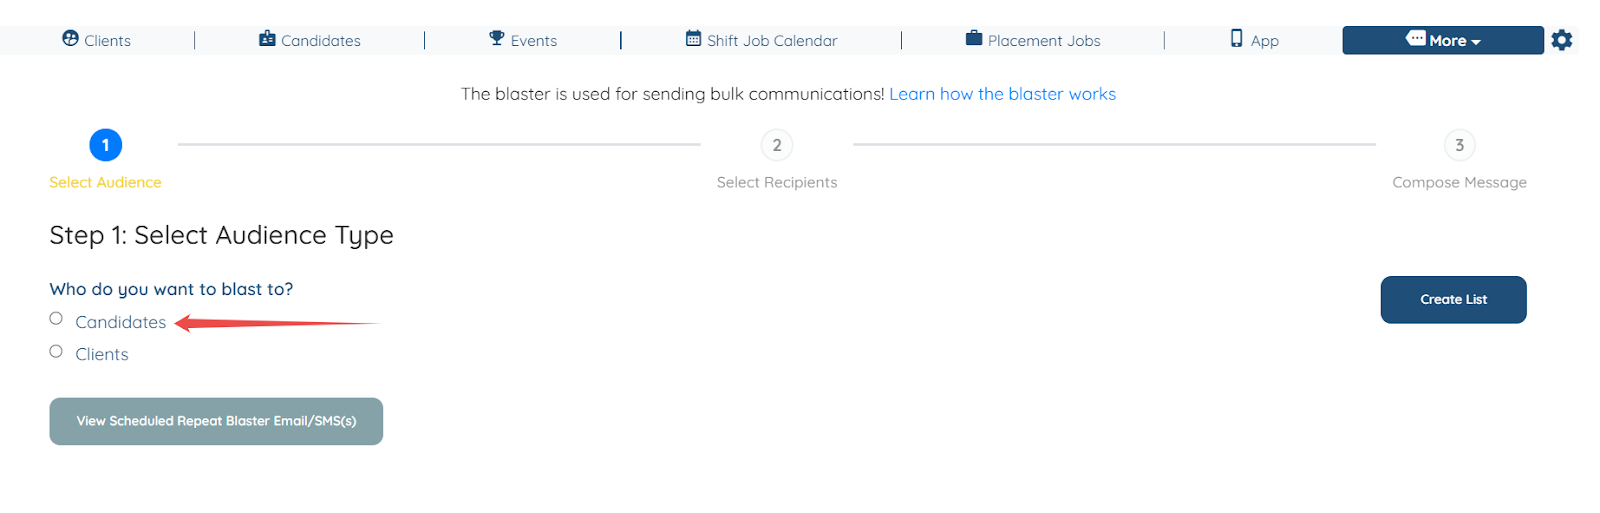
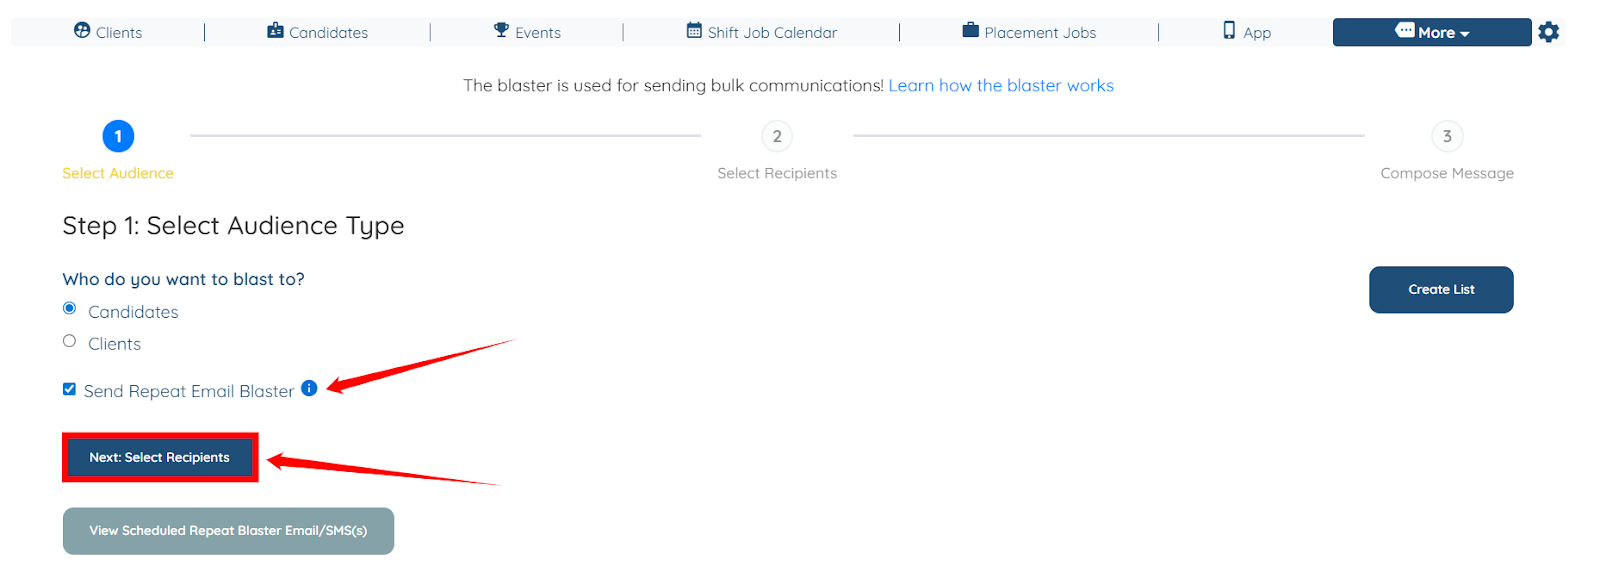
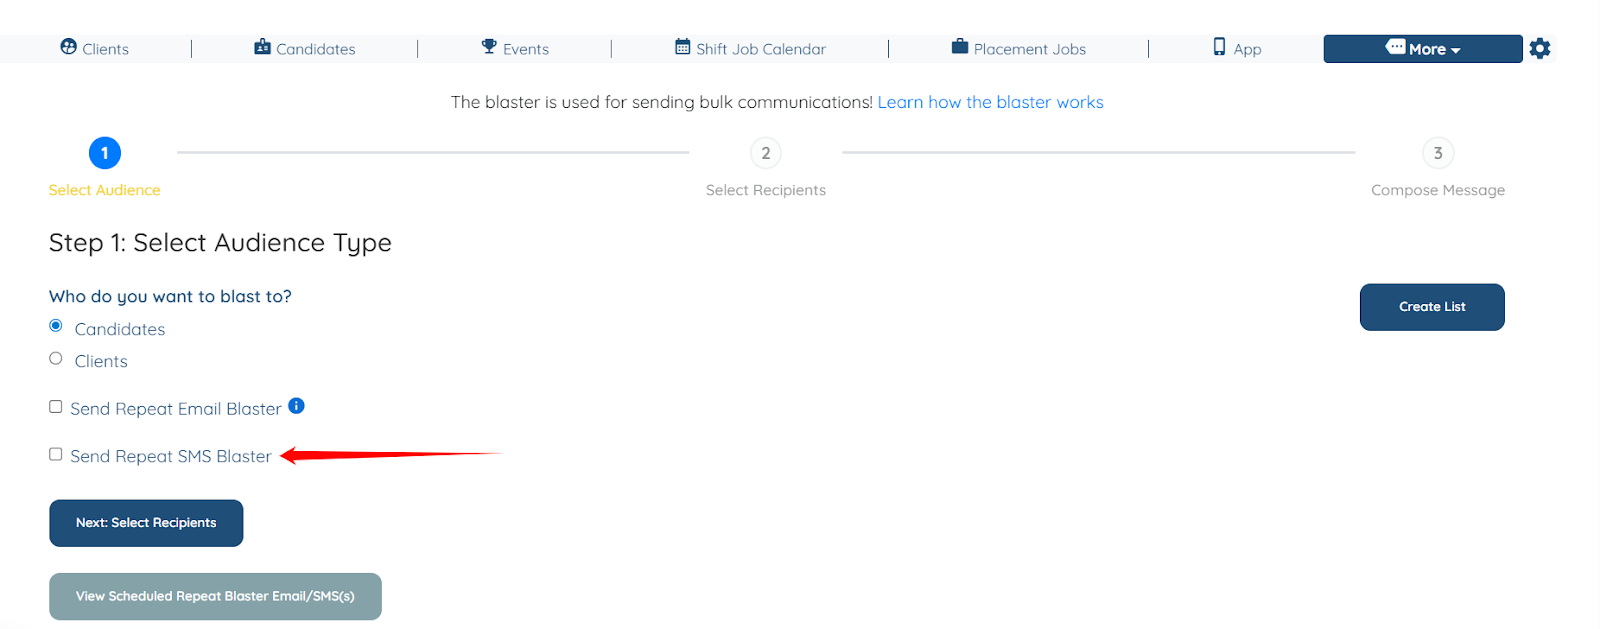
Step 2: Select the Audience Type for which you want to schedule the email; in this case, choose Candidates.
Step 3: Check the Send Repeat Email Blaster checkbox, and click the Next, Select Recipients button to continue.
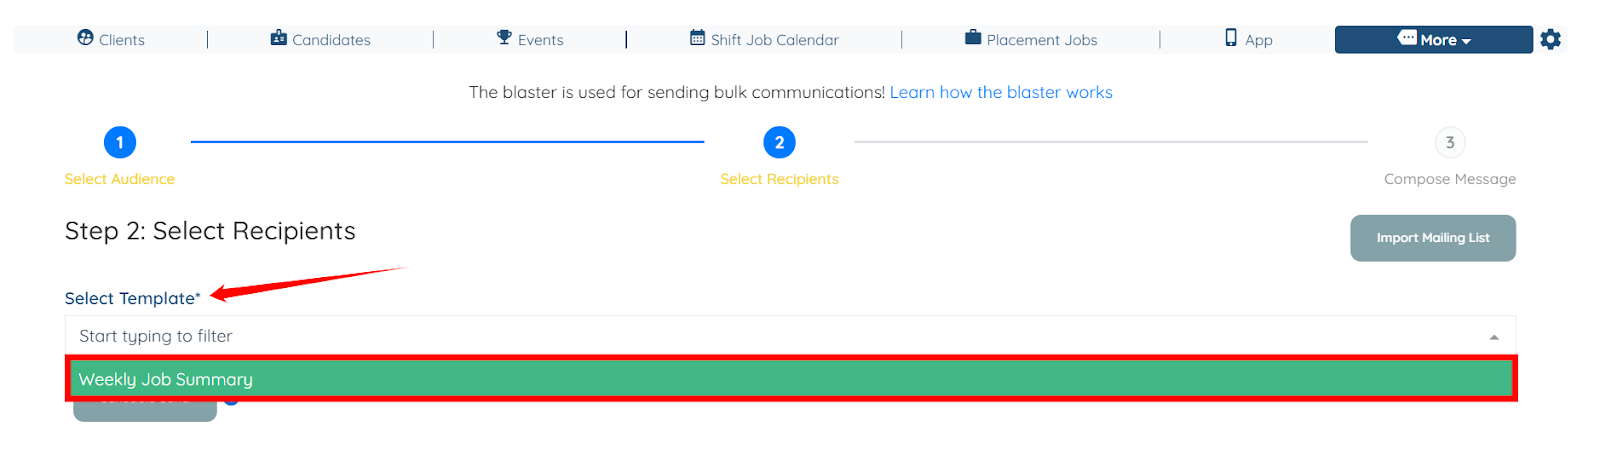
Step 4: From the Select Template dropdown, select the email blaster you created.
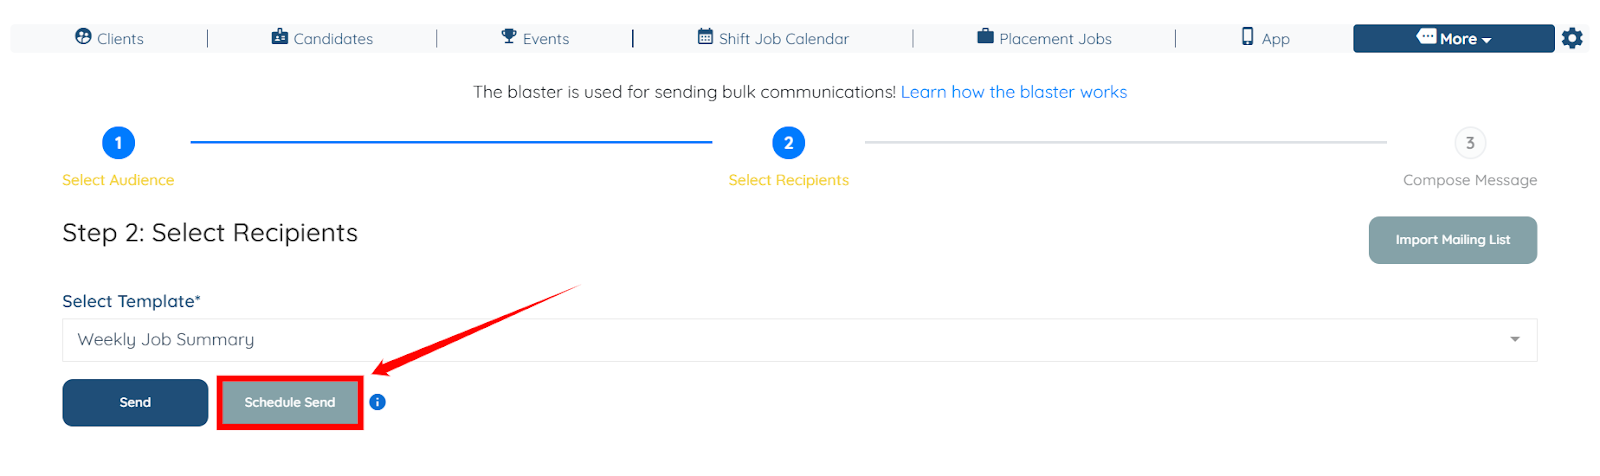
Step 5: Click the Schedule Send button to set a custom schedule for your email to be sent.
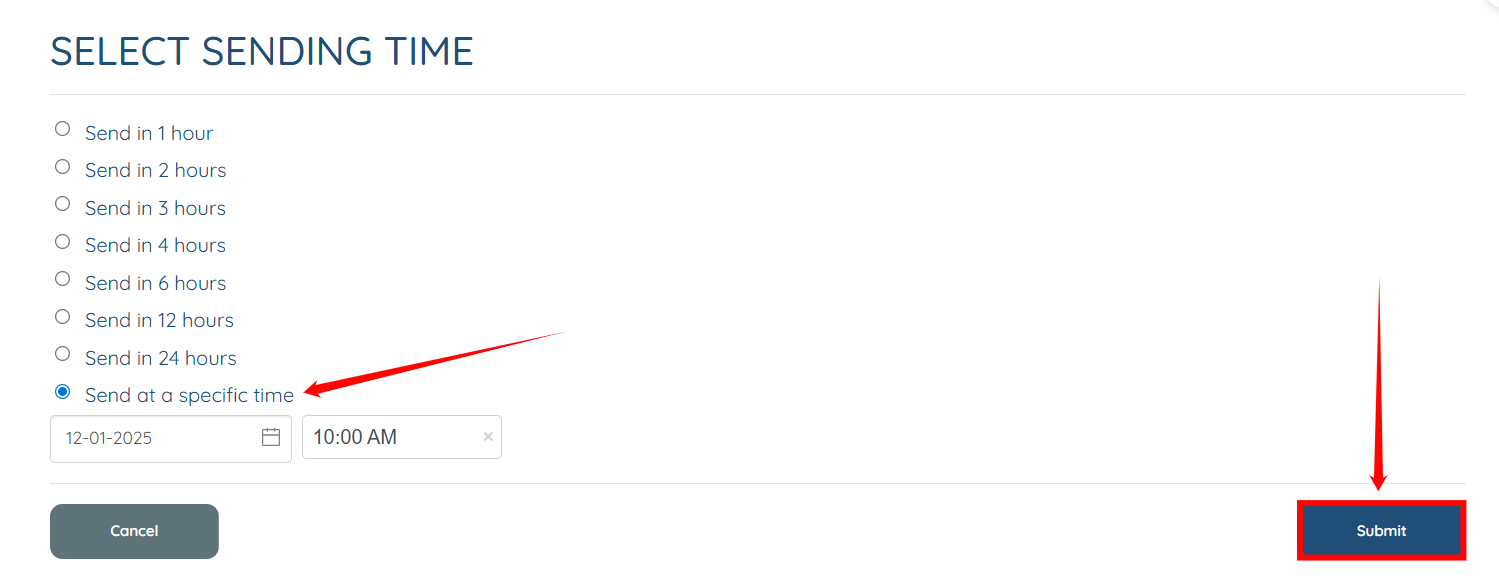
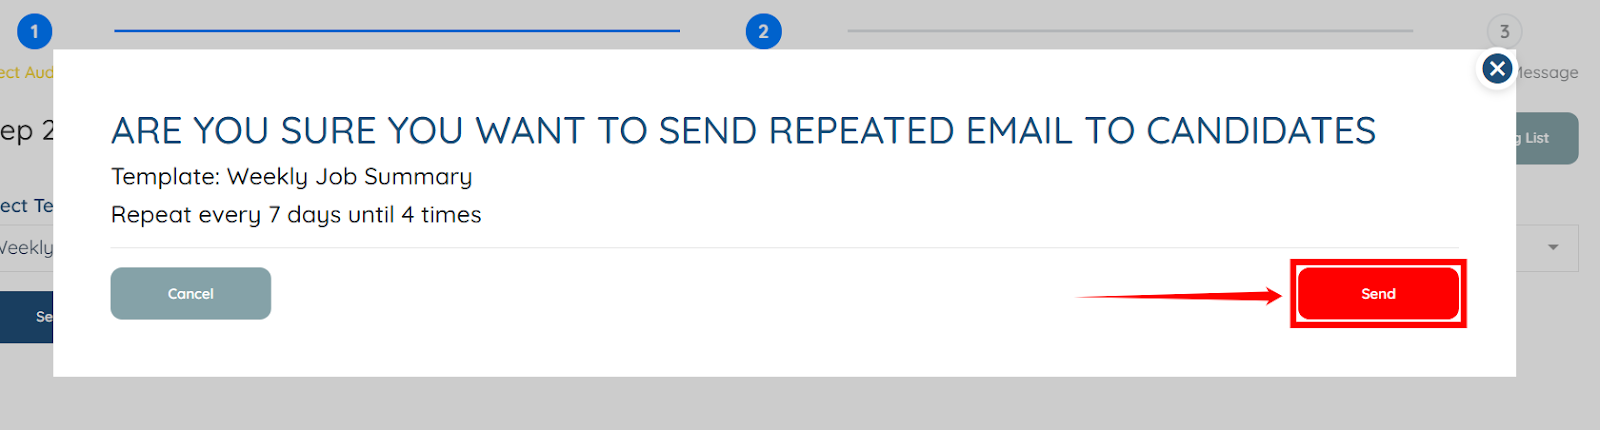
Step 6: Select the Send at a specified time radio button, and then provide the date from which you want to start sending the email to the specified candidates. After that, click the Submit button to proceed.
Step 7: Click the Send button to proceed. The system then sends the email to the specified candidates in the email blaster at the designated date and time, ensuring successful delivery.
Follow the steps below to create and send the weekly assigned job summary through the Repeat SMS Blaster.
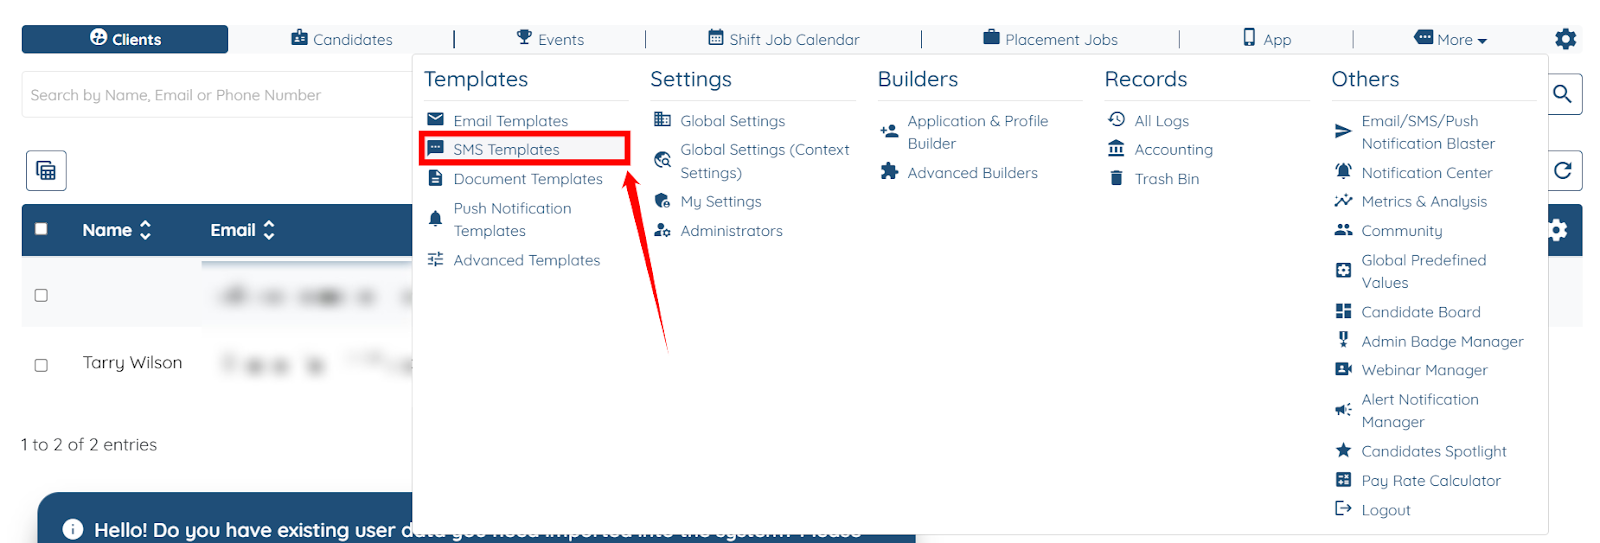
Step 1: On your agent dashboard, navigate to More > SMS Templates, as shown in the screenshot below.
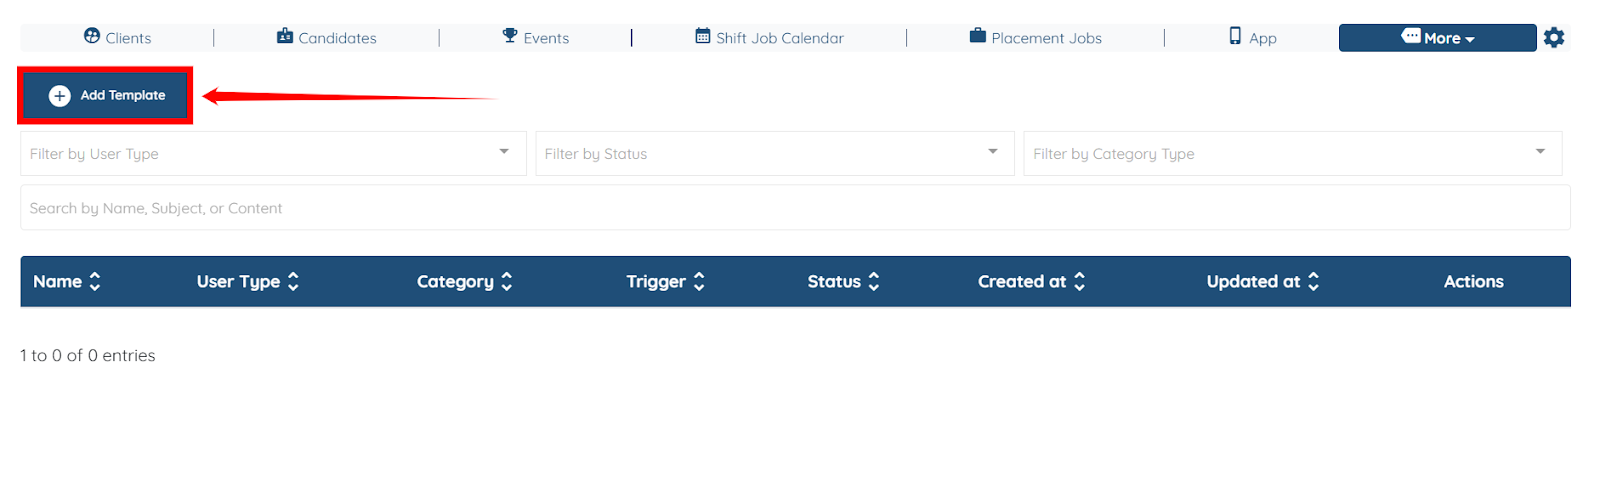
Step 2: Click the Add Template button to begin adding a new template.
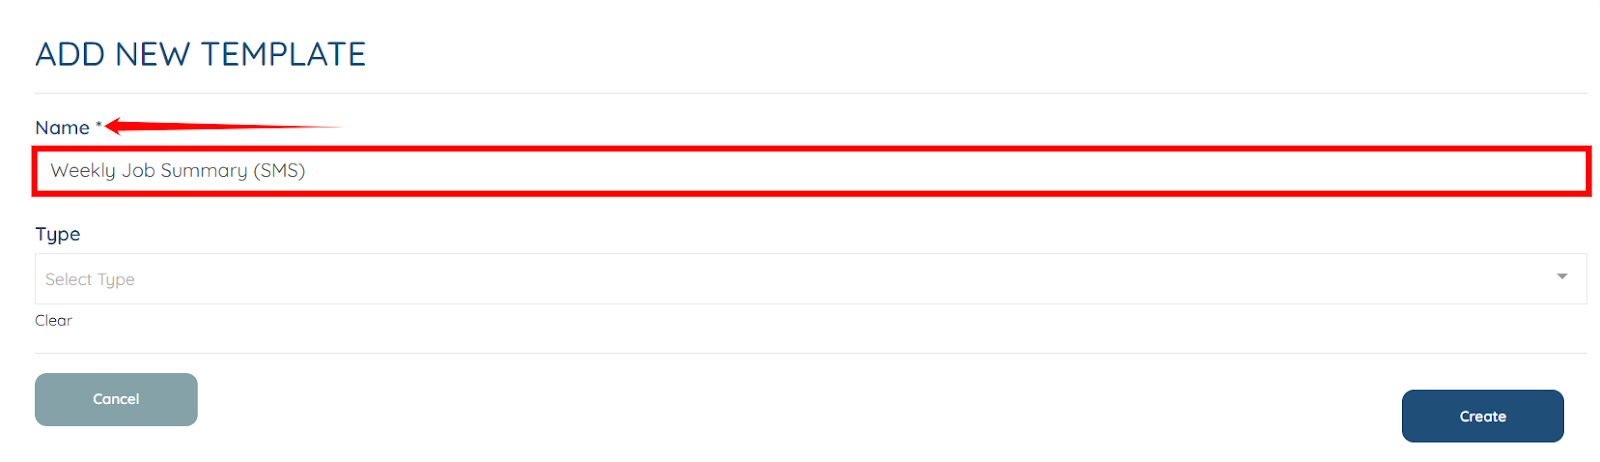
Step 3: Enter a name/label for the template for your reference. For example, Weekly Job Summary (SMS).
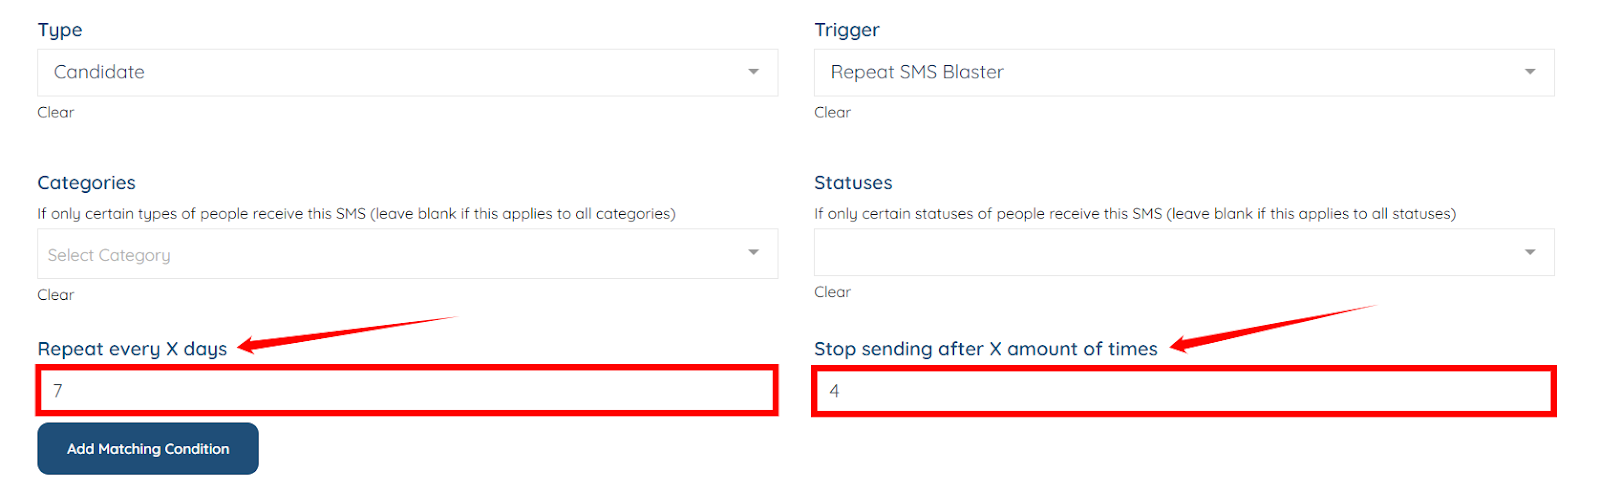
Step 4: Select the type of user you want to target in the SMS blaster from the Type dropdown.
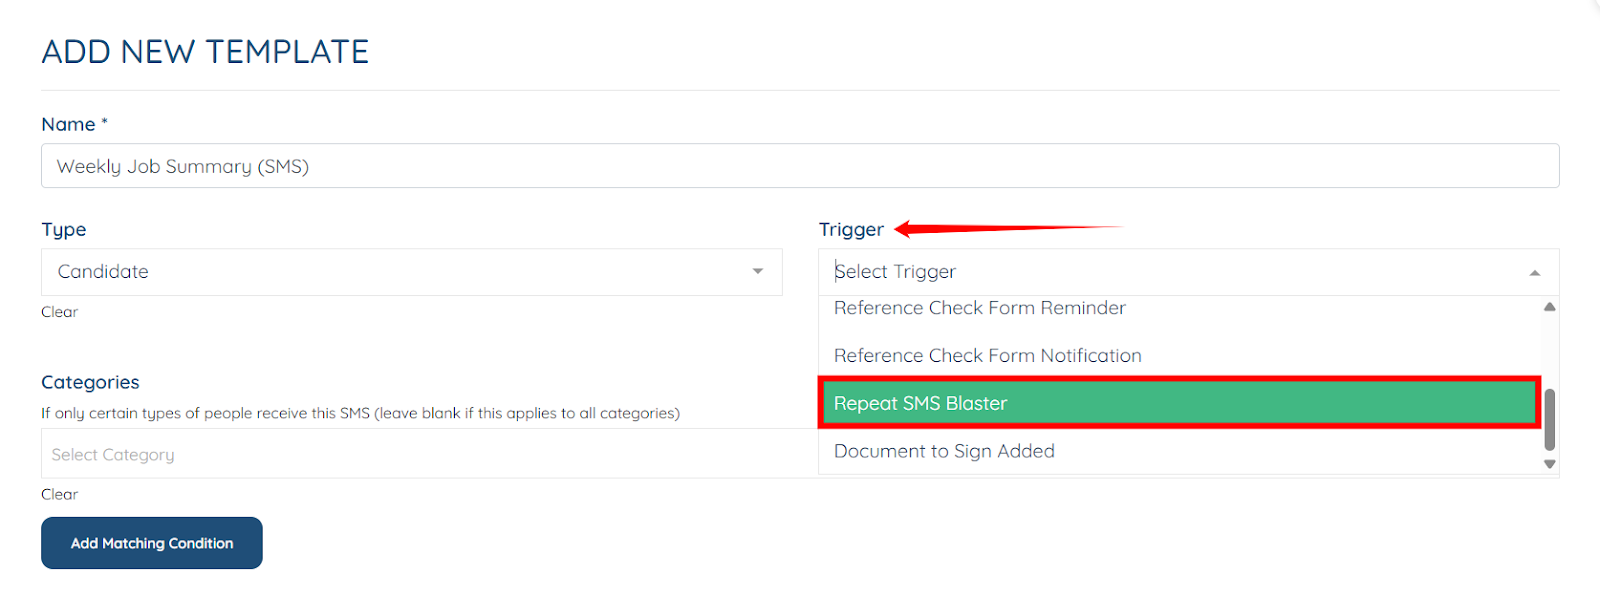
Step 5: Select the Repeat SMS Blaster trigger from the Trigger dropdown.
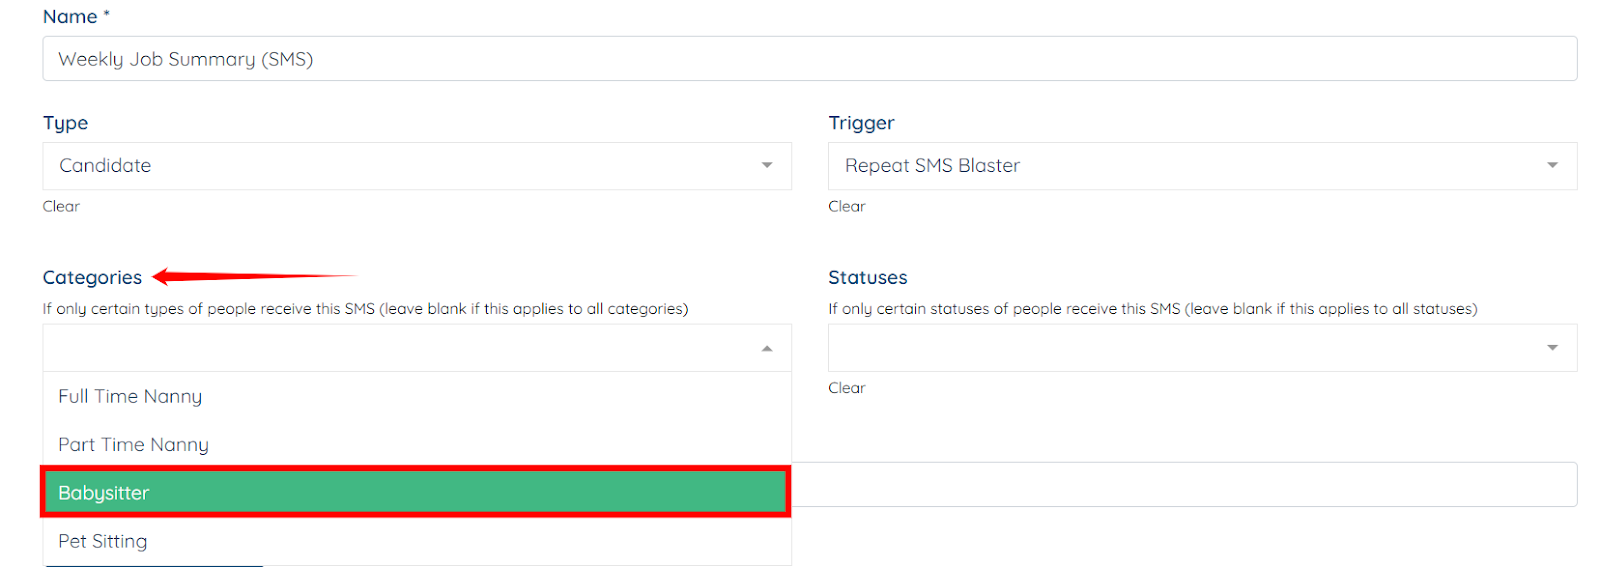
Step 6: Select the type of candidate you want to target in the SMS Blaster from the Types dropdown—for example, Babysitter.
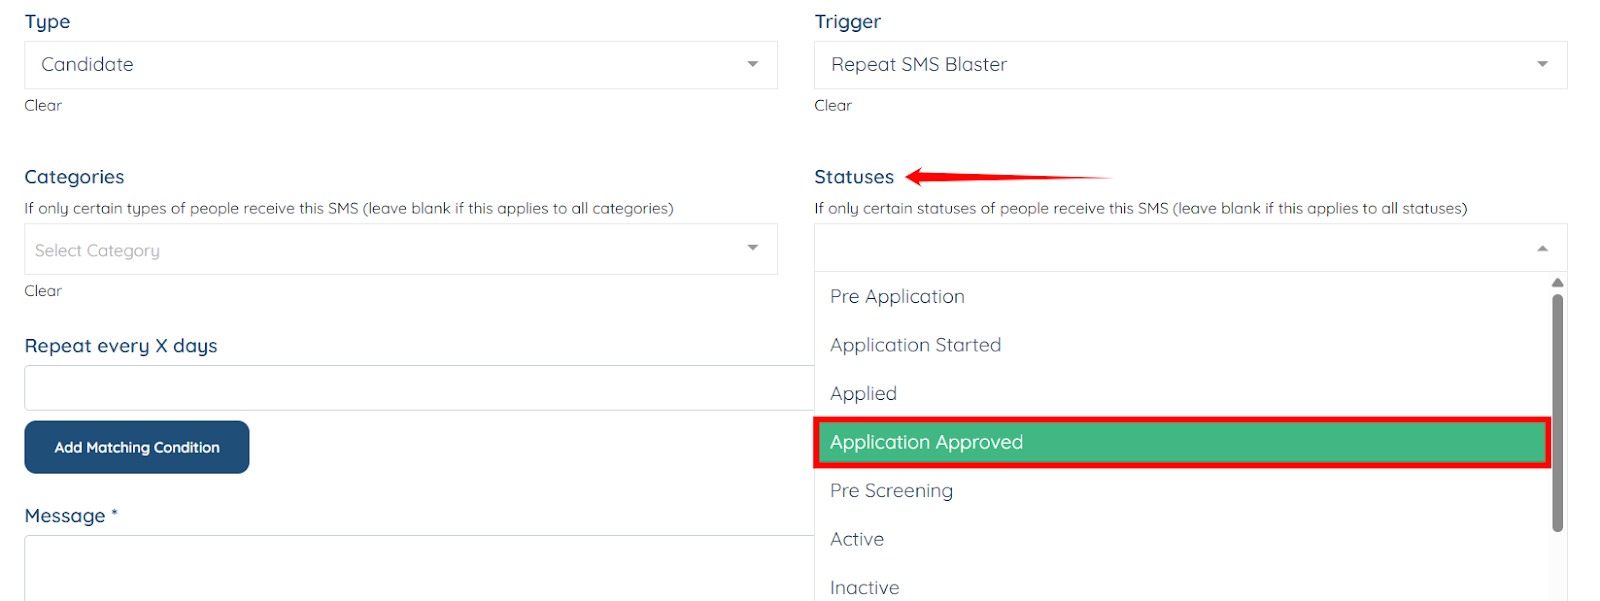
Step 8: Select the statuses within the candidate’s category (chosen in the previous step) to target more specific candidates in that category. For example, Application Approved.
Step 9: Enter the number of days in the Repeat every X days column to control how frequently the weekly summary sends.
Then, use the Stop sending after X amount of times column to specify how many times the sms sends before the schedule automatically ends.
Step 10: In the Message field, prepare the SMS content with all the required information that you will send to the candidates.
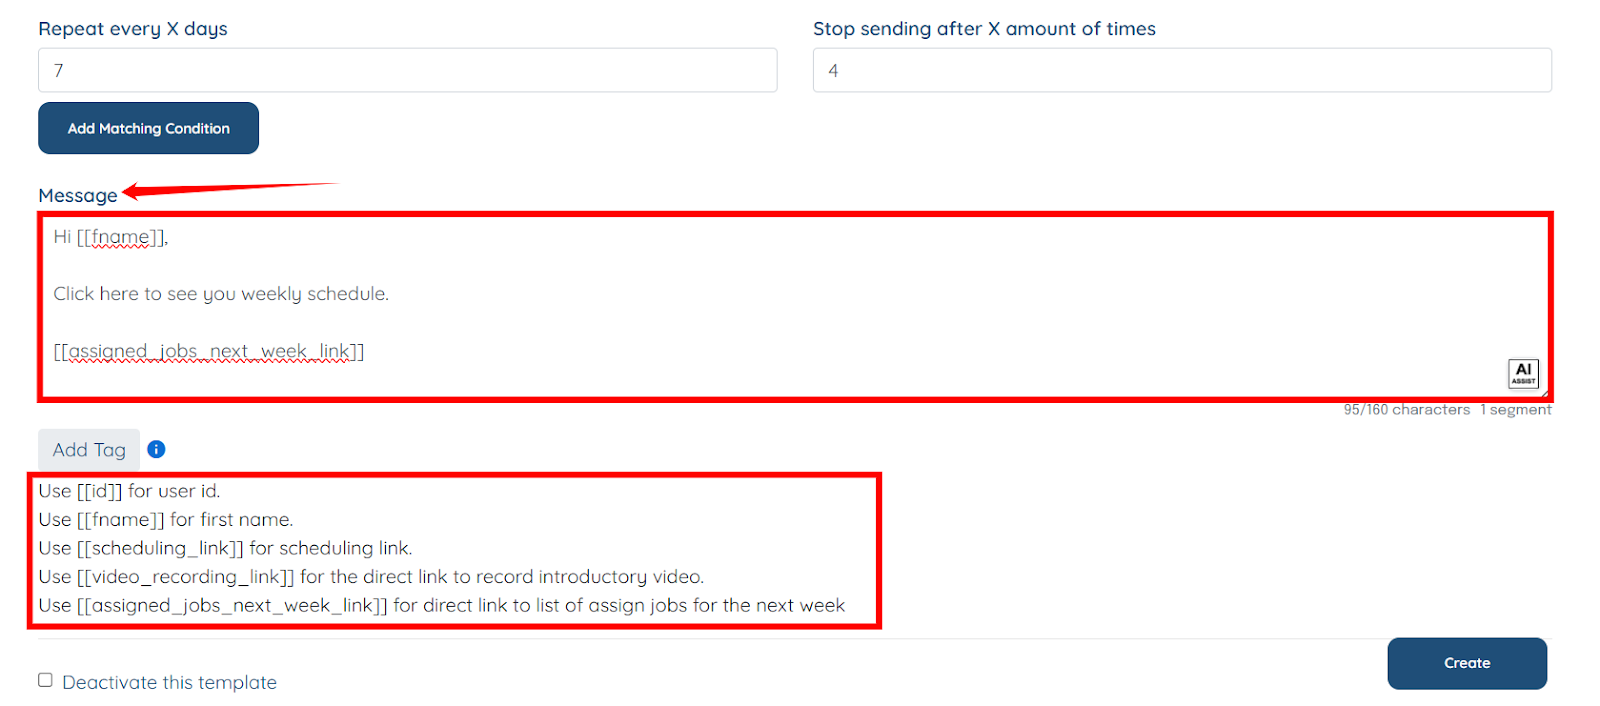
Step 11: Click the Create button to save the SMS Blaster.
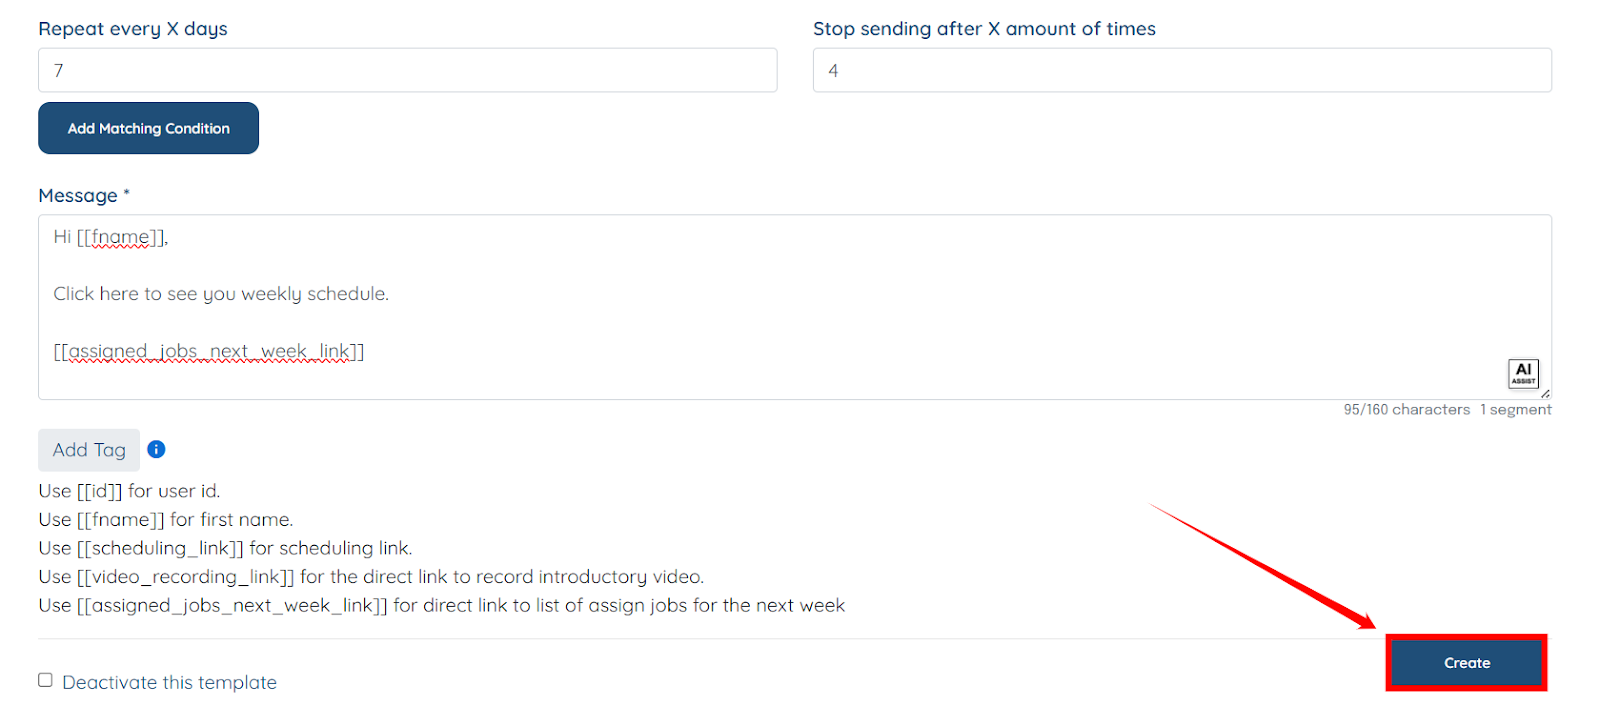
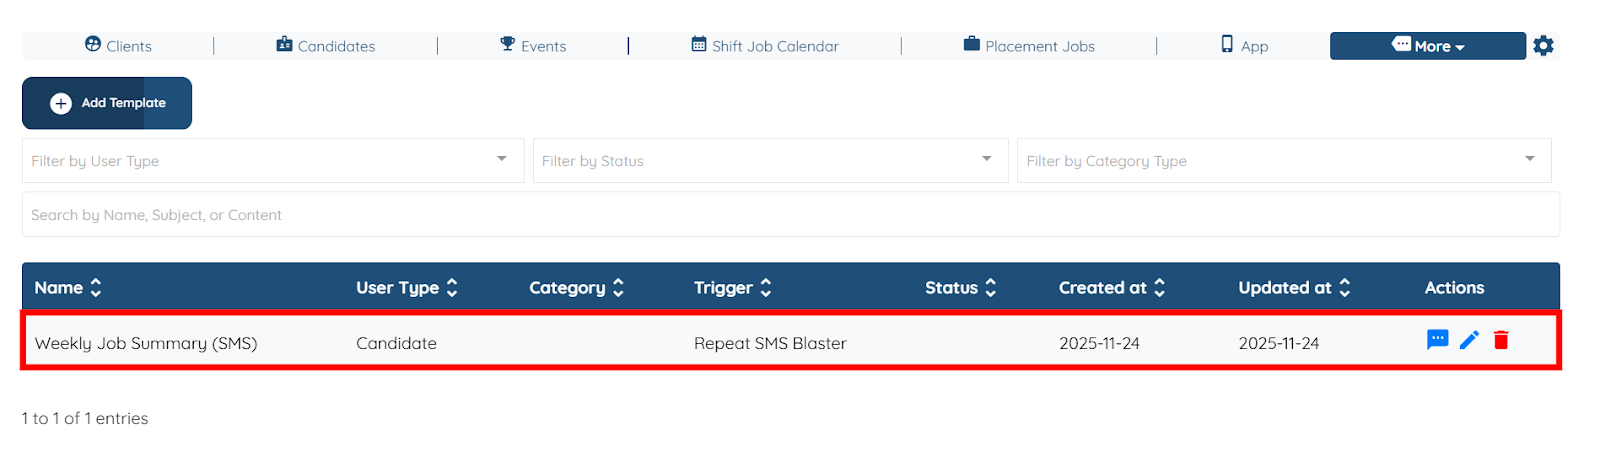
Your Weekly Job Summary (SMS) SMS blaster will be created successfully.
Schedule the weekly assigned job summary using the sms blaster you created in the Use SMS Blaster section.
The process for scheduling a weekly SMS summary is the same as scheduling the weekly email summary in the Schedule Email section. The only difference is that you must select the Send Repeat SMS Blaster checkbox instead of Send Repeat Email Blaster when setting up the SMS schedule.
To manage who receives the weekly assigned job summary, you simply need to update the candidate’s status. Only candidates whose status matches the ones configured in your Email or SMS Blaster will be enrolled and included in the scheduled summary.
This makes enrollment and unenrollment fully dependent on candidate status, allowing you to control delivery on an individual basis. In the steps below, we’ll focus on how to enroll a candidate by assigning a status that is included in your blaster settings.
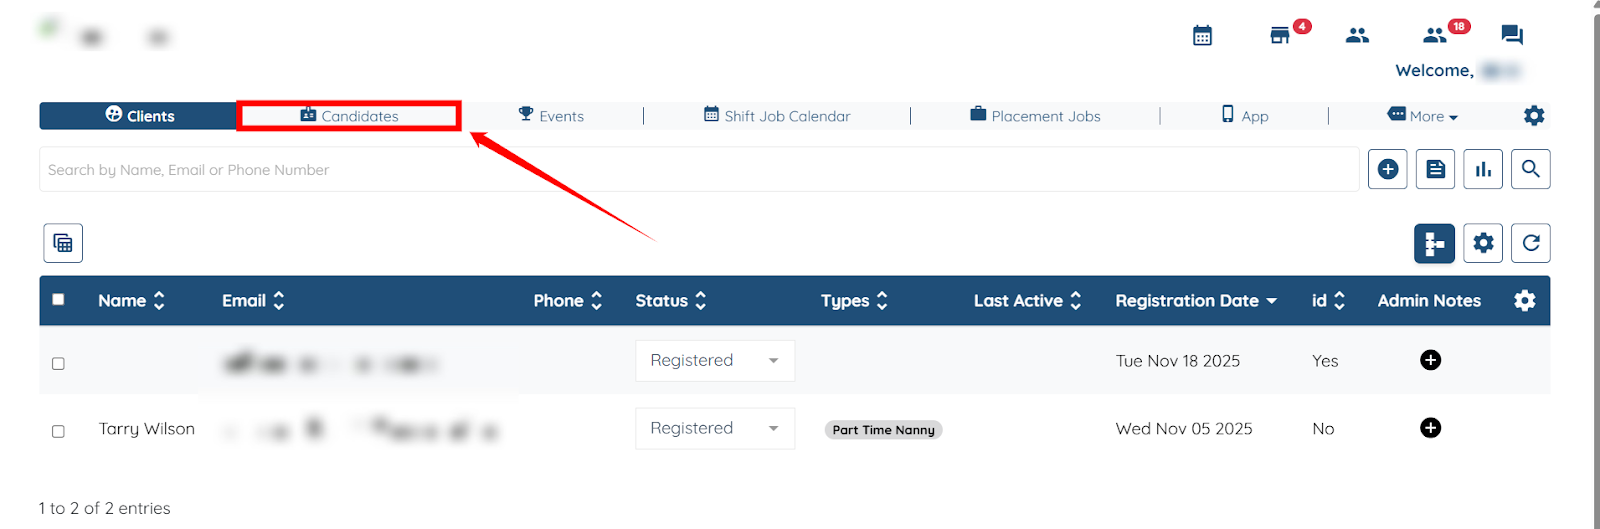
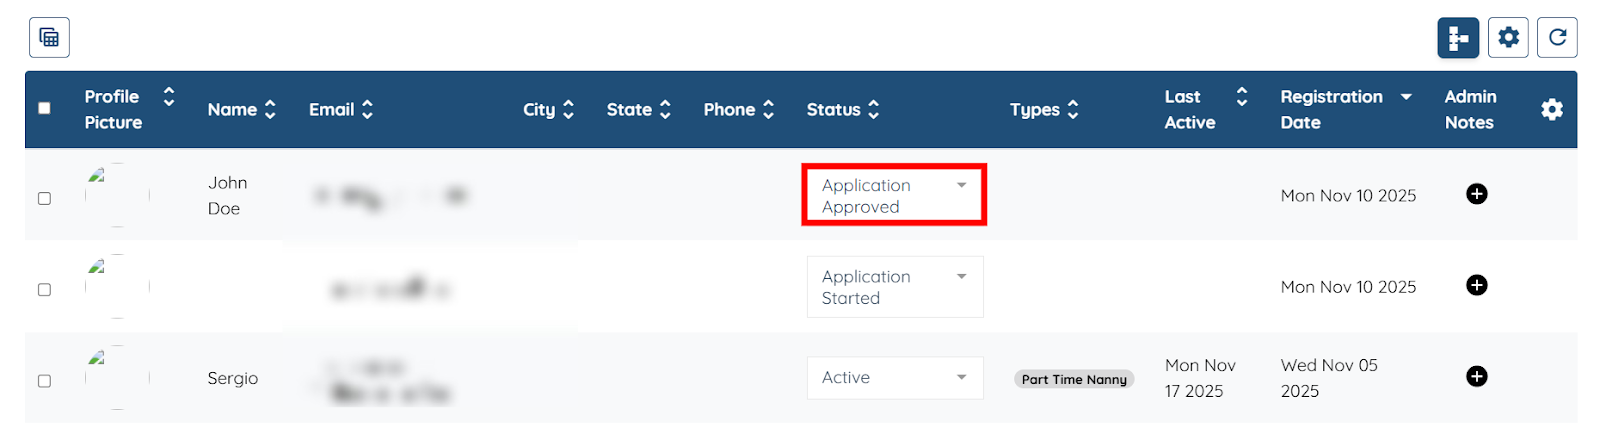
Step 1: On your agent dashboard, click the Candidates option in the top navigation bar.
Step 2: To enroll more candidates in the Email or SMS blaster, you must update the candidate’s status to the one configured in the Email or SMS blaster by clicking on the candidate’s status located under the Status column.
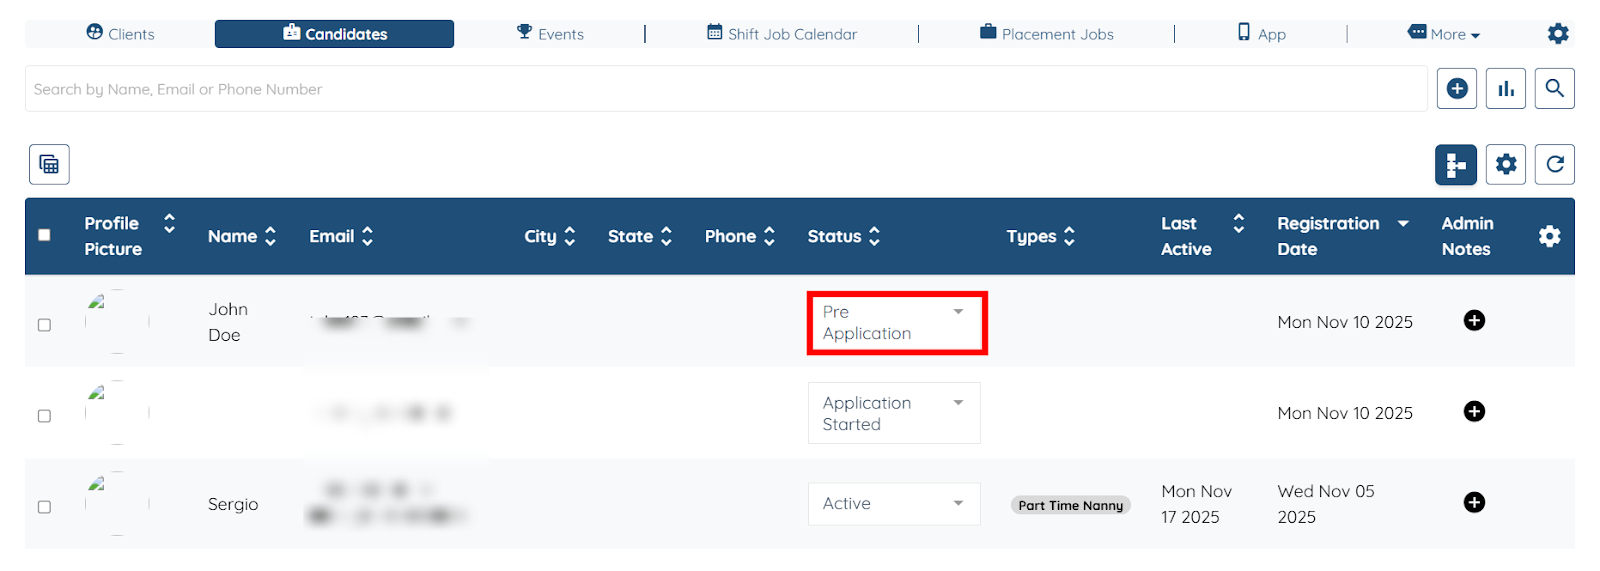
Step 3: Select the status configured in the Email or SMS Blaster. In our case it is Application Approved.

Step 4: Click the Yes button to proceed.
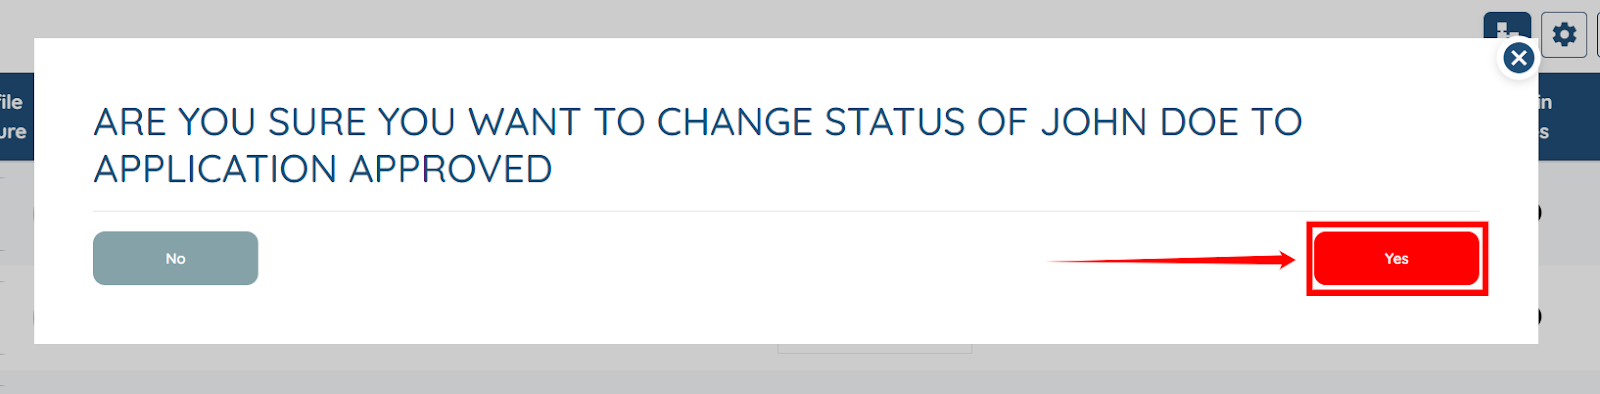
The action will successfully update the status to the one configured in the Email or SMS blaster, and the candidate will be enrolled in the Email or SMS blaster.
You can cancel any scheduled Email or SMS blaster at any time if it’s no longer needed. Canceling the scheduled blaster immediately stops all future weekly assigned job summaries from being sent to candidates, regardless of their enrollment status.
Follow the steps below to cancel a scheduled blaster.
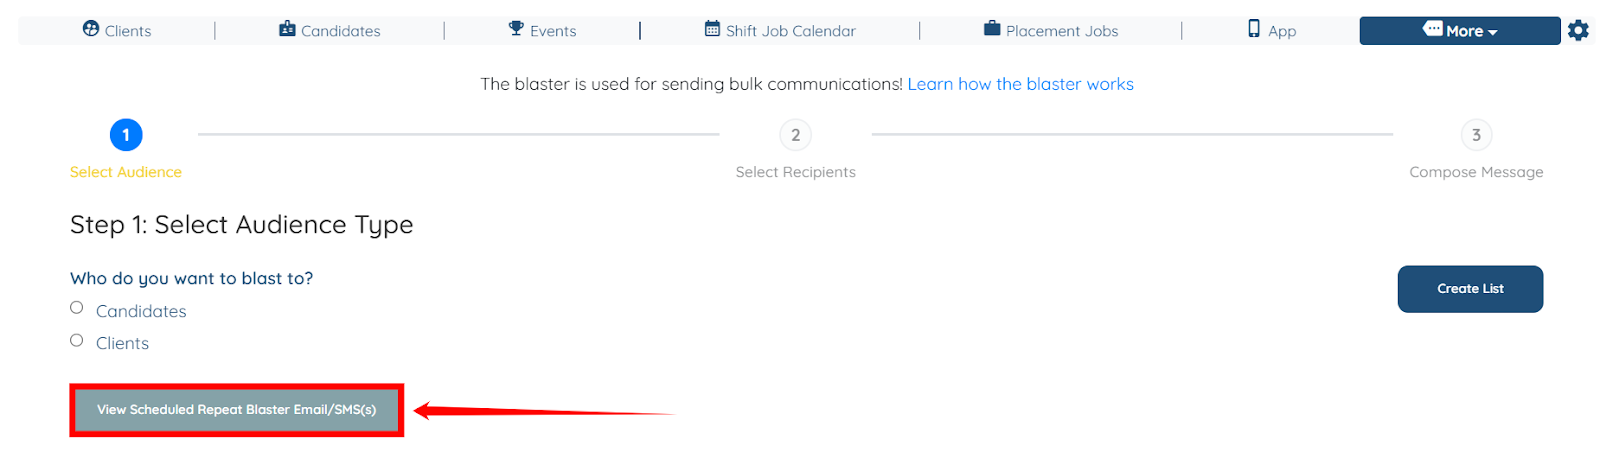
Step 1: On your agent dashboard, navigate to More > Email/SMS/Push Notification Blaster, as shown in the screenshot below.

Step 2: Click the View Scheduled Repeat Blaster Email/SMS(s) button to view all the Scheduled blasters.
Step 3: Click the Cancel button corresponding to the Scheduled blaster you want to cancel.
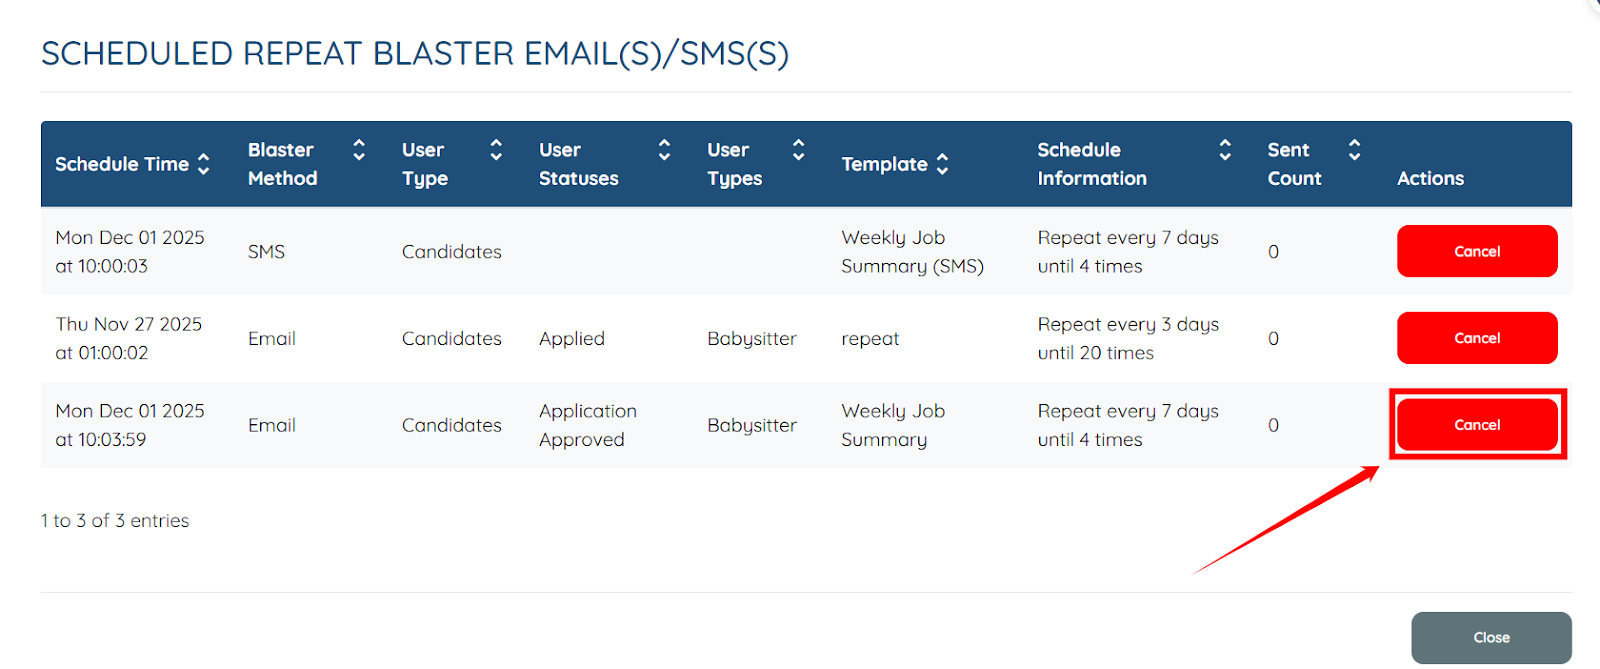
Step 4: Click the Yes button to proceed. This action will successfully cancel the selected scheduled blaster.

