Let’s get started 🚀
Follow the steps below to upload a document and automatically generate fillable fields using the Auto-Create Fields feature.
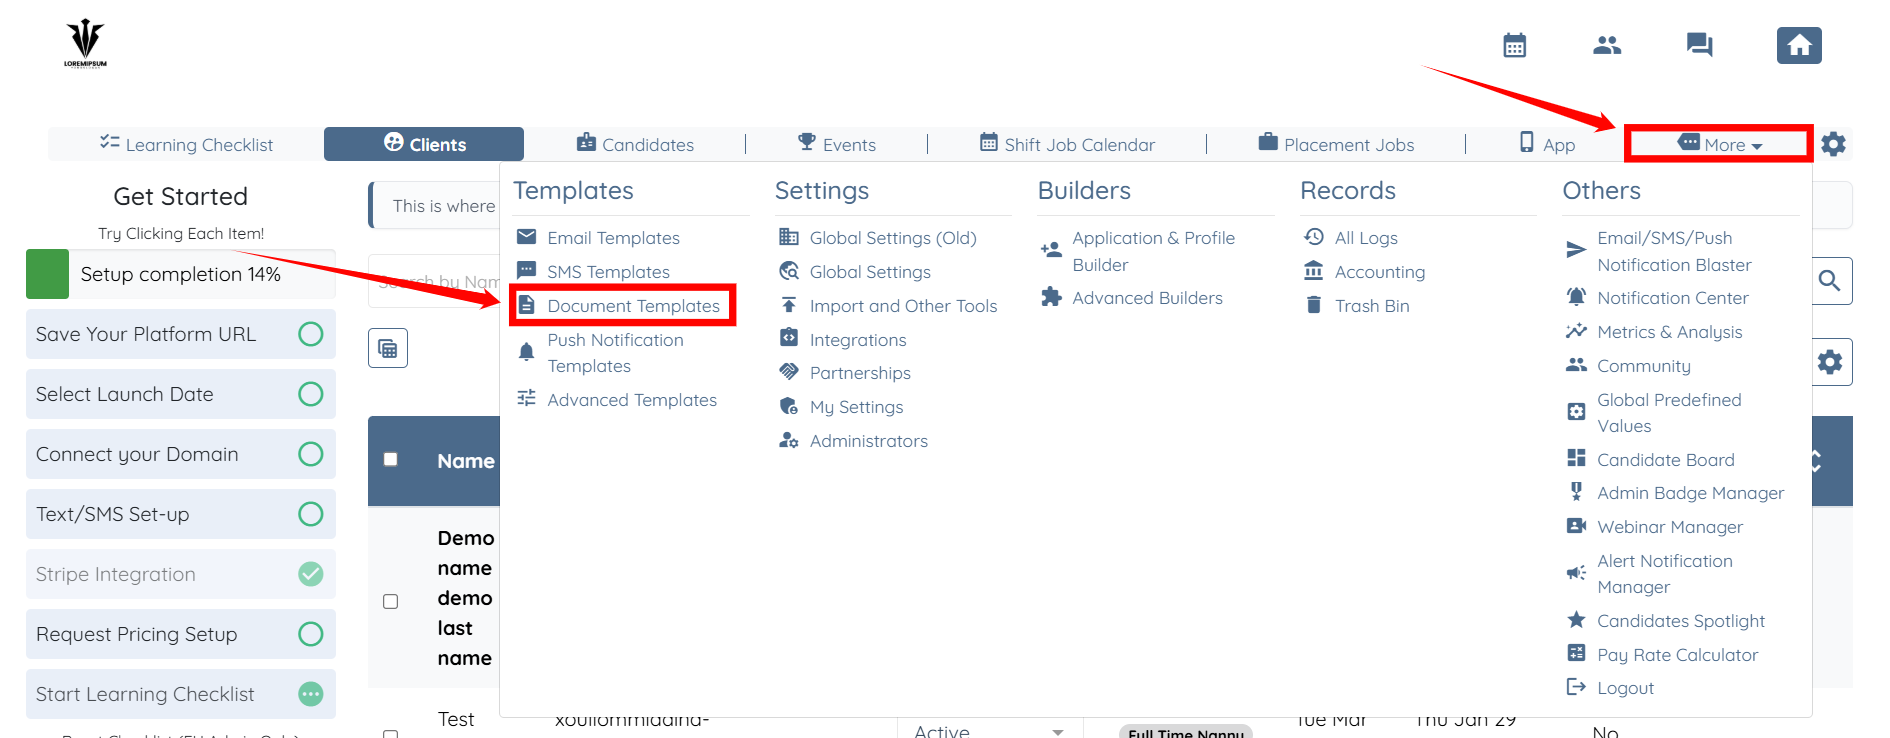
Step 1: Log in to your agent dashboard and click on More > Document Templates as shown in the screenshot below.
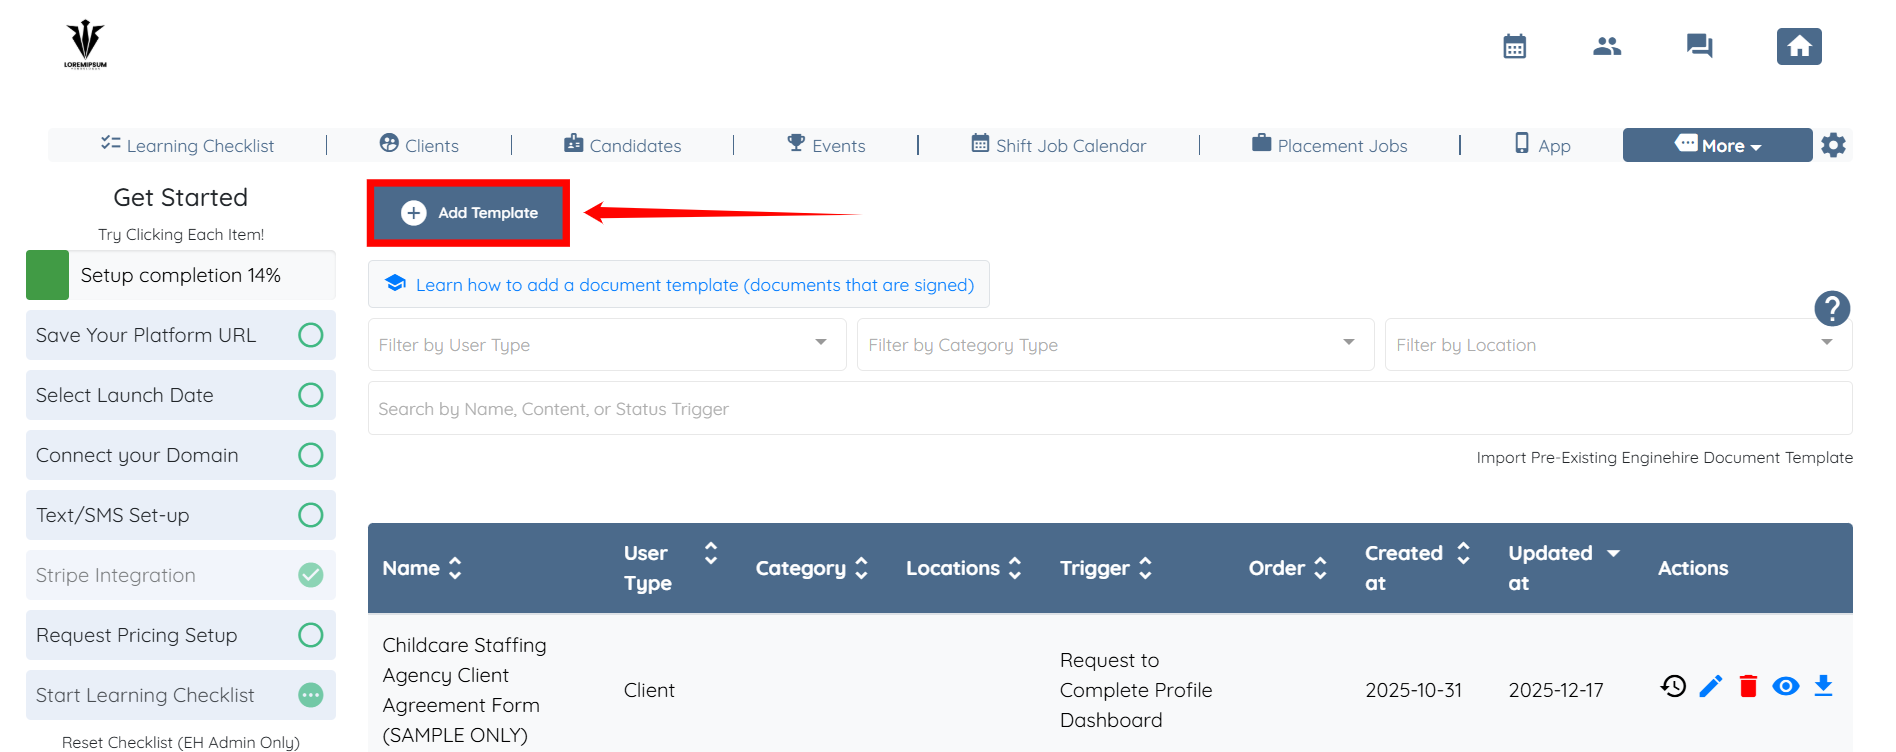
Step 2: Click the Add Template button to start adding a new template.
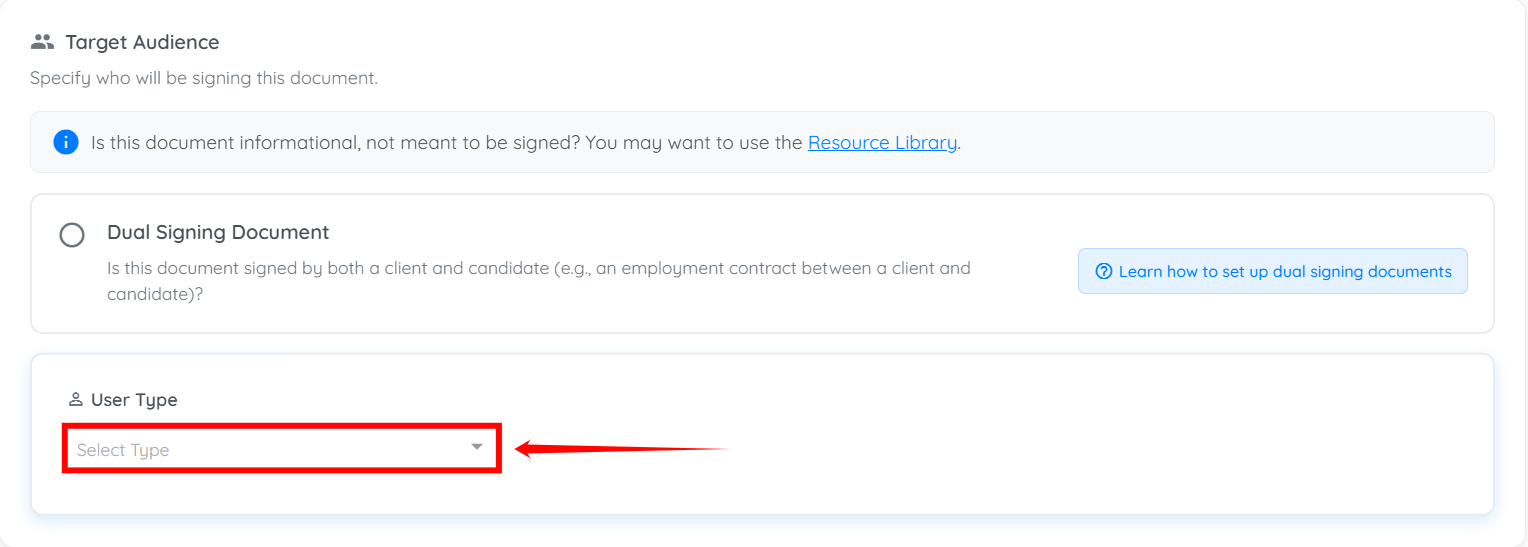
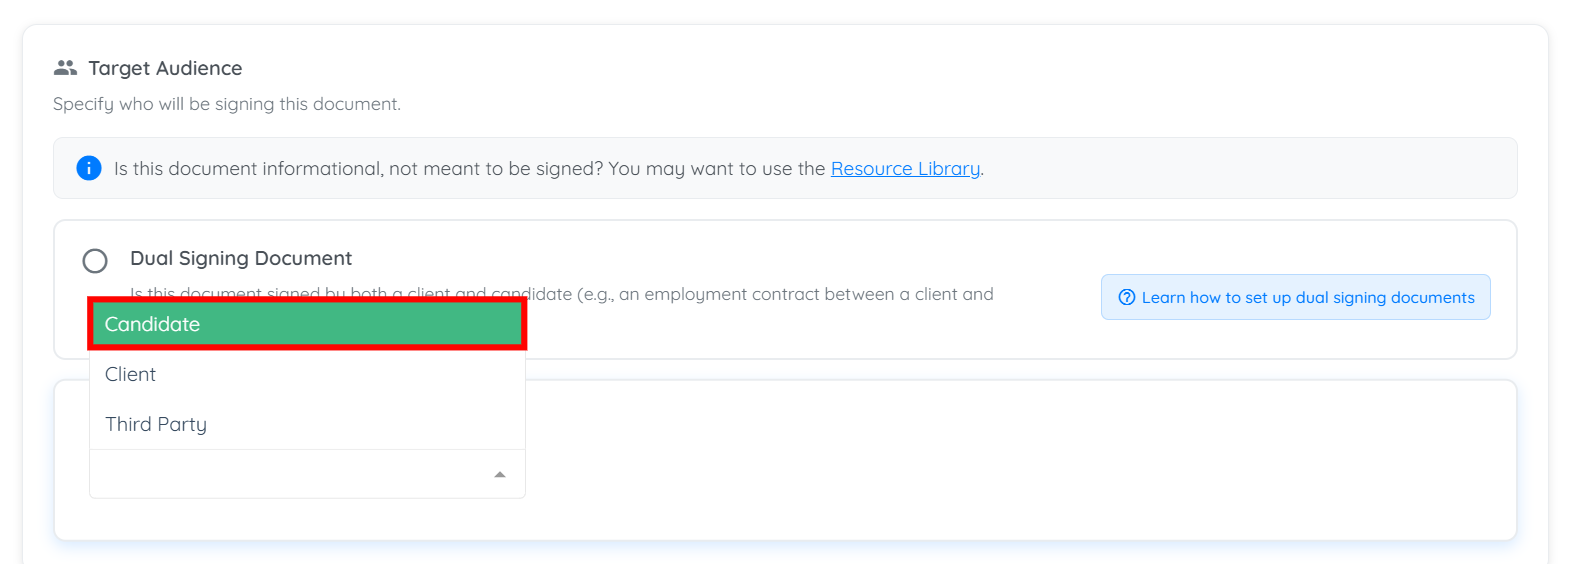
Step 3: Click the box under the User Type heading to activate the dropdown list.
Step 4: Select the Candidate option.
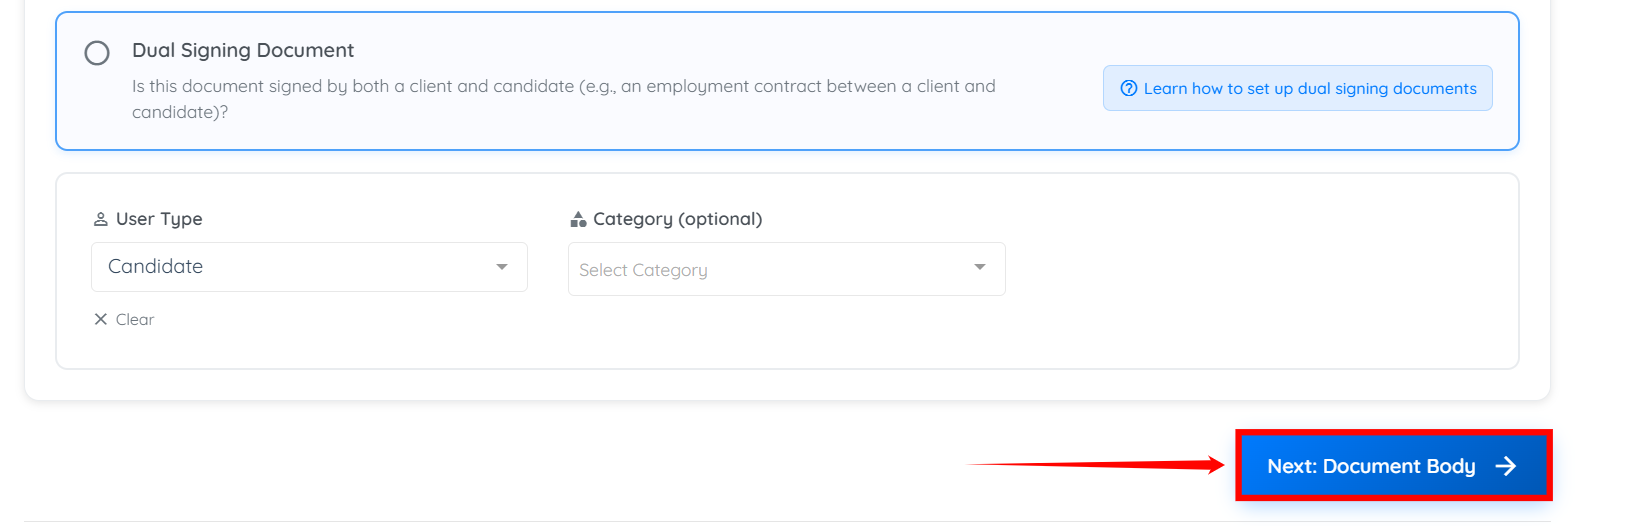
Step 5: Click the Next: Document Body button to proceed.
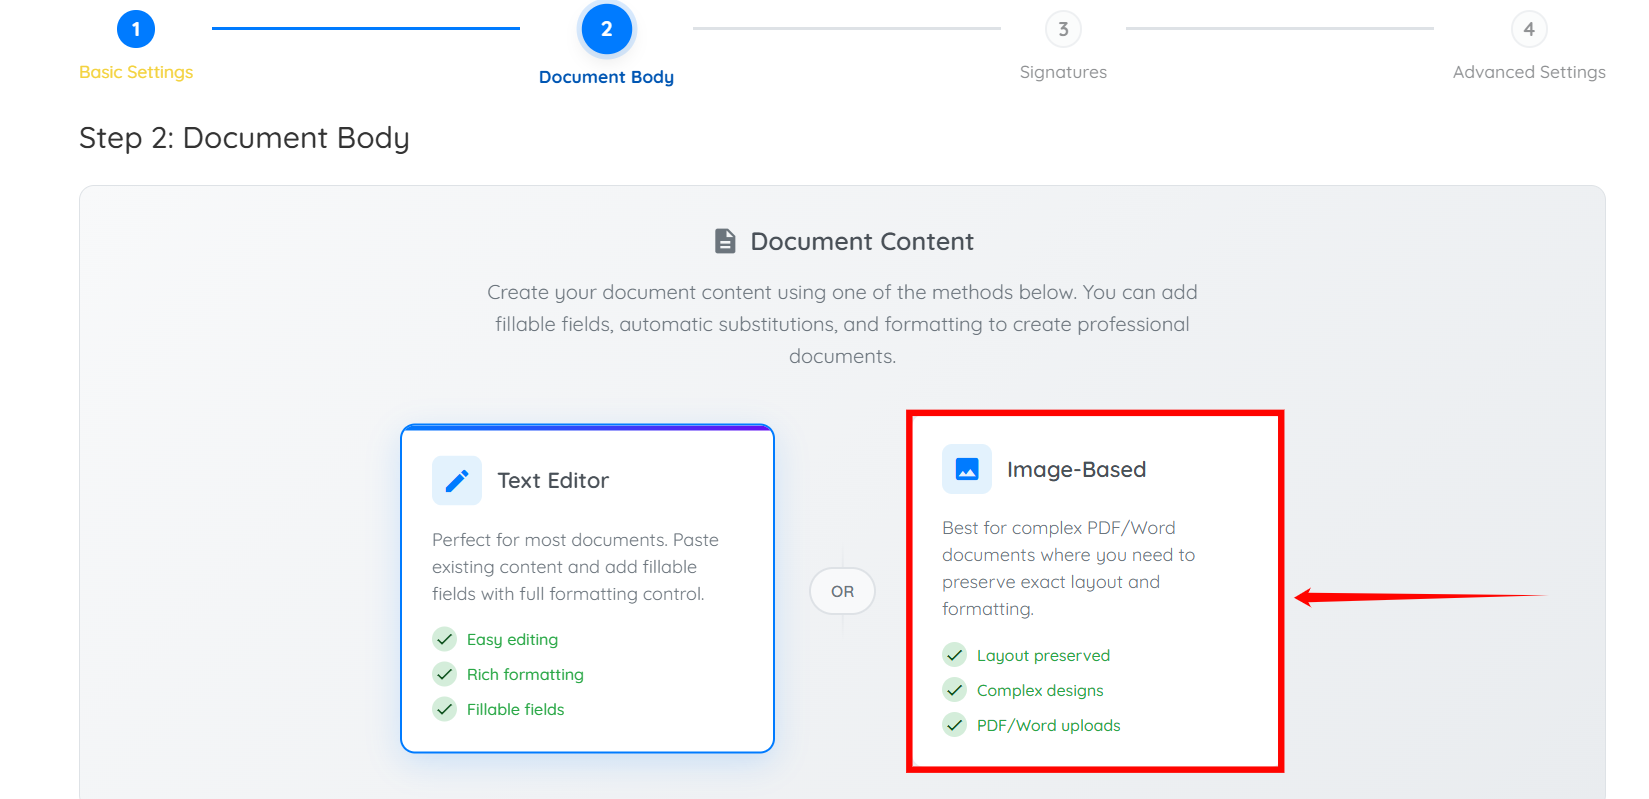
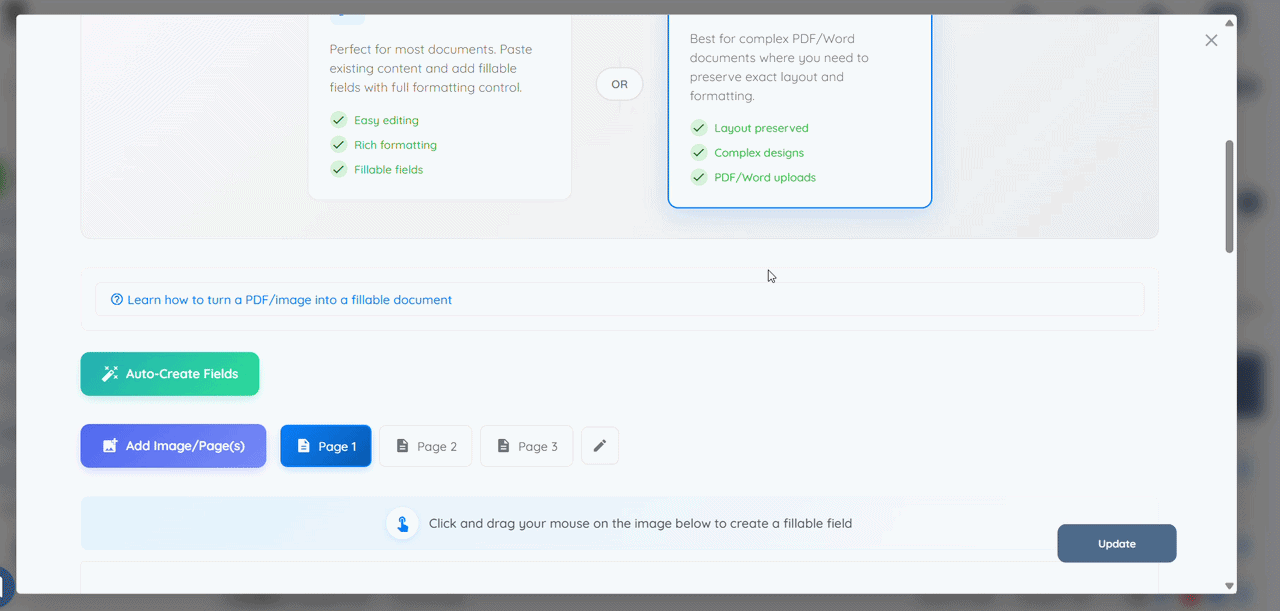
Step 6: Select the Image-Based option from the available options.
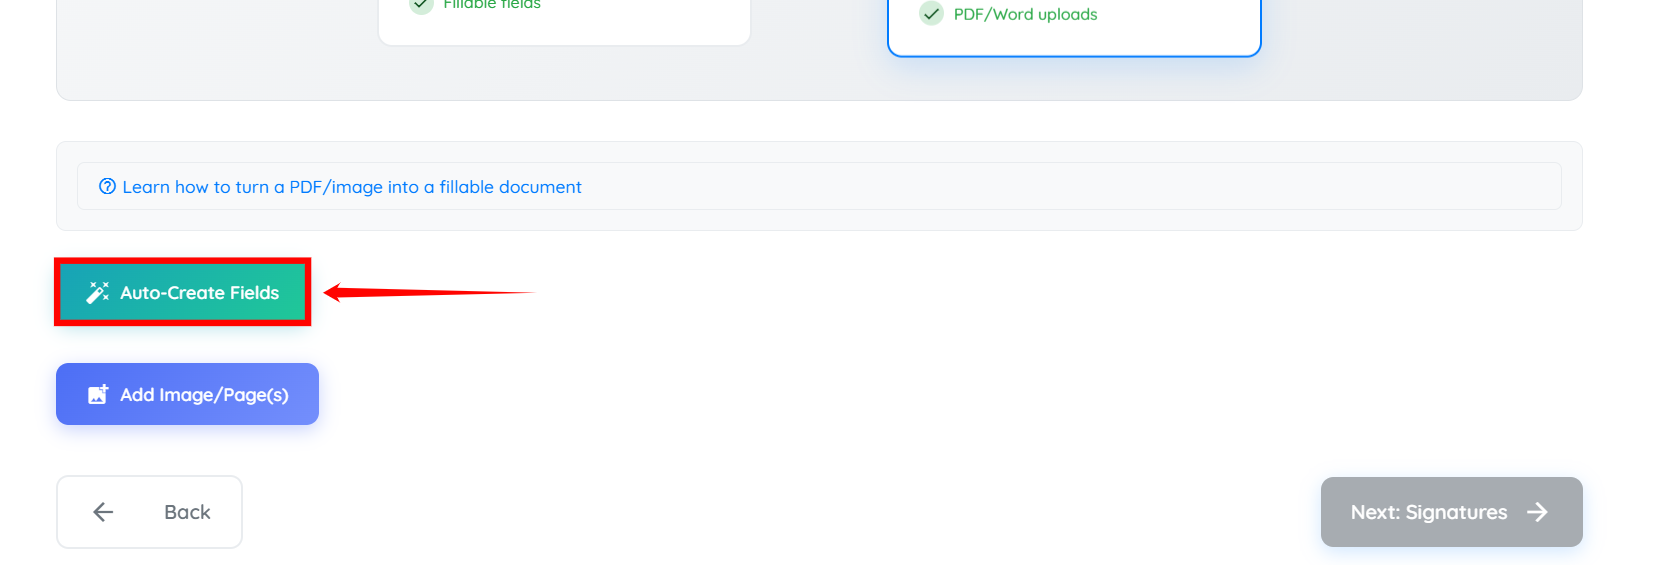
Step 7: Click the Auto-Create Fields button.
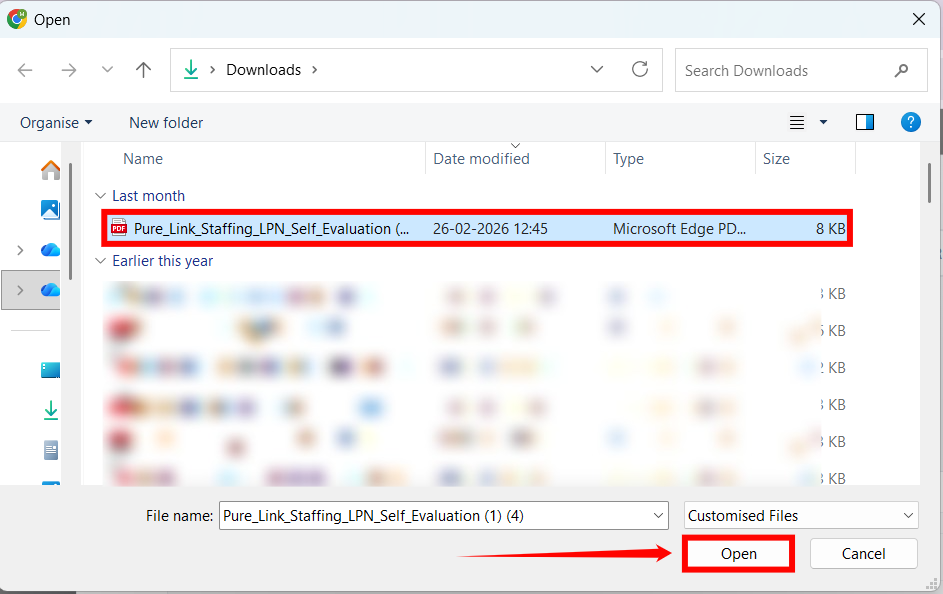
Step 8: Select the required document, and click the Open button.
The processing will automatically begin to detect and create fields in the uploaded document.

A notification will appear once the fields have been successfully created in the uploaded document.

Scroll down to review the automatically created fields.
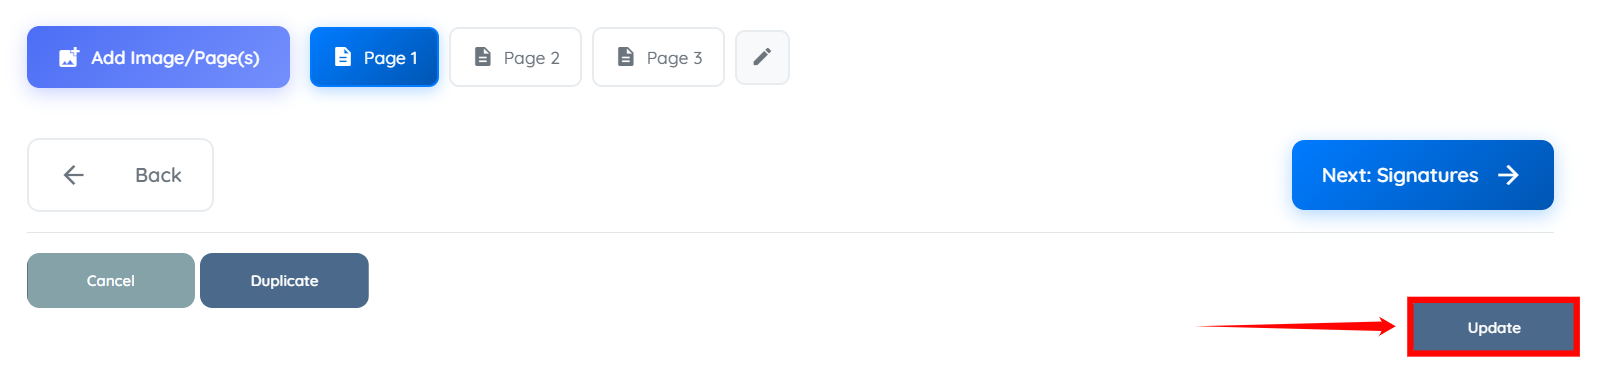
Step 9: After checking the auto-created fields, click the Update button to proceed.
The document template will be created successfully.
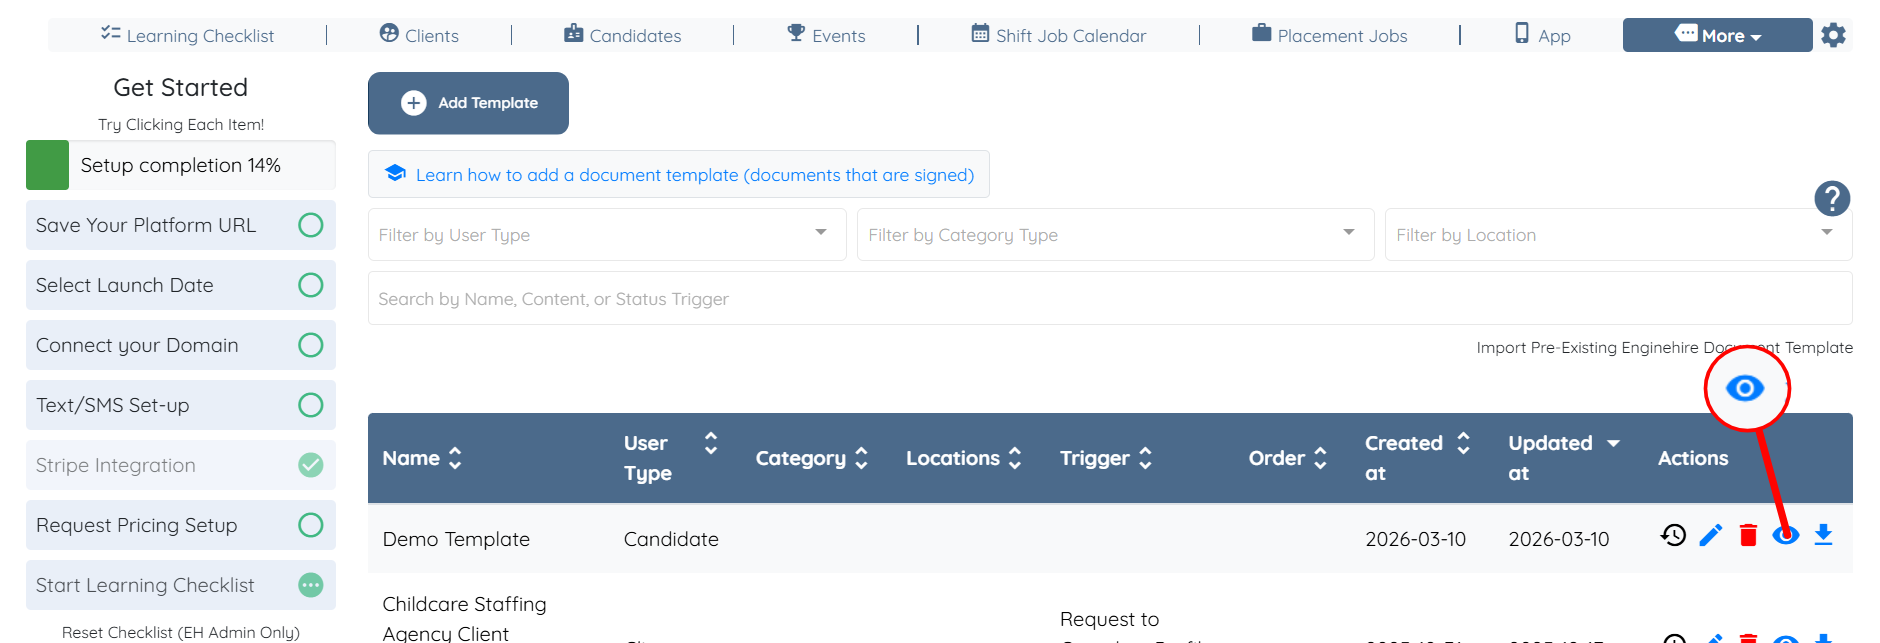
Use the preview option to review the generated fields and confirm that the document template appears as expected.
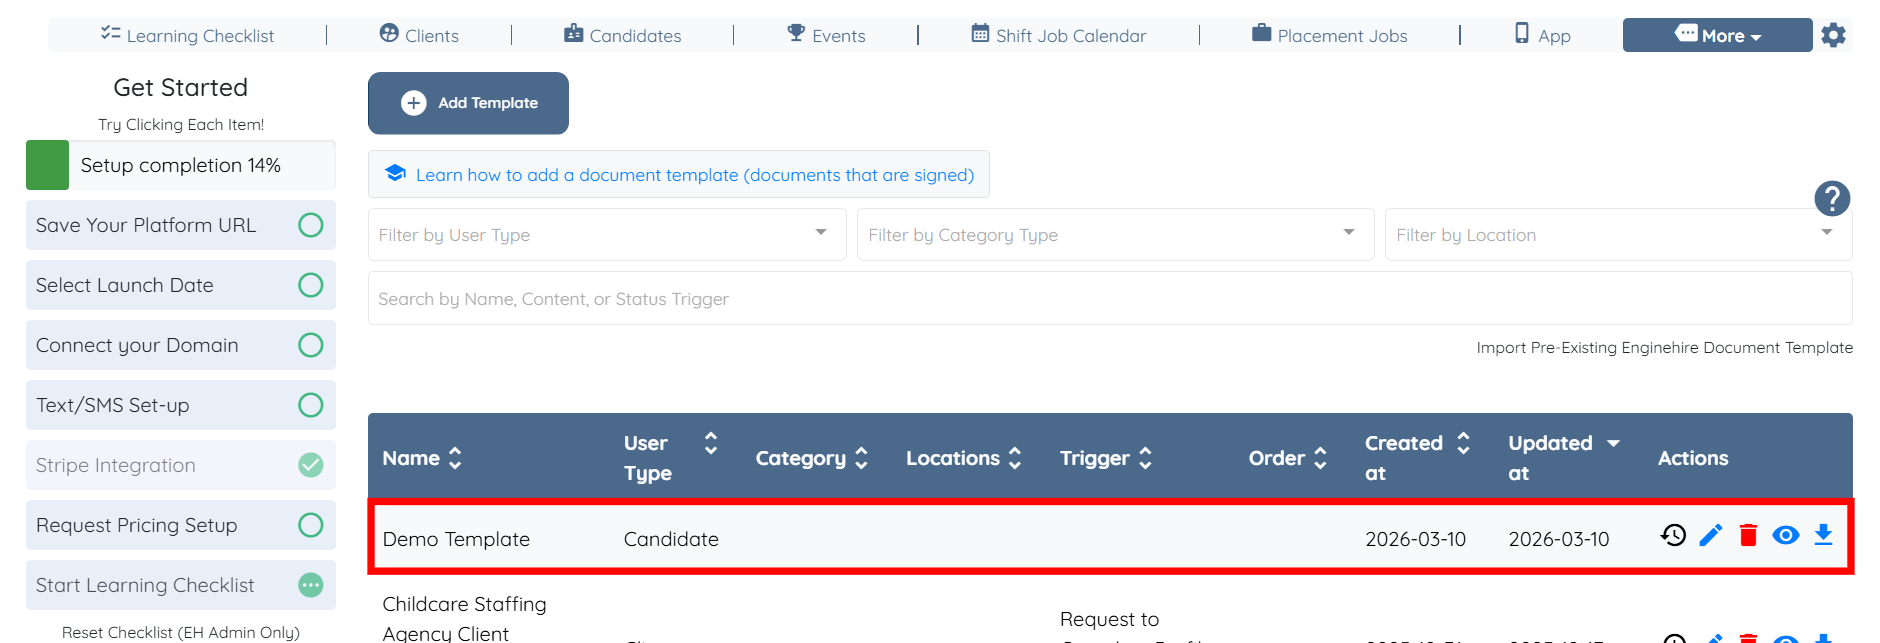
Click the corresponding eye icon for the created template, as shown in the screenshot below.
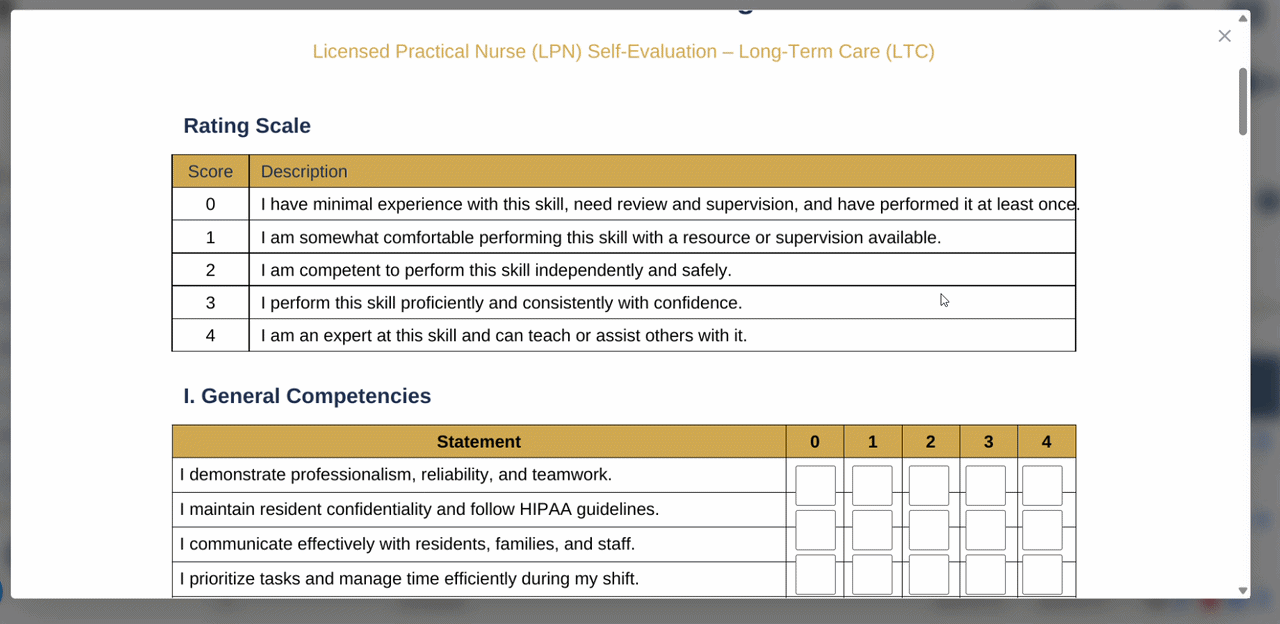
Review the template to ensure the fields appear correctly and function as expected.
After creating the template, assign it to a candidate profile so the candidate can review and sign the document.
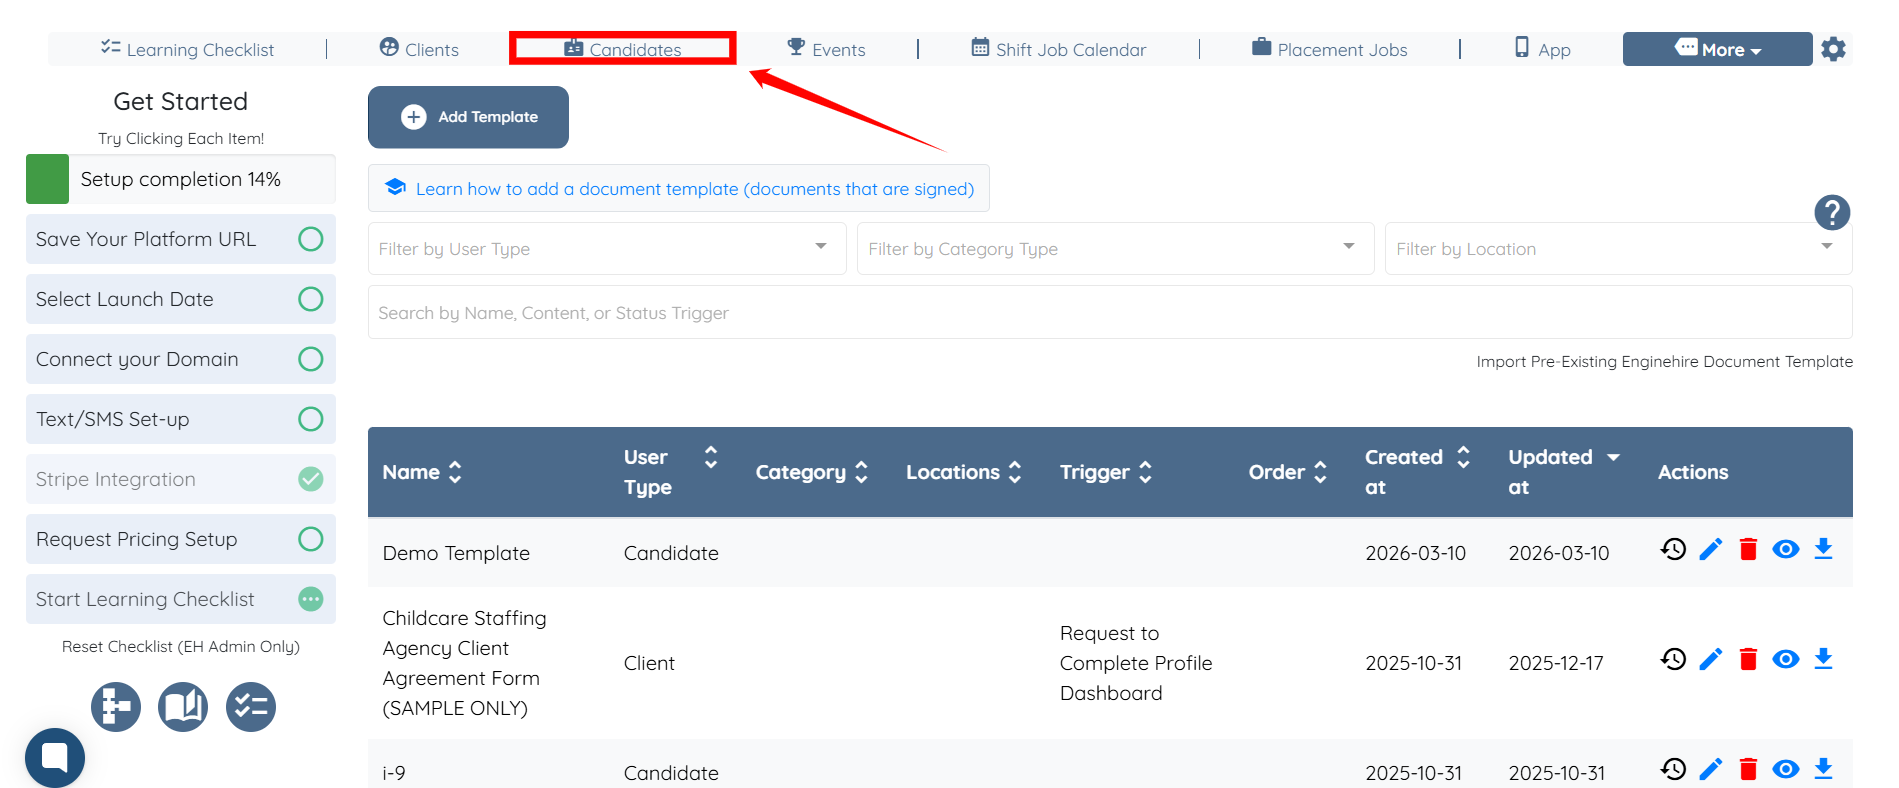
Step 1: On the agent dashboard, click Candidates in the navigation bar.
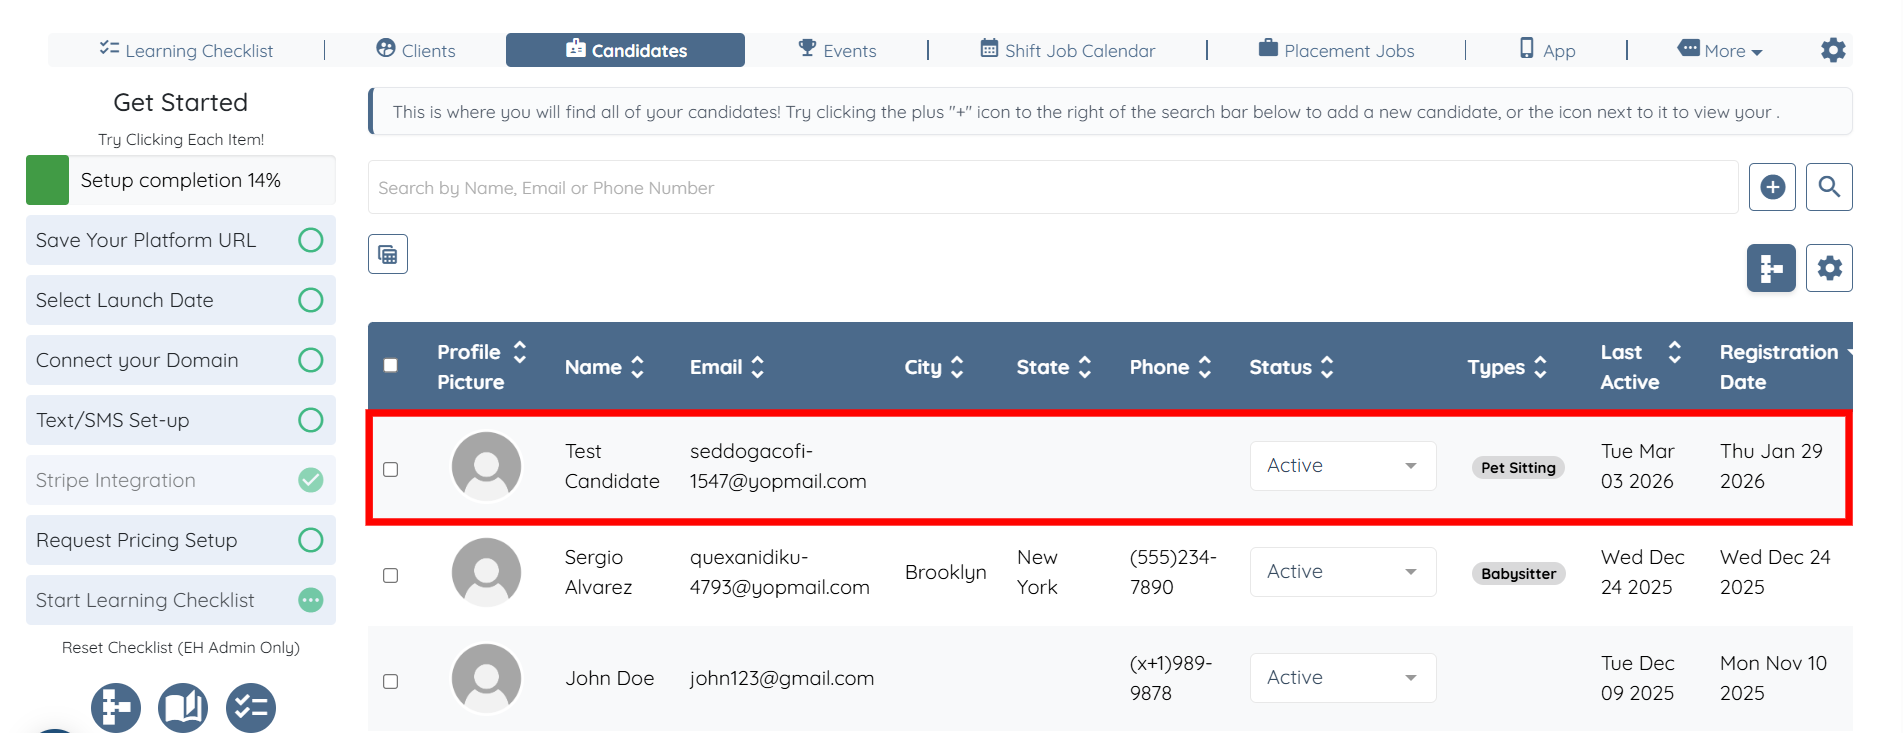
Step 2: Click any candidate from the list to add the created document template to their profile.
Step 3: Click the Documents tab from the list of available tabs.
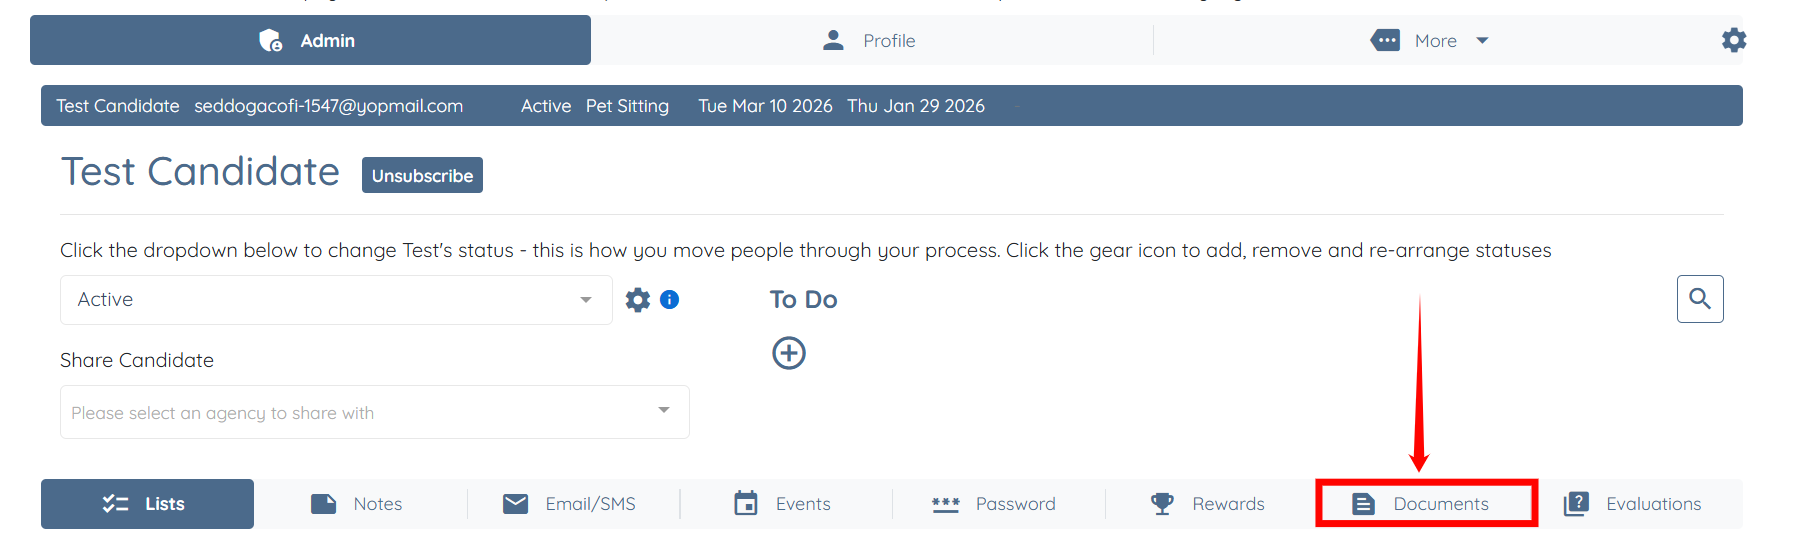
Step 4: Click the box under the Documents to Sign heading to open the dropdown list.

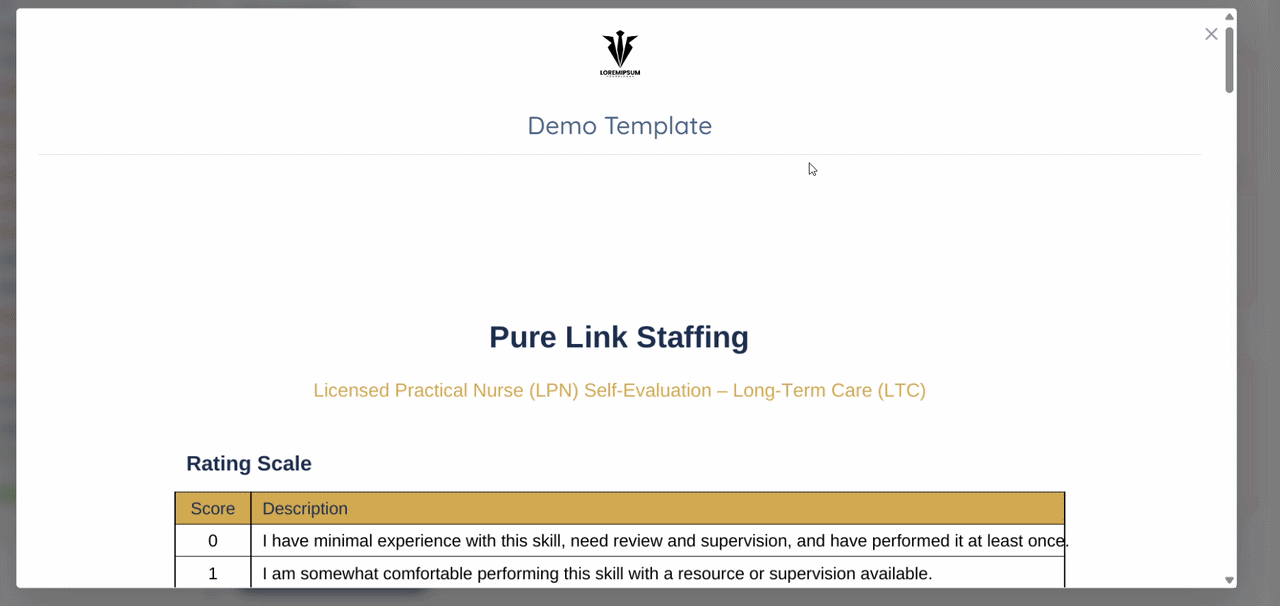
Step 5: Select the document template from the list that you created. In our case, the template is Demo Template.

Step 6: Click the Add button.

The document will be successfully added to the candidate profile.
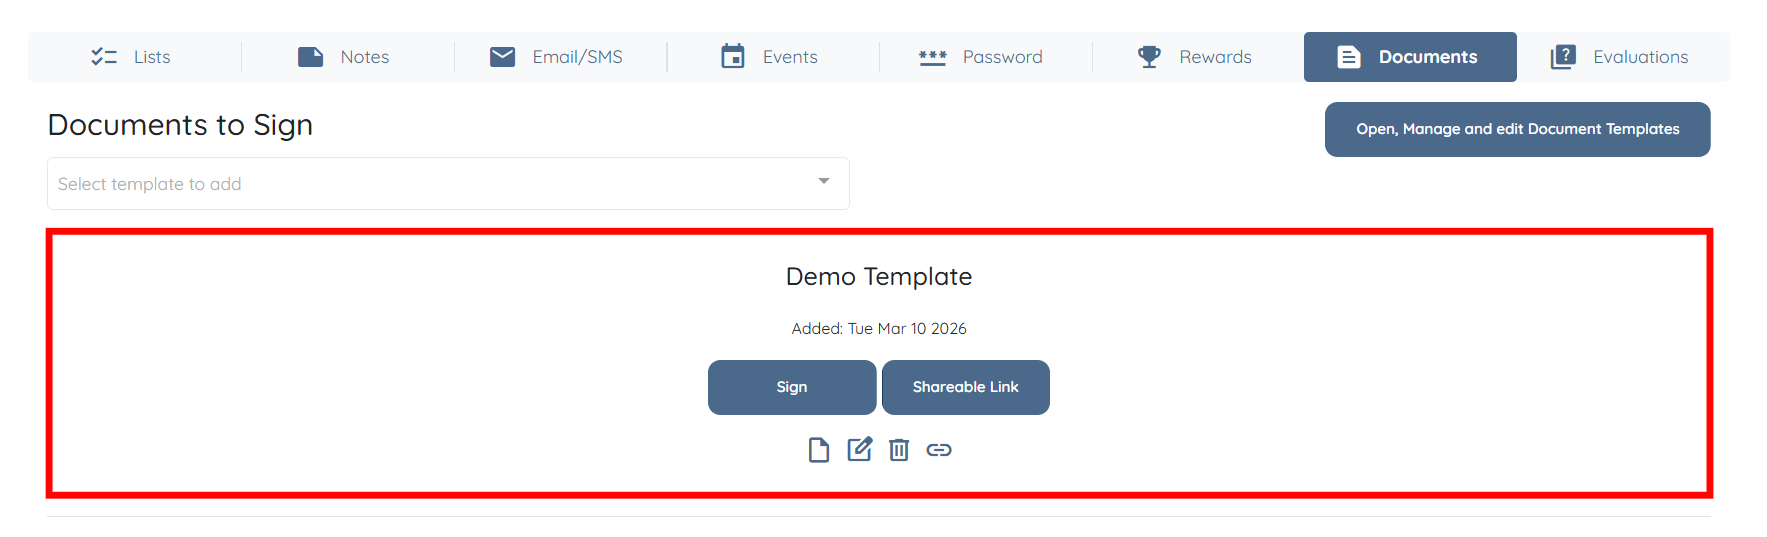
The candidate can open the document by clicking the Sign button in the Documents section.
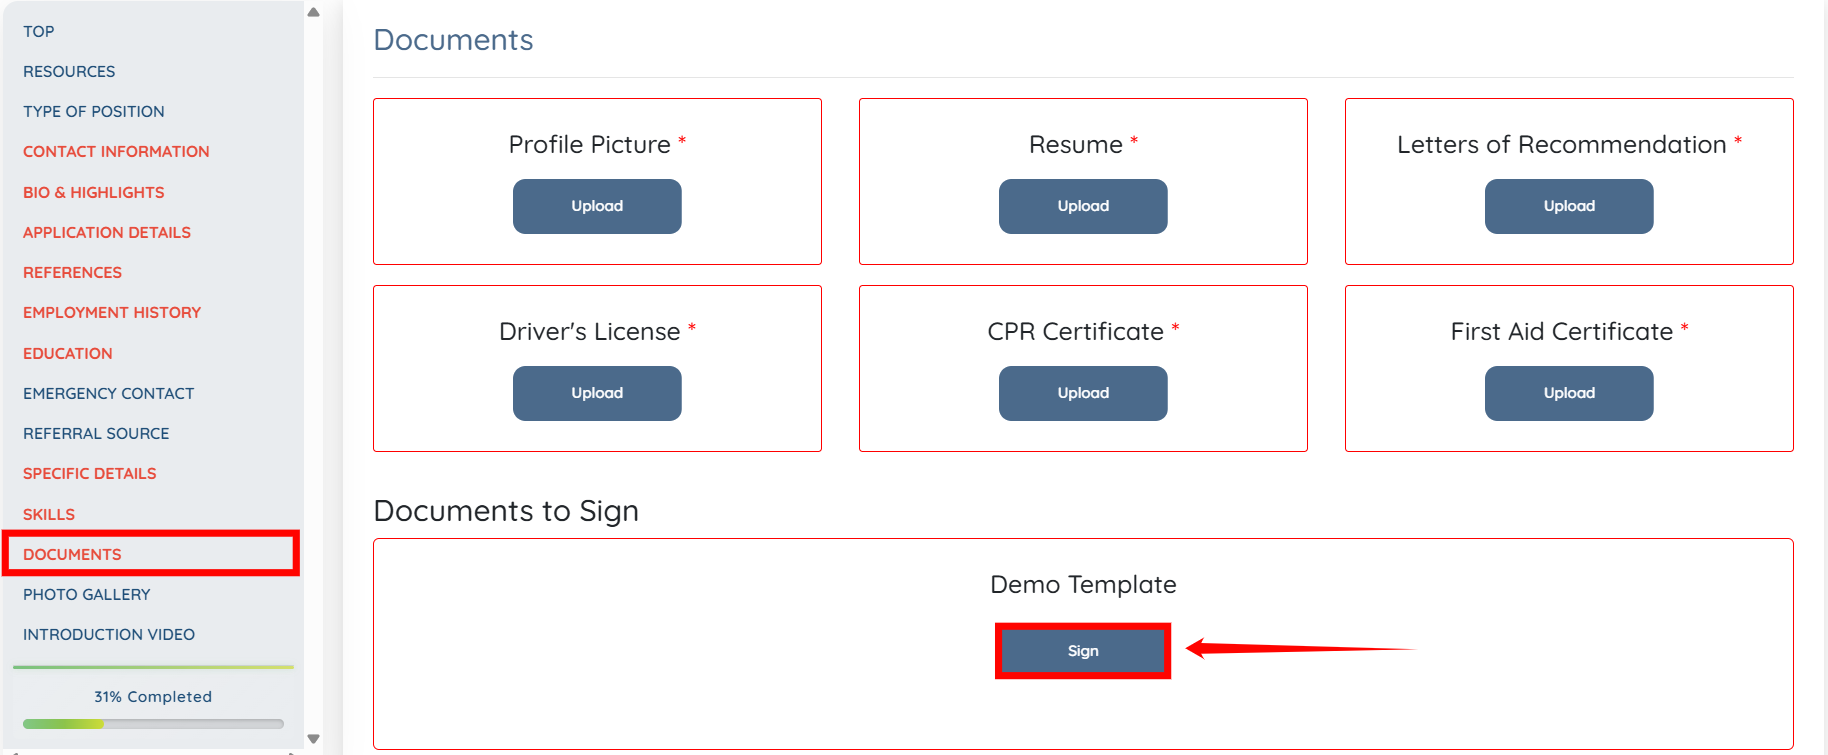
The candidate then completes the required fields and clicks the Sign button at the bottom of the document to submit it.