Let’s get started 🚀
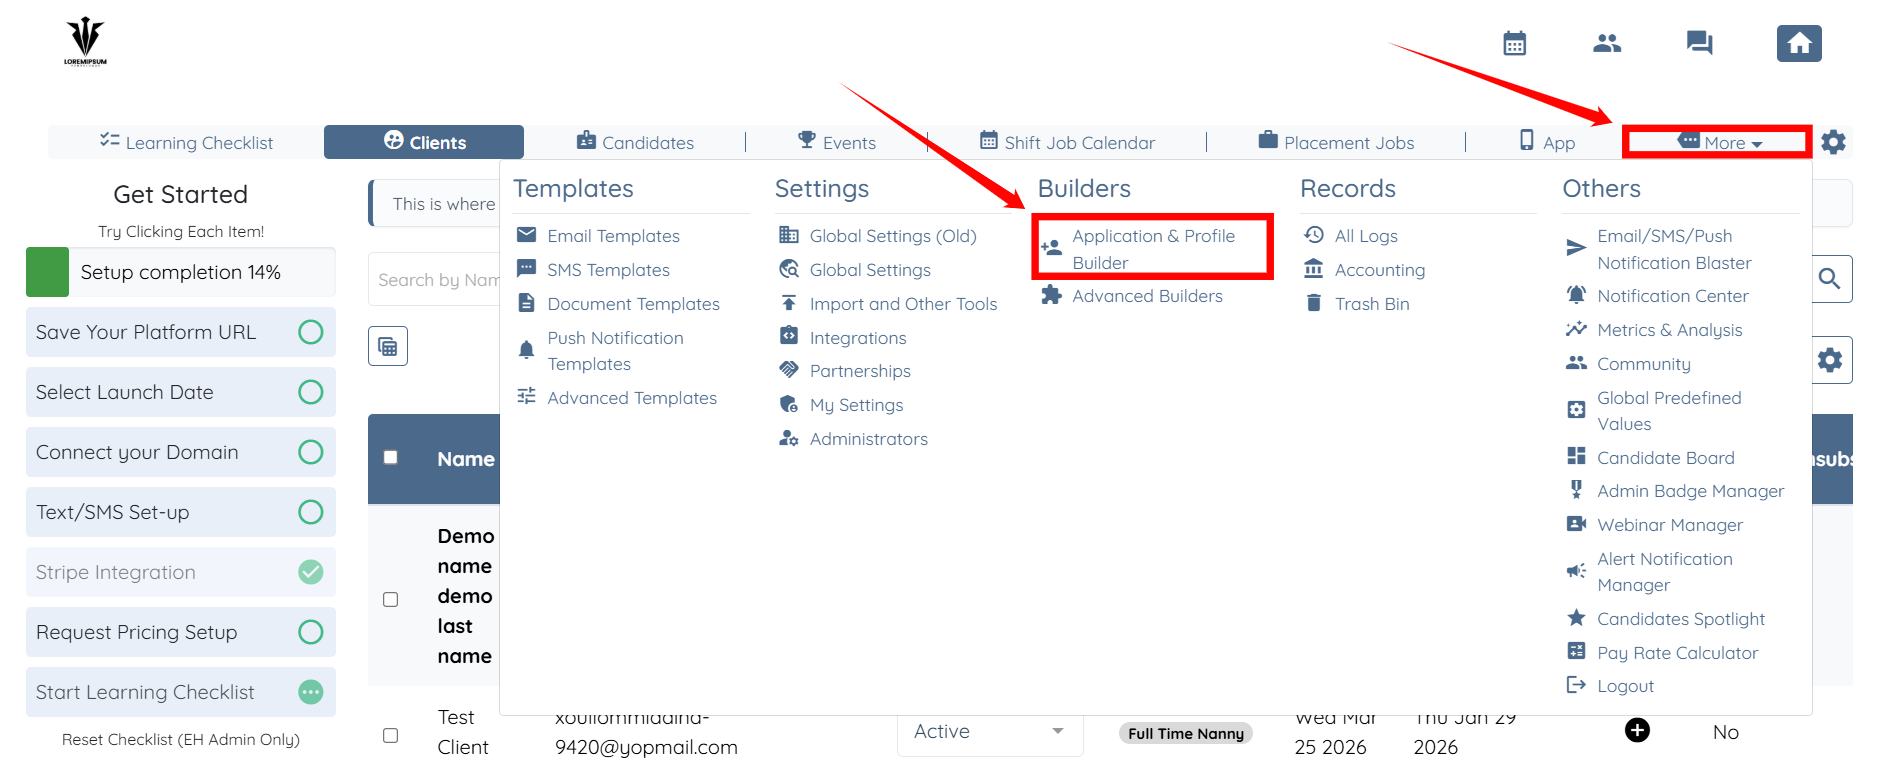
Step 1: Log in to your agent dashboard and click More > Application & Profile Builder, as shown in the screenshot below.
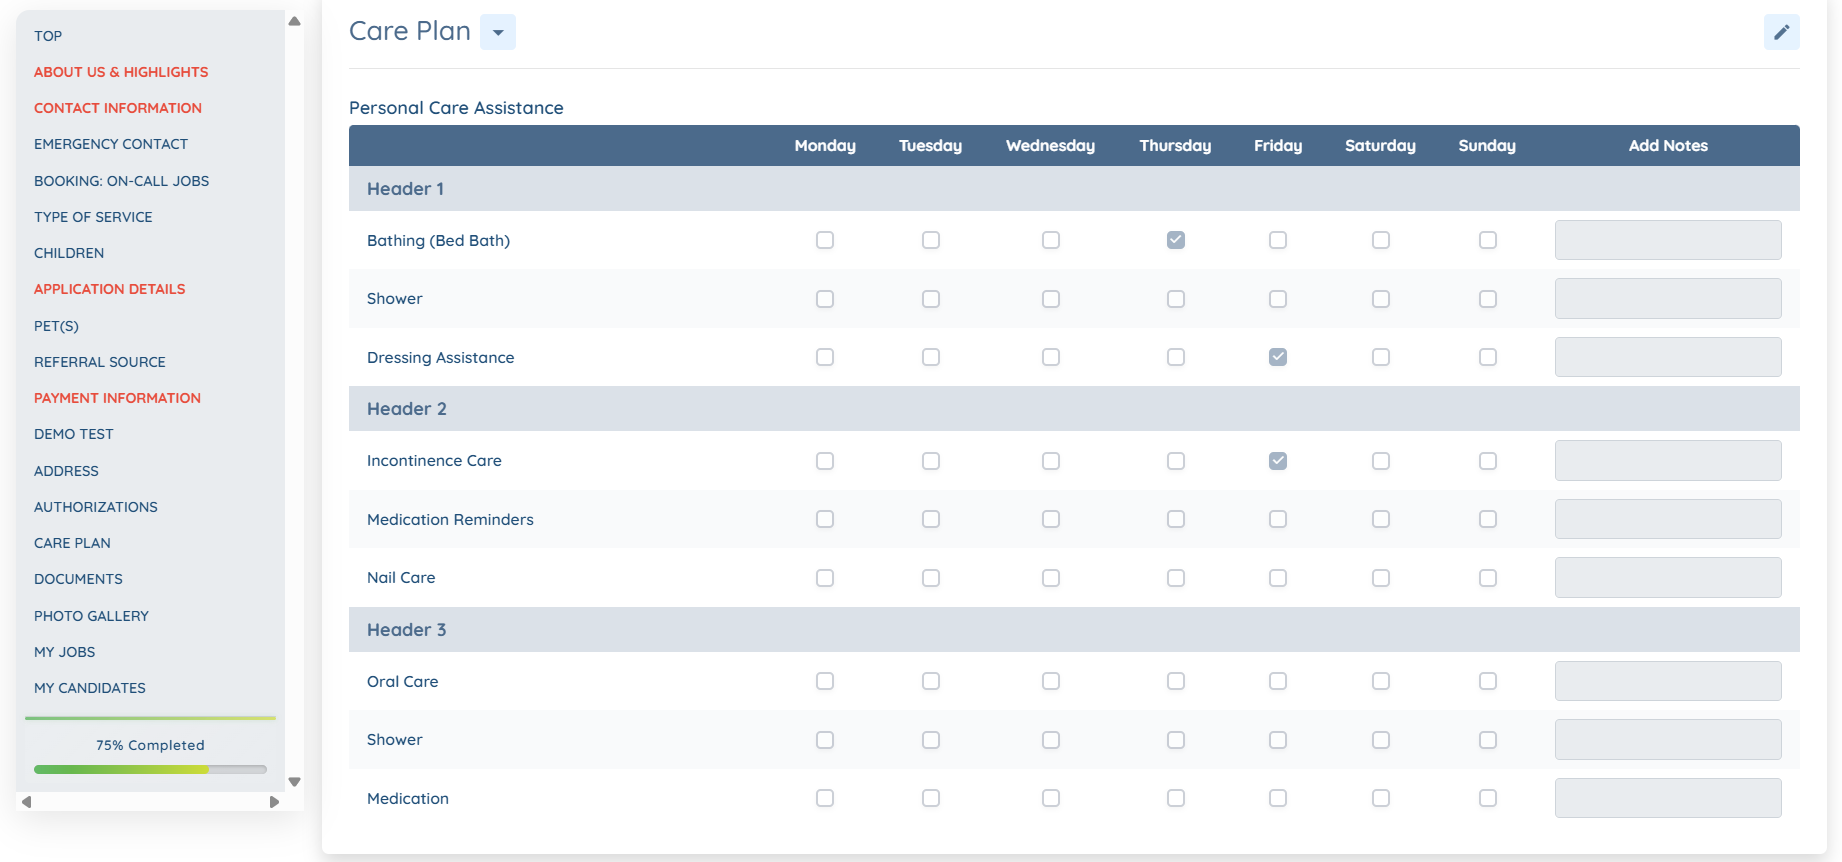
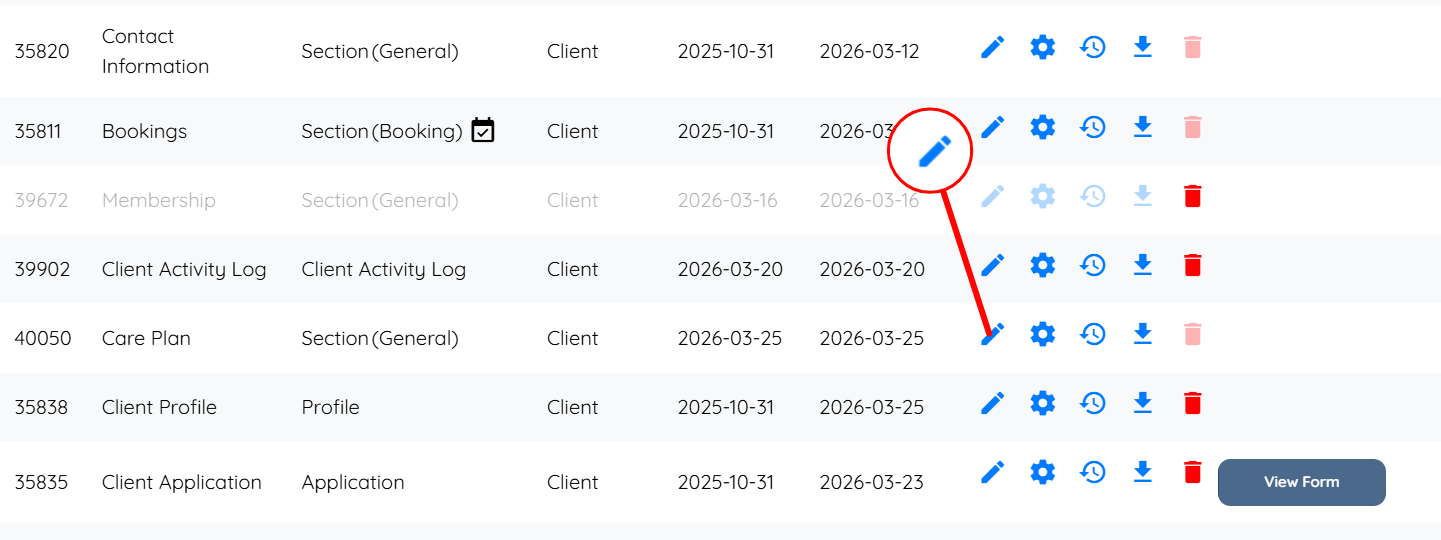
Step 2: Locate the section where you used the checkbox table, and then click the corresponding pencil icon for that section.
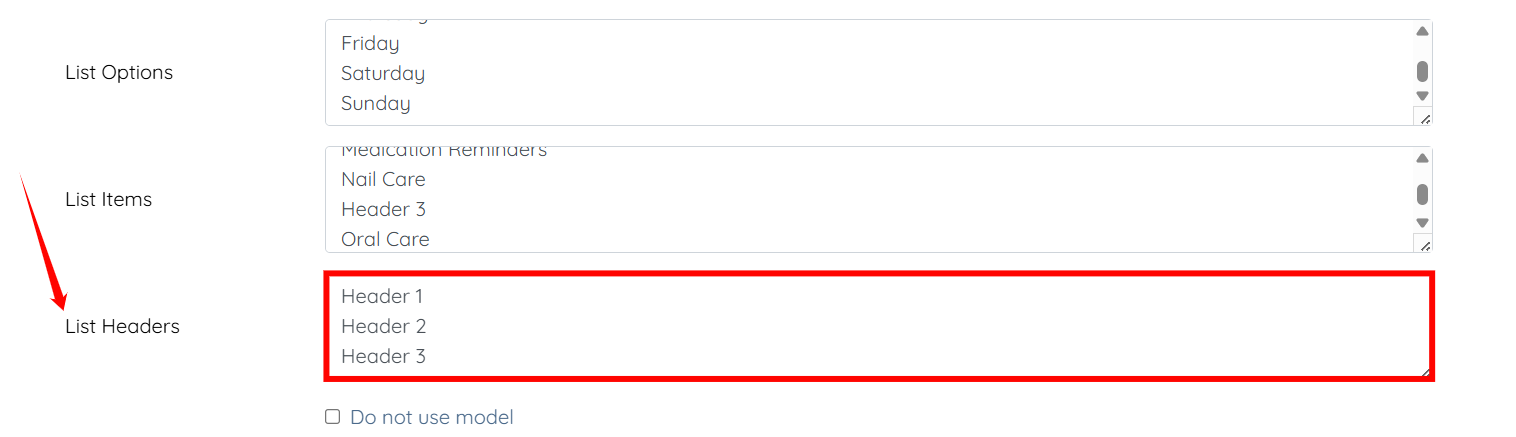
Step 3: Add the required headers to the List Items field, as shown in the GIF below.

Step 4: Add the same values to the List Headers field that you added in the previous step.
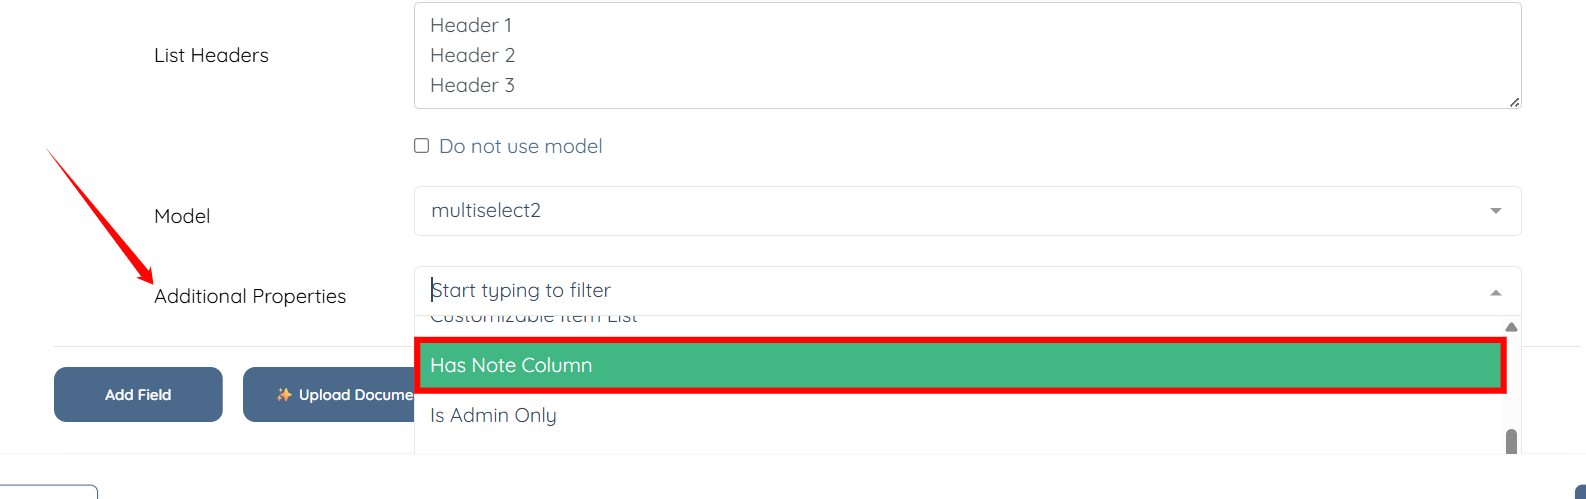
Step 5: Scroll down to the Additional Properties field and select the Has Note column option from the dropdown list.
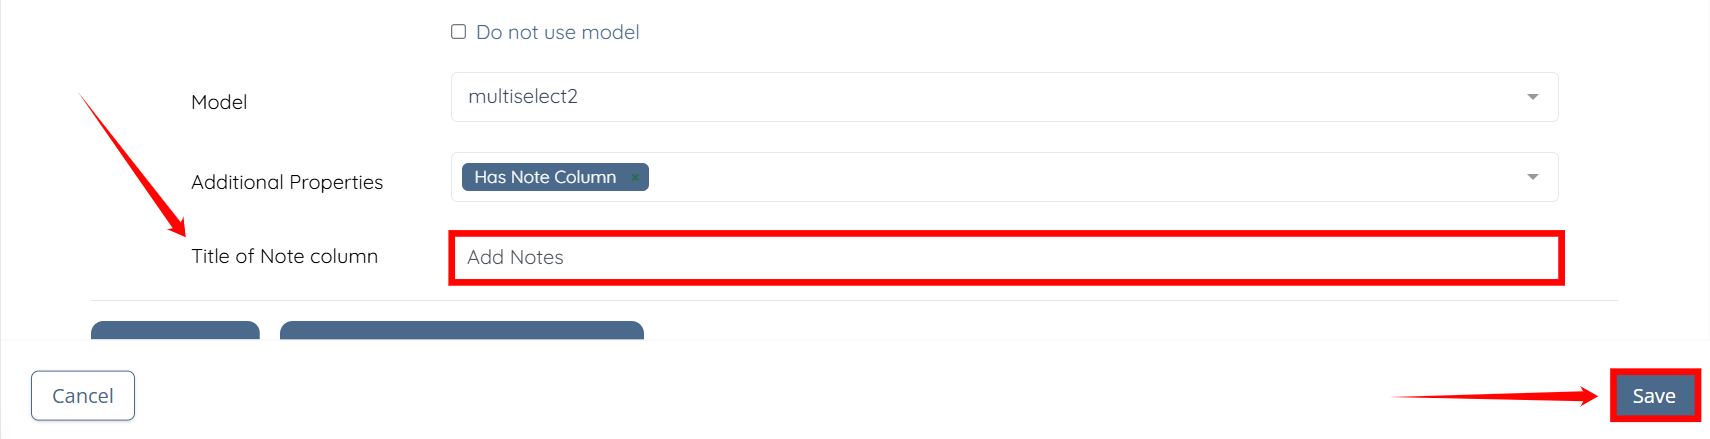
Step 6: Add the required value in the Title of Note column field, then click the Save button to proceed.
The checkbox table will now display the defined headers along with an additional note column.