Let’s get started 🚀
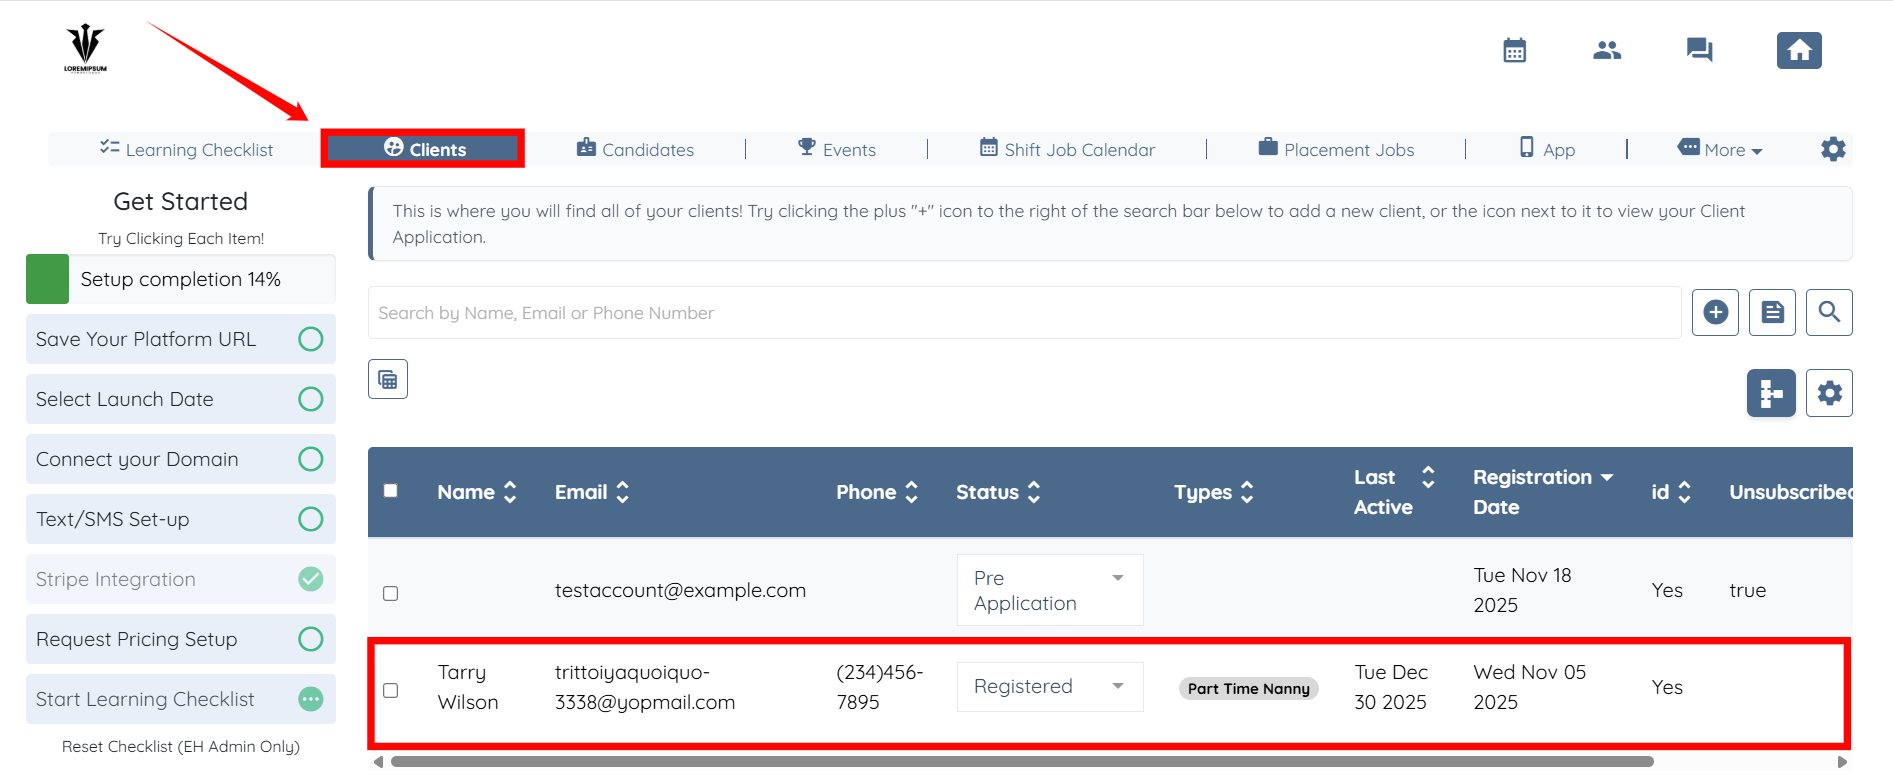
Step 1: Log in to your agent dashboard and click on any client from the list displayed under Clients.
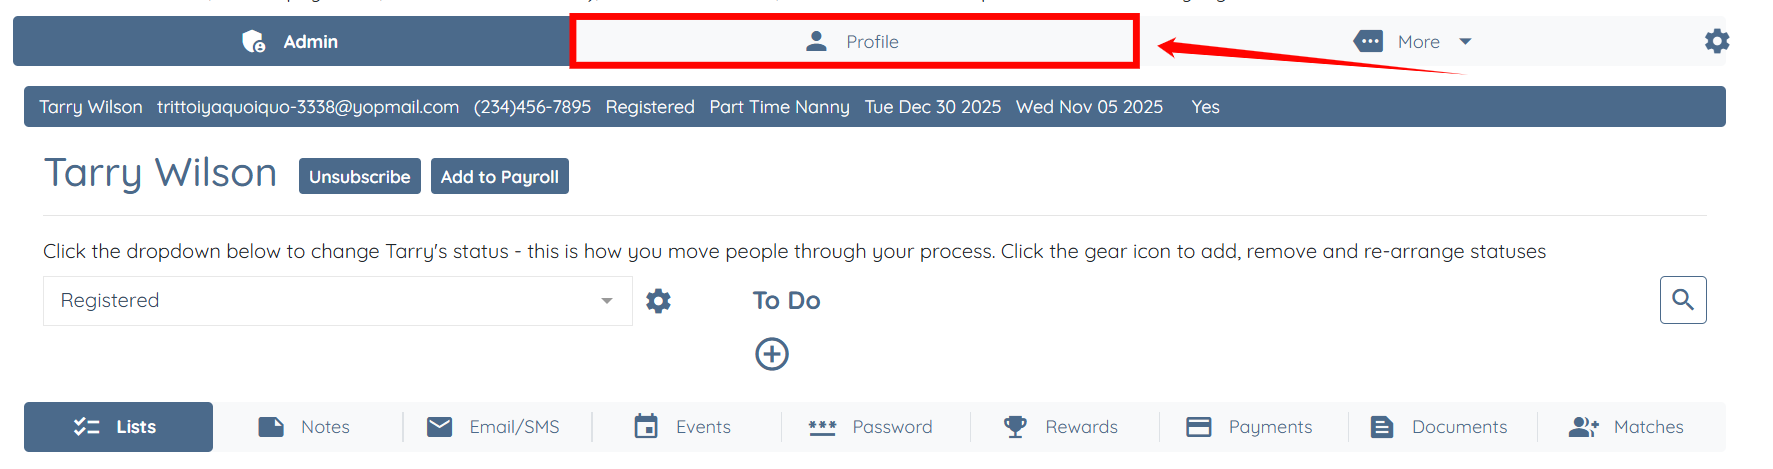
Step 2: Click the Profile tab as shown in the screenshot.
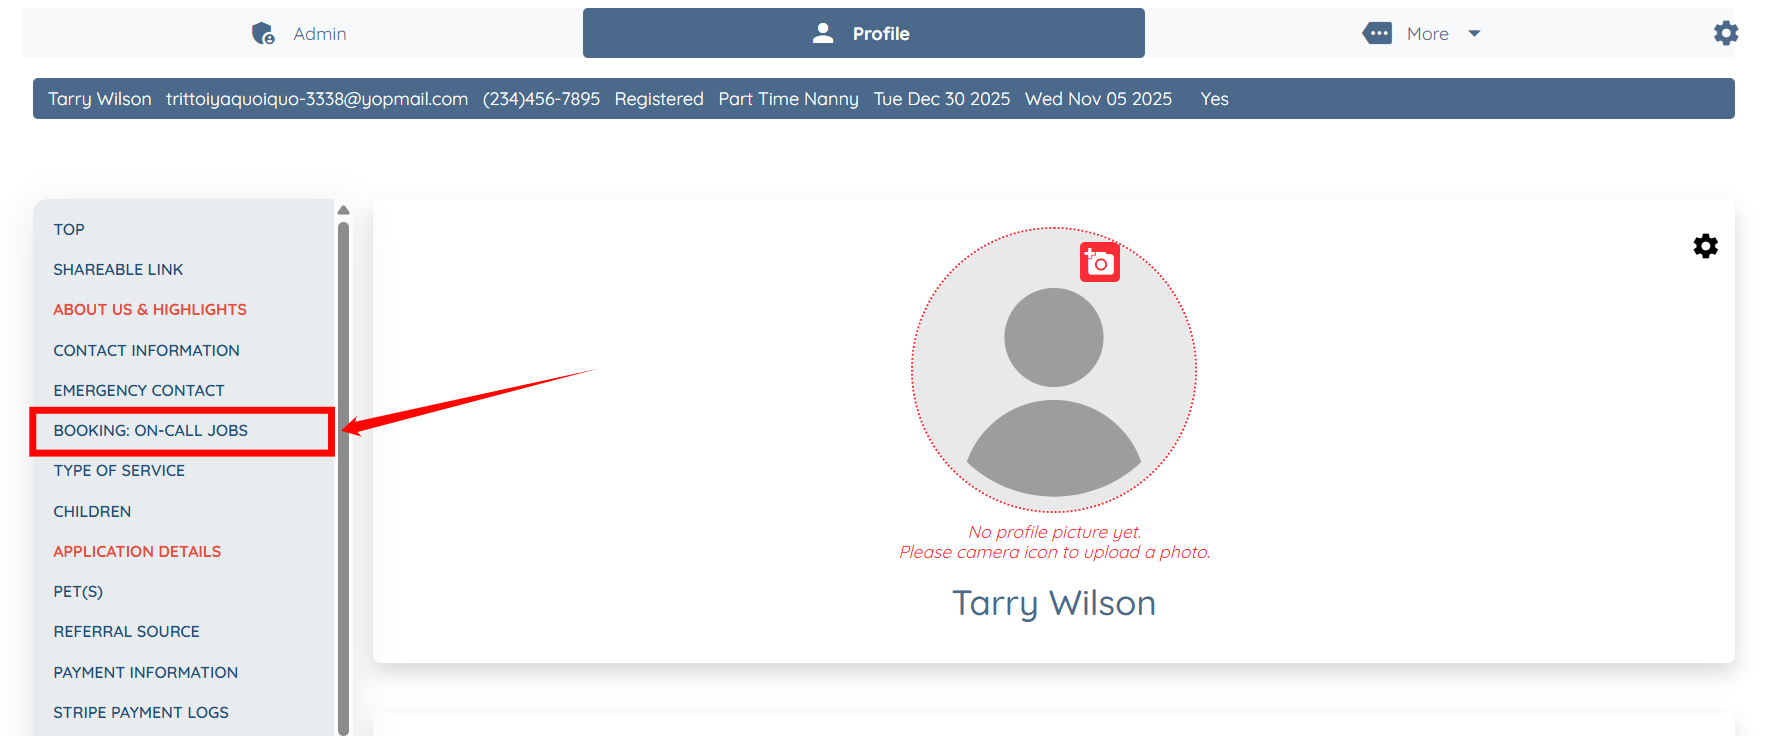
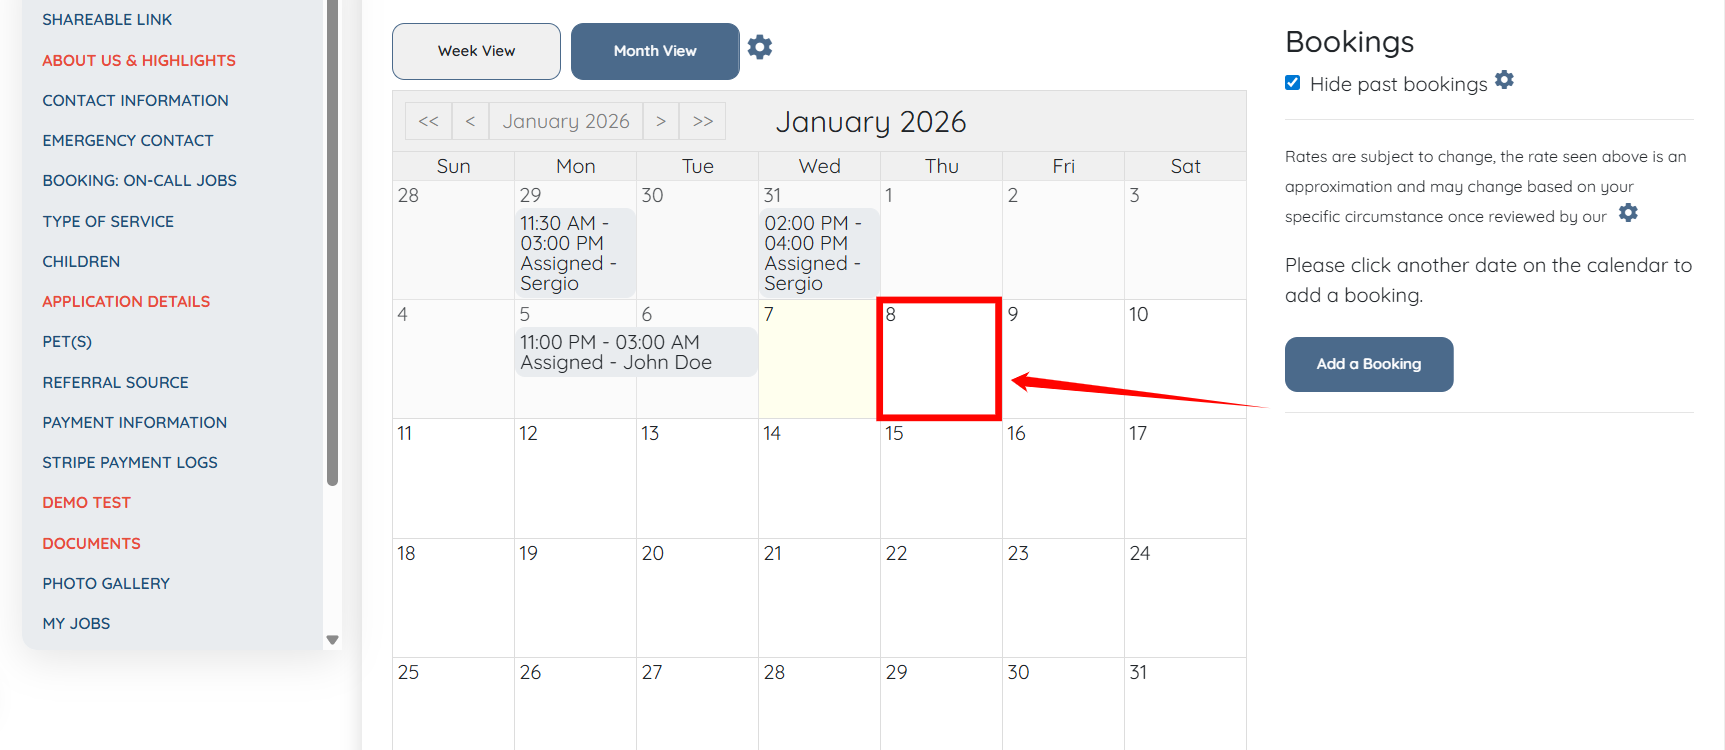
Step 3: Click the BOOKING: ON-CALL JOBS option on the left-hand side navigation bar.
Step 4: Start a new booking by clicking on any of the available upcoming slots.
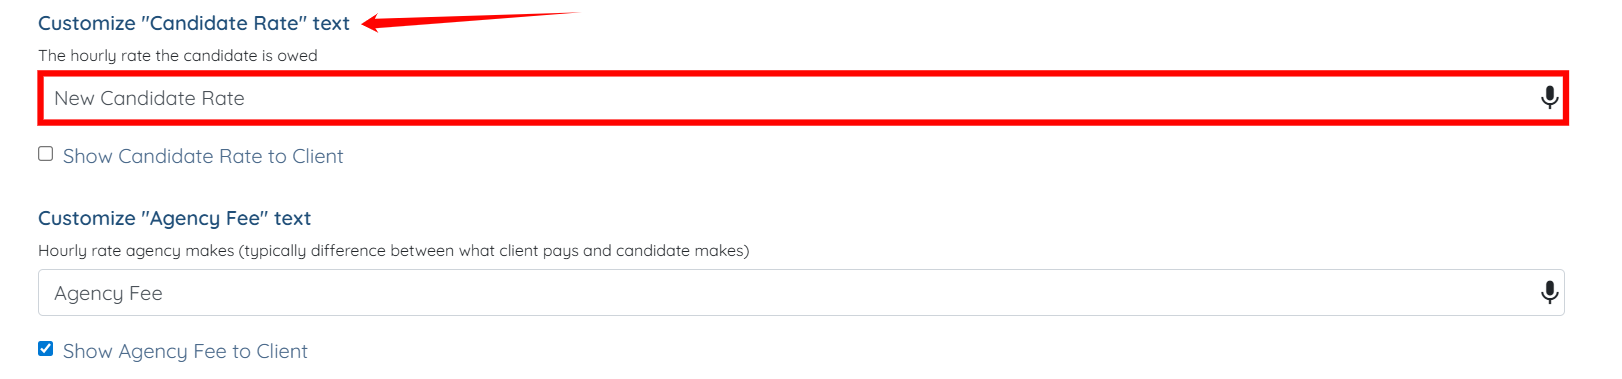
Step 5: Click the Customize Price Labels button to open the Price Labels Settings.

Step 6: You can customize the text of any rate if you want. For example, you can change the text “Candidate Rate” to “New Candidate Rate”.
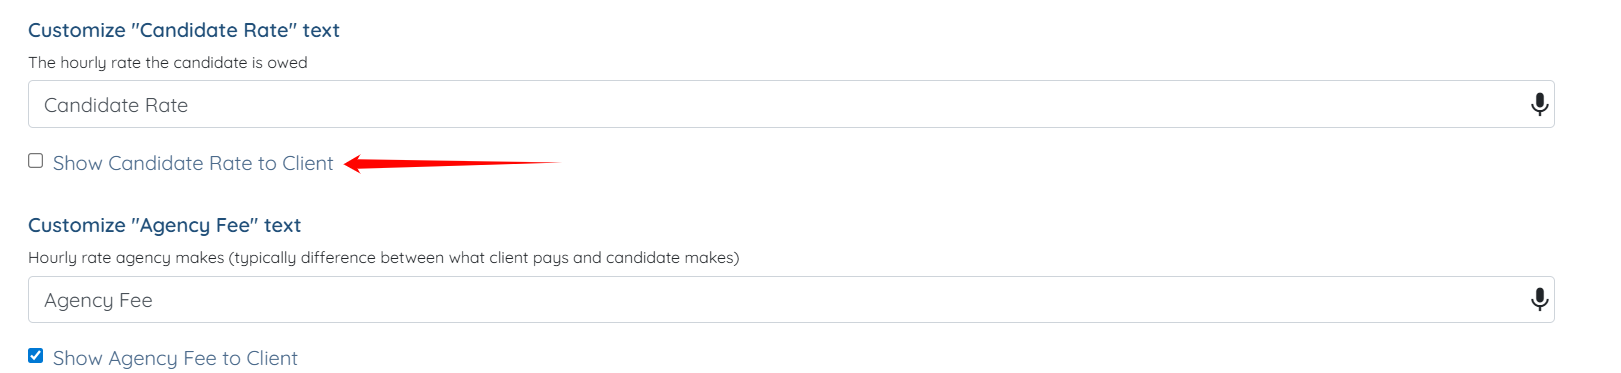
Step 7: To make any rate visible to the client, simply check the checkbox associated with that rate so it becomes visible to the client. For example, to make the Candidate Rate visible to the client, check the Show Candidate Rate to Client checkbox.
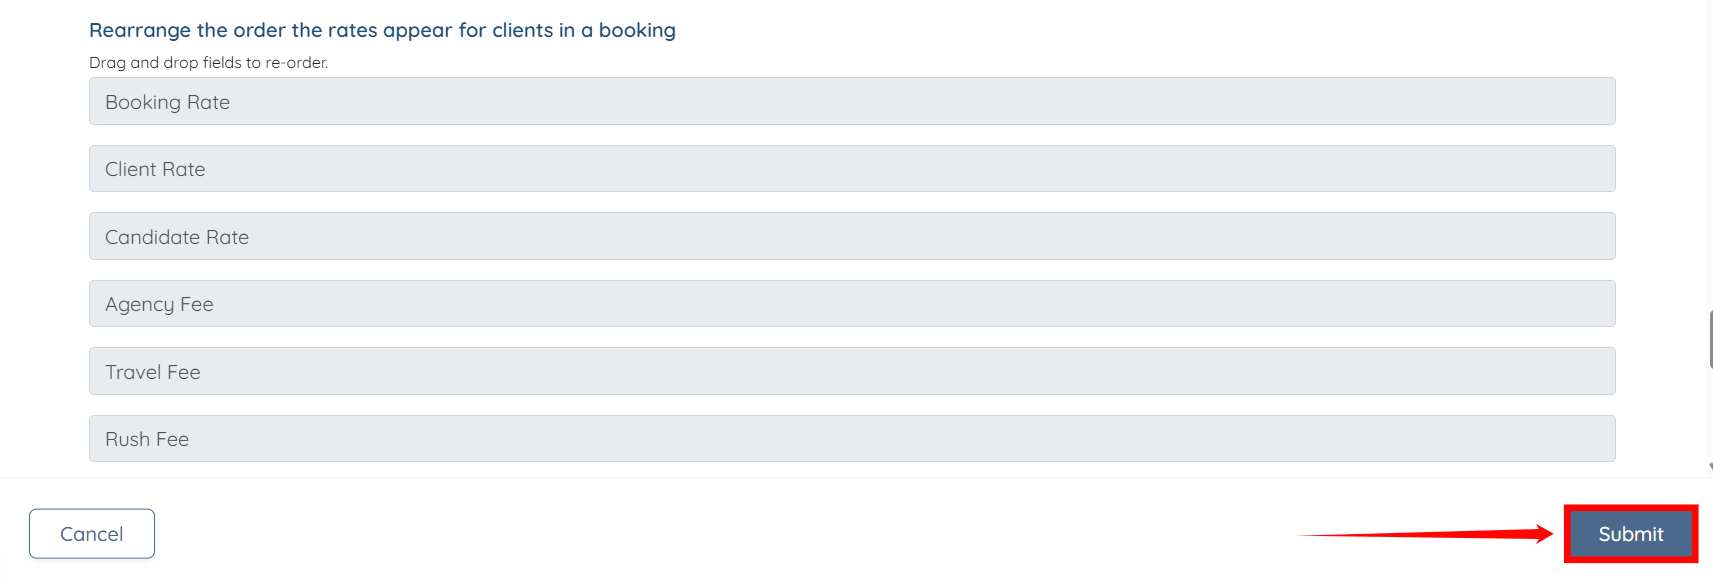
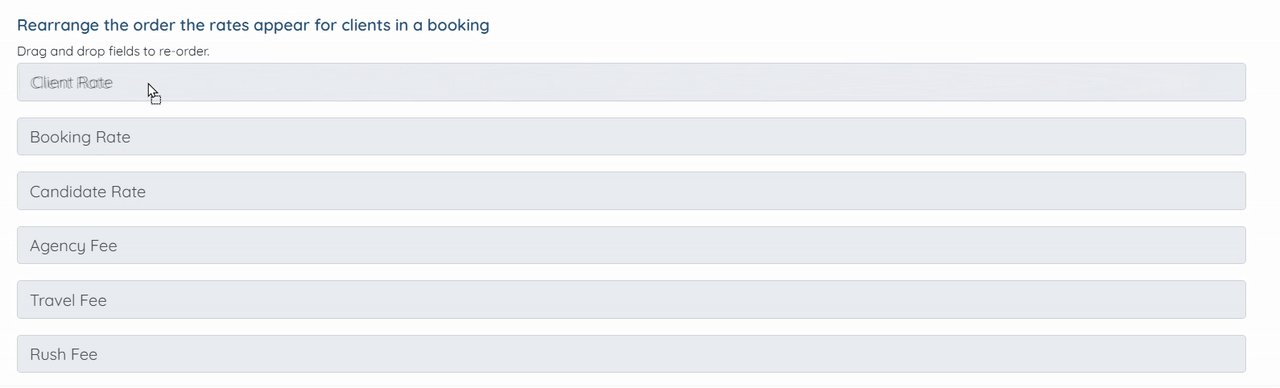
Step 8: You can also rearrange the order in which rates appear for clients within a booking by dragging and dropping the fields as required.
Step 9: After making all the required changes, click on the Submit button to save the changes.