
Let’s get started 🚀
Create your first application form by following the steps below to collect the information you need from candidates.
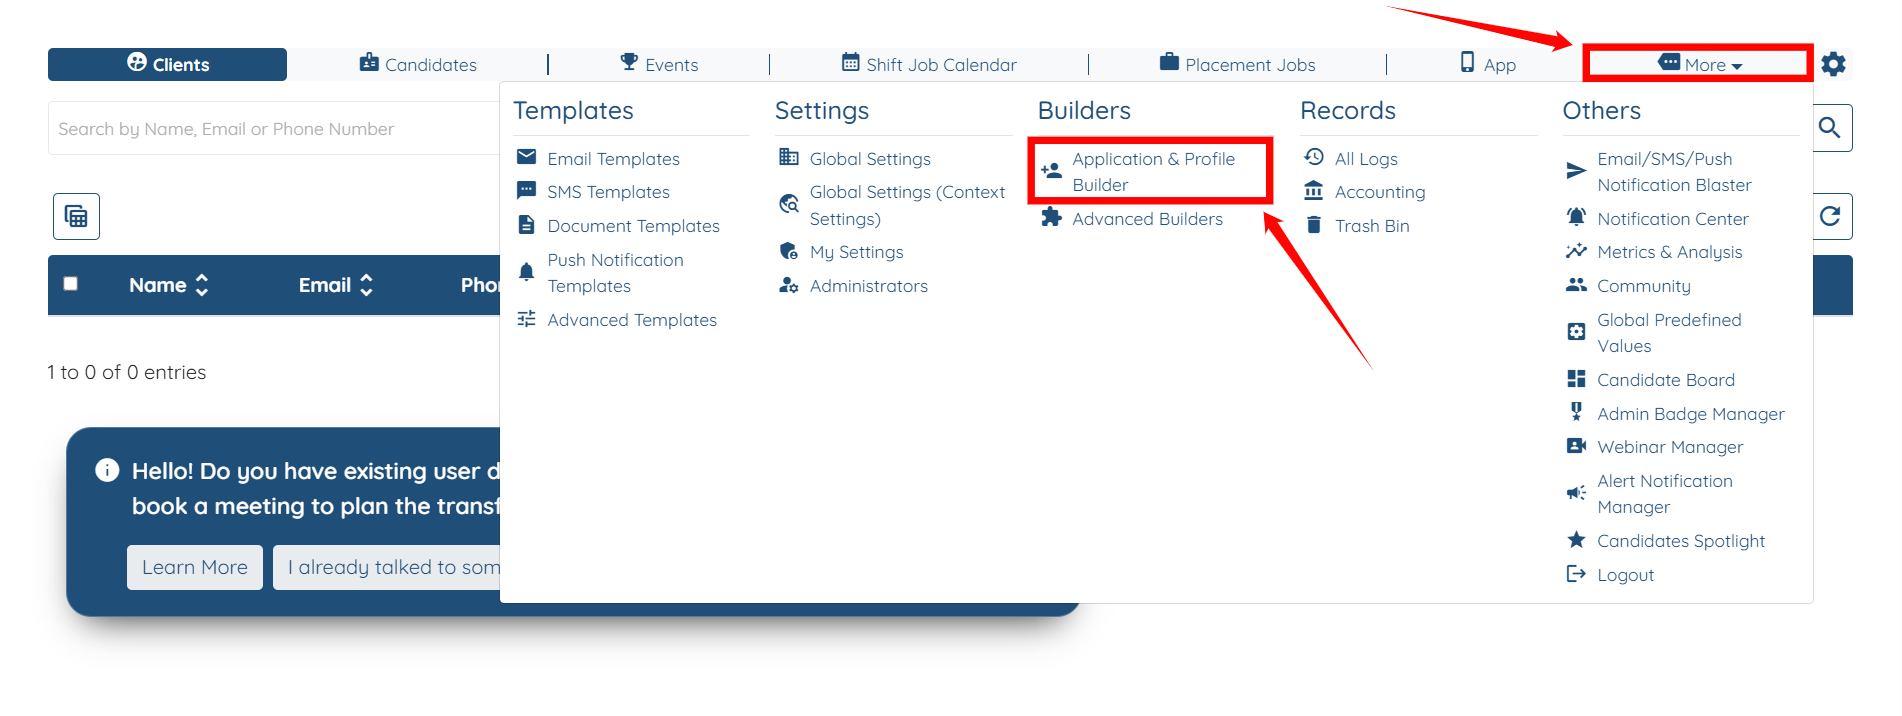
Step 1: Log in to your agent dashboard, then navigate to More > Application & Profile Builder, as shown in the screenshot below.
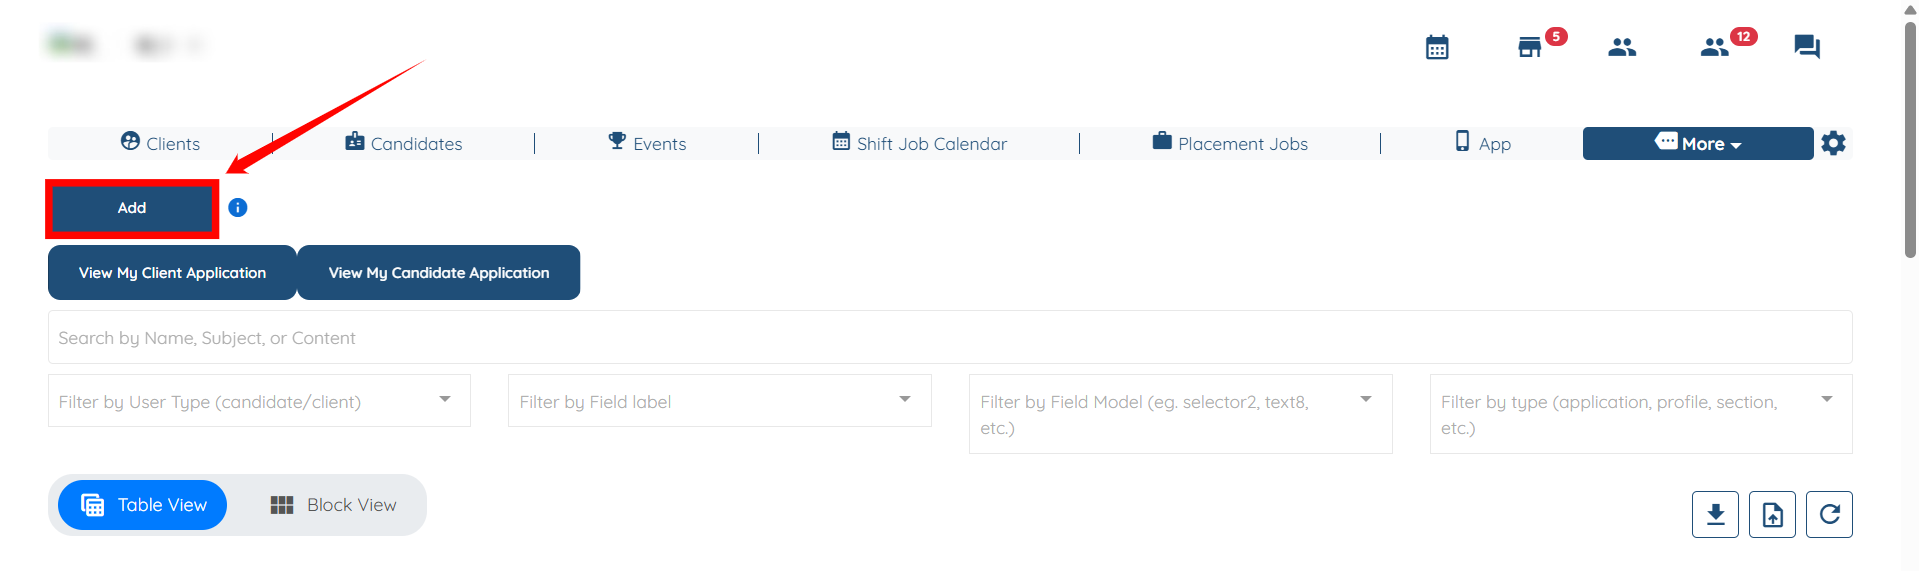
Step 2: Click the Add button located on the left-hand side of the interface.
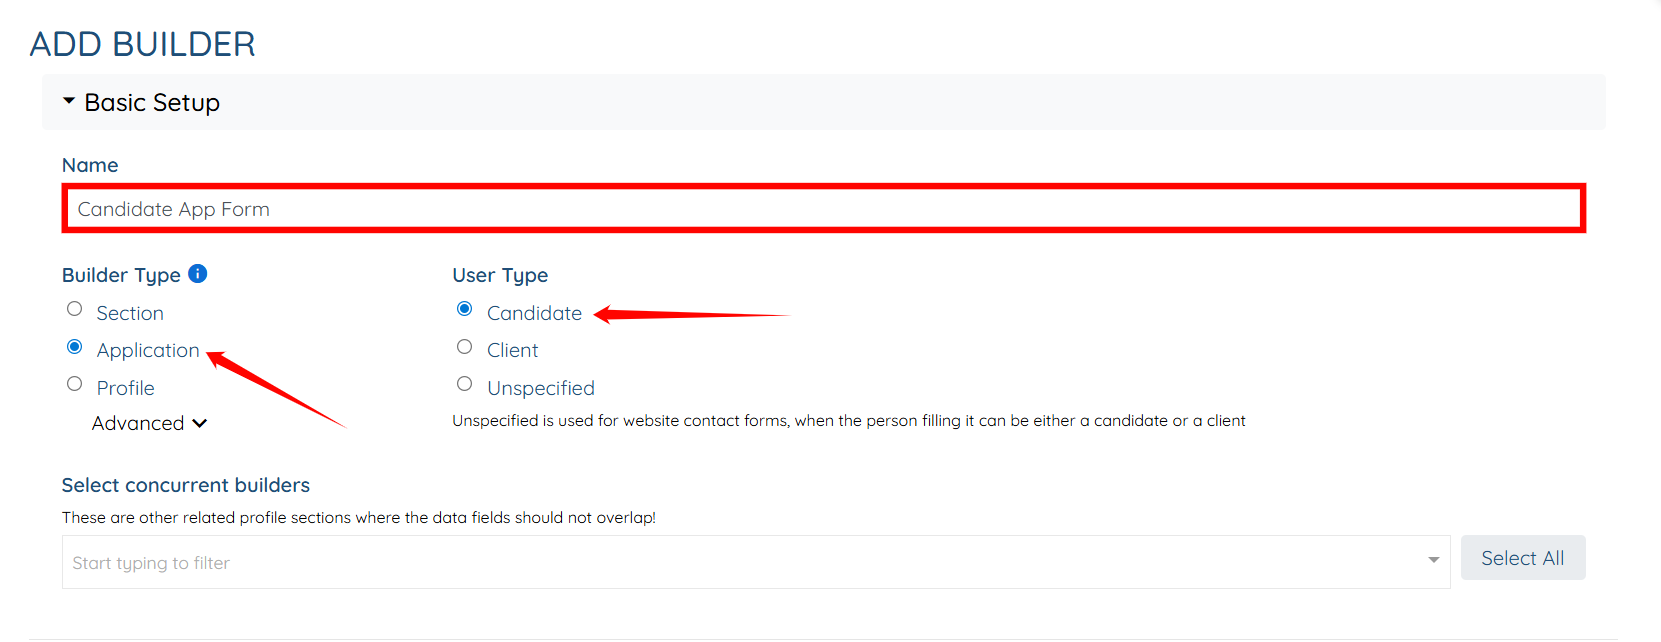
Step 3: Enter the application form’s name in the Name field, select Application as the Builder Type, and then select Candidate as the User Type.
Step 4: You need to create and add a section to structure your application form with questions on a specific topic that the candidate will answer—such as Contact Information and Education.
To learn how to create a new section and add it to your application form, follow the steps in Adding a new section to the profile and/or application article.
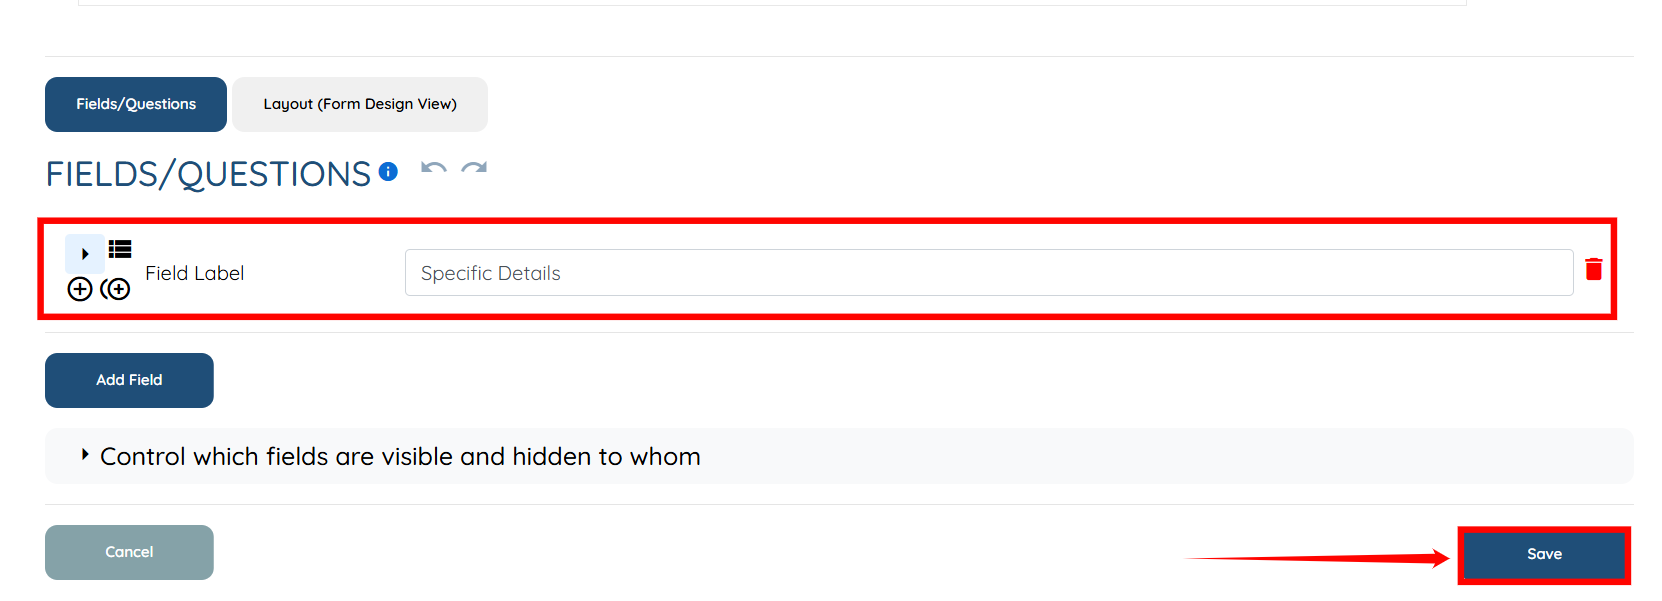
Step 5: After you add the required section(s), click the Save button to proceed. The Application form will be created successfully.
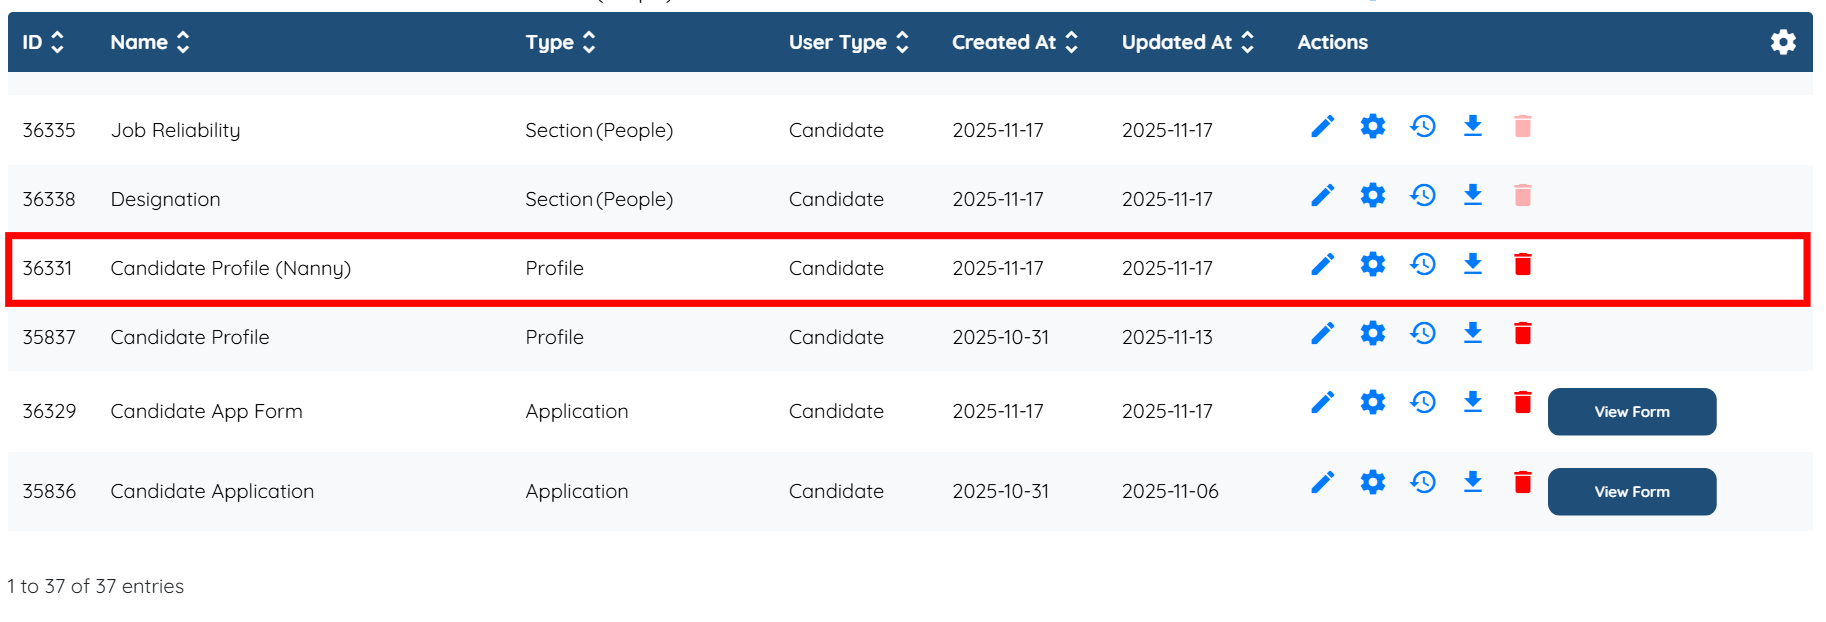
Step 6: Click the View Form button corresponding to the application form (you just created) to open it.
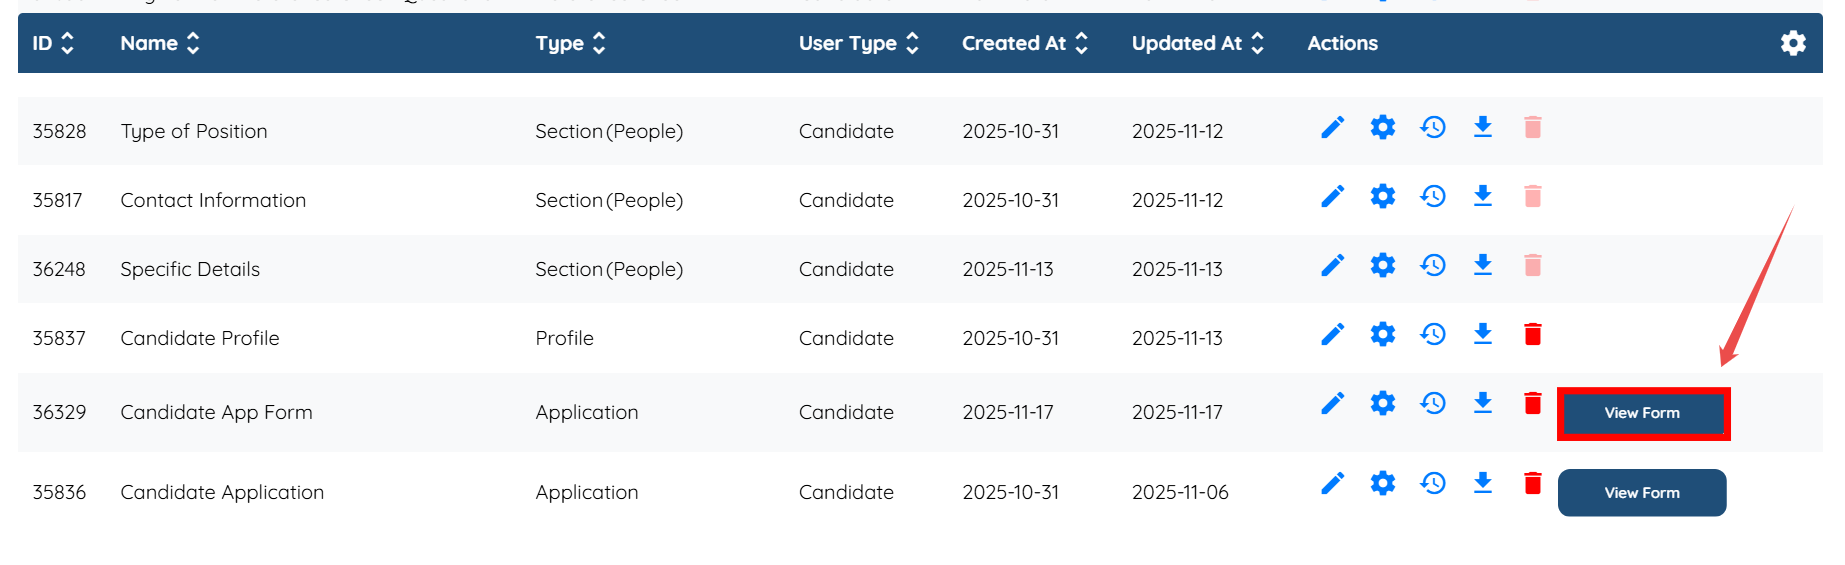
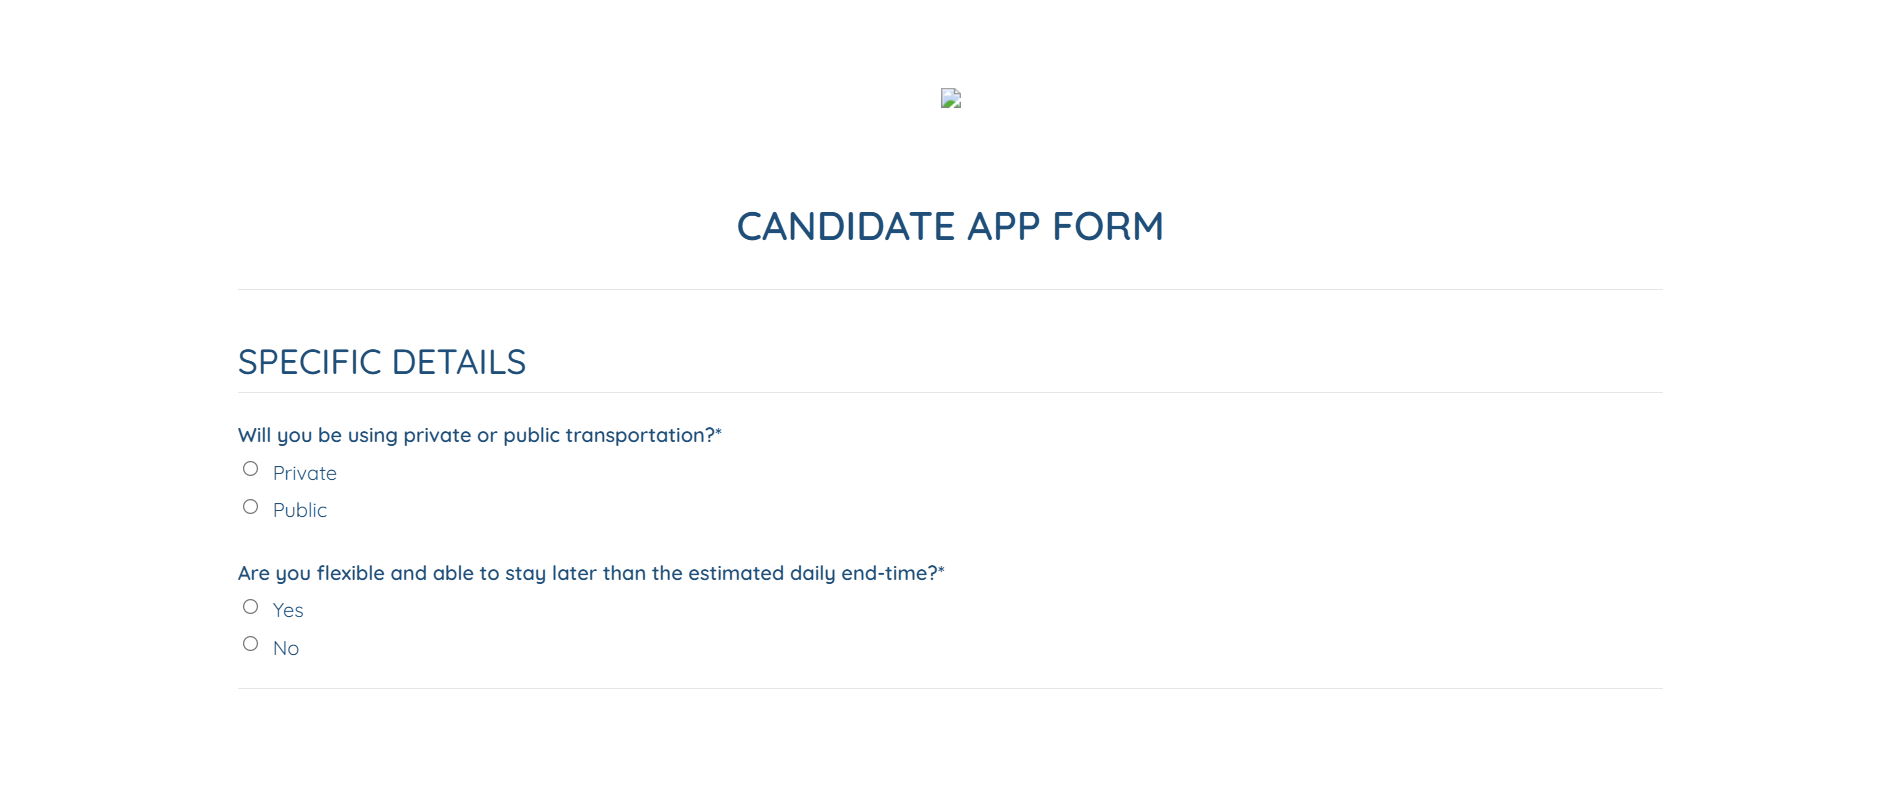
You can review how it will appear on the candidate’s side, and if needed, you can add more sections by repeating Step 4.
Create a profile to define what information candidates will complete after they register. Profiles work alongside application forms—you can keep the application simple by collecting only the essentials, and then let users fill in additional details later within their profile.
When creating a profile, you’ll select which application form it corresponds to and then add the relevant sections that make up the full profile layout (such as Contact Information or Professional Experience).
This allows you to control what appears in the profile versus what appears in the initial application, giving you flexibility in how much information you collect at each stage.
Step 1: Log in to your agent dashboard, then navigate to More > Application & Profile Builder, as shown in the screenshot below.

Step 2: Click the Add button located on the left-hand side of the interface.

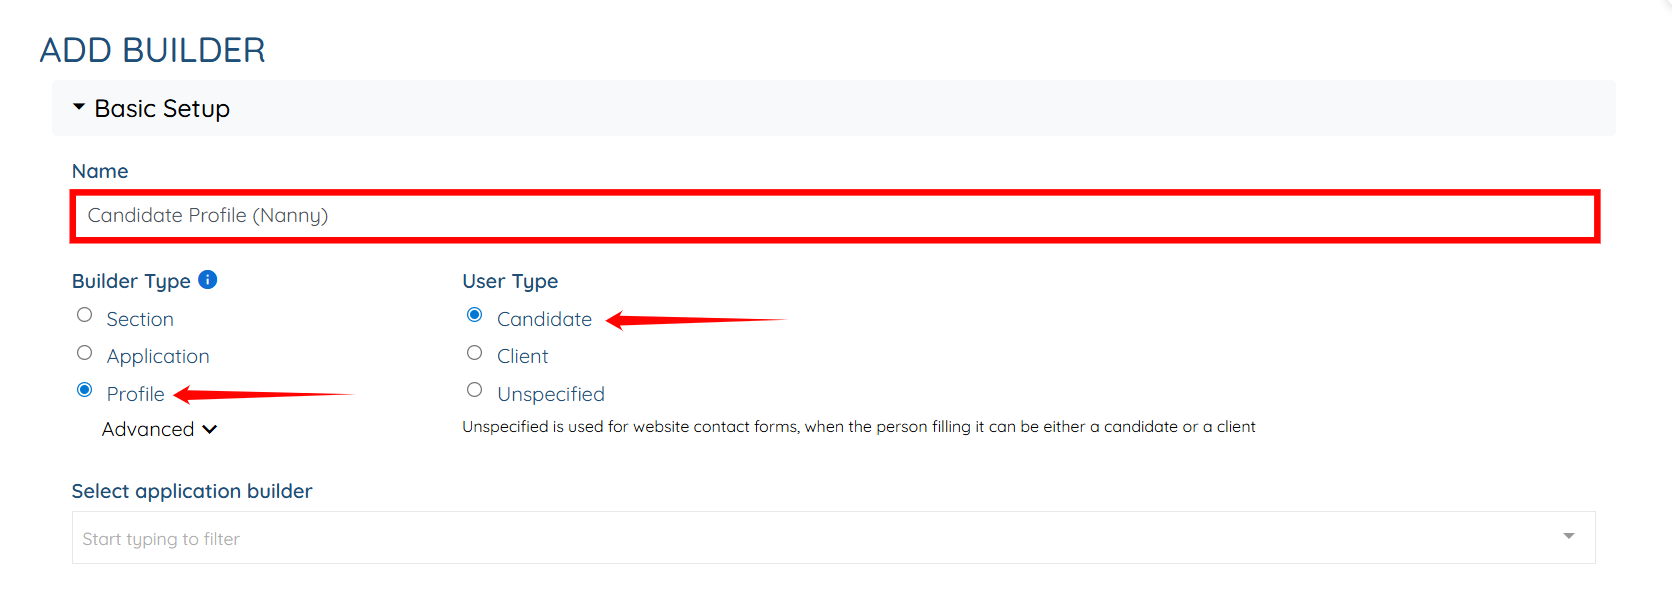
Step 3: Enter the candidate’s profile name in the Name field, select Profile as the Builder Type, and then select Candidate as the User Type.
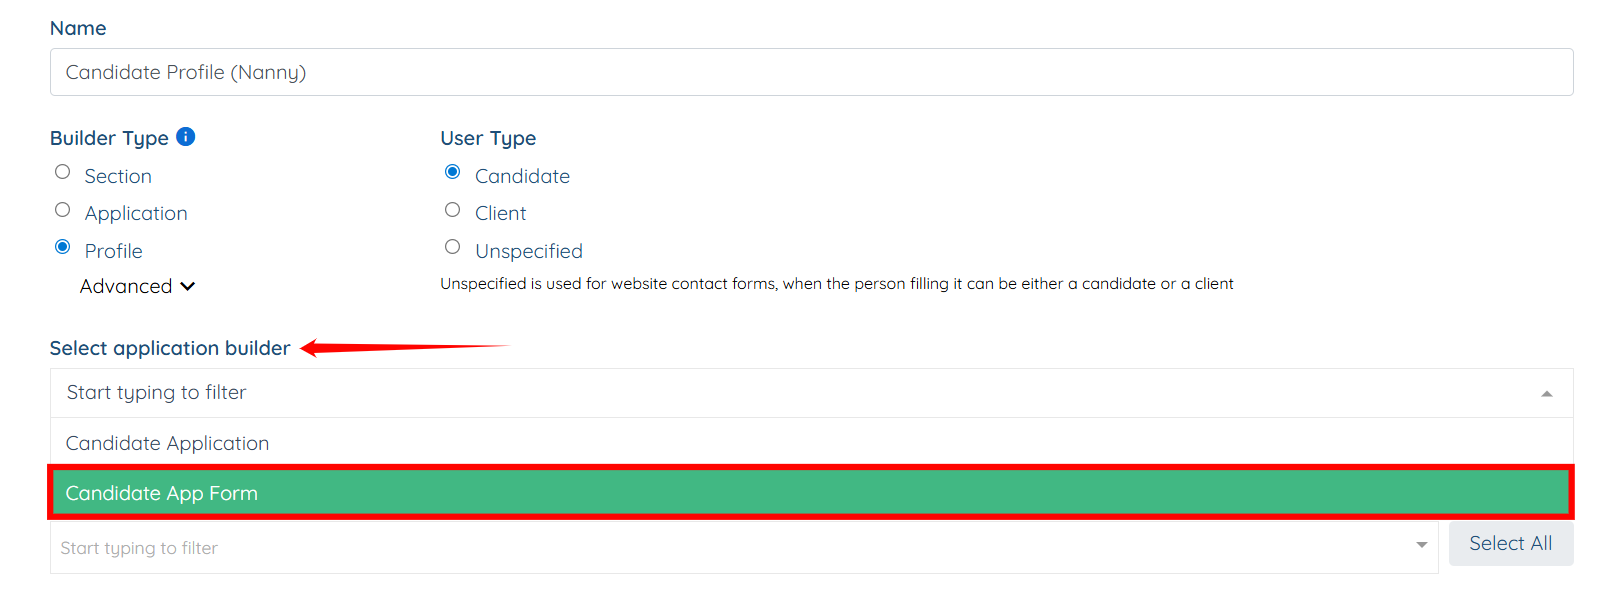
Step 4: Select the application form you created from the “Select application builder” dropdown.
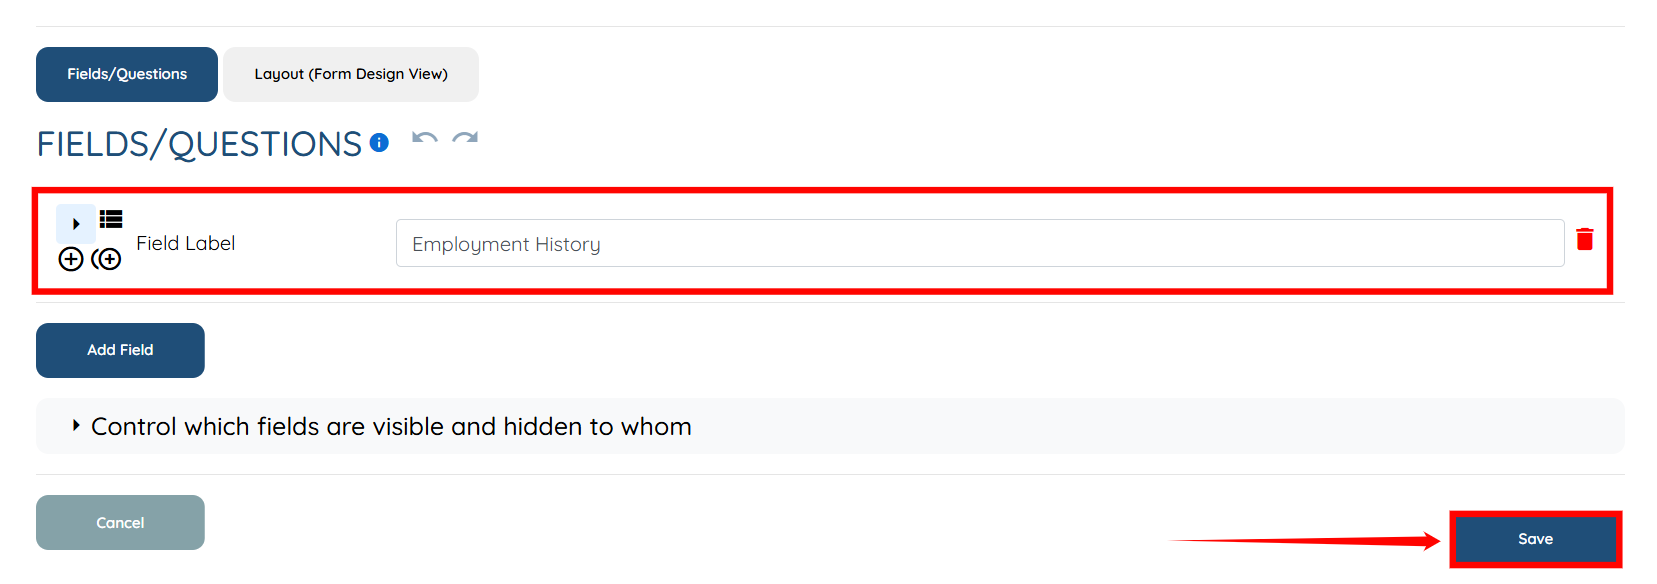
Step 5: You need to create and add section(s) that will make up the profile—such as Employment History. These section(s) determine what information the candidate will fill out inside their profile after registering.
To learn how to create a new section and add it to the candidate profile, follow the steps in Adding a new section to the profile and/or application article.
Step 6: After you add the required section(s), click the Save button to proceed.
The Candidate Profile will be created successfully.
If this video doesn't answer your questions you can always contact us by clicking here
