Let’s get started 🚀
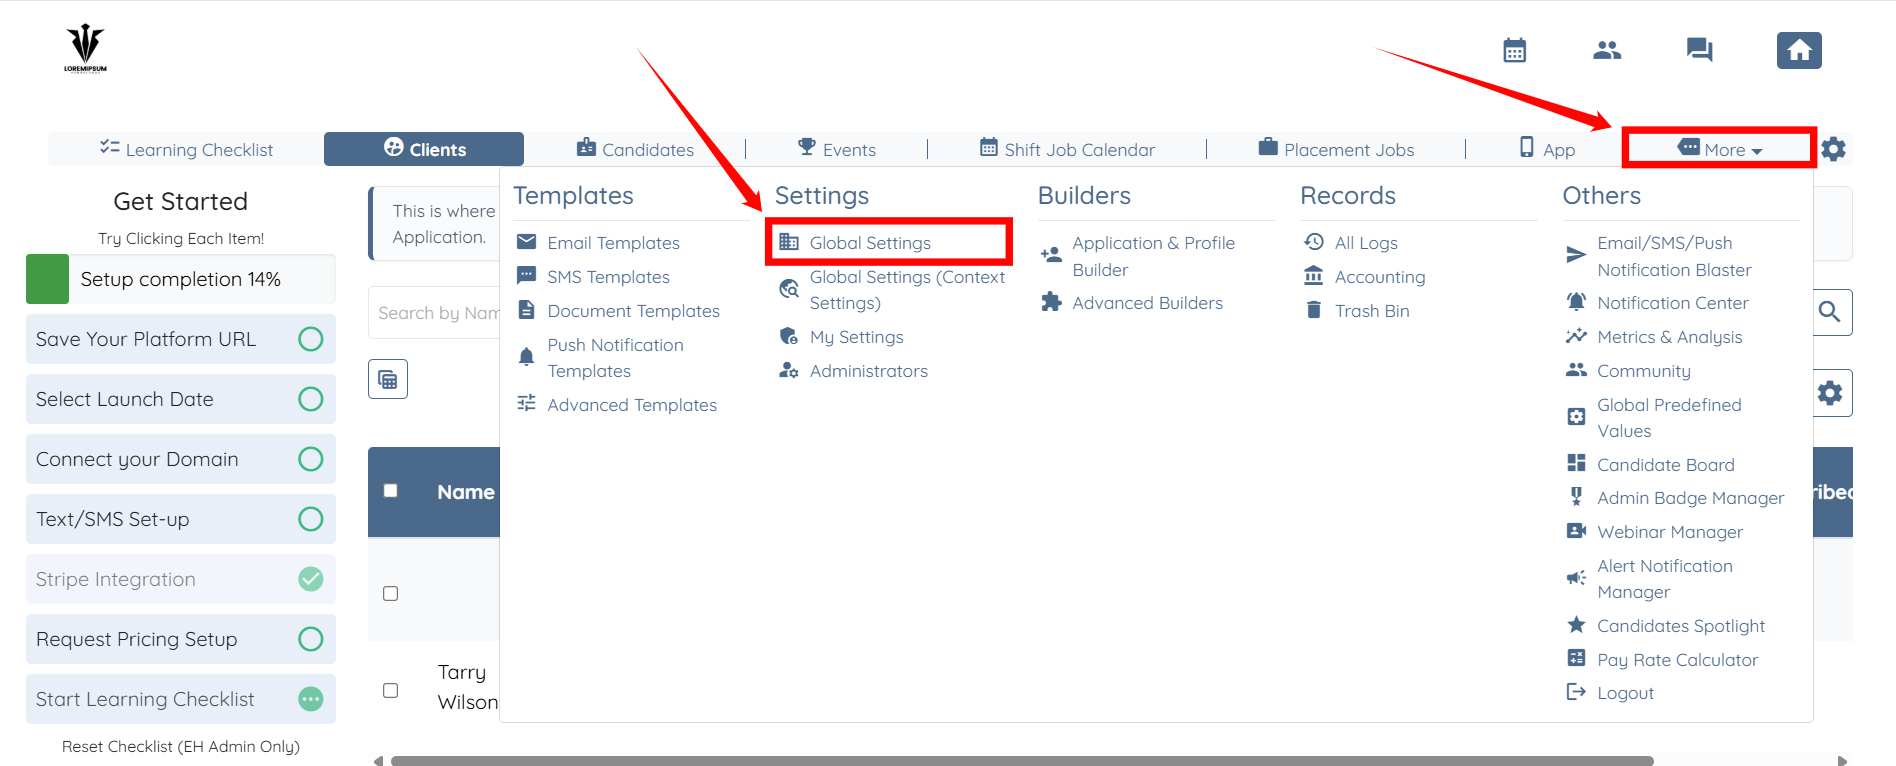
Step 1: Log in to your agent dashboard and click More > Global Settings, as shown in the screenshot below.
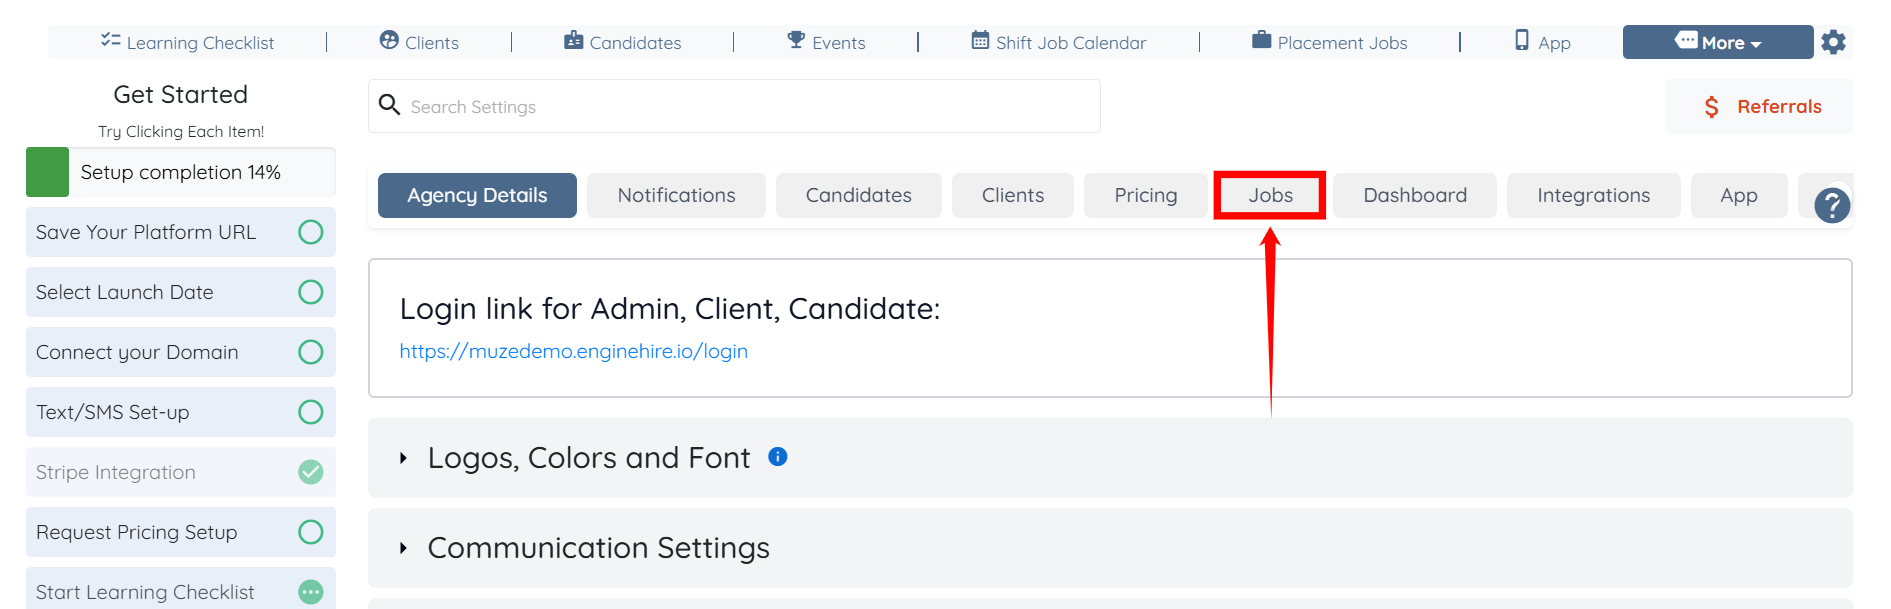
Step 2: Click the Jobs tab from the list of available tabs.
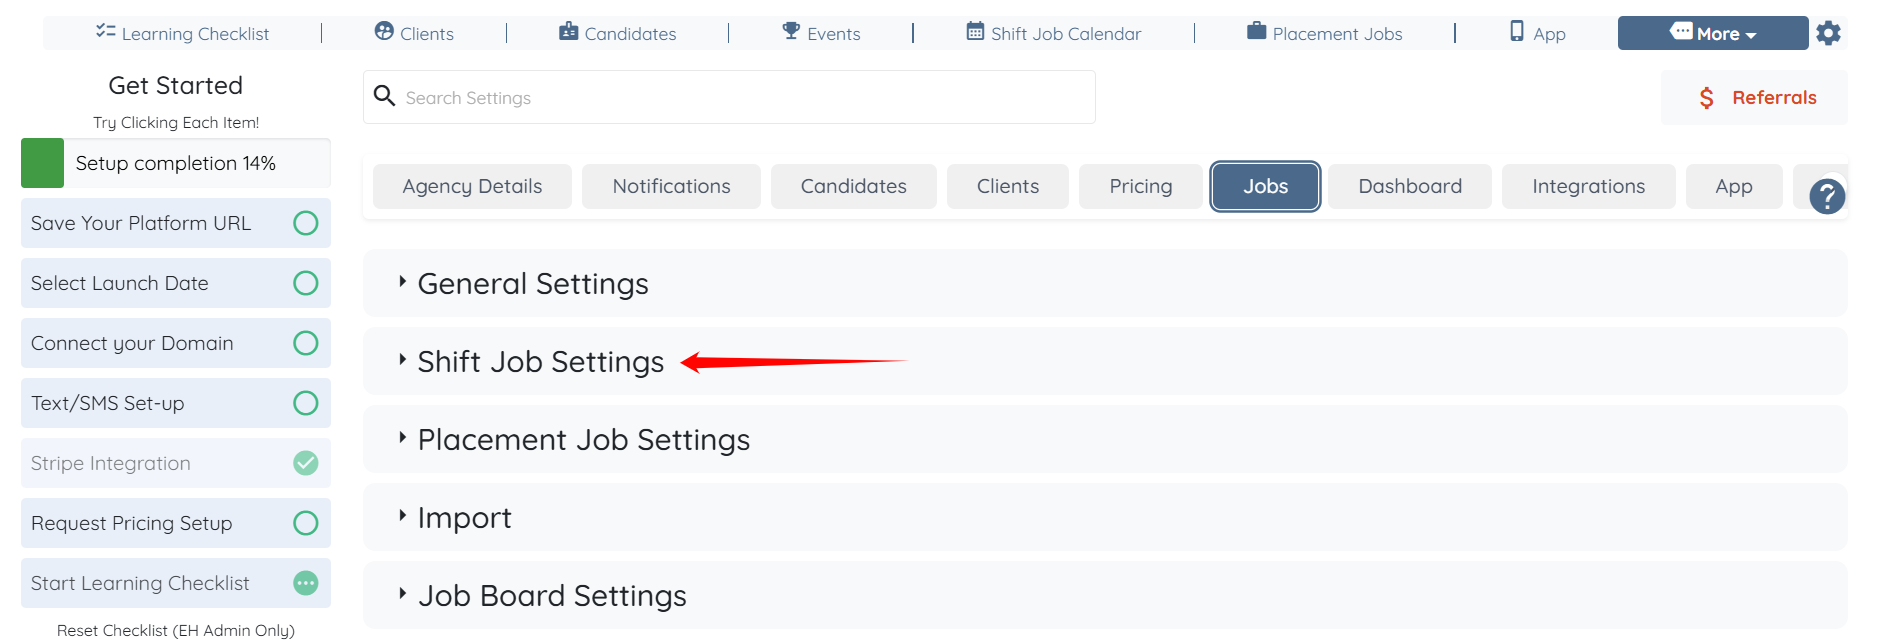
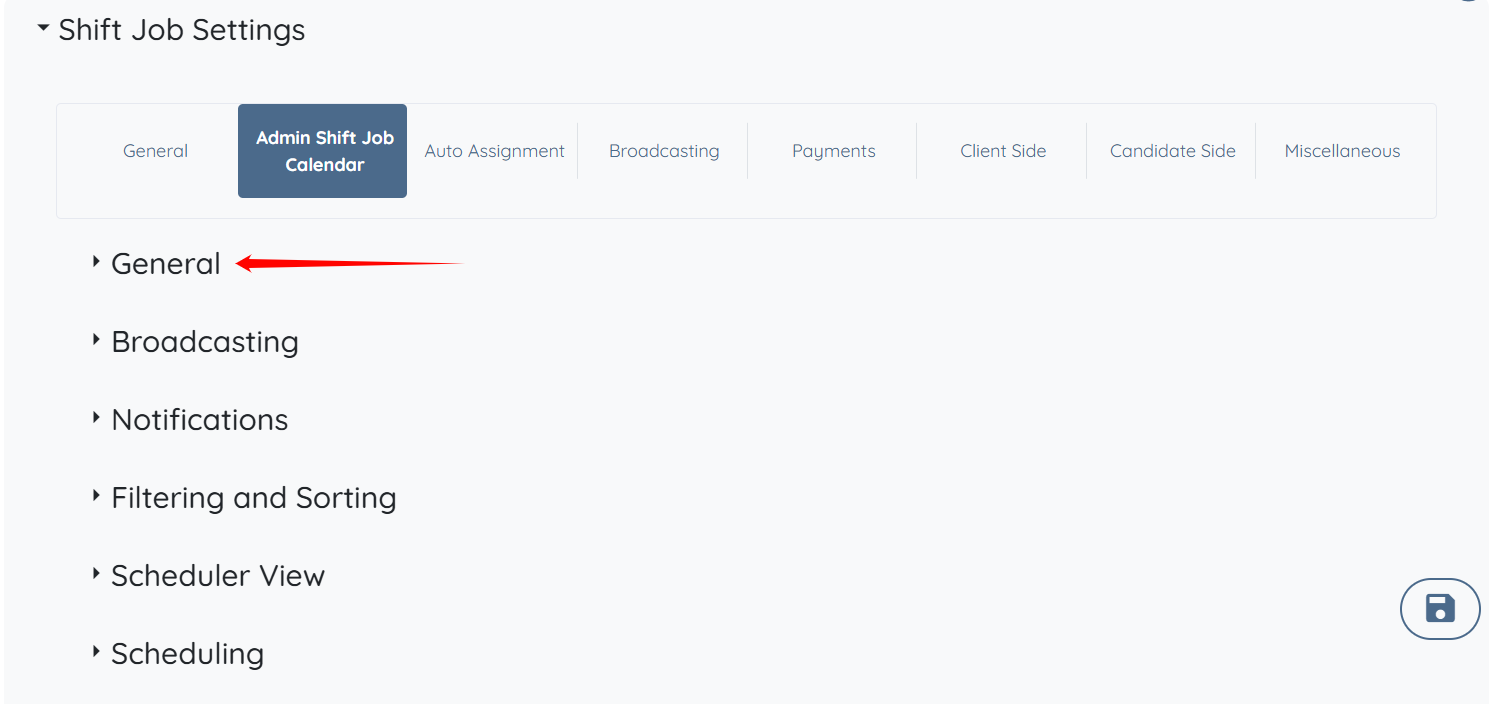
Step 3: Click the Shift Job Settings option to expand its details.
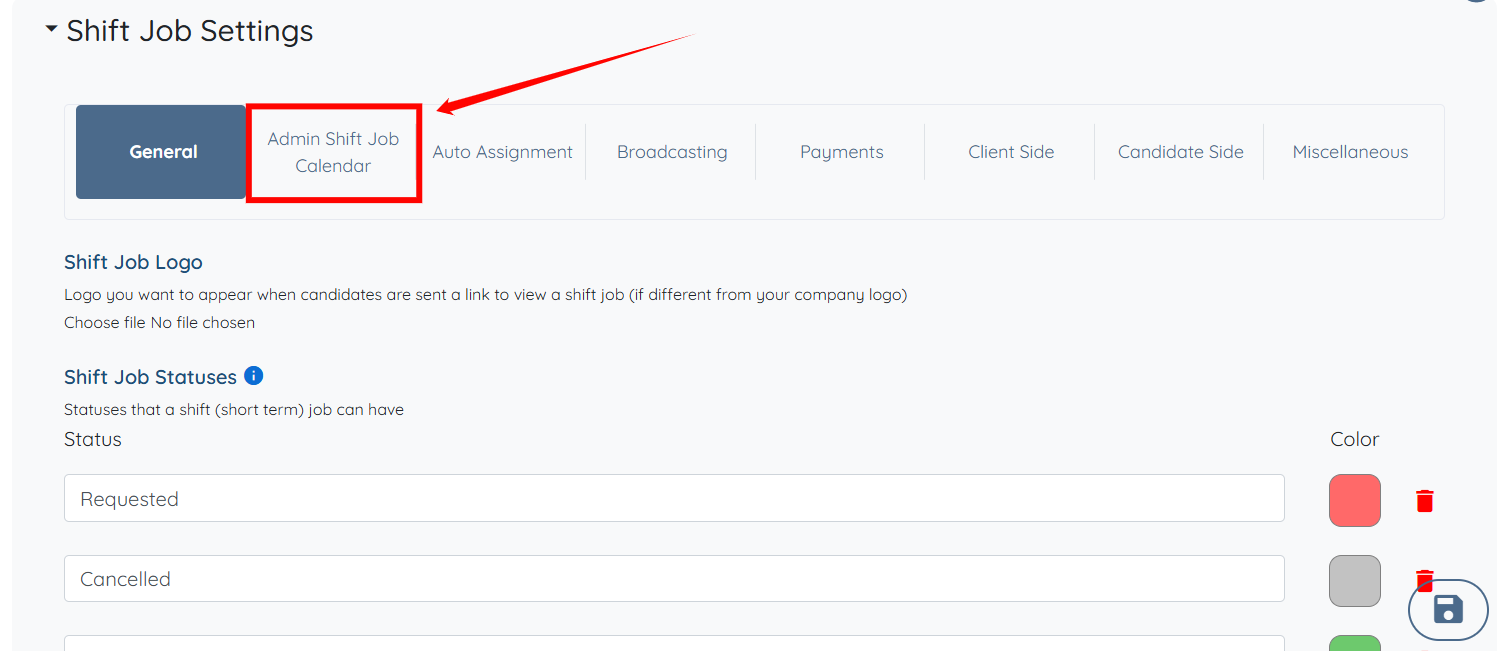
Step 4: Click the Admin Shift Job Calendar option from the list of available options.
Step 5: Click the General option to expand its details.
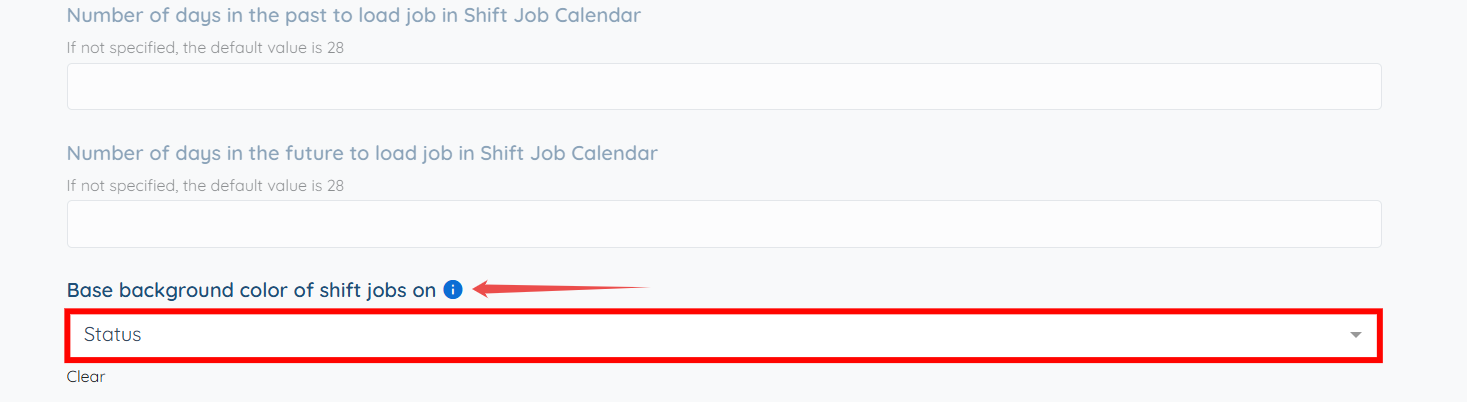
Step 6: Scroll down and locate the Base background color of shift jobs on option, then click the box beneath it to activate the dropdown.
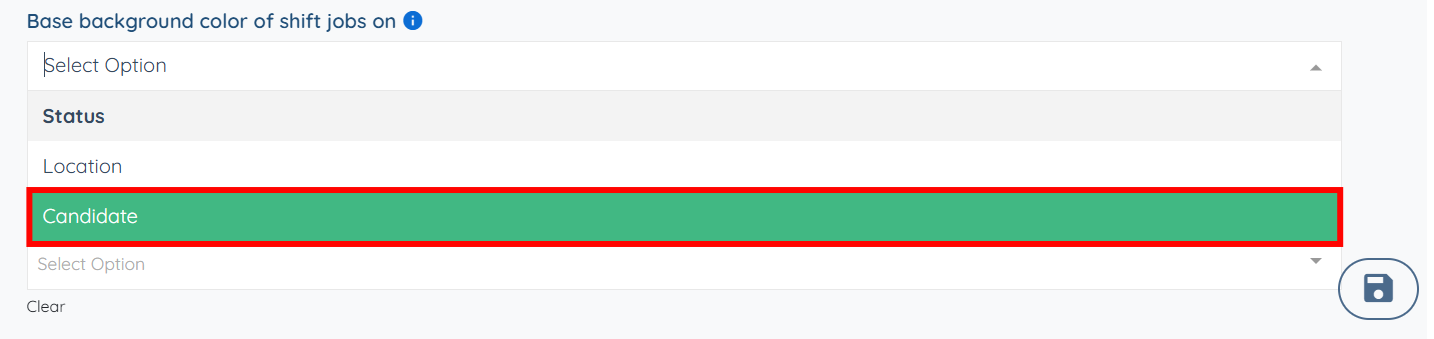
Step 7: From the dropdown list, select the Candidate option.
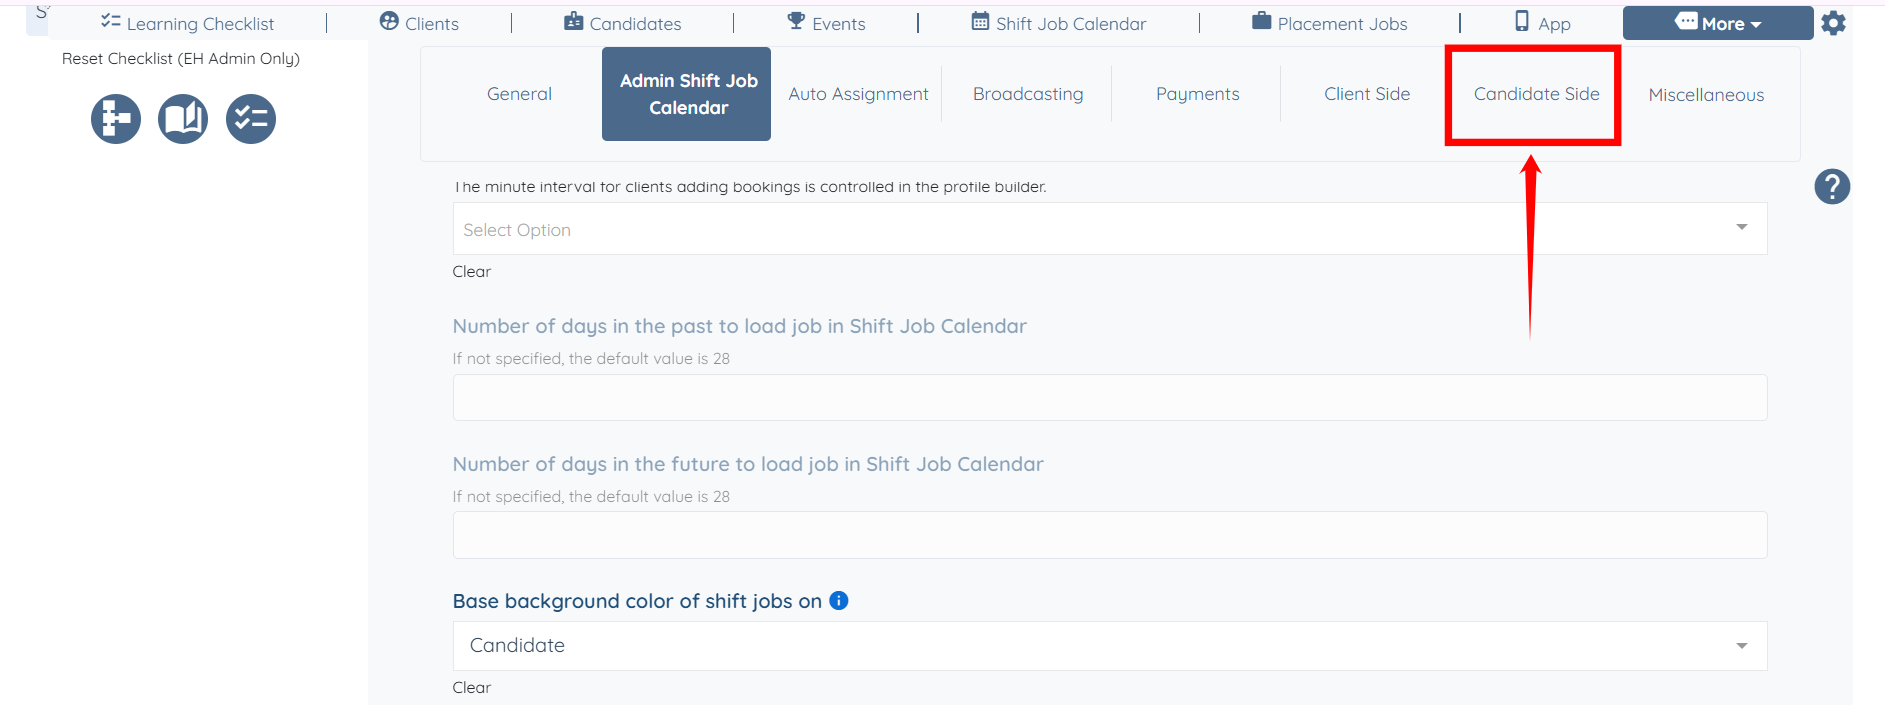
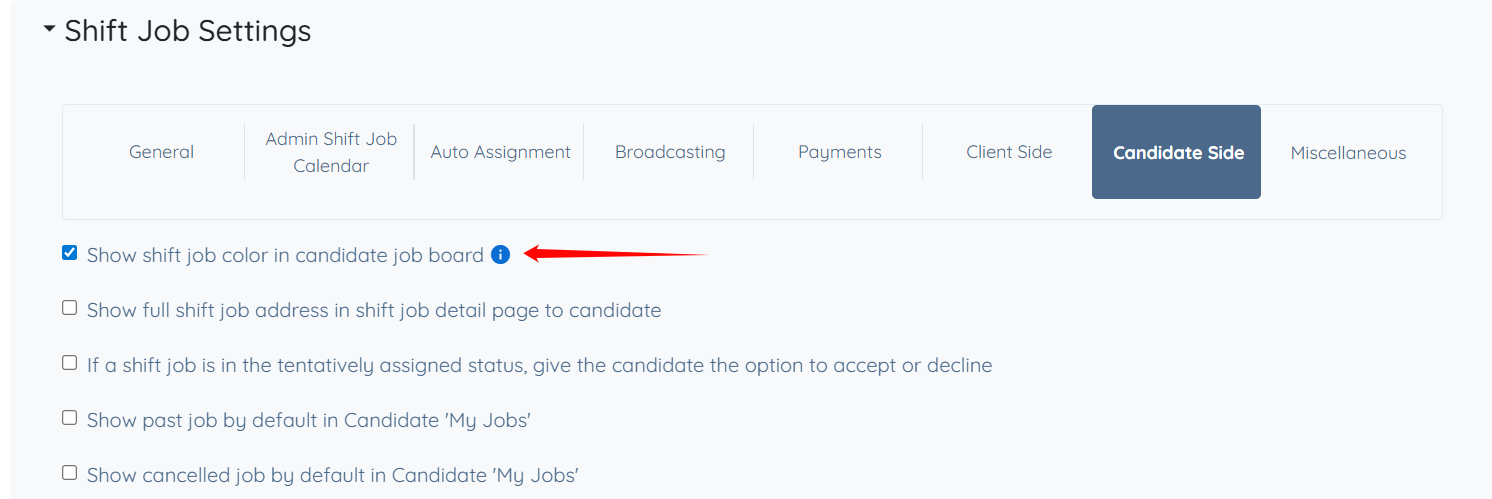
Step 8: Click the Candidate Side option from the available options list.
Step 9: Check the Show shift job color in candidate job board checkbox.
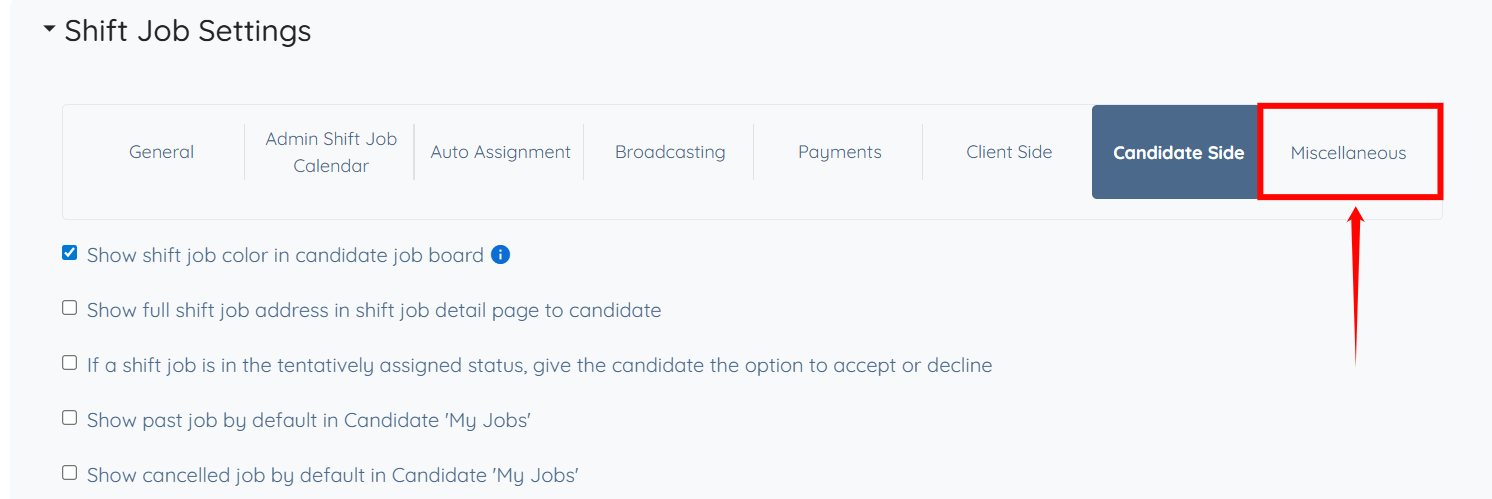
Step 10: Click the Miscellaneous option from the available options list.
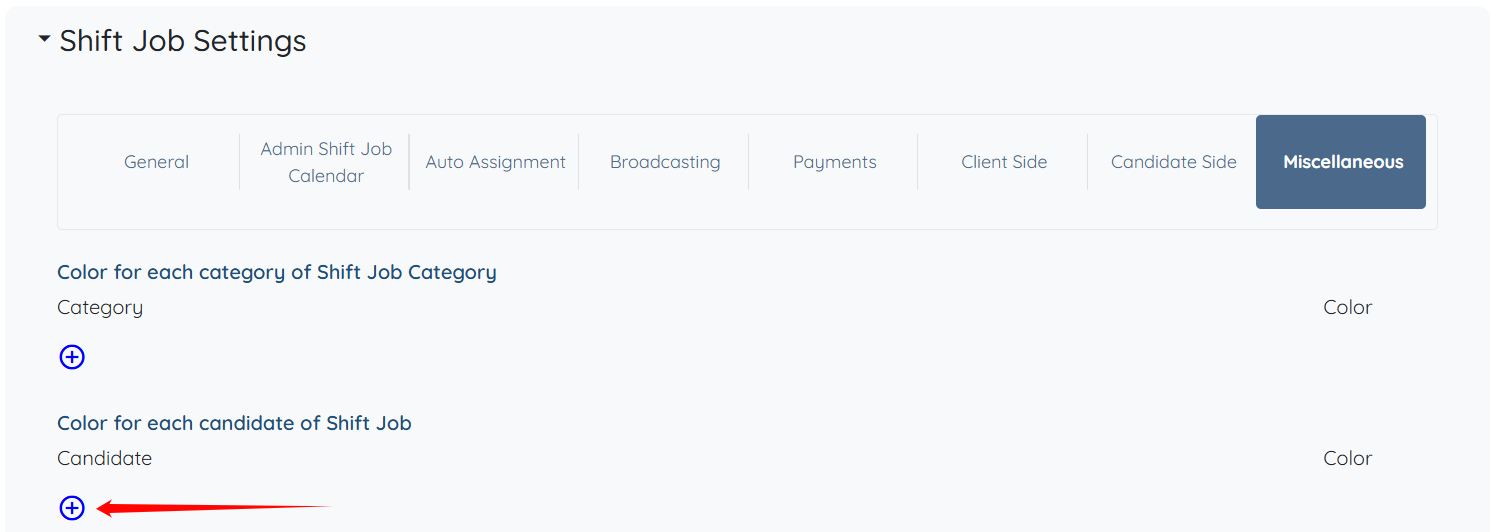
Step 11: Click the + icon to start adding a color code for the candidate.
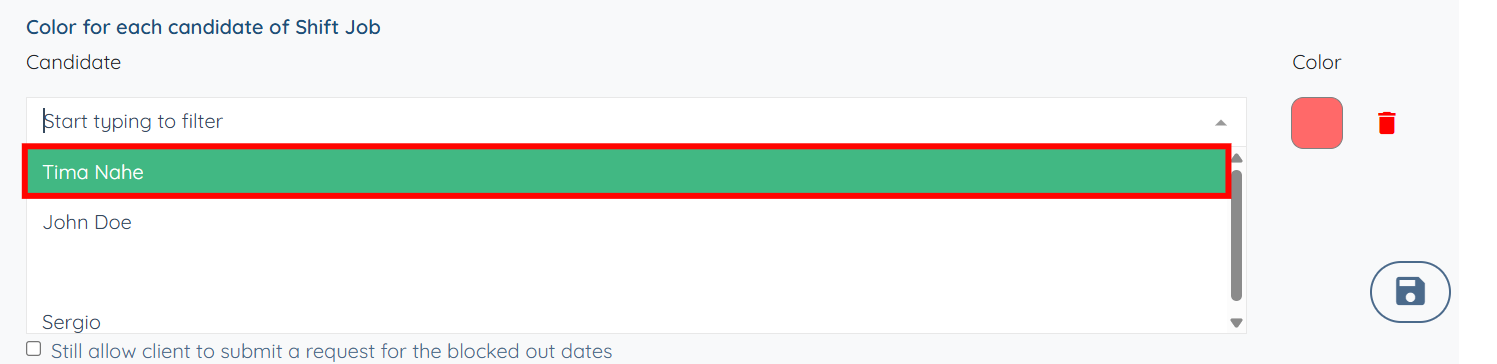
Step 12: Select the candidate from the dropdown for whom you want to assign the color code.
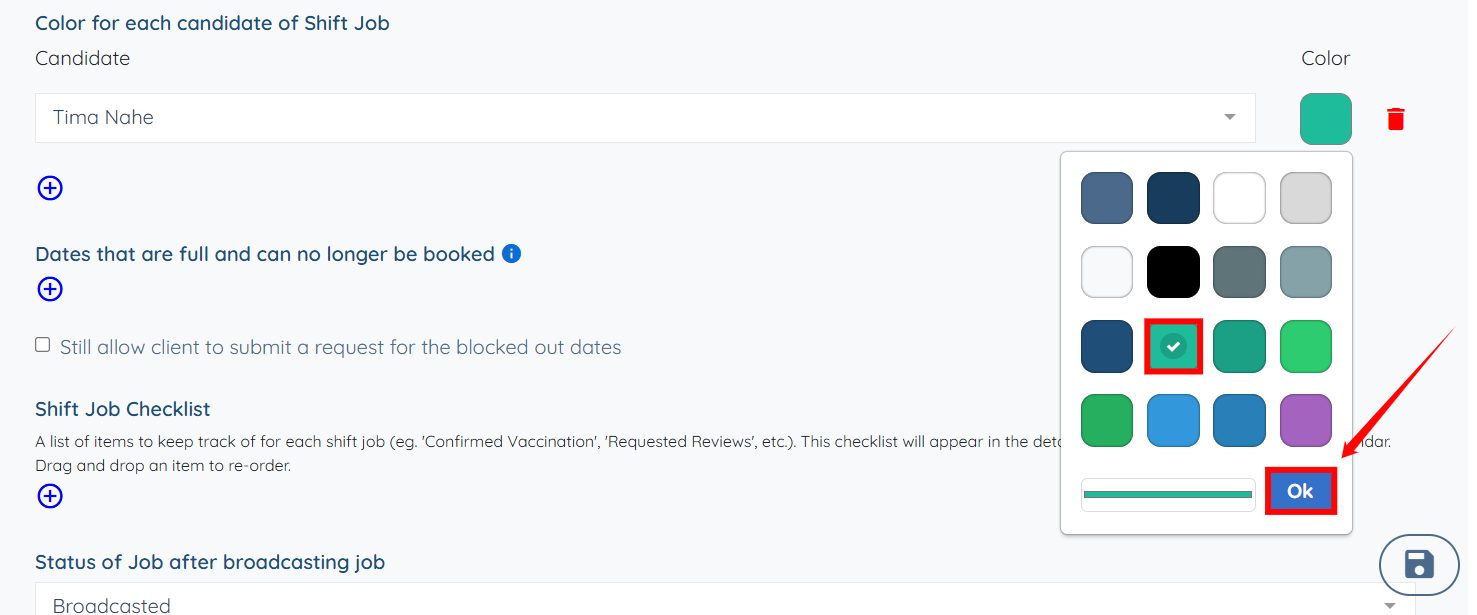
Step 13: Click the color tile to choose a custom color for the selected candidate.

Step 14: Select the required color from the available options as needed. After that, click the OK button.
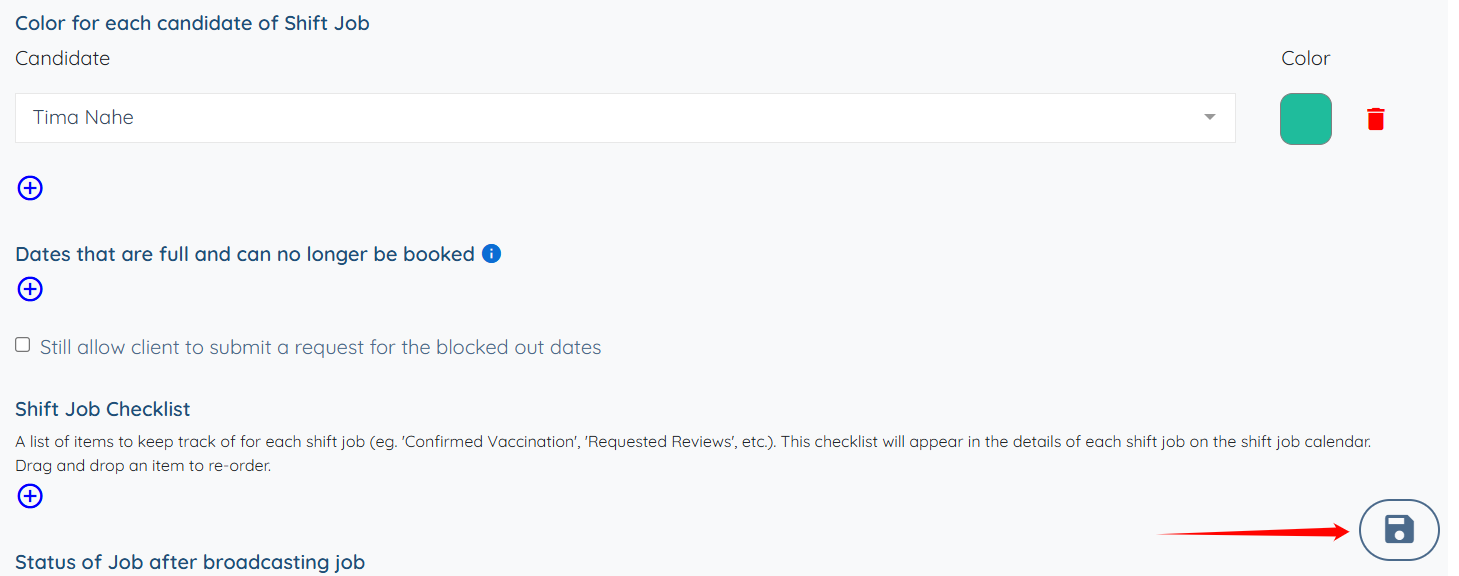
Step 15: Click the Save icon to confirm the changes.
If this content doesn't answer your questions you can always contact us by clicking here
