
Let’s get started 🚀
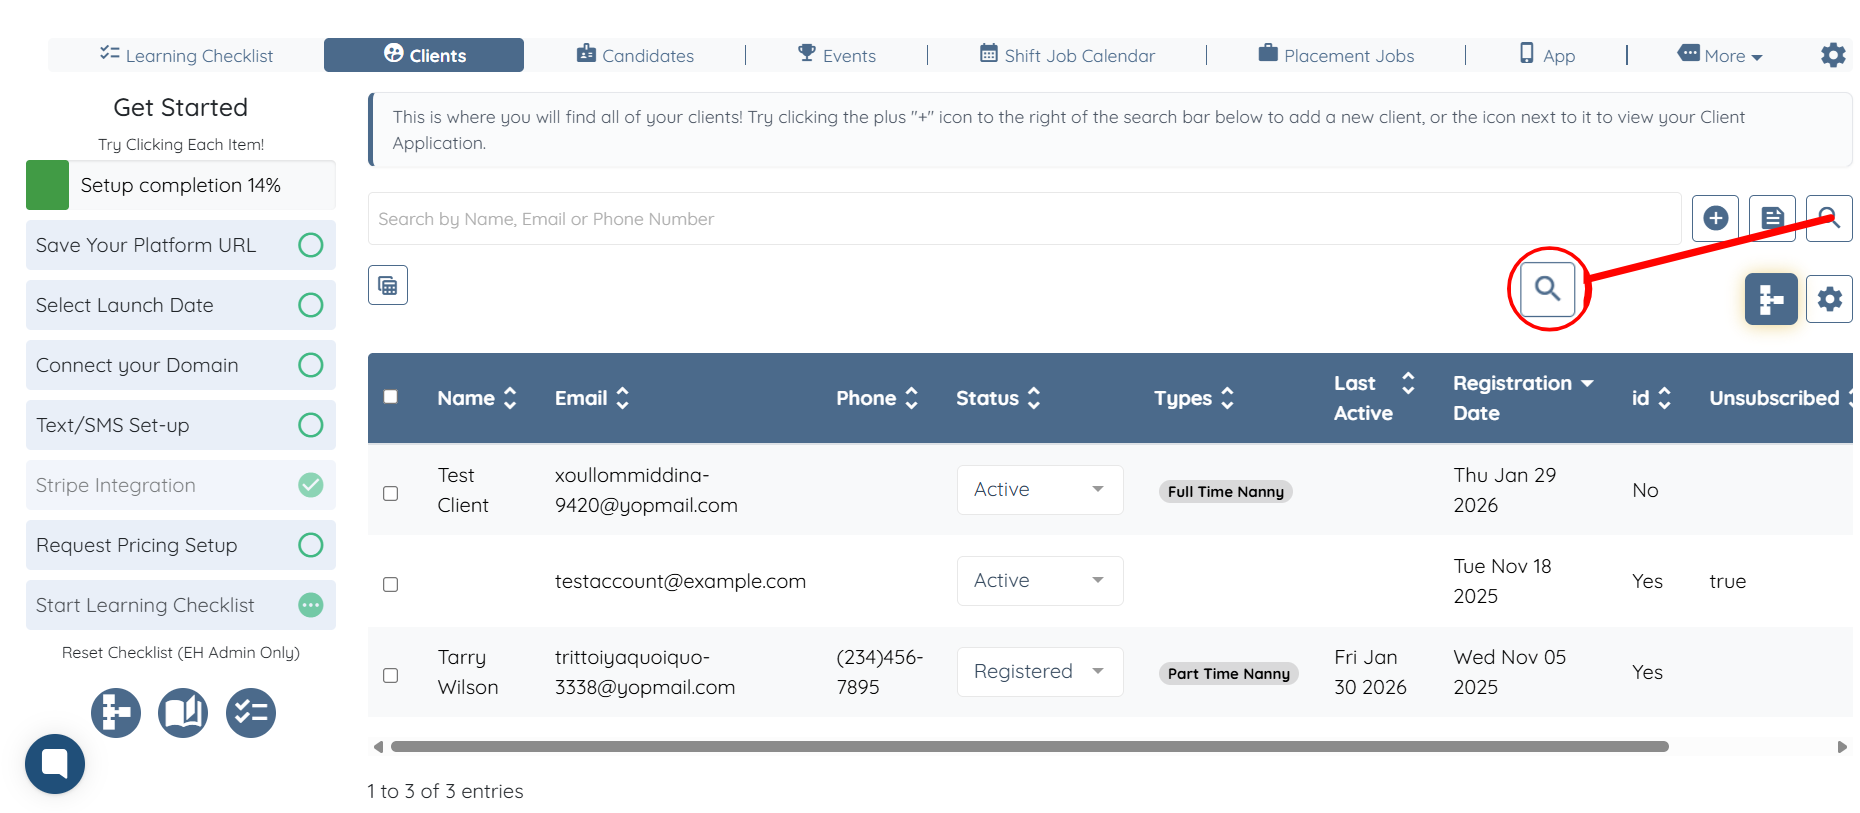
Step 1: Log in to your agent dashboard and click the Search and Filter Tools icon, as shown in the screenshot below.
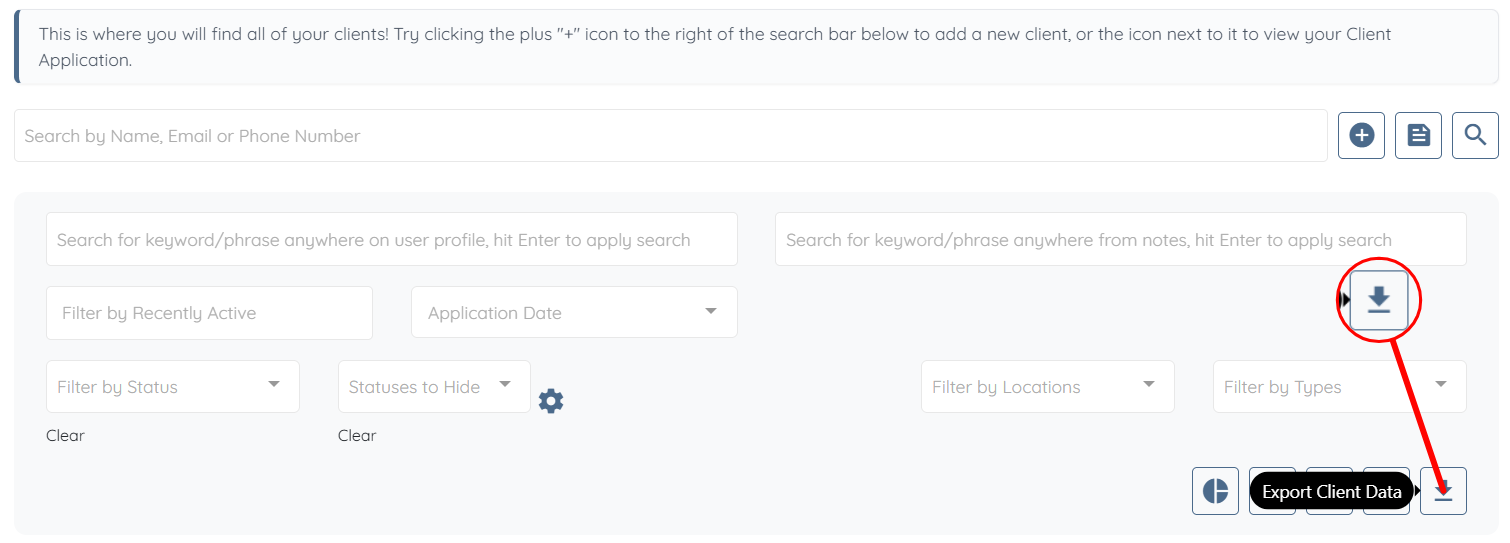
Step 2: Click the Export Client Data button.
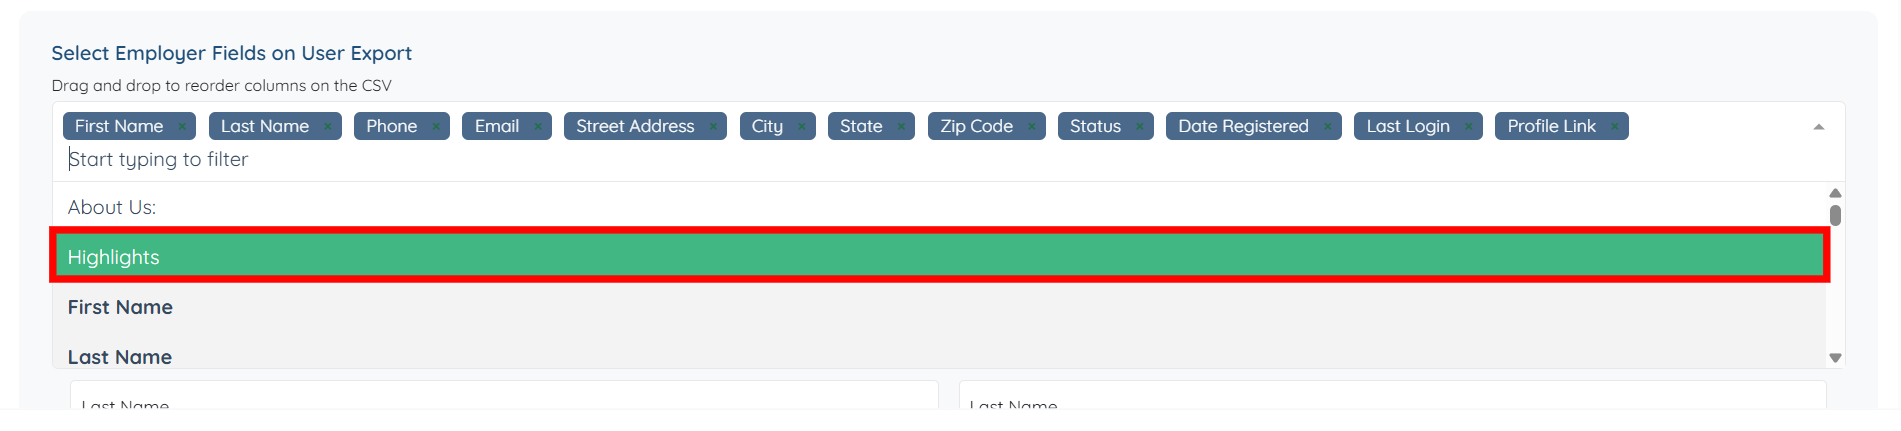
Step 3: Click the box to activate the dropdown list.
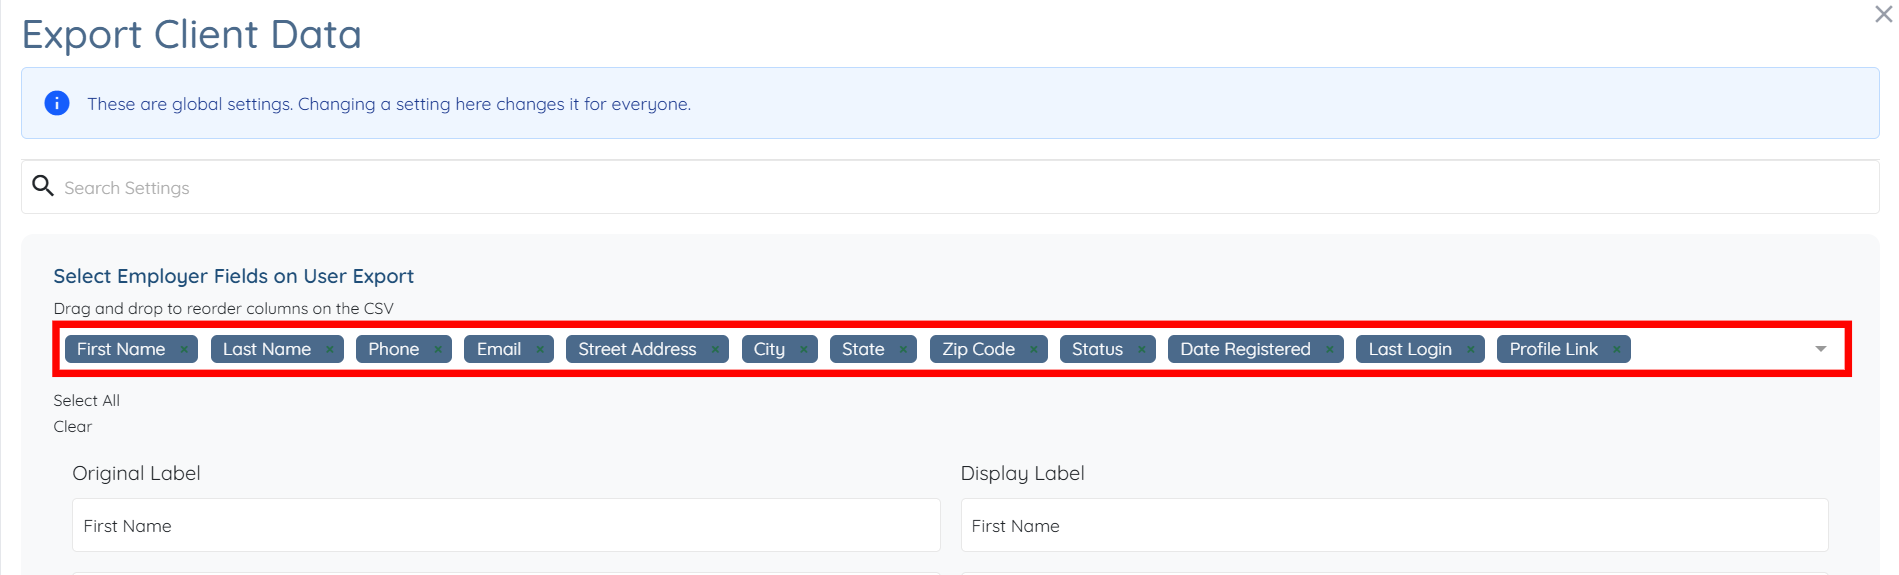
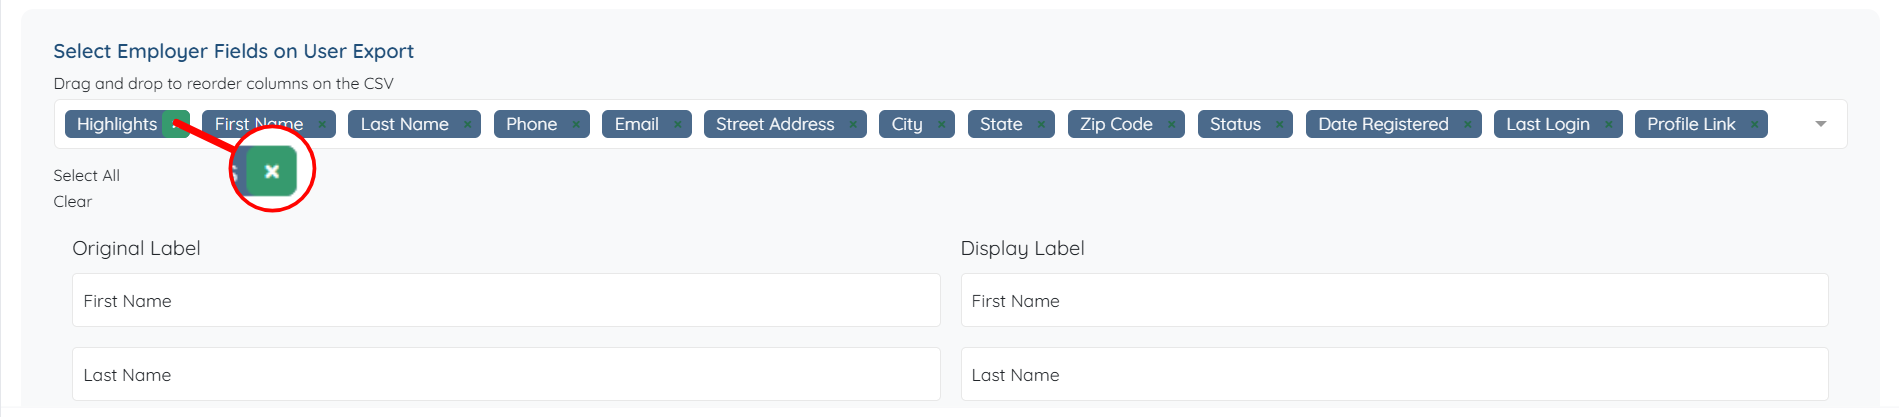
Step 4: Select the field you want to include in your exported client data. The system automatically saves these settings.
You can also remove any selected field by hovering over it and clicking the cross icon that appears.
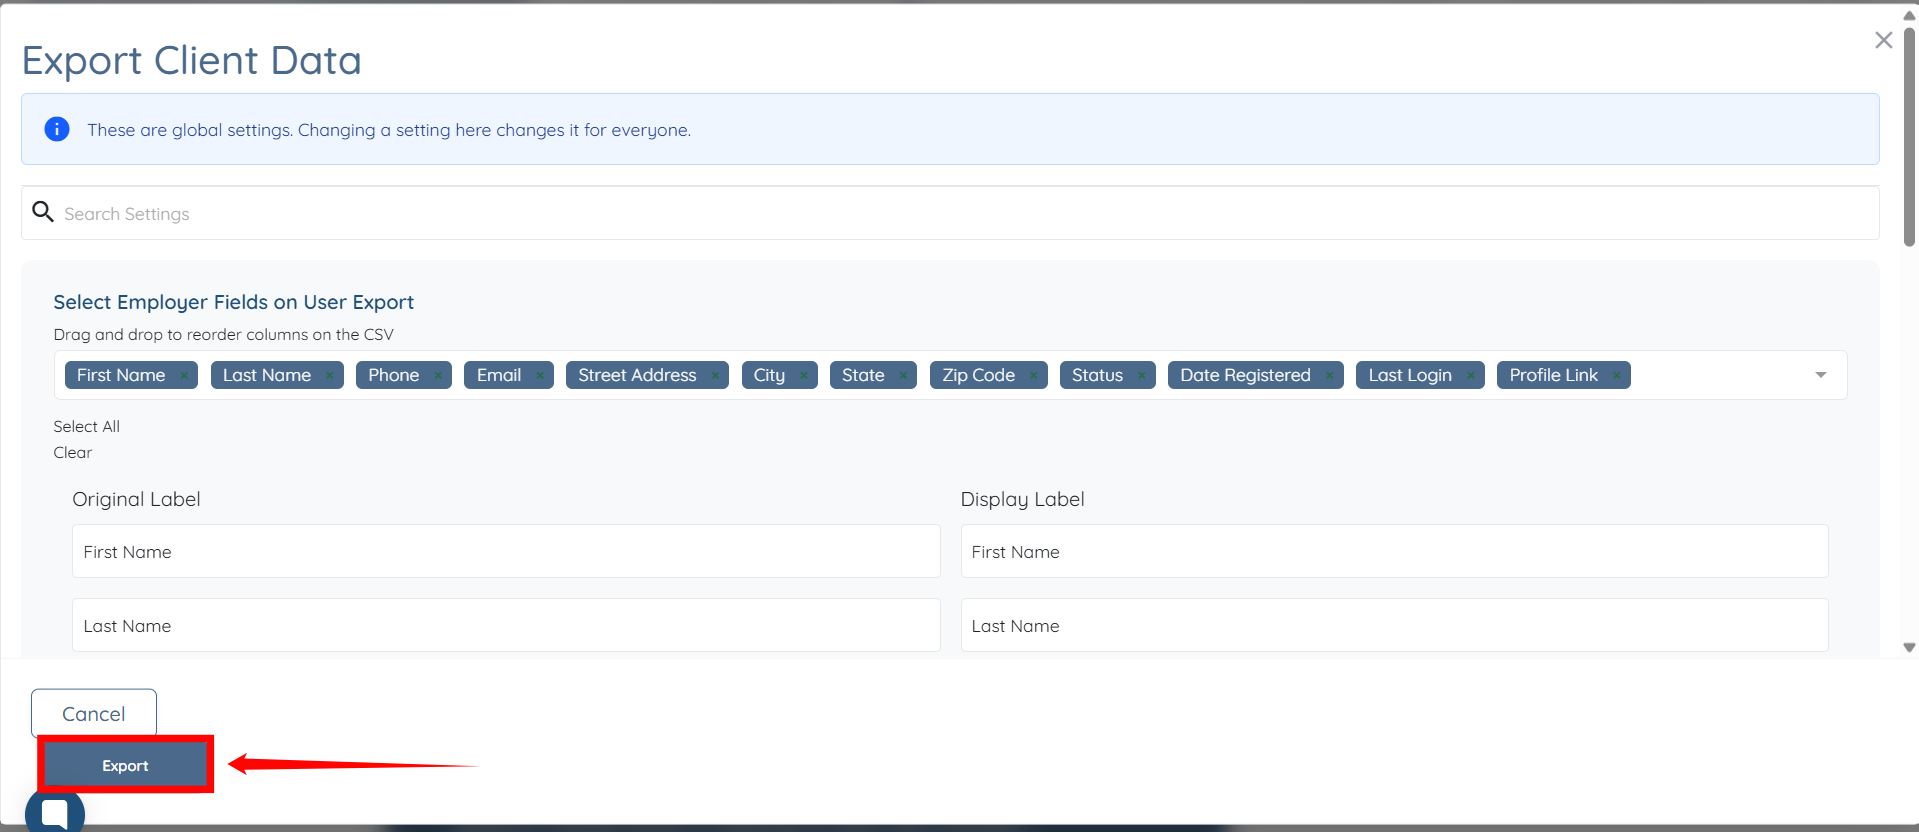
Step 5: Scroll down and then click on the Export button.
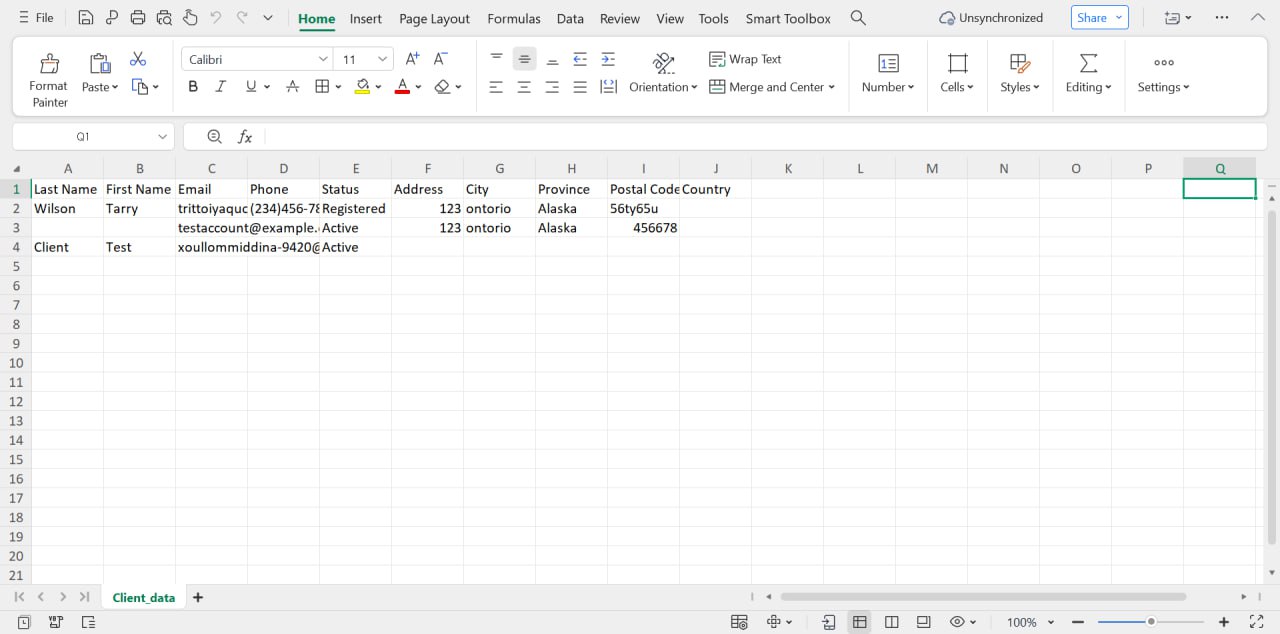
The client data will be successfully exported in a csv file.
If this doesn't answer your questions you can always contact us by clicking here
