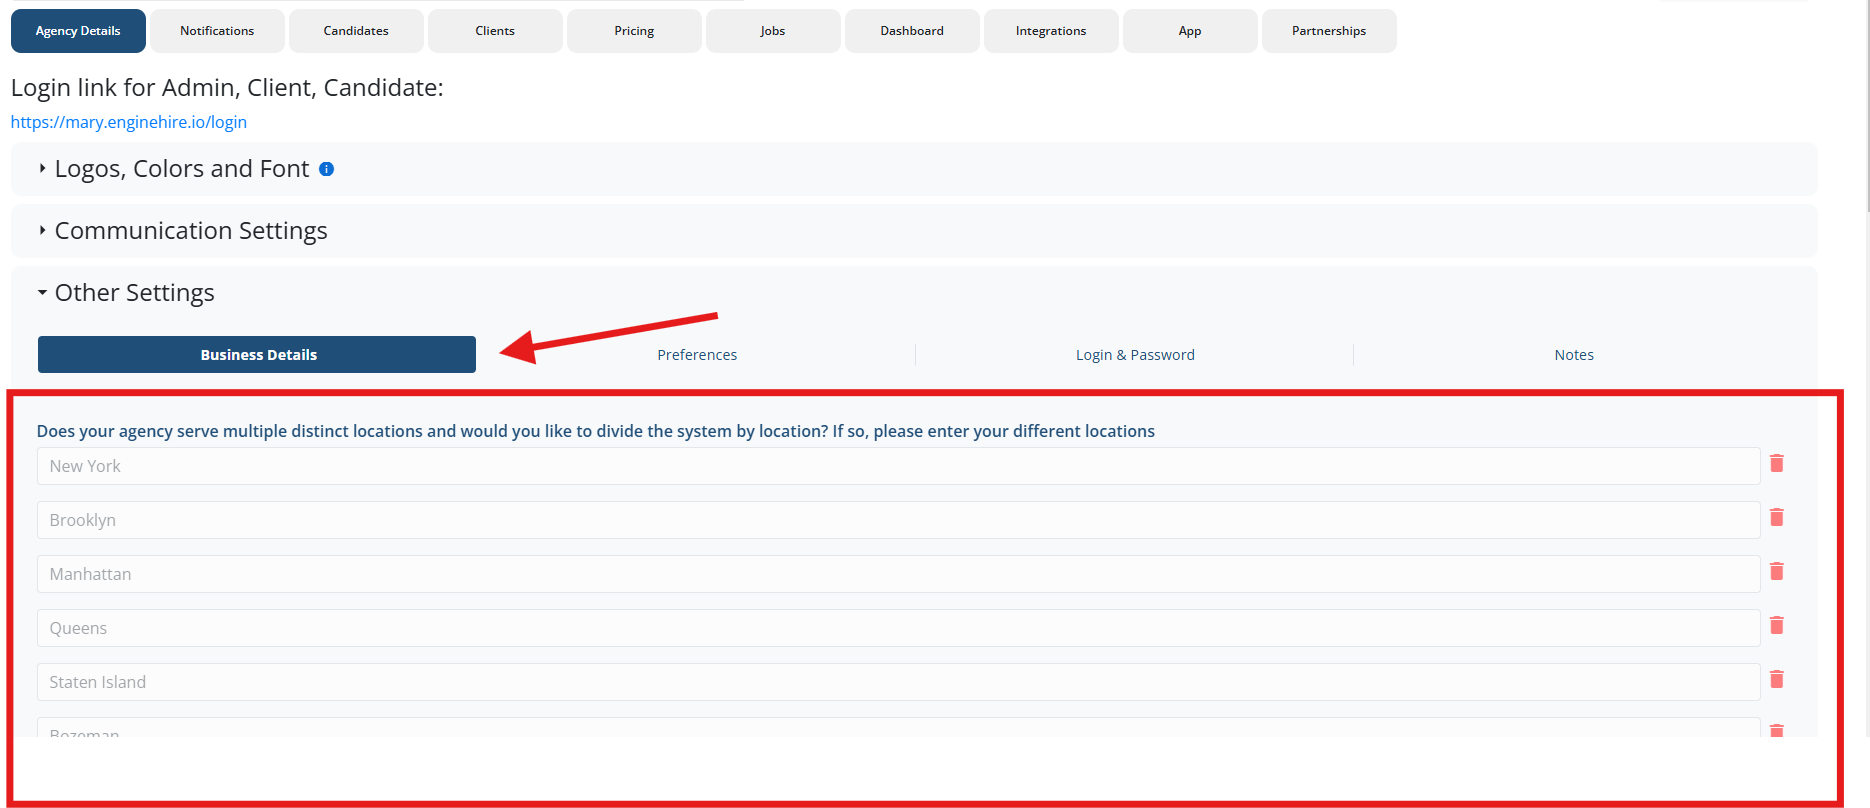
Navigate to:
MORE → GLOBAL SETTINGS → AGENCY DETAILS → BUSINESS DETAILS
Add your new location(s).
Click Save.
Depending on how your location question is set up, new locations should automatically appear as options on your client and/or candidate applications.
To confirm:
Open your Applications.
If the new location is missing, click Edit on the location question and manually add it.
Ensure the location condition is enabled:
Open the section settings
Click Conditions
Confirm the correct location is selected.
Go to:
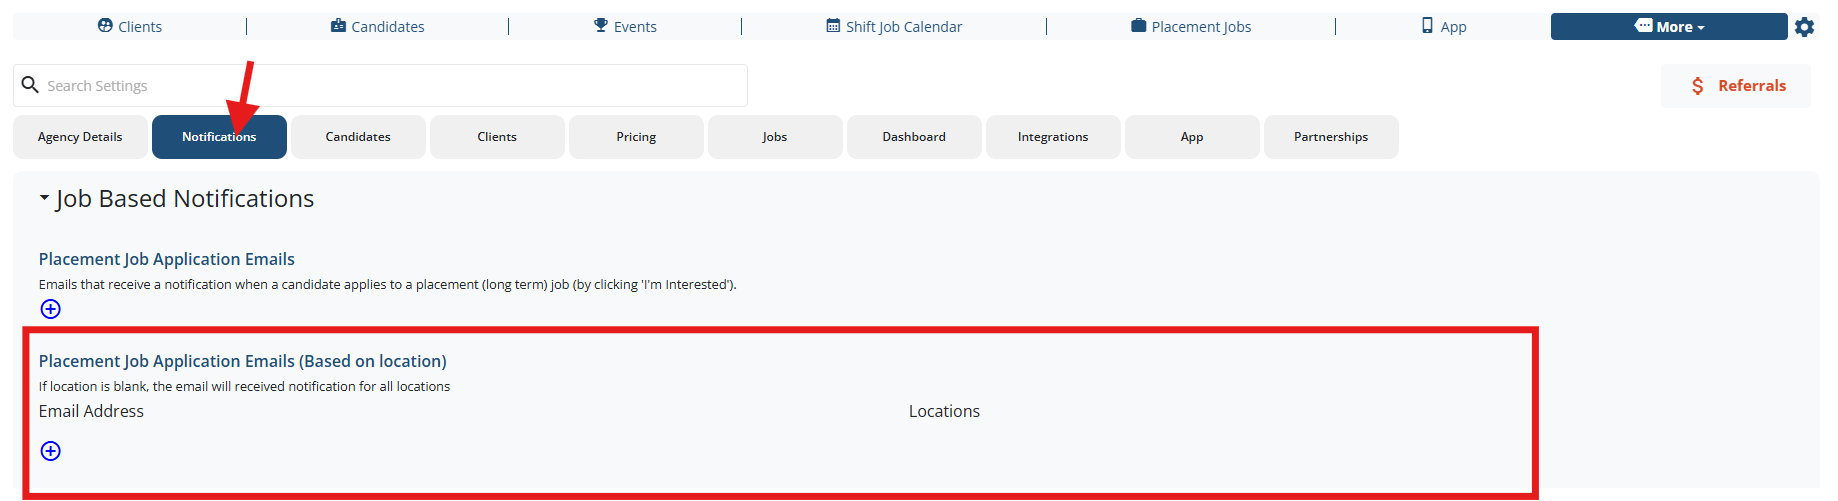
MORE → GLOBAL SETTINGS → NOTIFICATIONS
Review each notification type to ensure the correct email addresses are assigned for the new location.
See example:
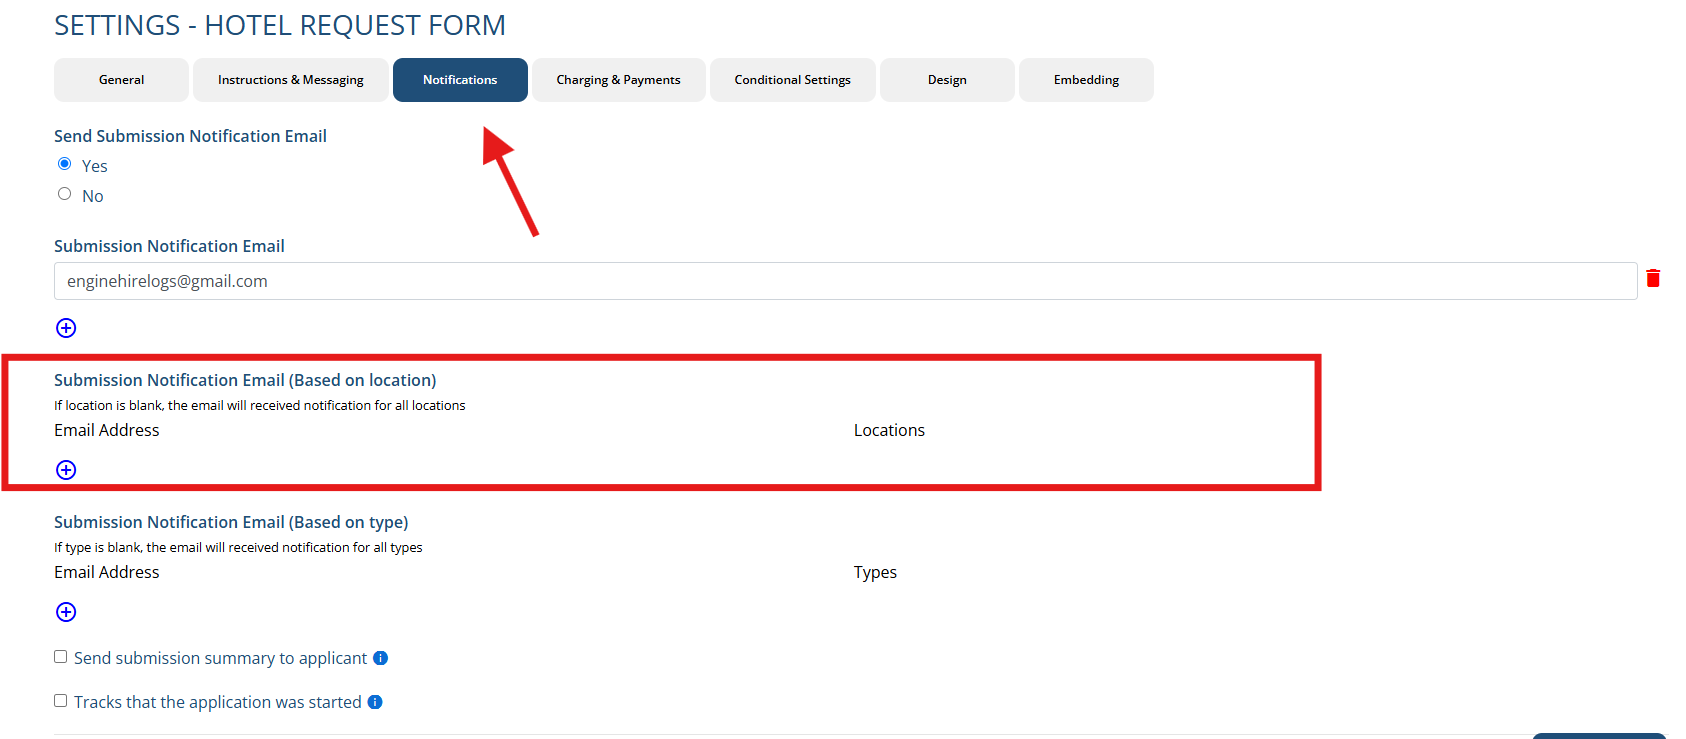
While logged in as an admin, open your Application Form.
Click the Edit settings button under the application title.
Select Notifications.
Add or adjust notification recipients as needed.


There are multiple notification settings throughout Global Settings. We recommend reviewing each tab to ensure the new location is fully configured.
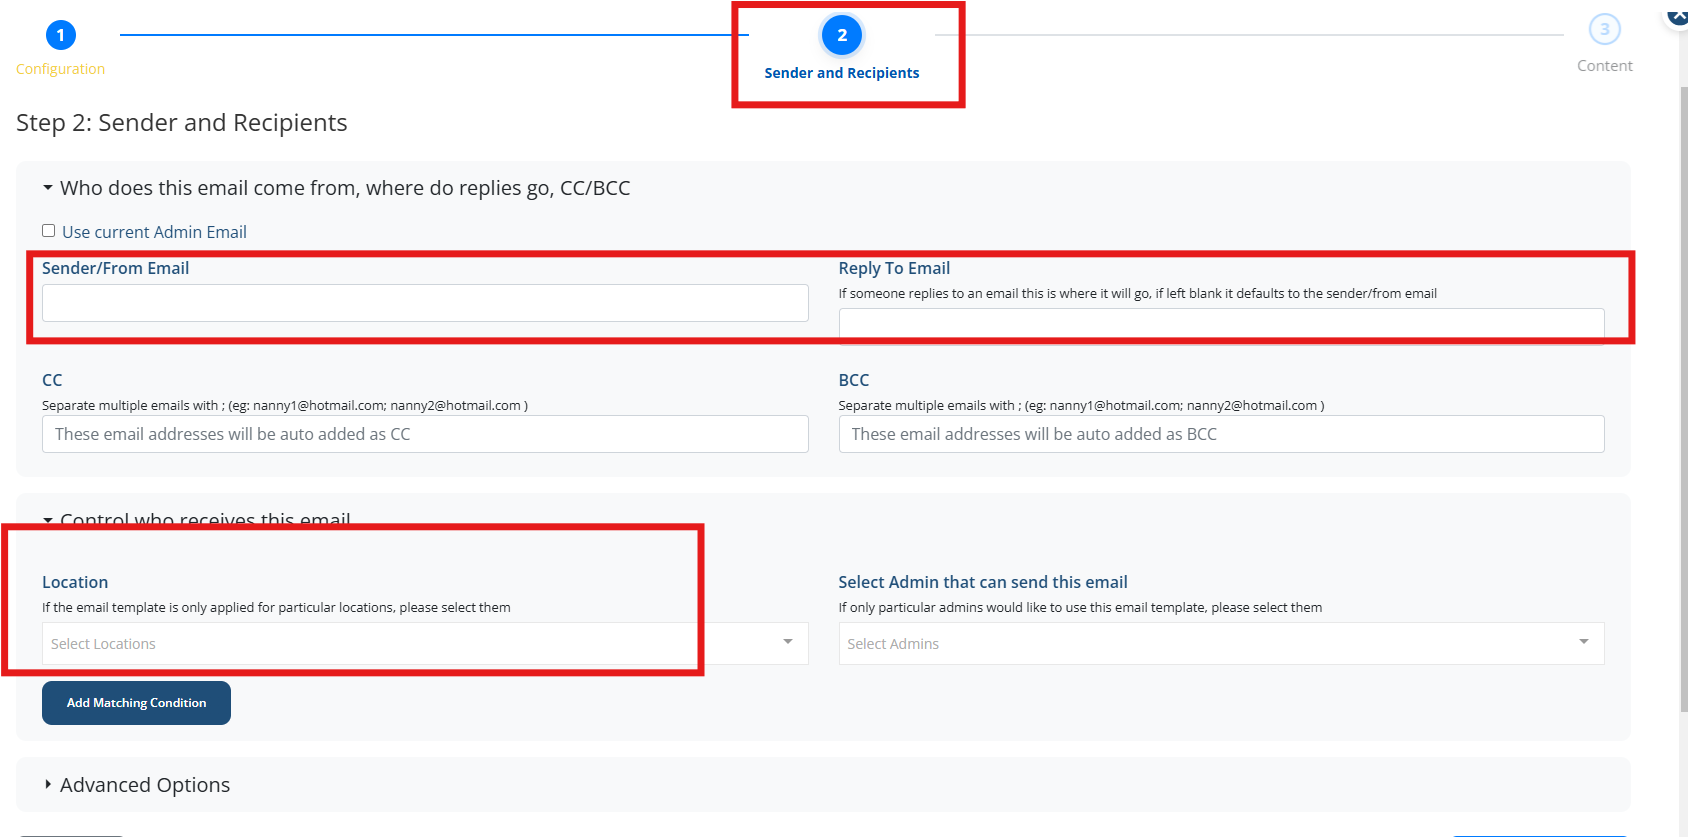
Go to:
MORE → EMAIL TEMPLATES
To create a version of a template for the new location, duplicate an existing one:
Click the pencil icon → Duplicate.
Once you duplicate it, it will show up on your email template lists.
Edit the new template:
Adjust the template content
Select which location(s) the template applies to
Update the sender email and reply-to email if needed

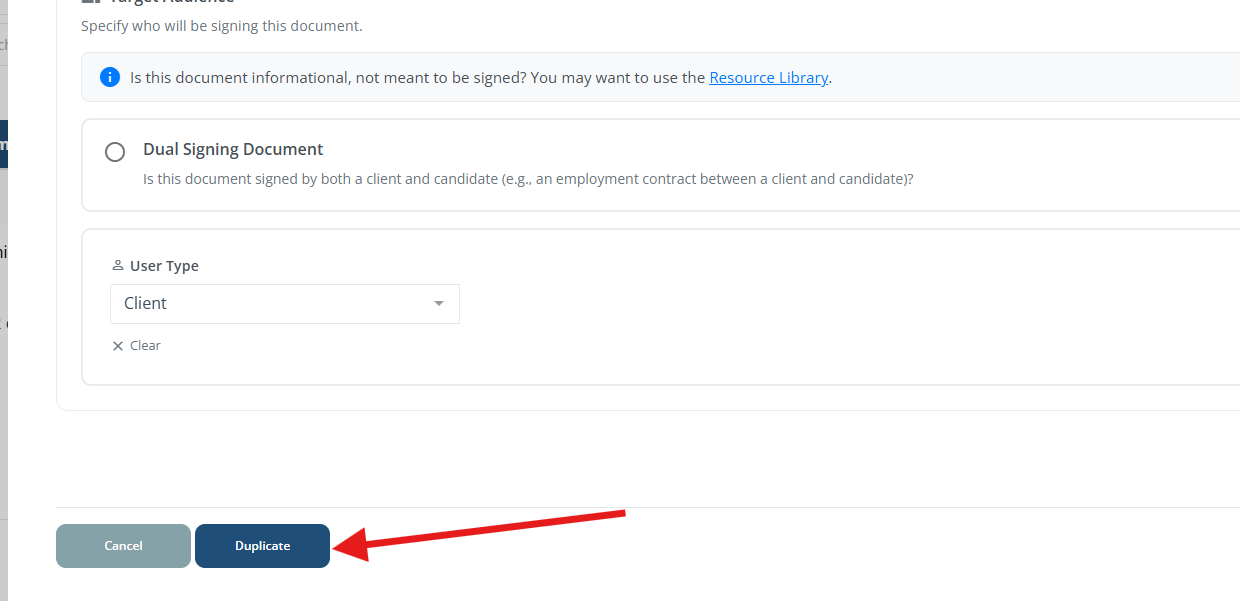
Document templates work the same way as email templates.
Duplicate an existing template using the pencil icon, or create a new one from scratch.
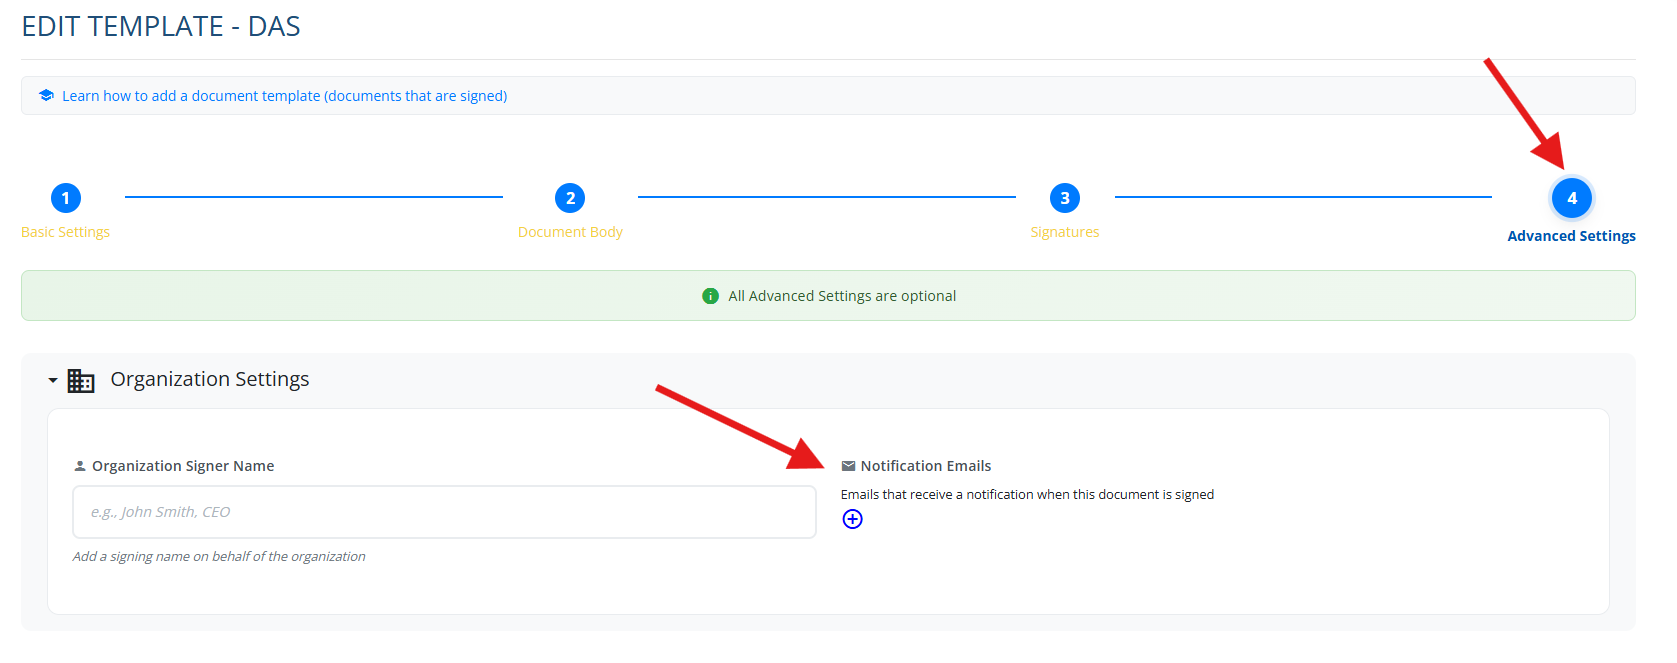
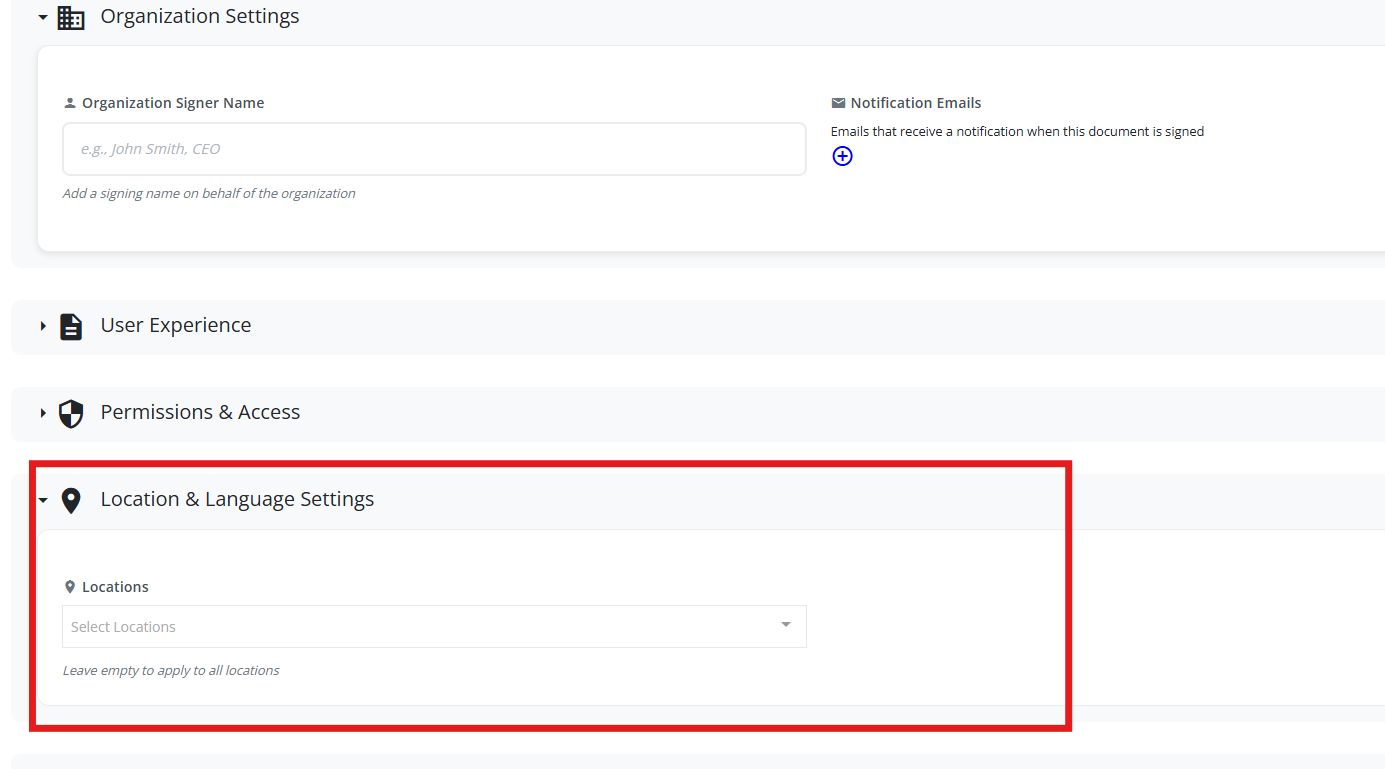
Update:
The template content
Which location(s) it applies to
Notification recipients (who is notified when the document is signed)
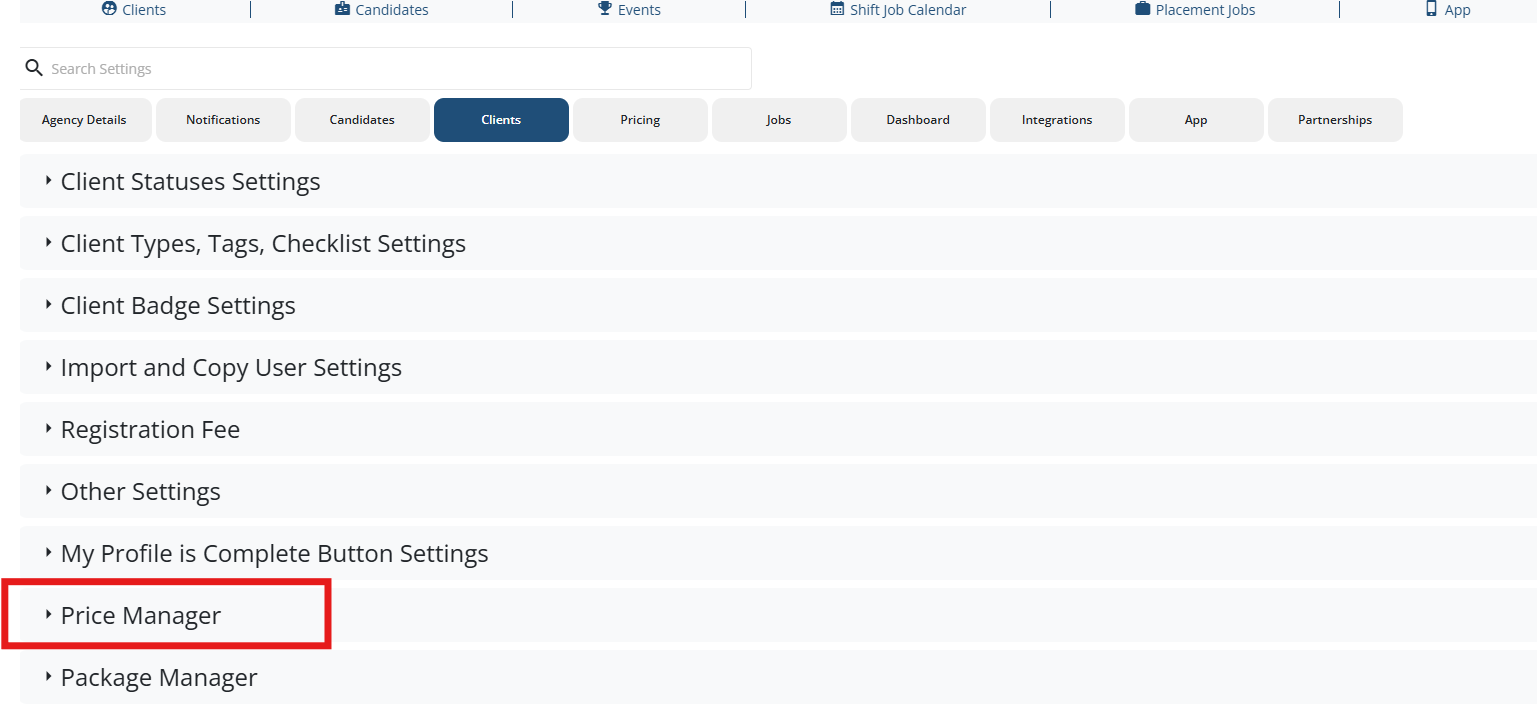
If you have different pricing for each location, go to MORE→ GLOBAL SETTINGS→ CLIENTS→ Price Manager.
From there, you can open up each price by the pencil icon, create a new price and have it be based on location.
Example:

