
Let’s get started 🚀
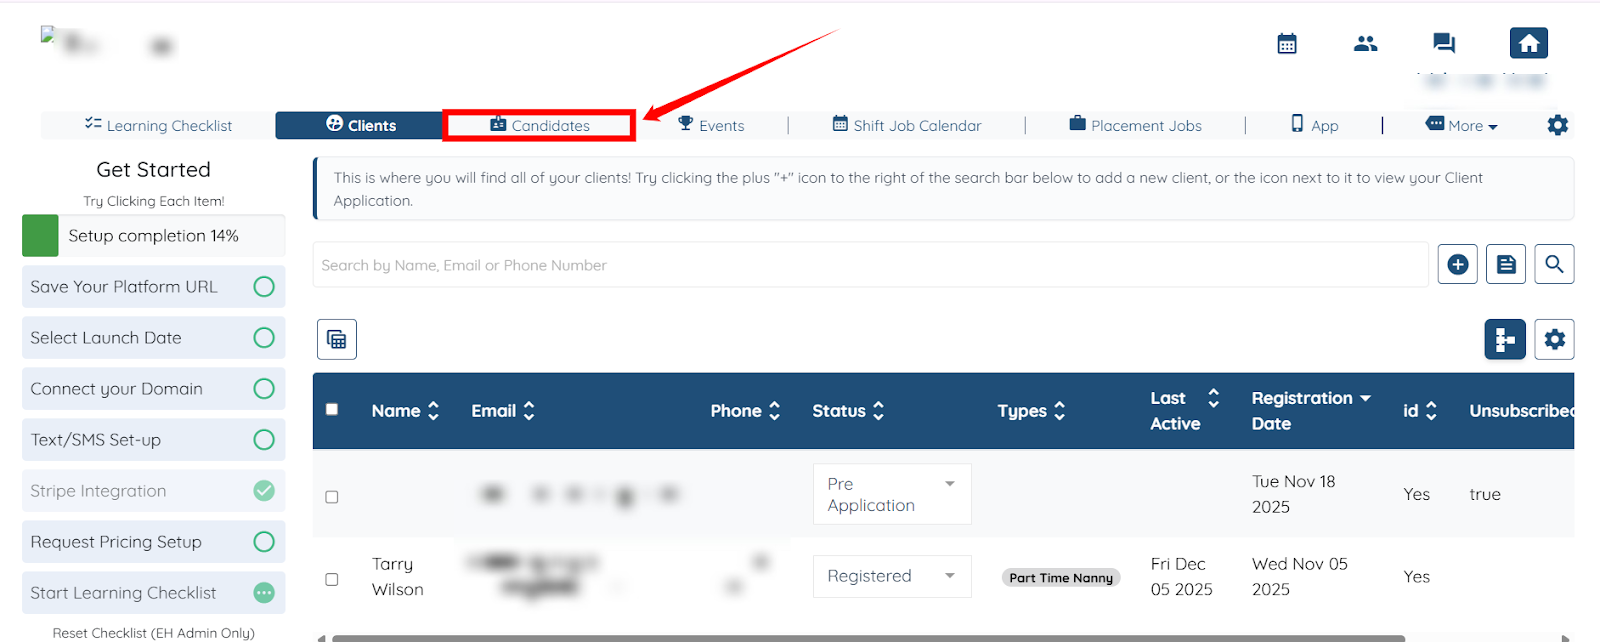
Step 1: Log in to your agent dashboard and click the Candidates in the top navigation bar.
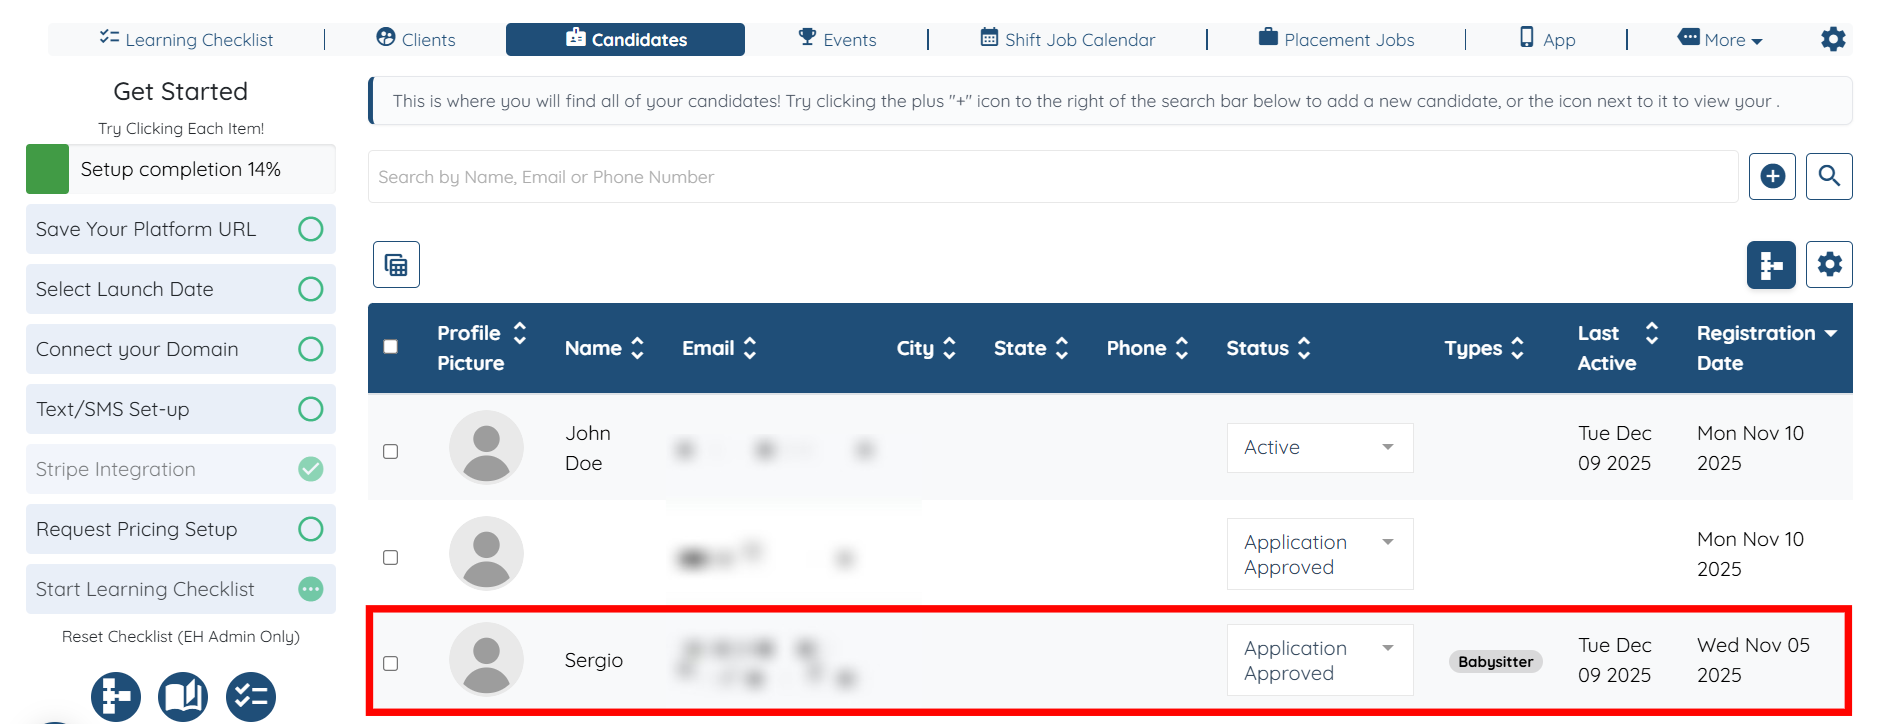
Step 2: Click any candidate in the list to open their details.
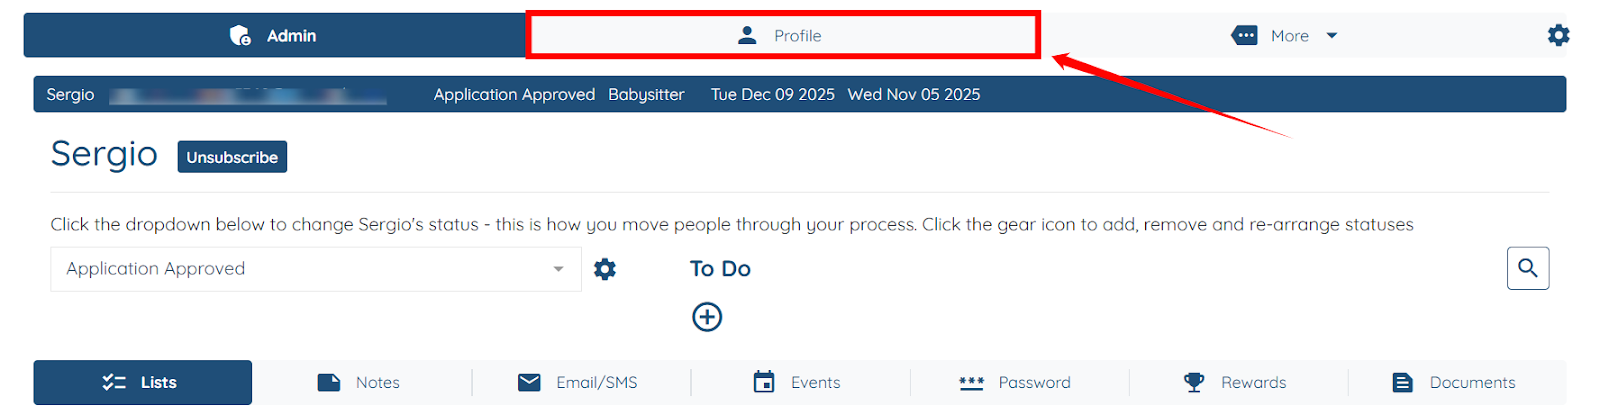
Step 3: Click the Profile tab, as shown in the screenshot below.
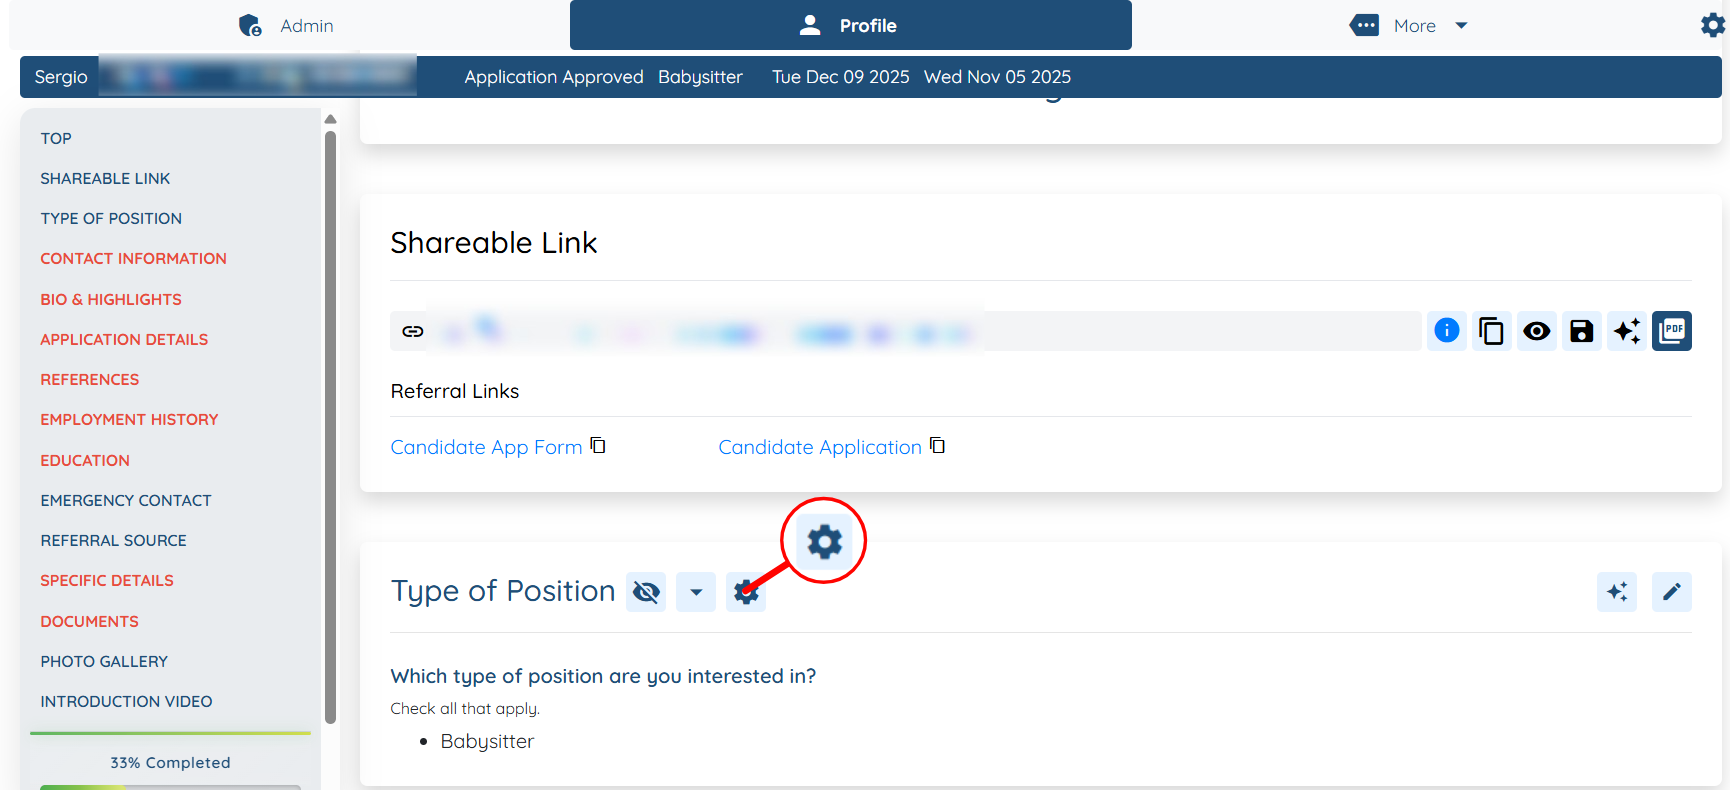
Step 4: Locate the section for which you want to set up the email notification for. Then, click the Gear icon next to that section name.
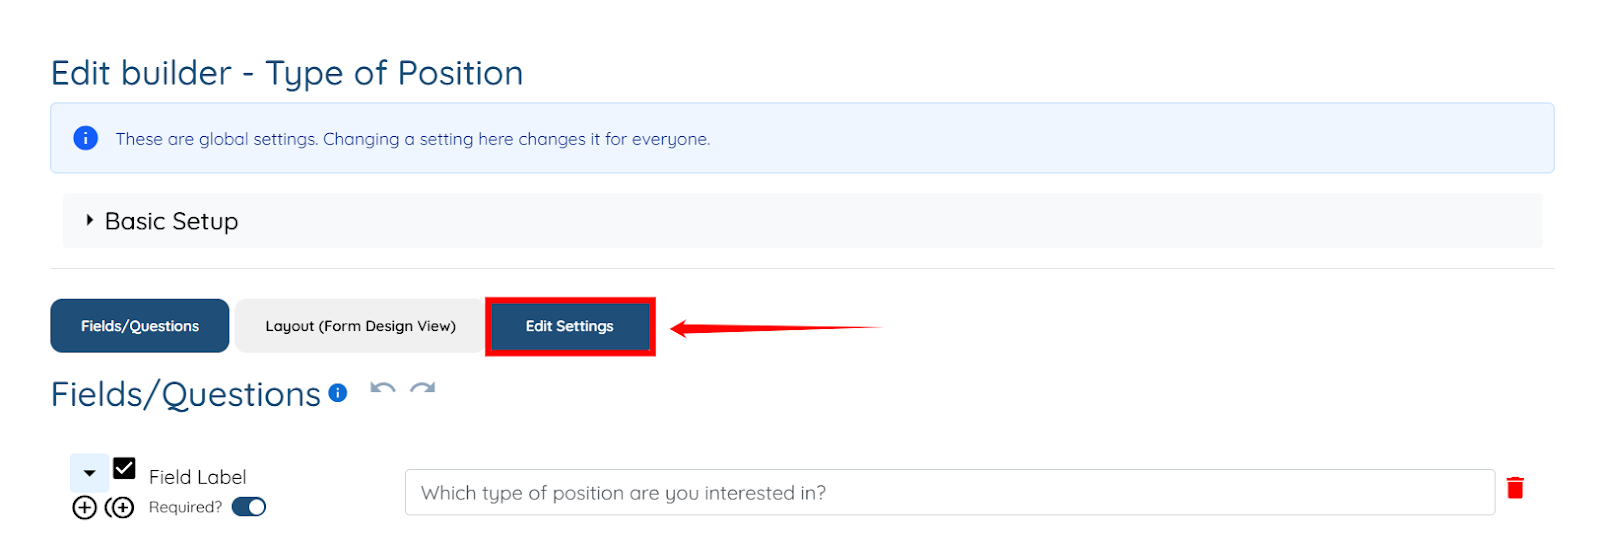
Step 5: Click the Edit Settings button.
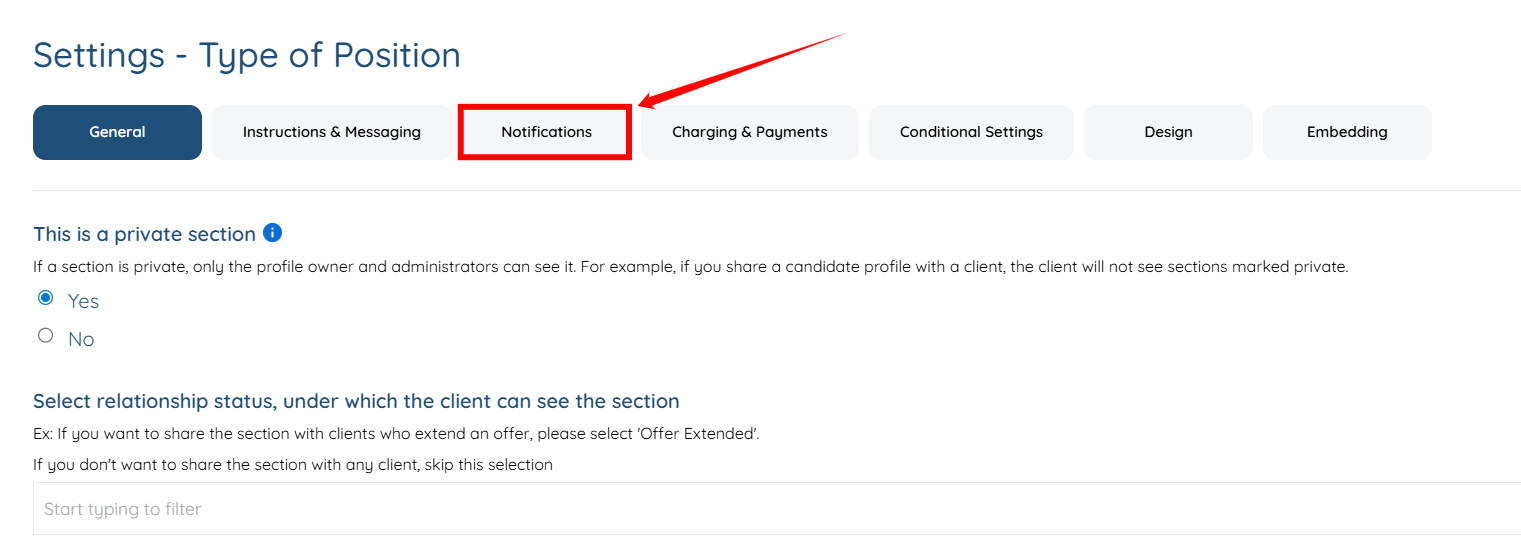
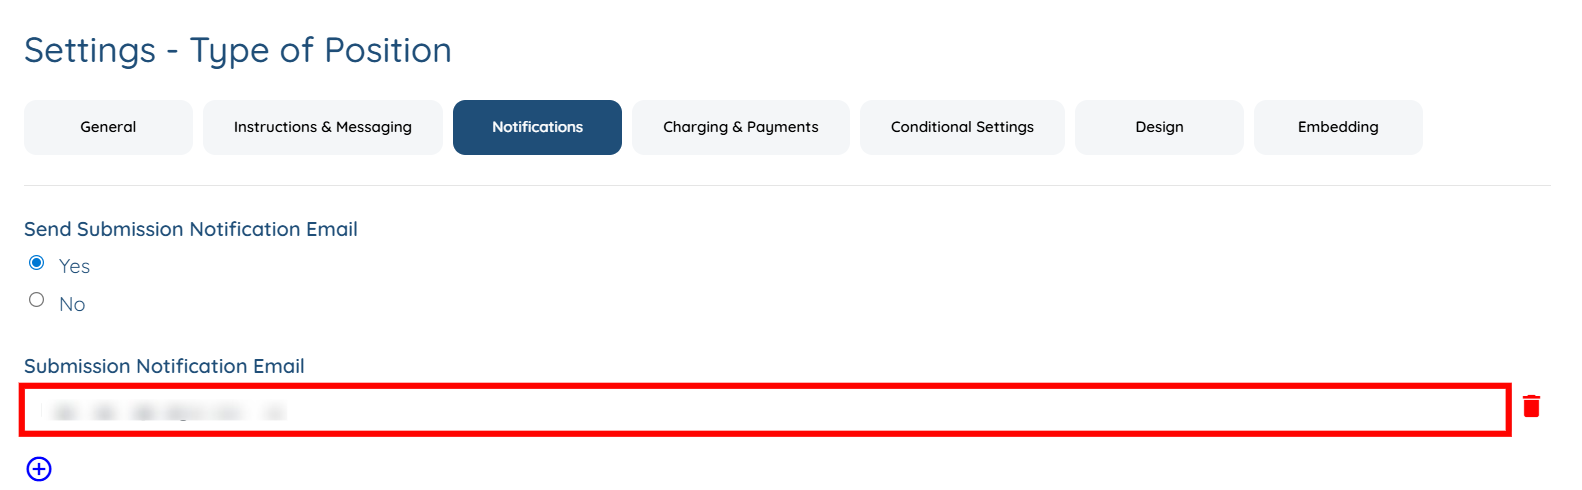
Step 6: Click the Notifications tab from the list of available tabs.
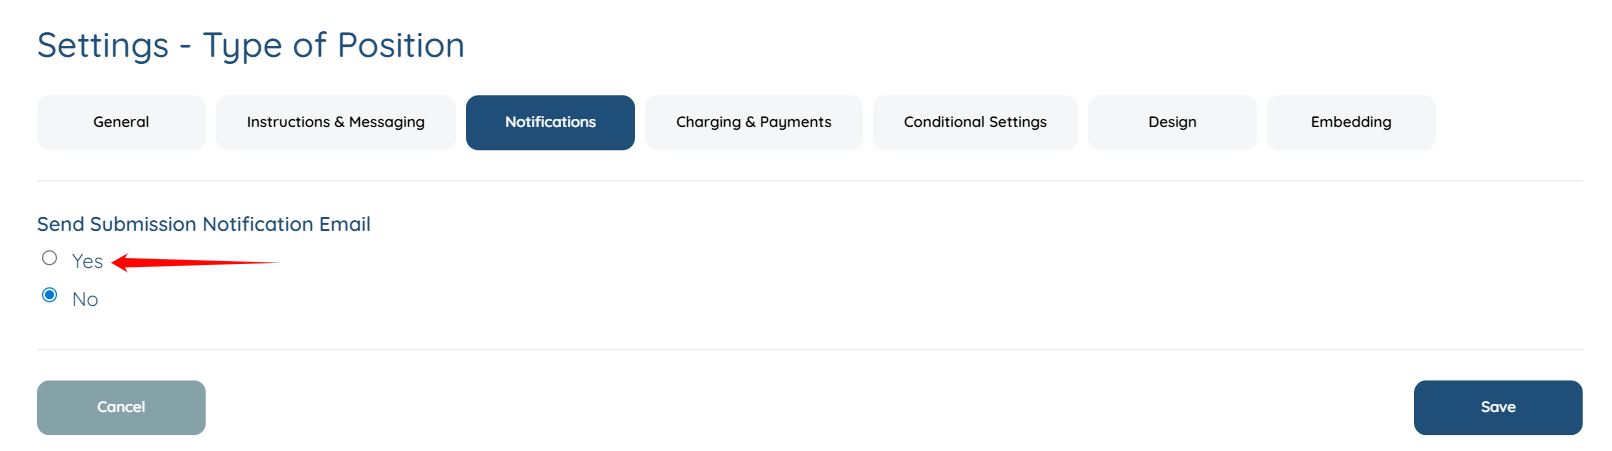
Step 7: Select the Yes radio button under the Send Submission Notification Email option.
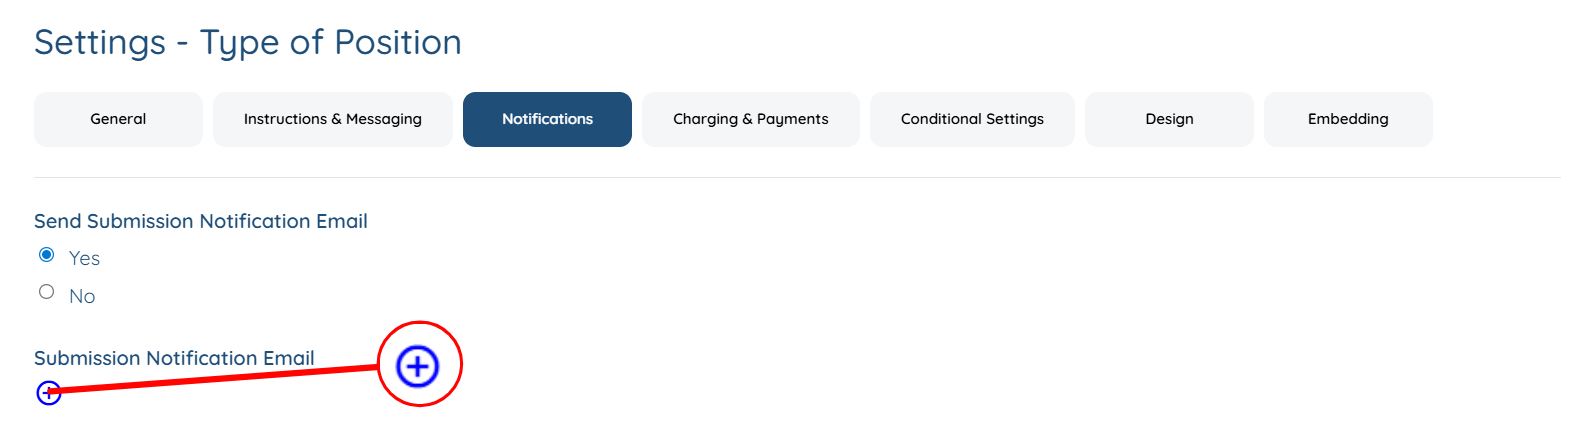
Step 8: Click the + icon as shown in the screenshot.
Step 9: Enter the email address where you wish to receive the notification.
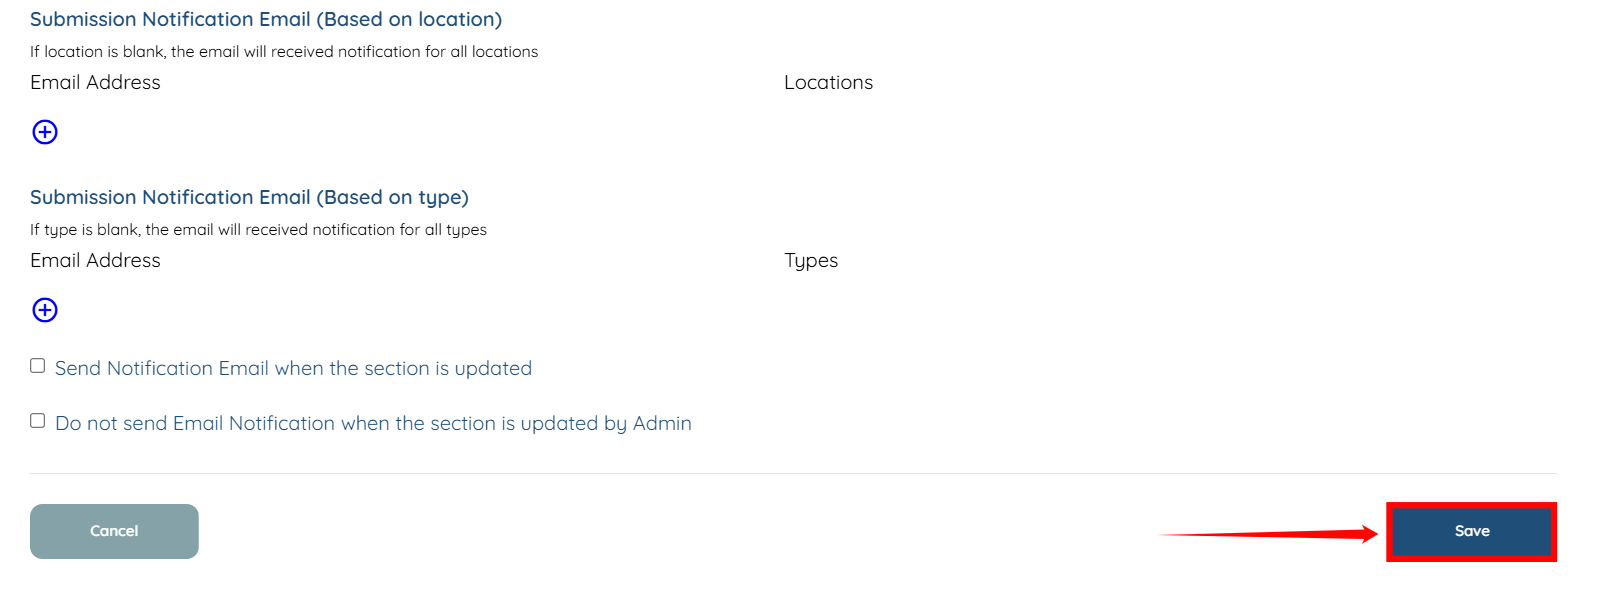
Step 10: Click the Save button to confirm the changes.
You can also set up the email notifications to receive updates whenever a candidate submits information for a specific section in their profile using the Edit Profile Builder option.
Follow the steps below to add the email address that will receive updates using the Edit Profile Builder option.
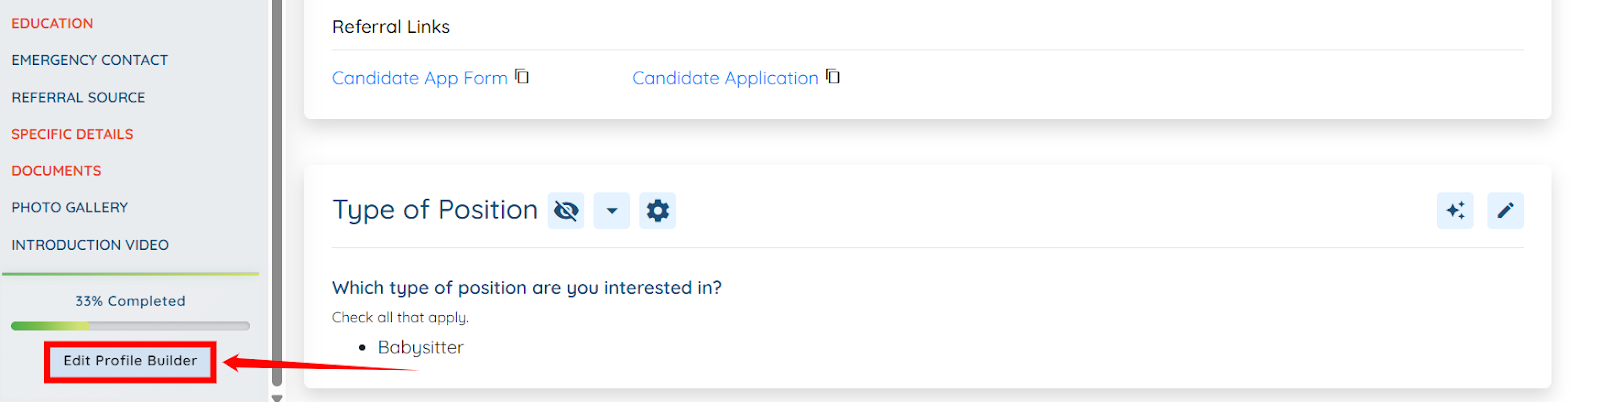
Step 1: Under the Profile tab, click the Edit Profile Builder button located at the bottom of the left navigation bar.
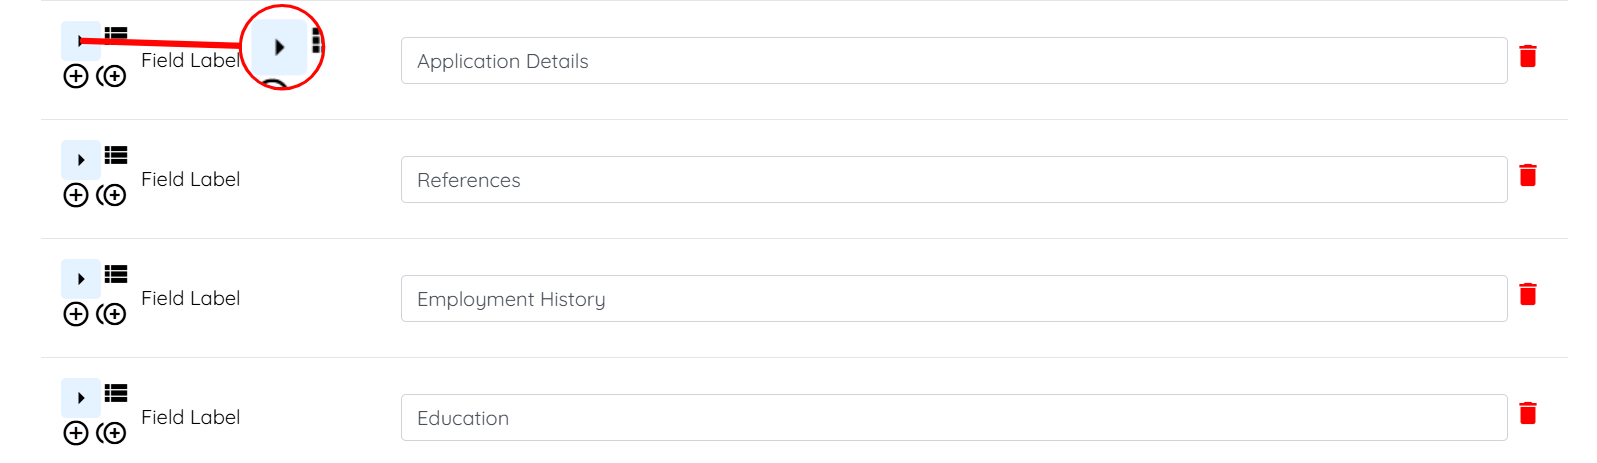
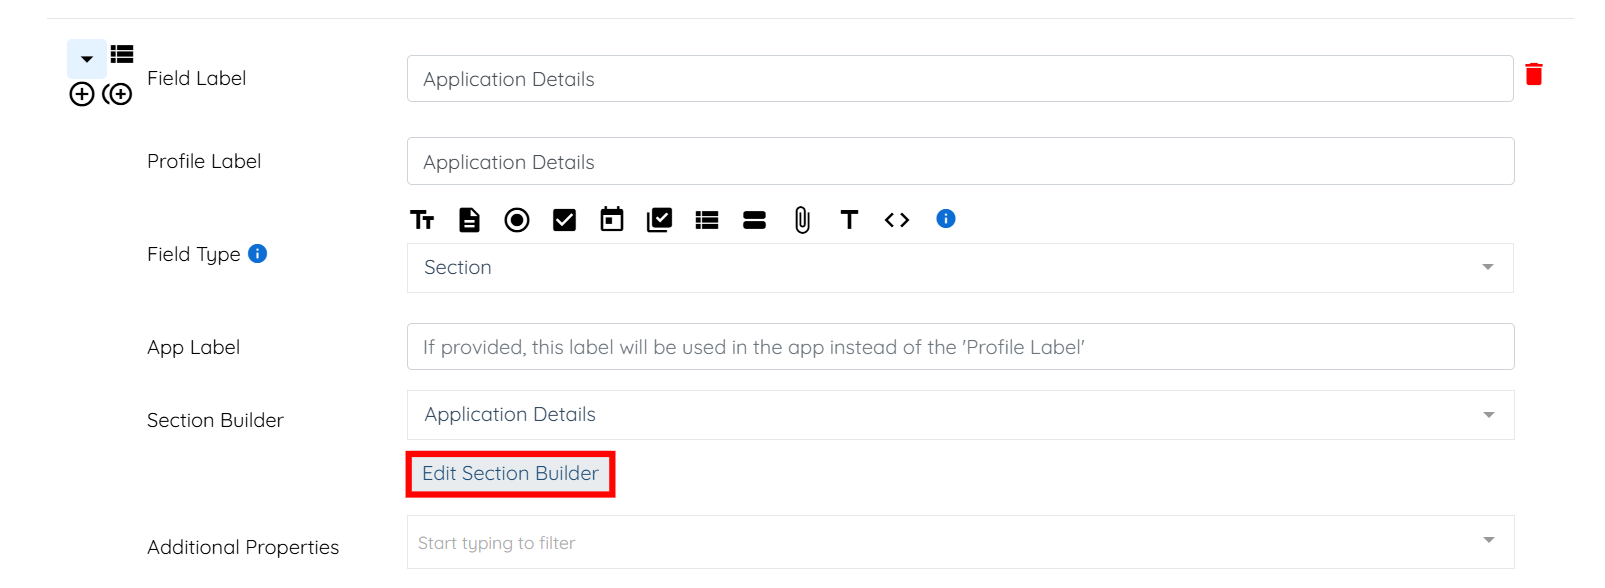
Step 2: Locate the field where you used a section builder, and click the arrow button to expand its details.
Step 3: Click the Edit Section Builder button.
Step 4: Now, follow the same steps (steps 5–10) as outlined above to add the email address that will receive updates whenever a candidate submits information for the selected section.
