Let’s get started 🚀
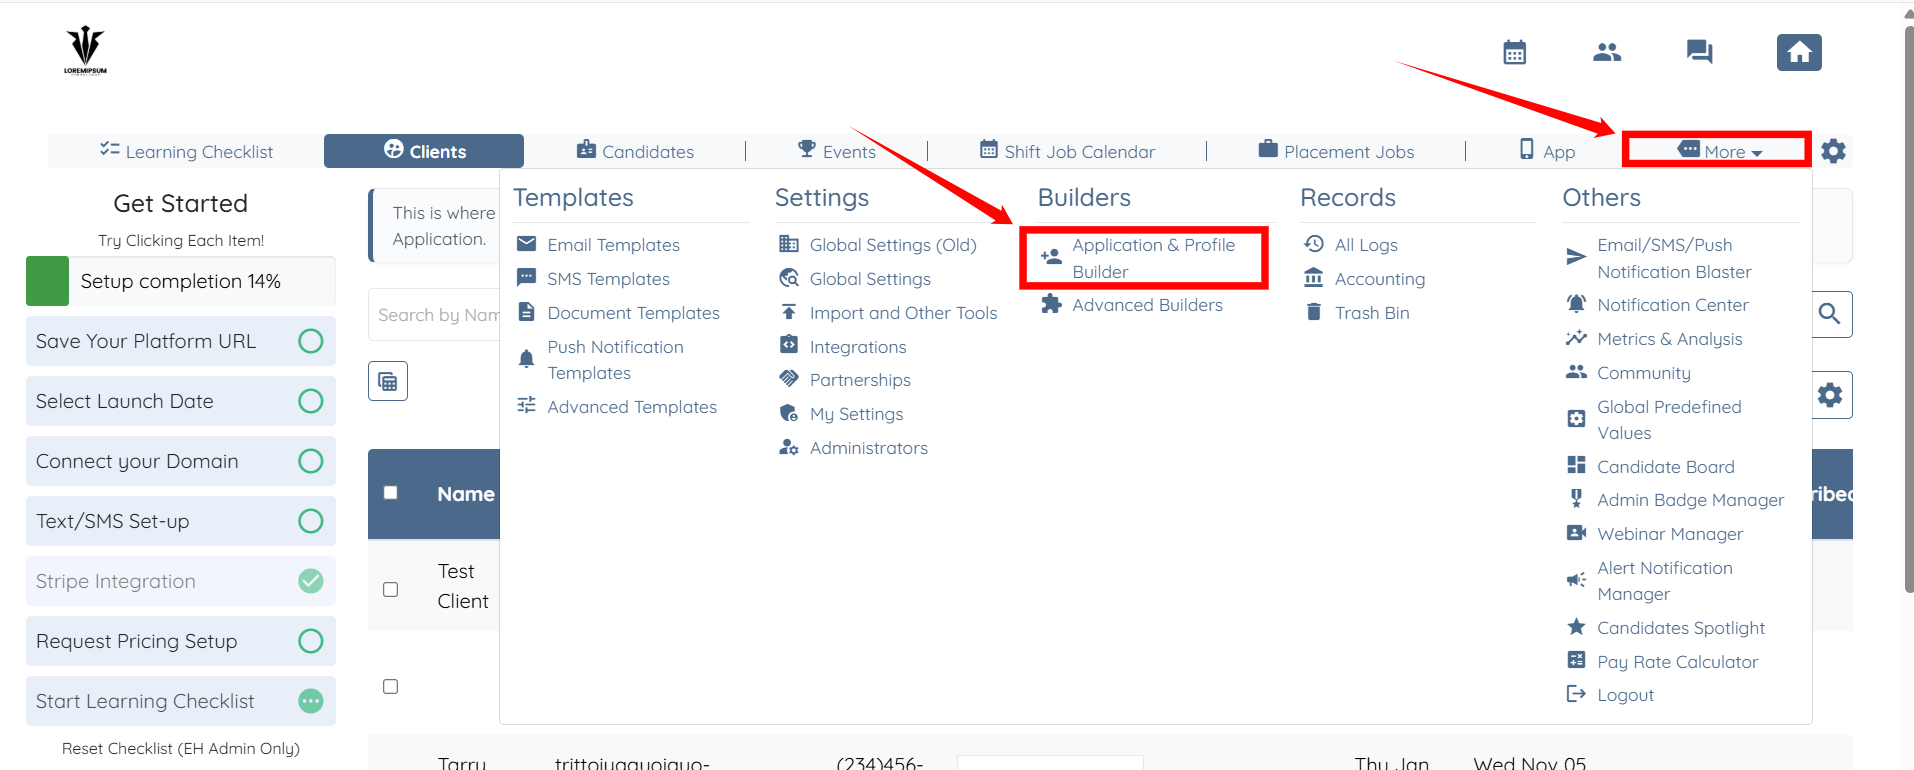
Step 1: Log in to your agent dashboard and click More > Application & Profile Builder, as shown in the screenshot below.
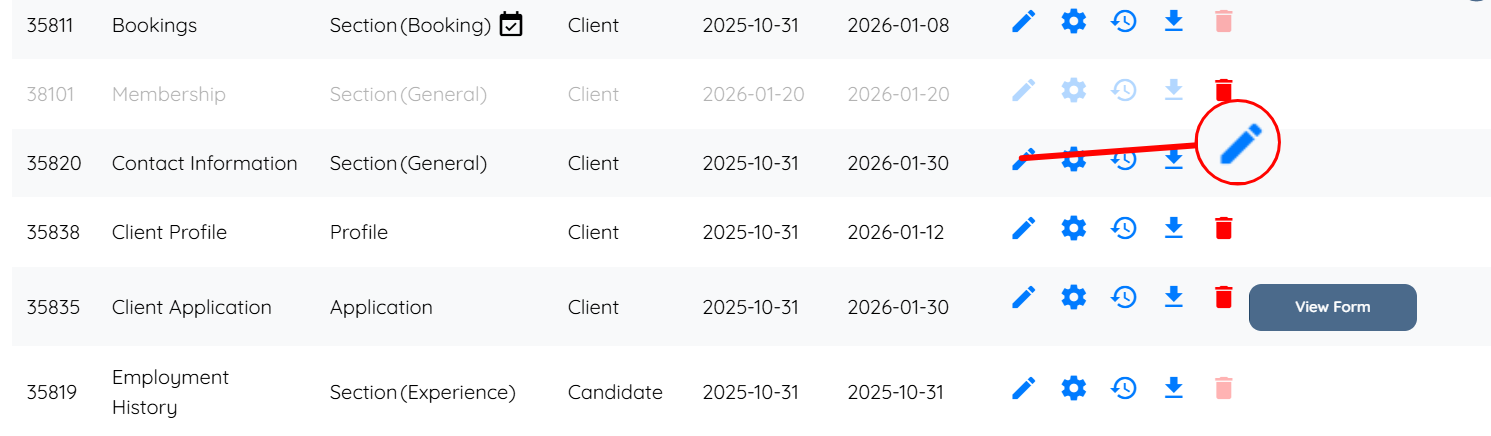
Step 2: Scroll down and locate the section where you want to add the field with the multi-select feature. Then, click the corresponding pencil icon to continue.

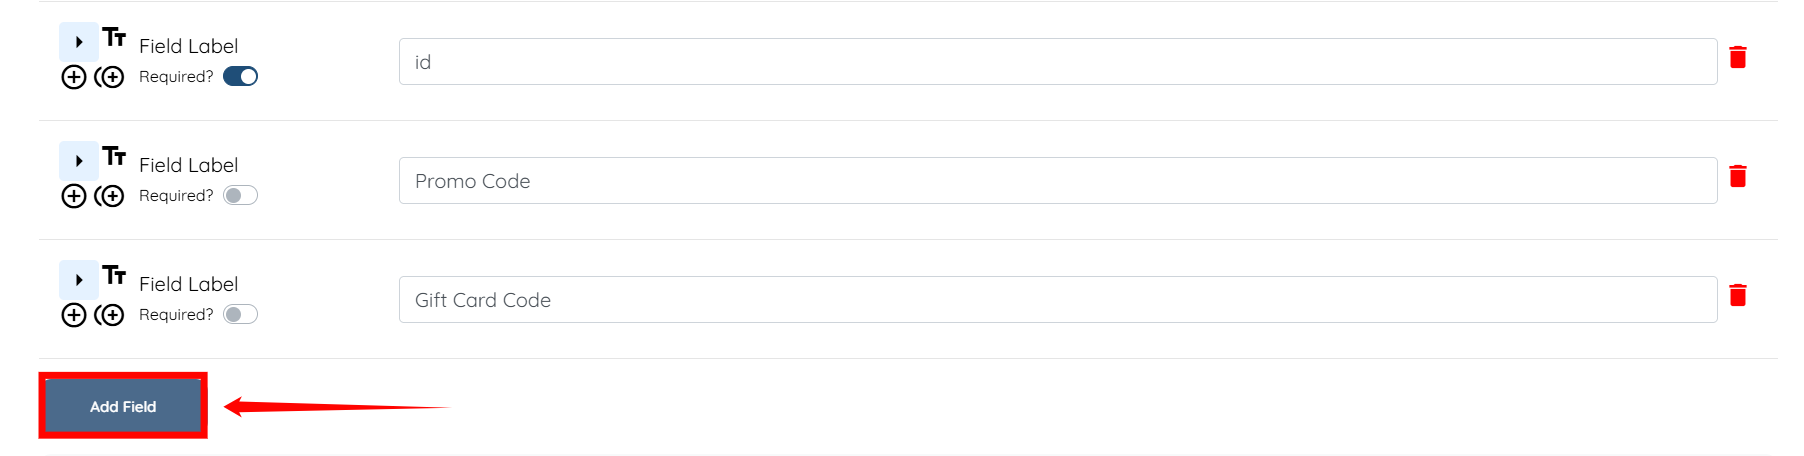
Step 3: Scroll down and click the Add Field button.
Step 4: Enter the Field Label and Profile Label.

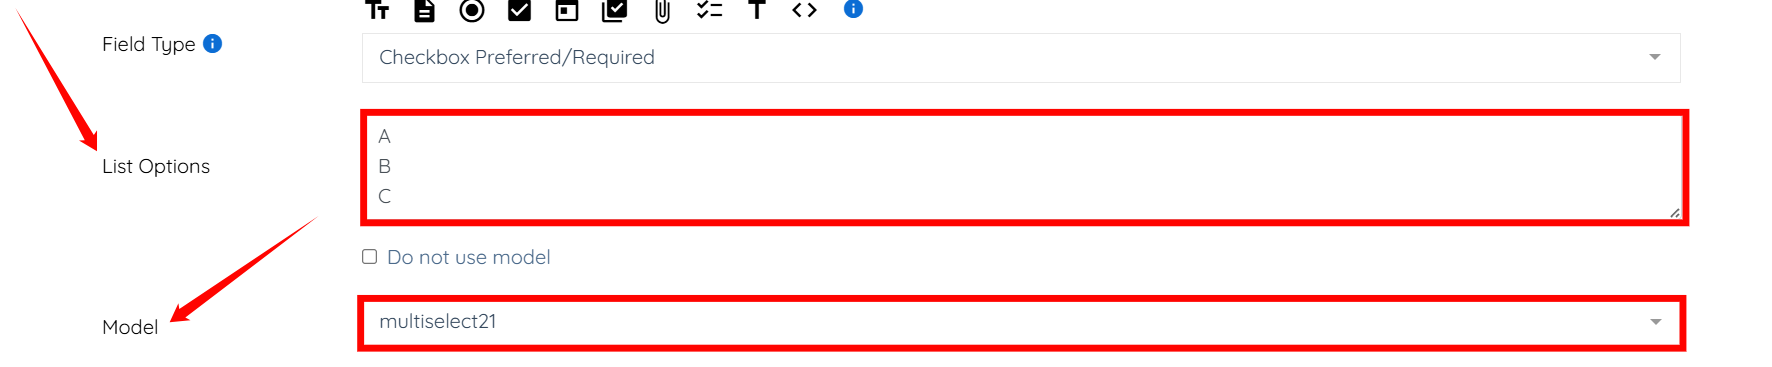
Step 5: Select Checkbox Preferred/Required option from the dropdown list for the Field Type.

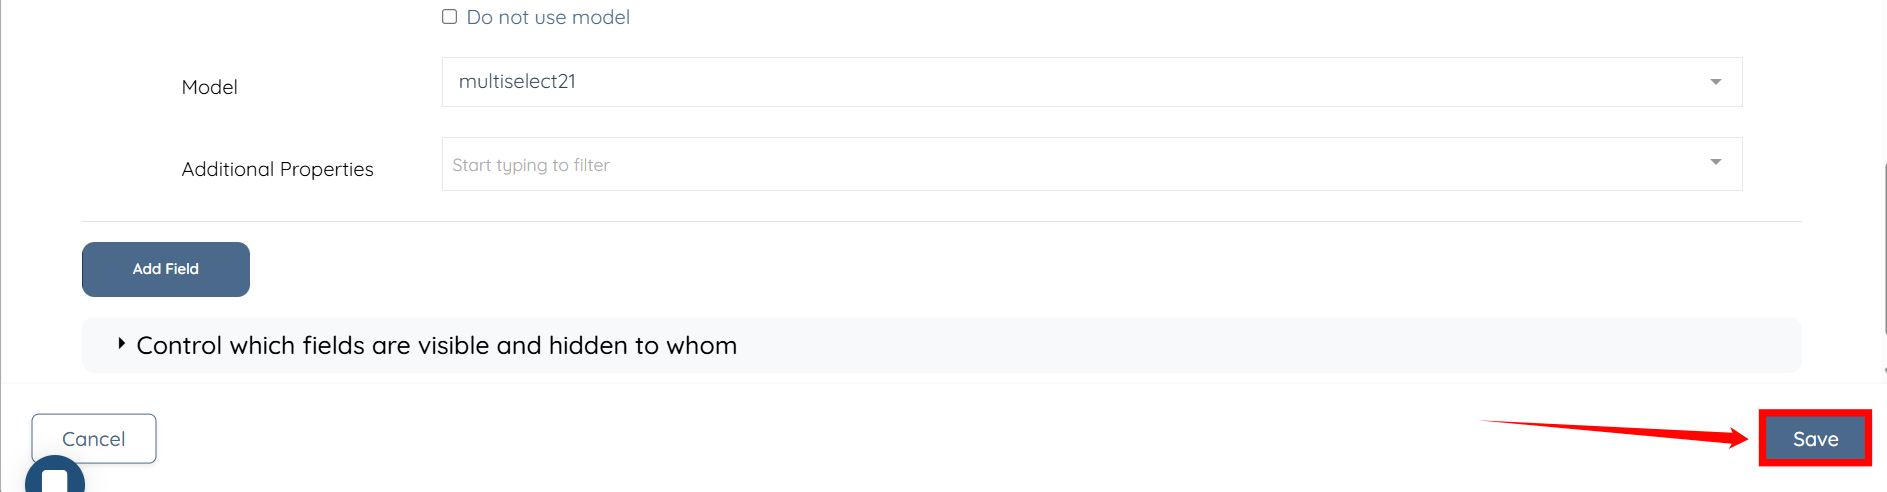
Step 6: Enter the list options for your field, and select the mutiselect21 option in the Model field.
Step 7: Click the Save button to confirm the changes.
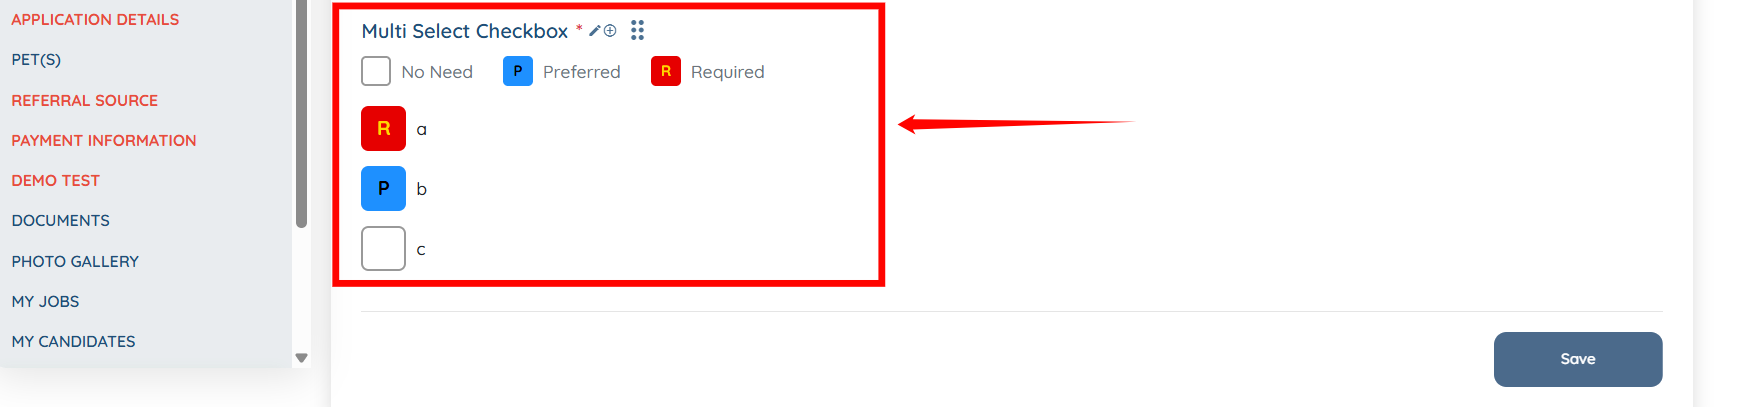
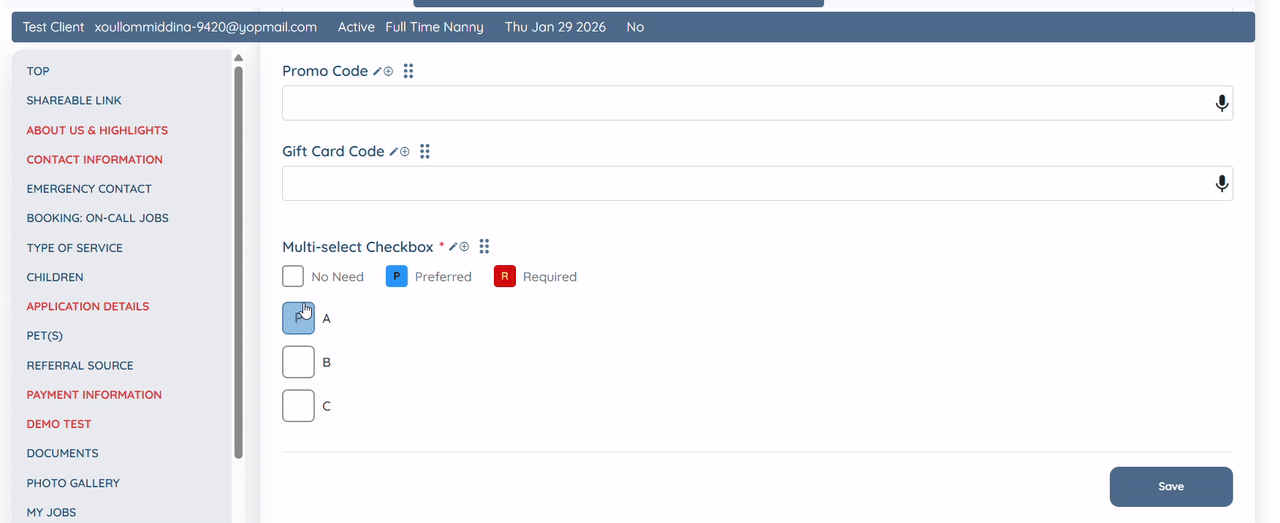
The multi select field will be added successfully.
Map imported data to the multi-select field to apply the correct option to each record.
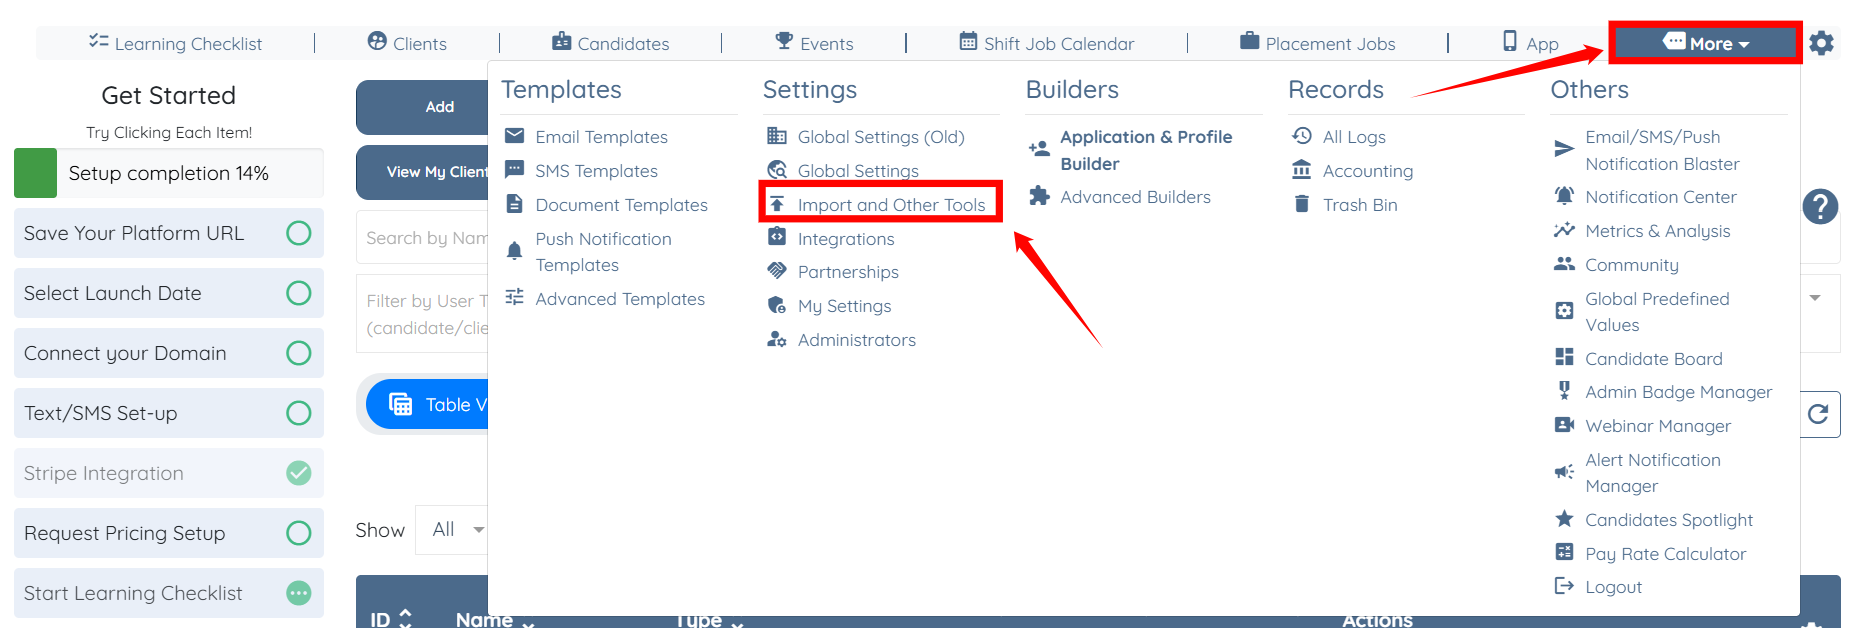
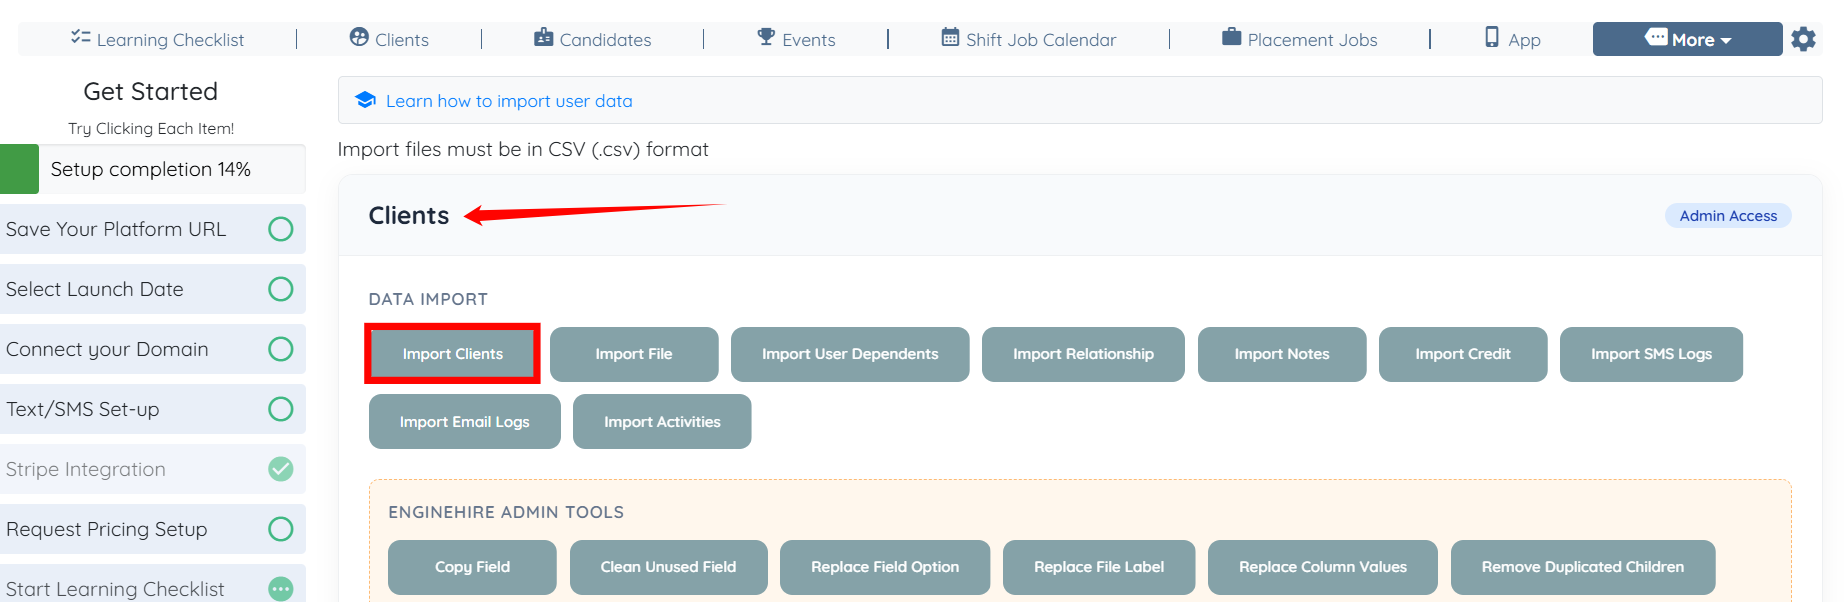
Step 1: On your agent dashboard, click More, then select Import and Other Tools, as shown in the screenshot below.
Step 2: Click the Import Clients button under the Clients heading.
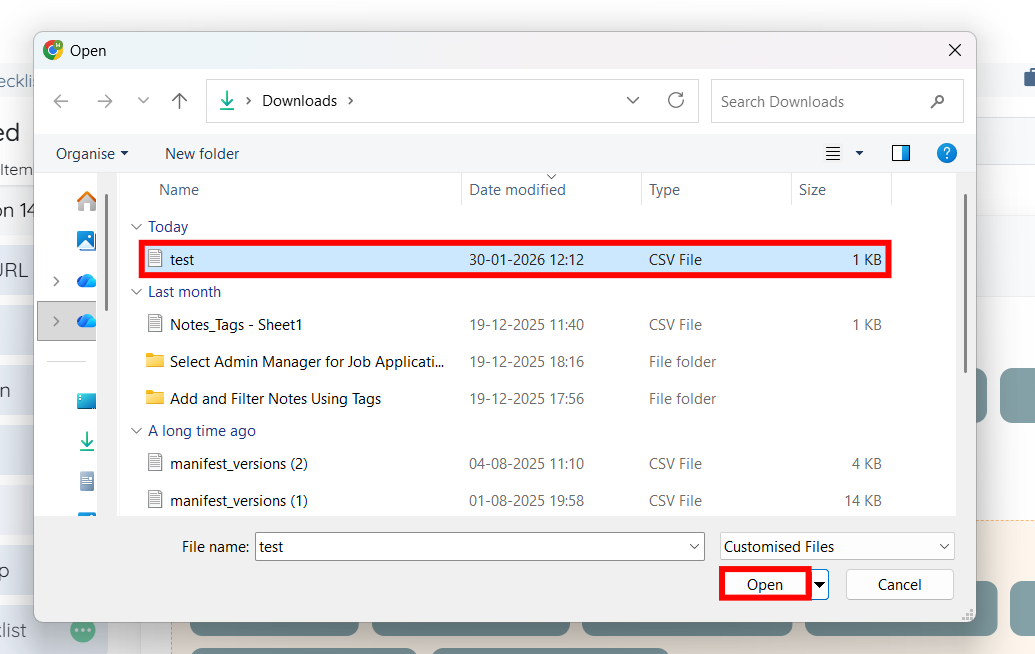
Step 3: Select the CSV file, and click the Open button.
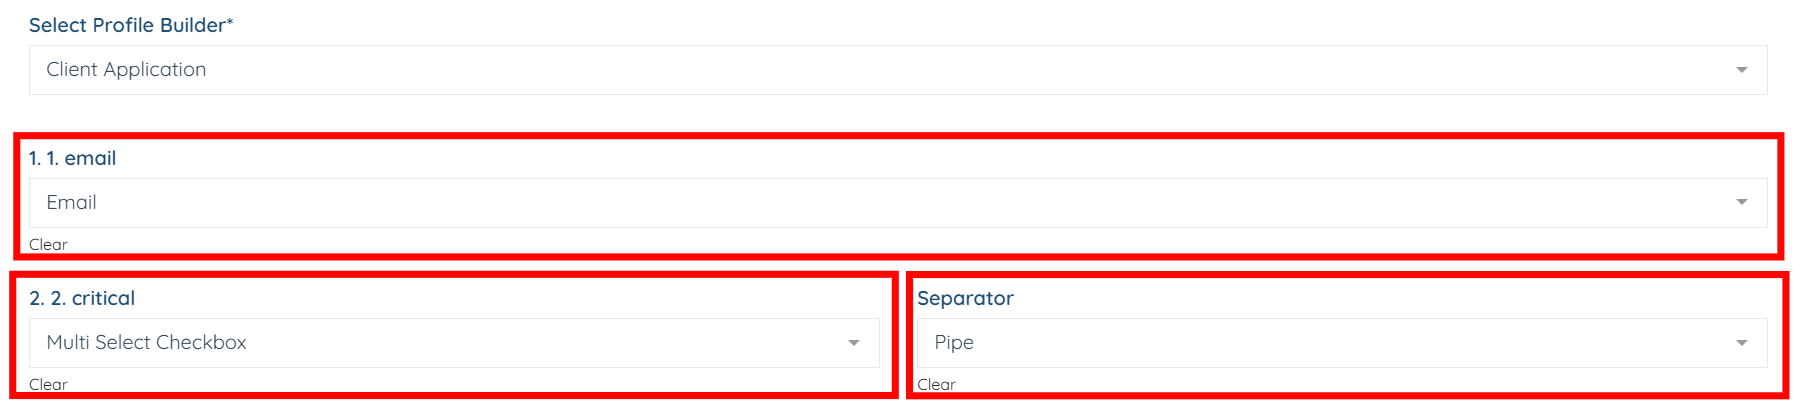
Step 4: Select the Email field for the email column in the CSV file, and select Multi Select Checkbox (the field label you entered in Step 4 in the Create a Multi-Select Field section above). Then, choose the Pipe option as the separator.
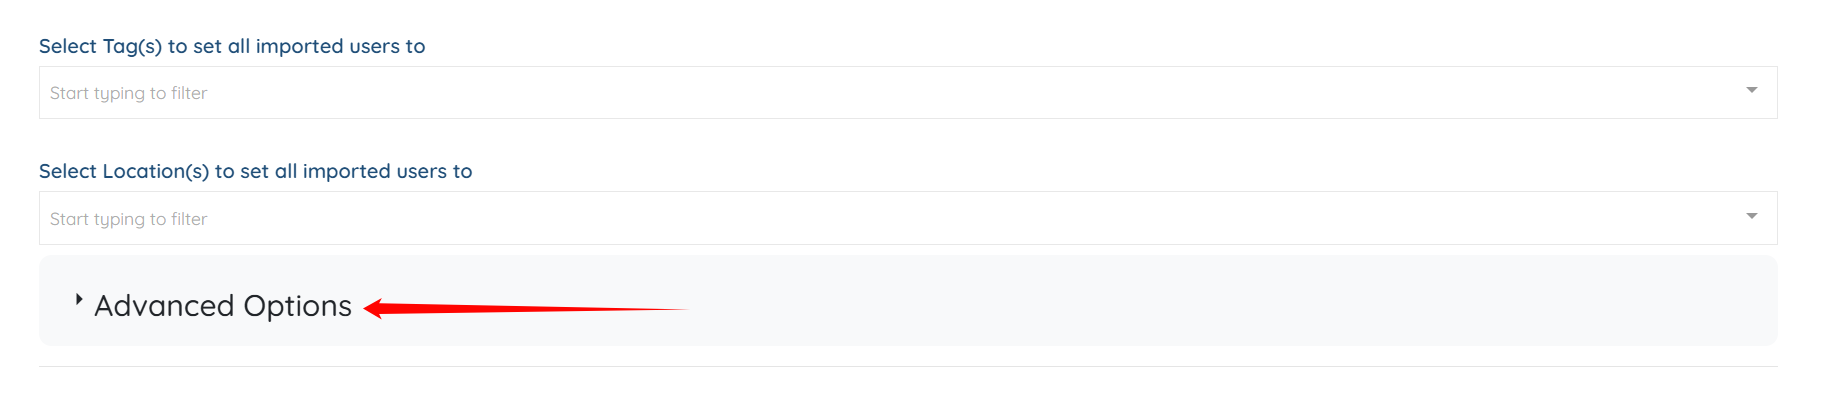
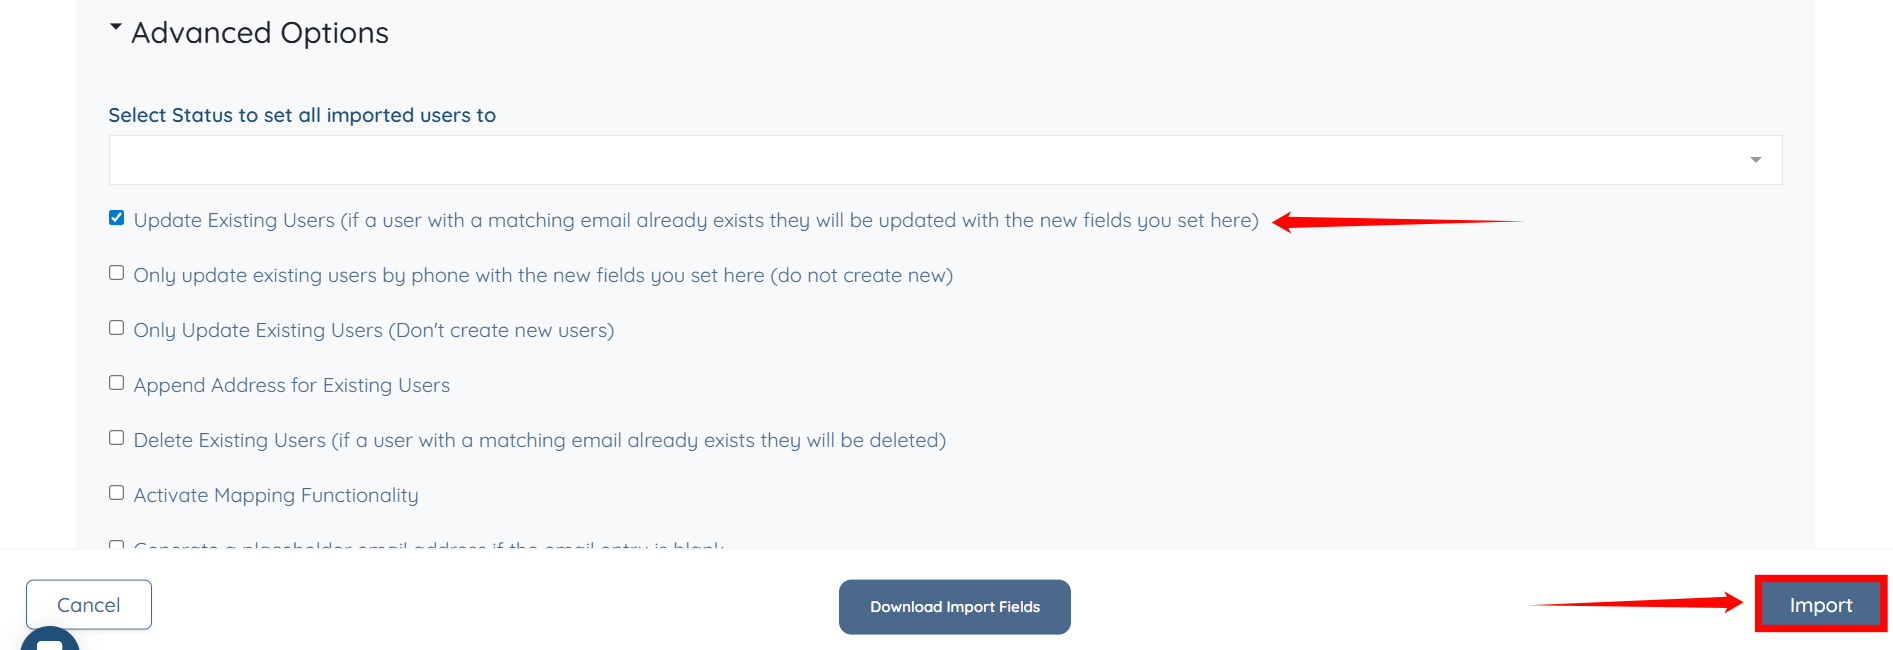
Step 5: Scroll down and click Advanced Options to expand it.
Step 6: Check the Update Existing Users (if a user with a matching email already exists they will be updated with the new fields you set here) checkbox. Then, click the Import button to import the data from the CSV file.
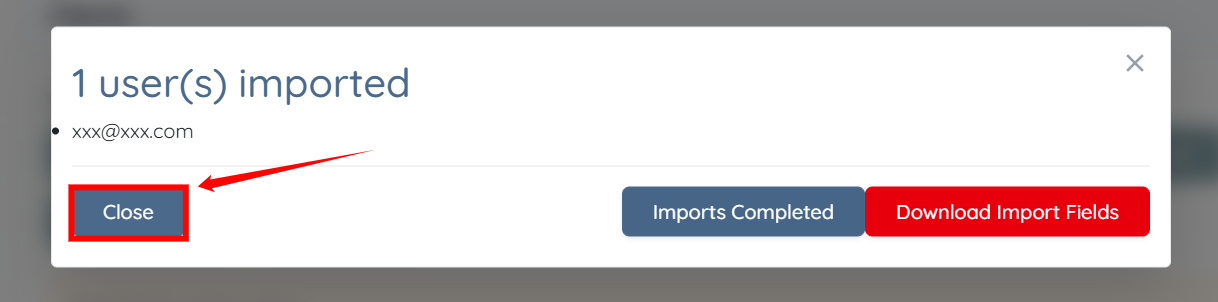
Step 7: Click the Close button to proceed.
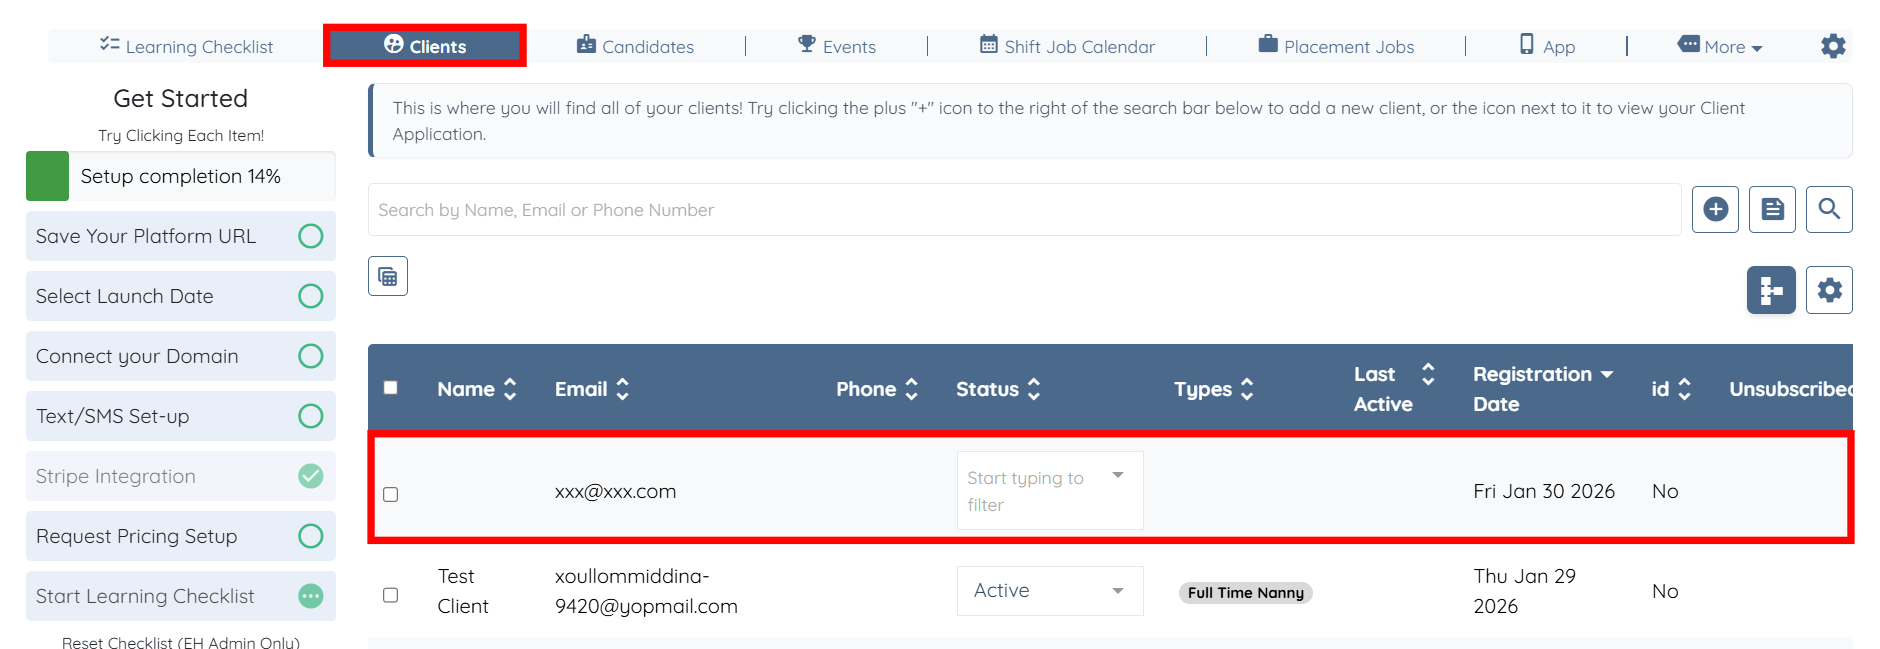
Step 8: In the Clients section, click the imported user in the client list to view its details.
Step 9: Click the Profile tab to open the client profile.
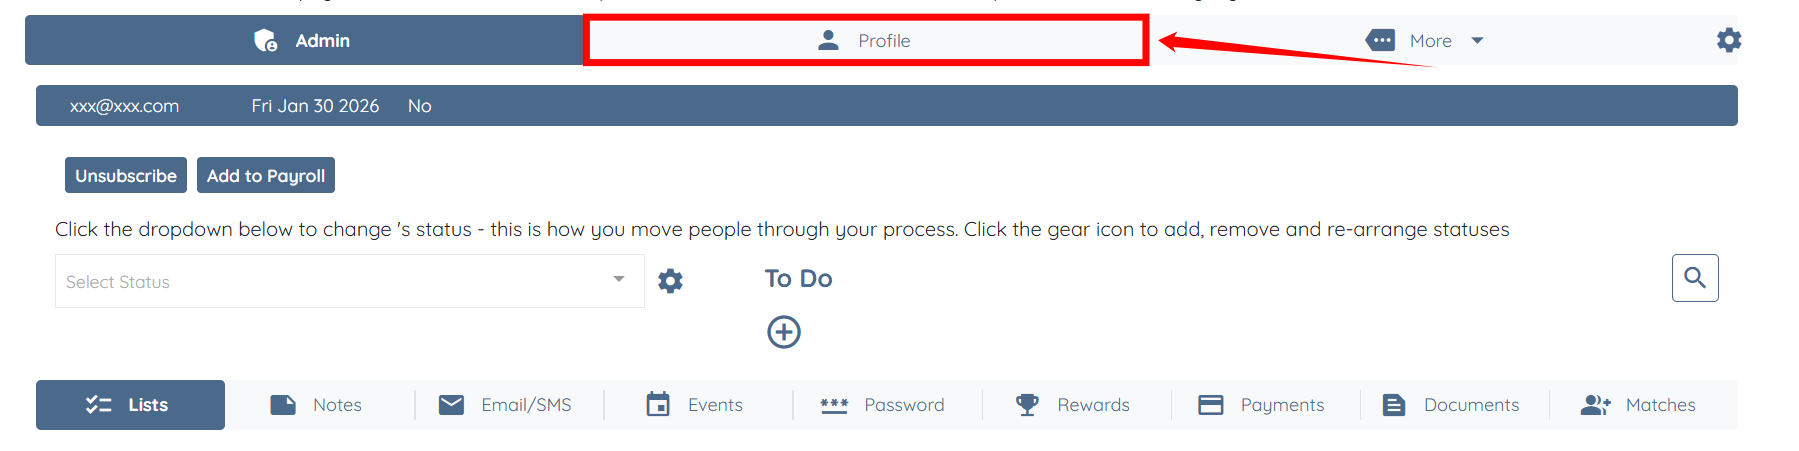
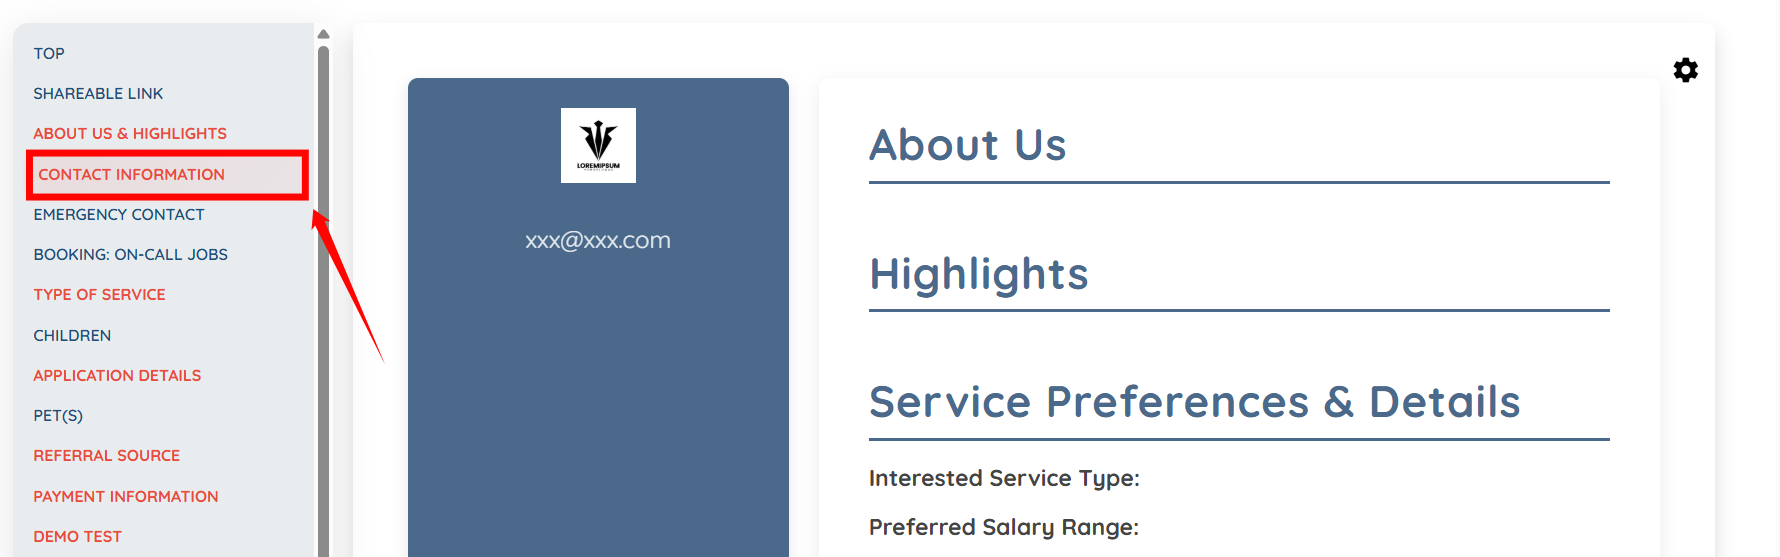
Step 10: Select the section in the left navigation bar where you added the multi-select field.
The system will successfully import and map the data into the added field in the selected section.