
Let’s get started 🚀
Before payment authorizations can be used, you must first create an Authorization Builder. This builder defines the structure of the payment authorization form, including required fields that control authorization limits and validation.
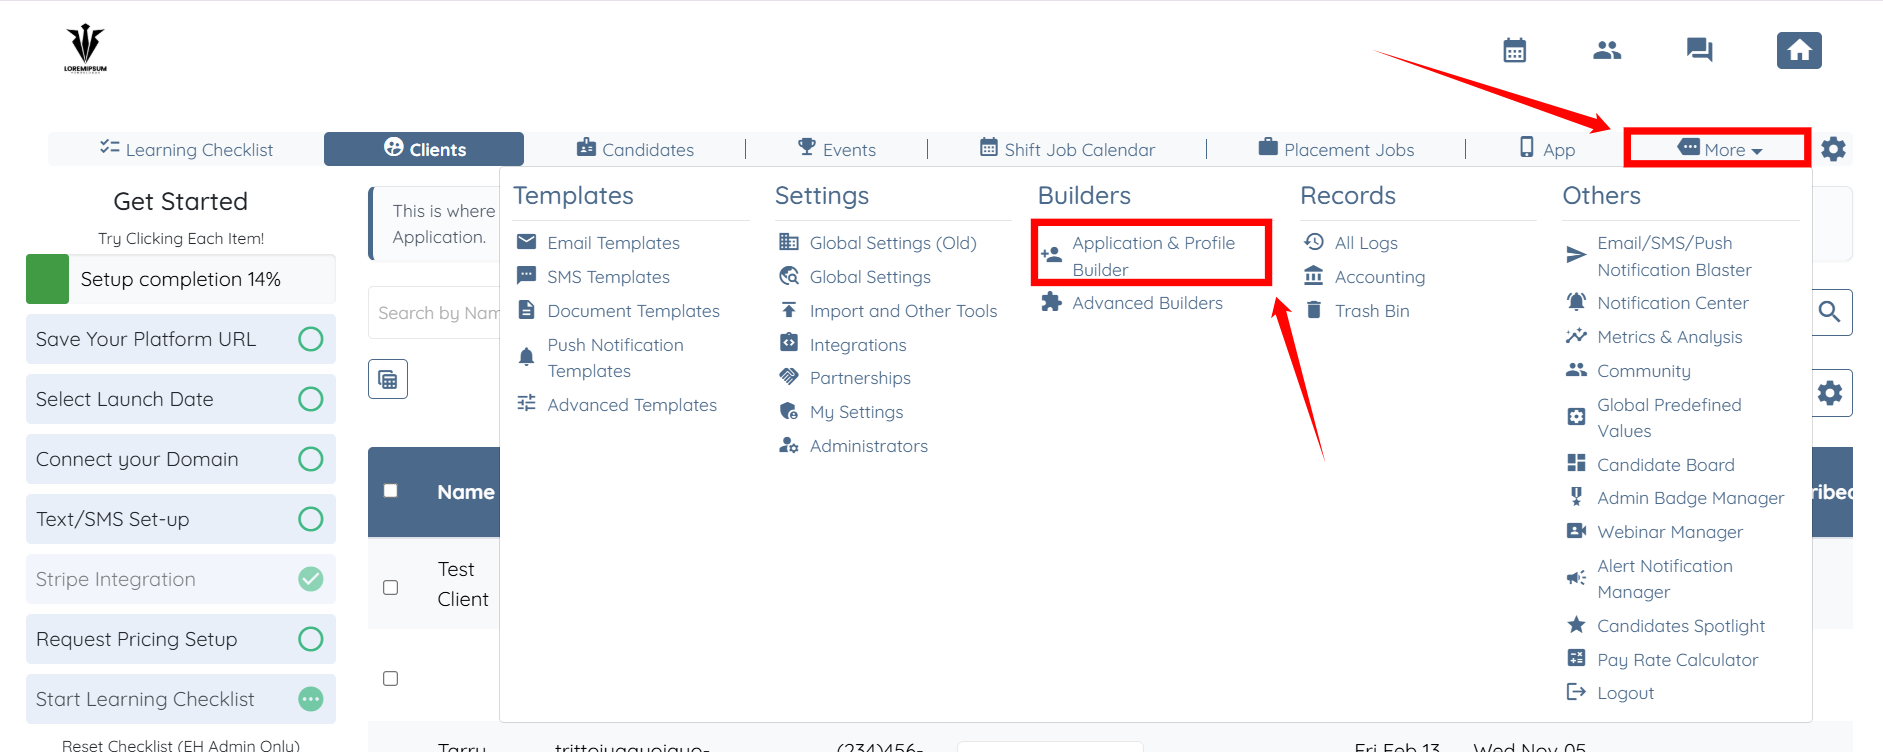
Step 1: Log in to your agent dashboard and click More > Application & Profile Builder, as shown in the screenshot below.
Step 2: Click the Add button to start creating the Authorization Builder.

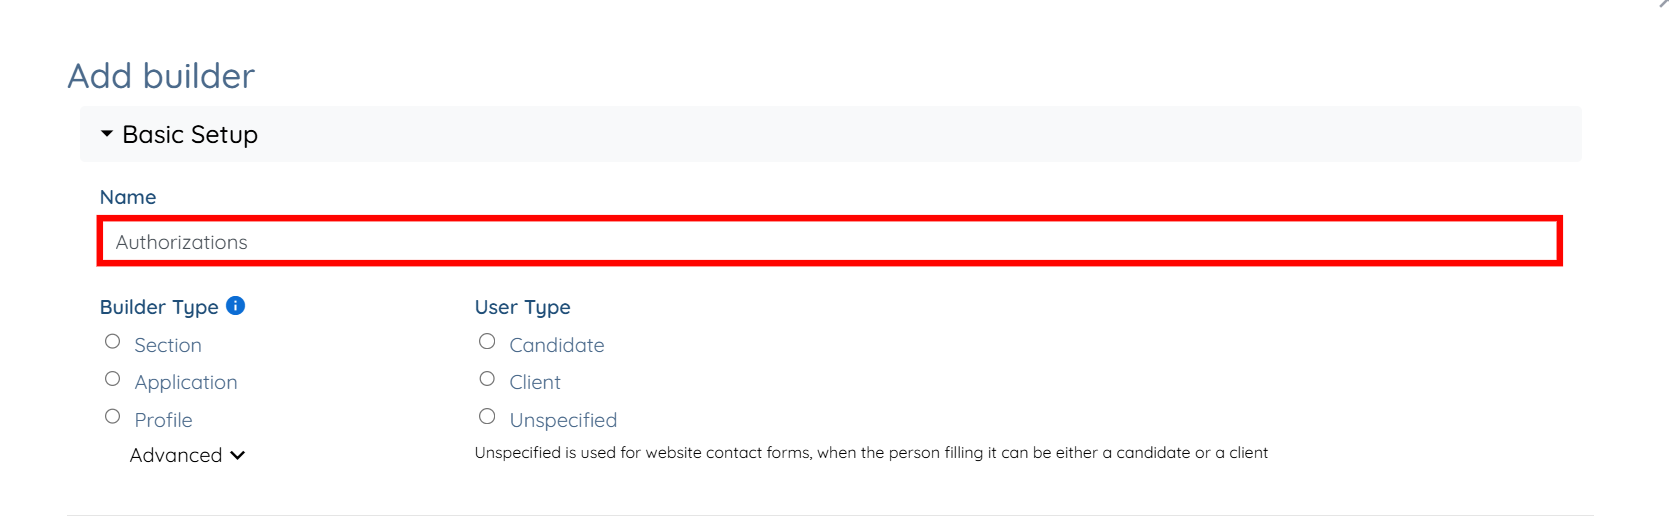
Step 3: Enter a name for your authorization builder.
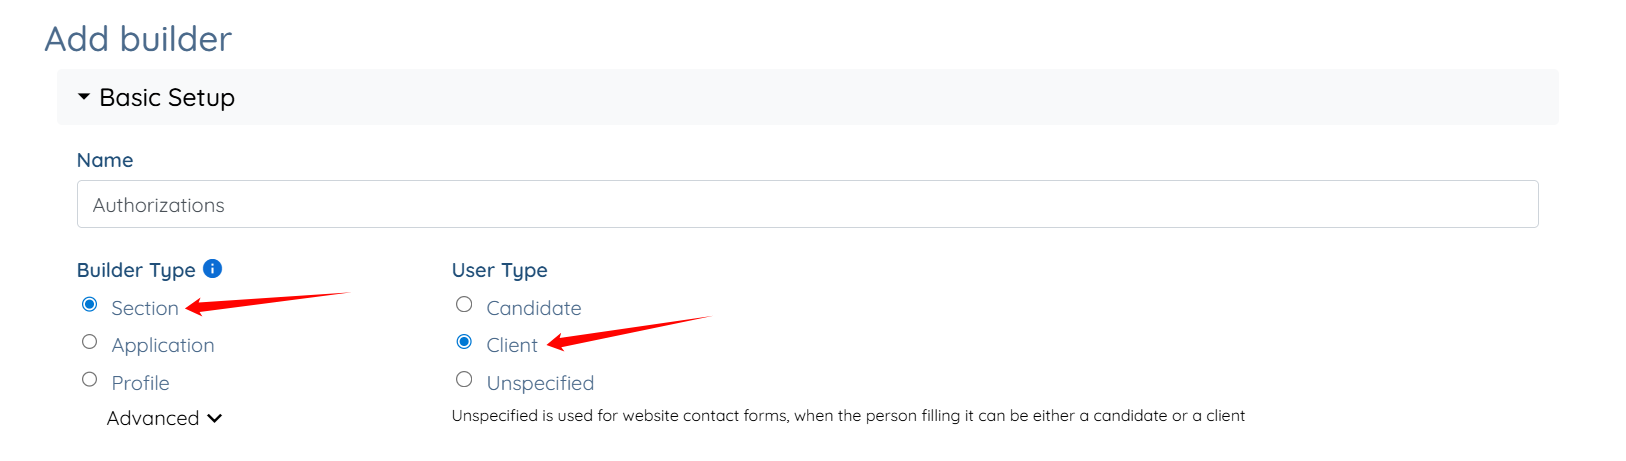
Step 4: Select Section as the Builder Type and Client as the User Type.
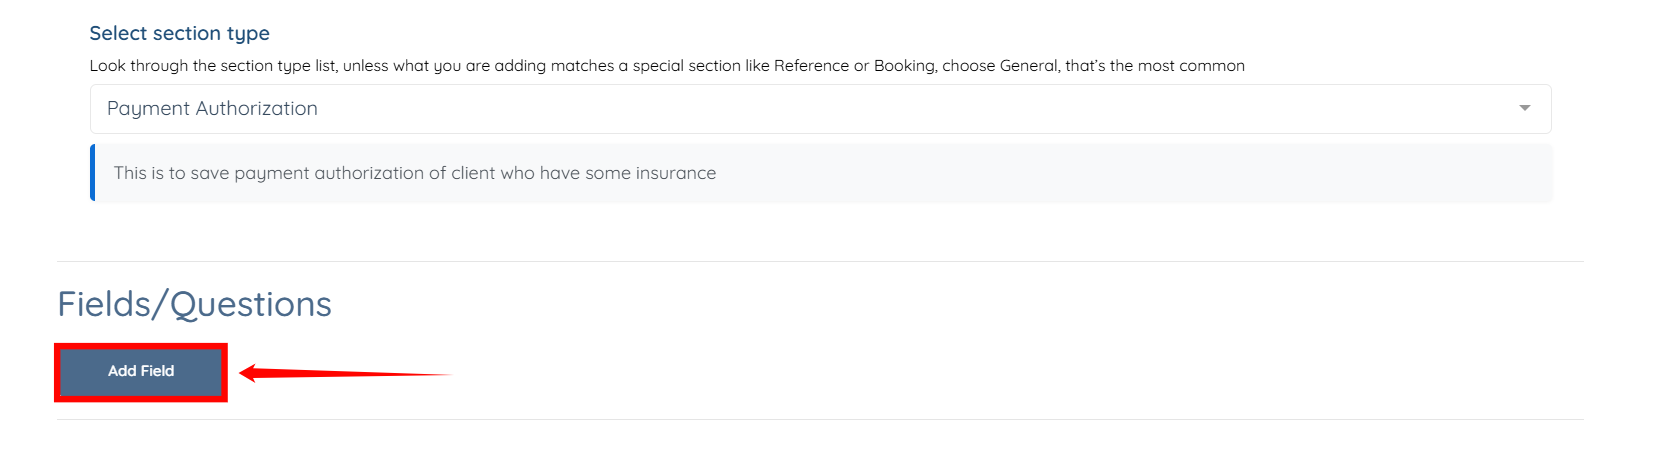
Step 5: Select Payment Authorization as the section type.

Add the required fields to define how the authorization behaves and enable the system to validate bookings correctly.
1. Authorization ID Field
This field stores the name of the authorization and is required for identification and reporting.
Step 1: Click the Add Field button to begin adding a new field.
Step 2: Enter Authorization ID as both the Field Label and the Profile Label.
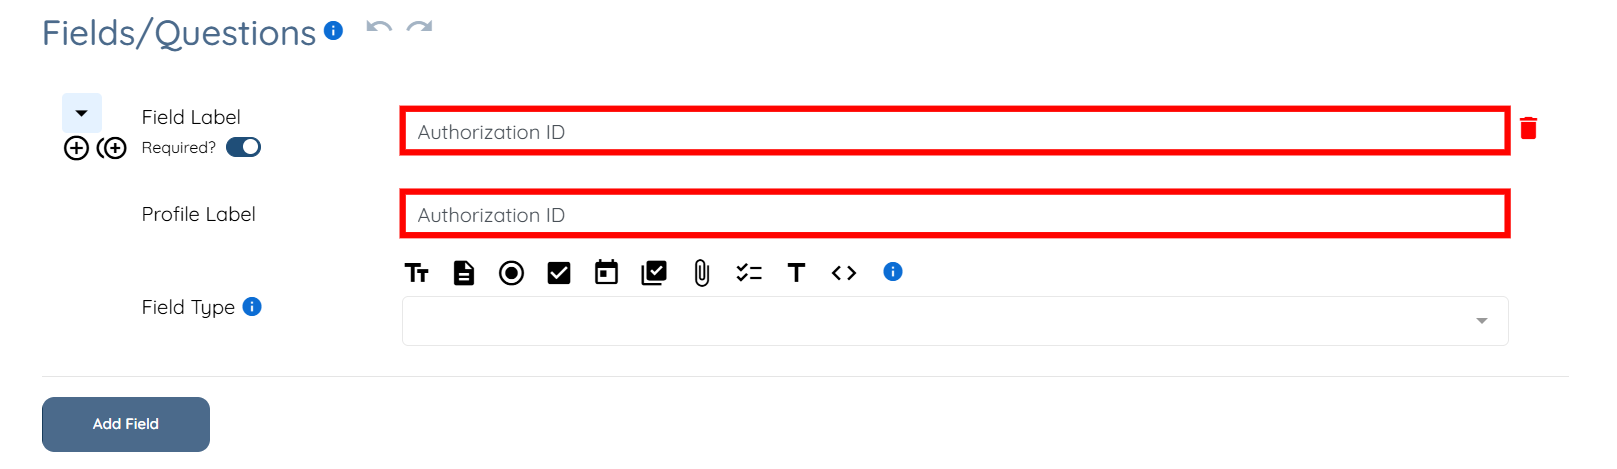
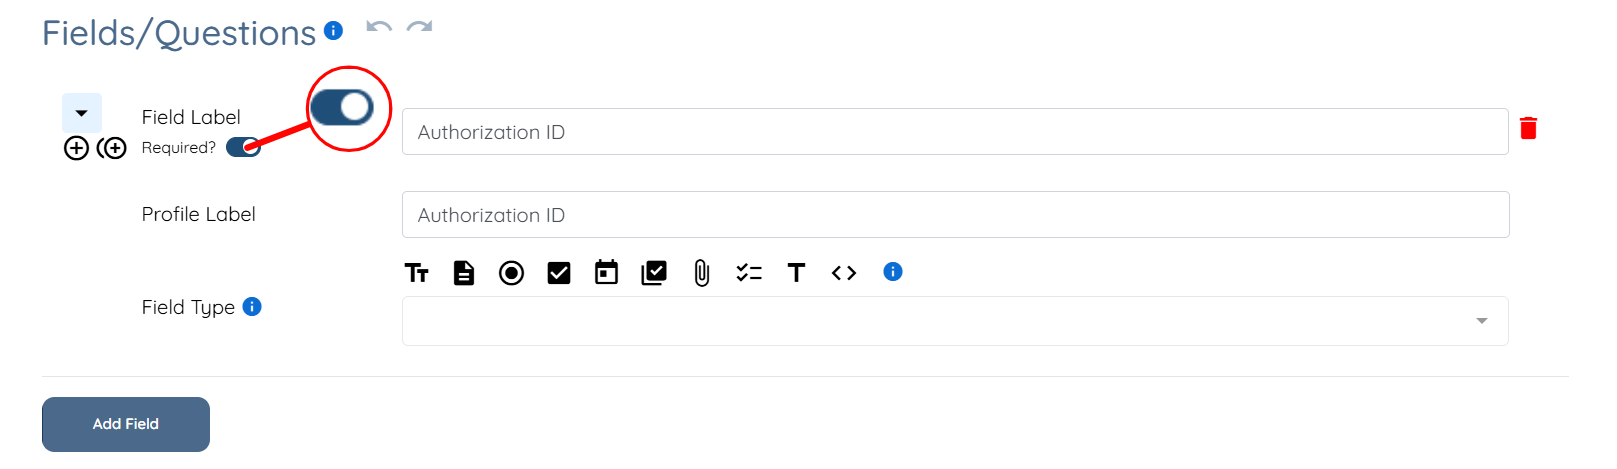
Ensure that you set the Required toggle to ON for this field.
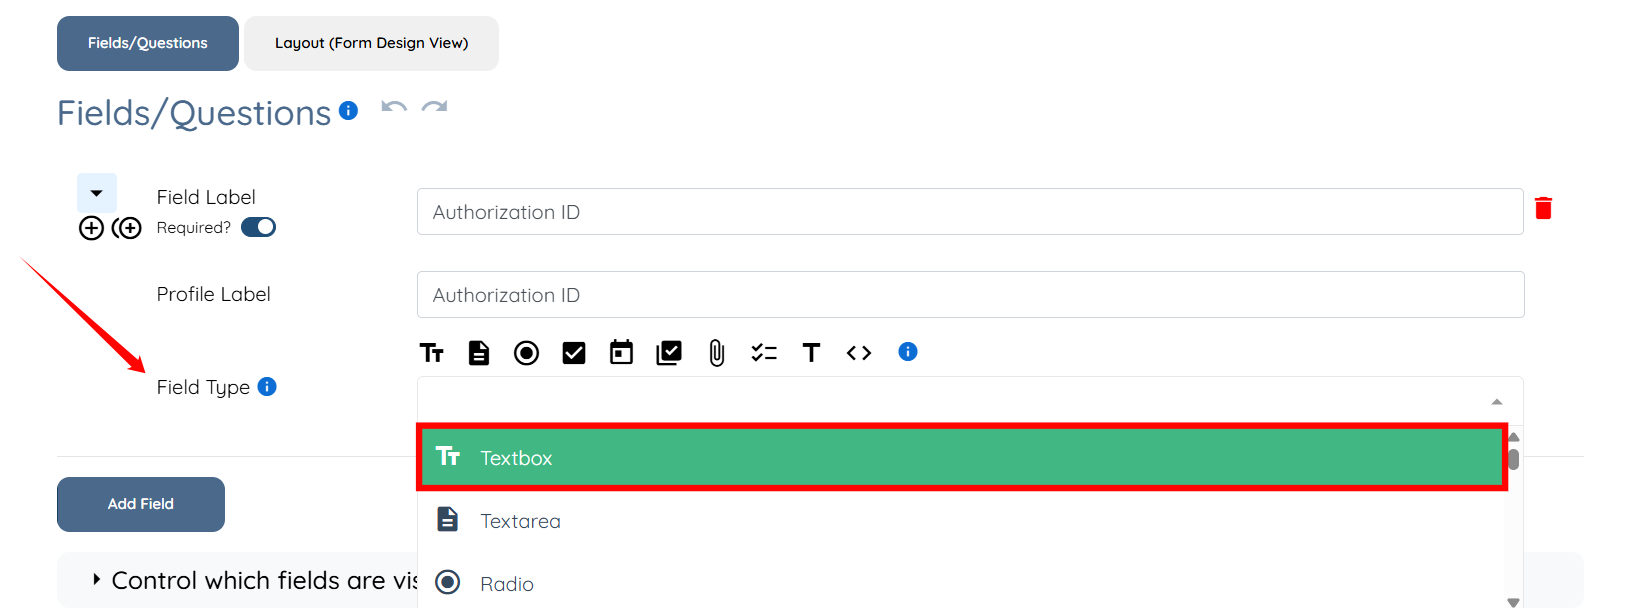
Step 3: Select Textbox as the Field Type.
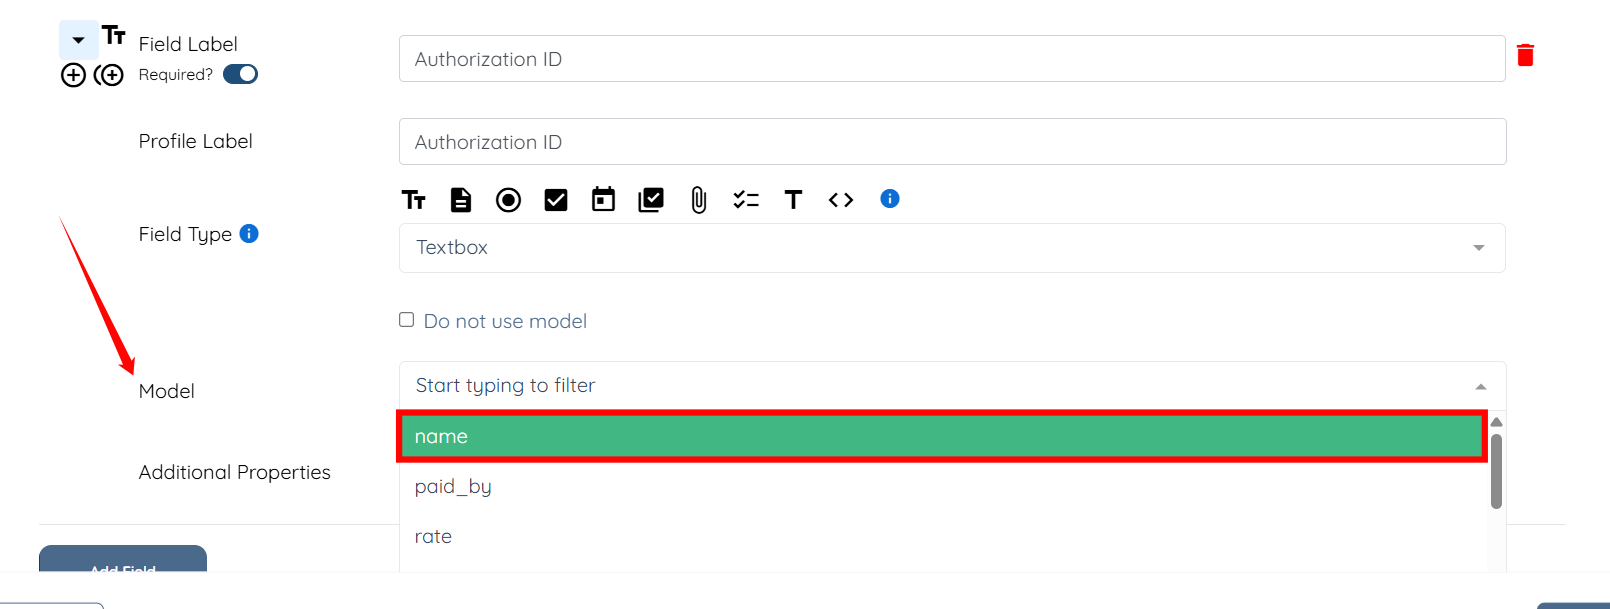
Step 4: Select name as the model for this field.
Similarly, create the following fields for your authorization builder.
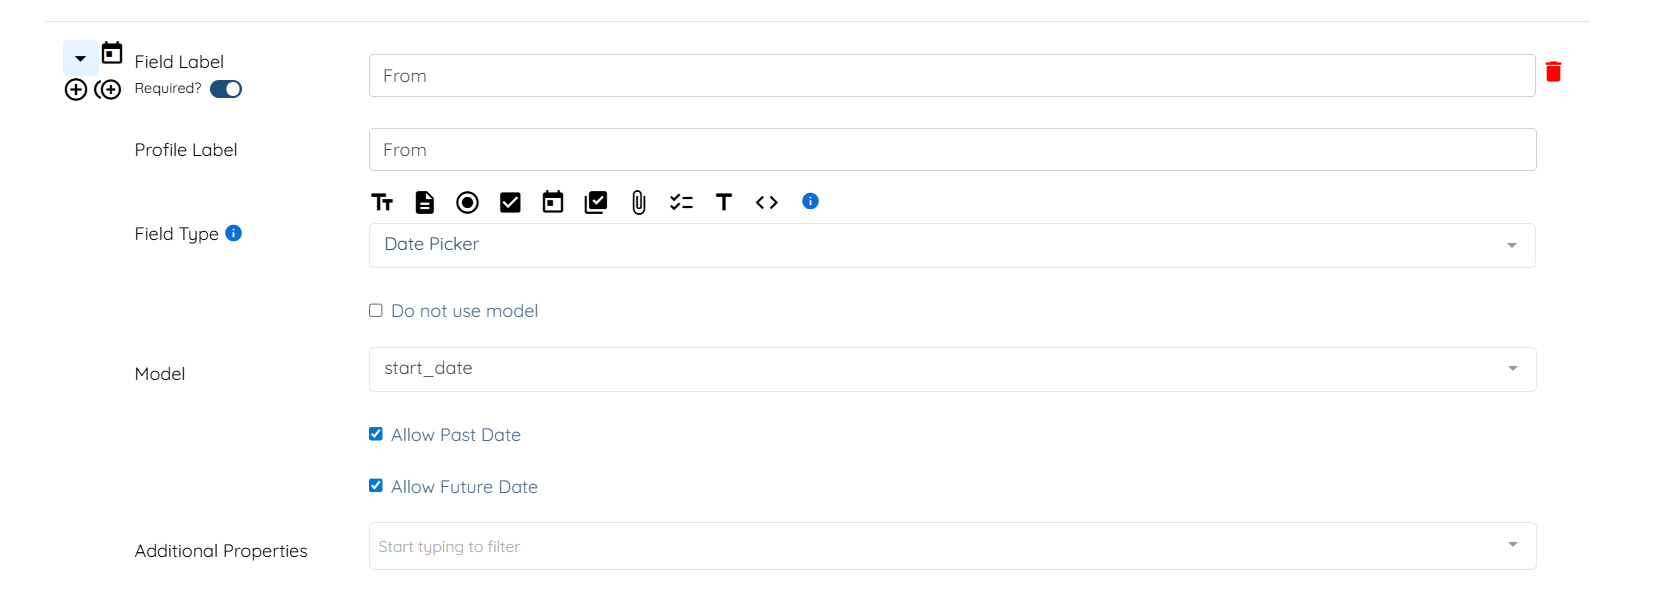
2. From Field
This field defines the start date of the authorization. Shifts cannot be created using this authorization before this date.
Create a From field using the Date Picker field type and assign the model start_date. Enable both Allow Past Date and Allow Future Date, and turn the Required toggle ON.
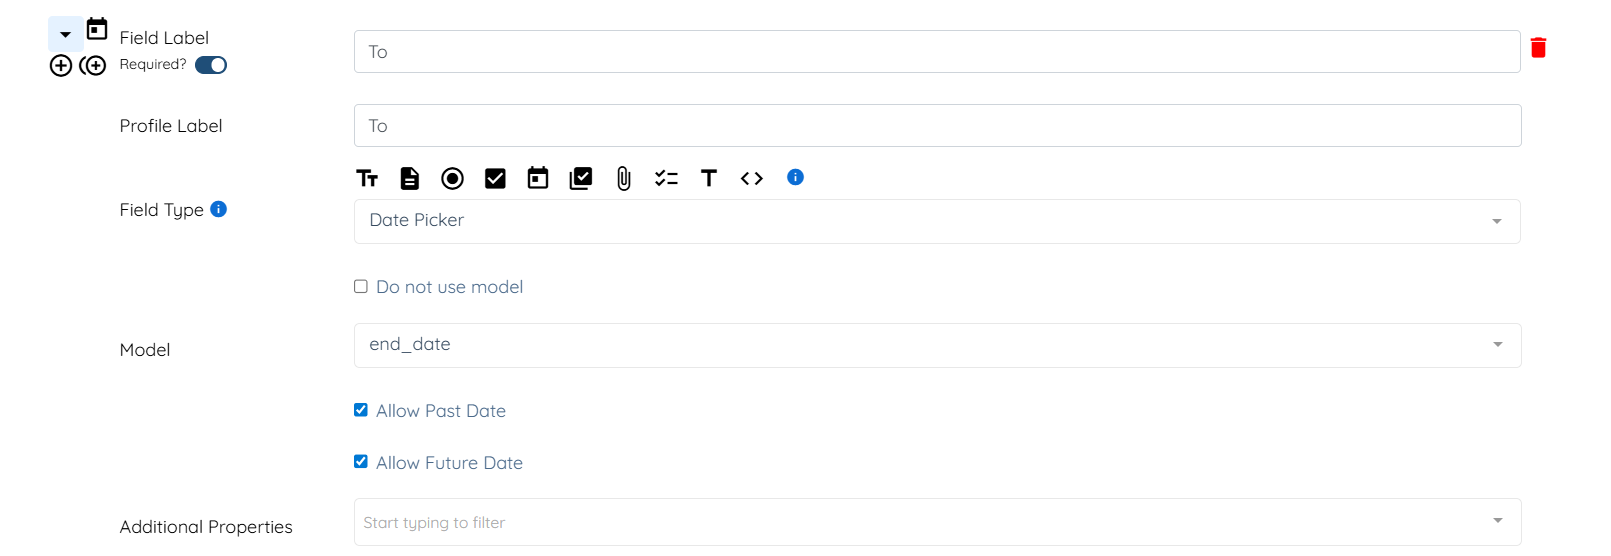
3. To Field
This field defines the end date of the authorization. Shifts cannot be created using this authorization after this date.
Create a To field using the Date Picker field type and assign the model end_date. Enable both Allow Past Date and Allow Future Date, and turn the Required toggle ON.
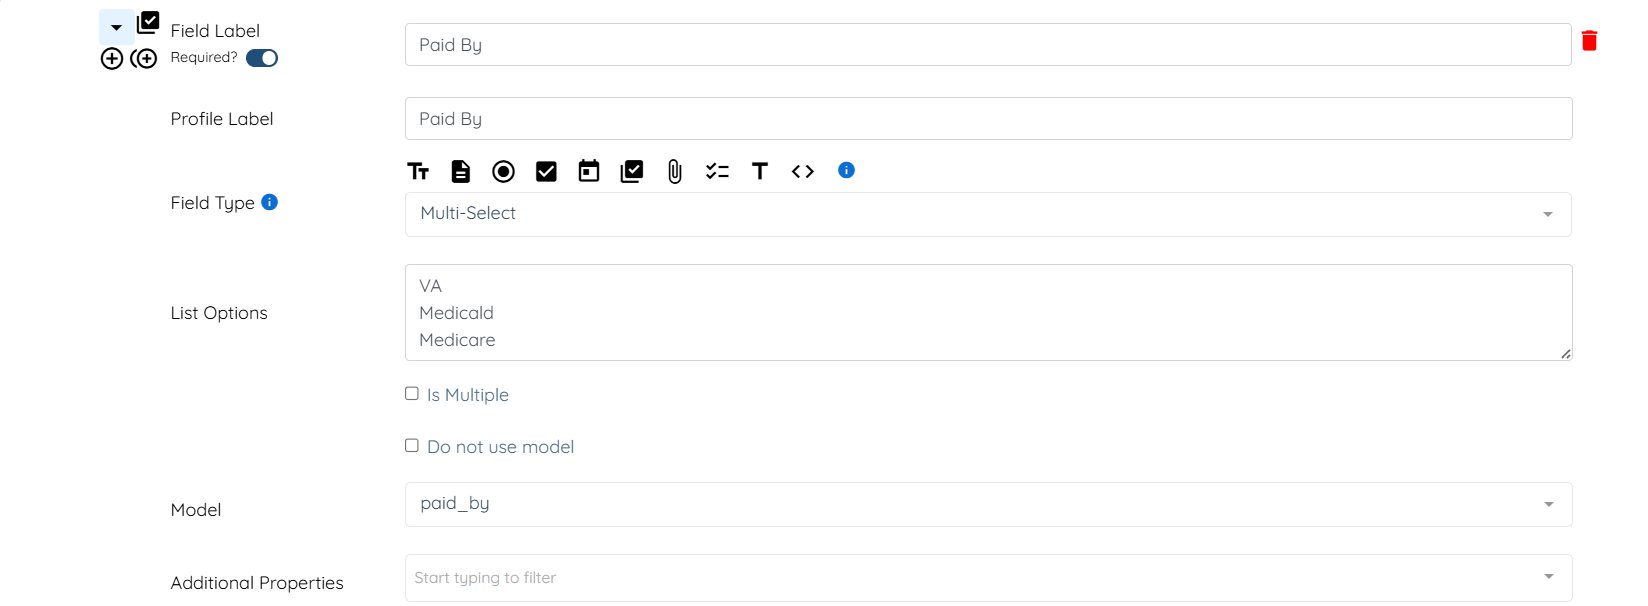
4. Paid By Field
This field defines who is responsible for payment under the authorization. Create a Paid By field using the Multi-Select field type. Enter the available payer options (insurance providers) in the List Options field. Assign the model paid_by, and turn the Required toggle ON.
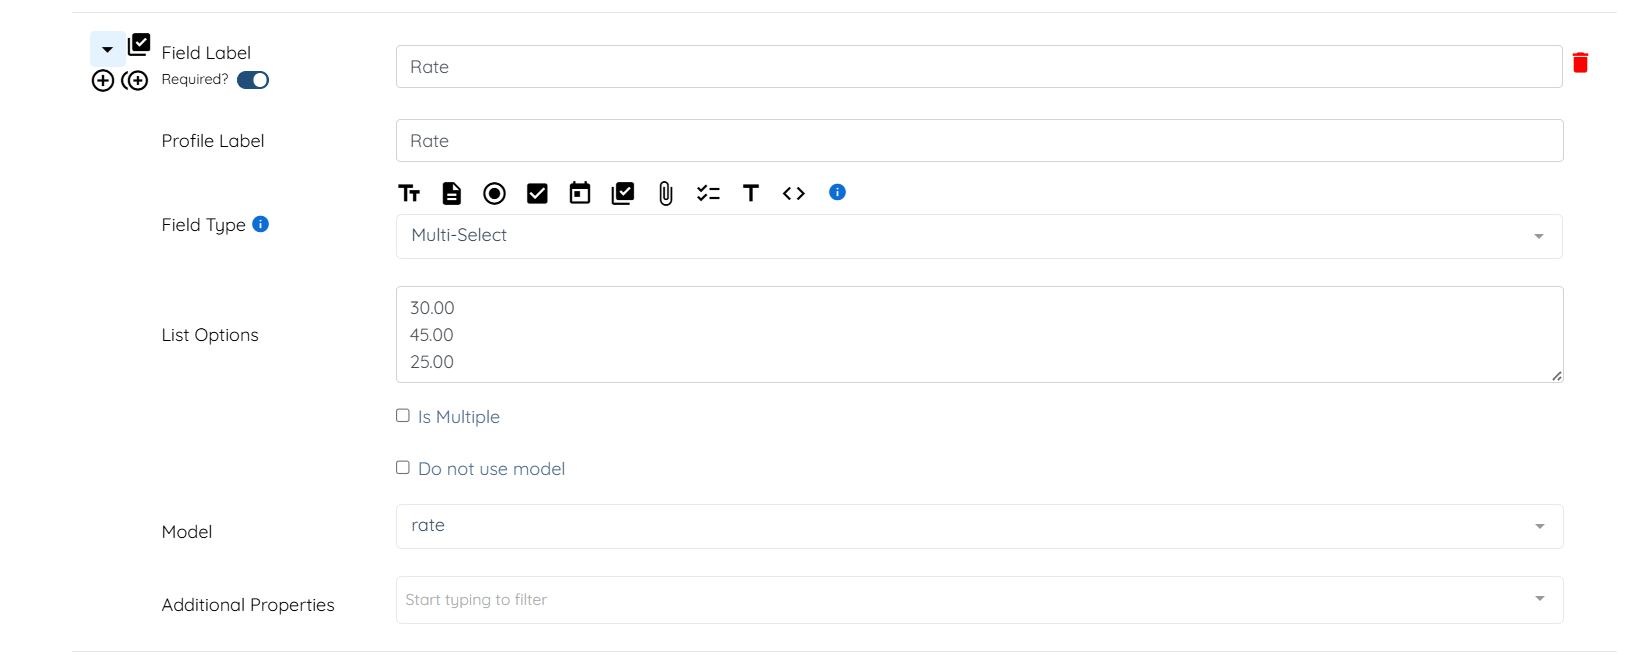
5. Rate Field
The selected rate will automatically apply to shifts created using this authorization. Create a Rate field using the Multi-Select field type. Enter the available rate options in the List Options field. Assign the model rate, and turn the Required toggle ON.
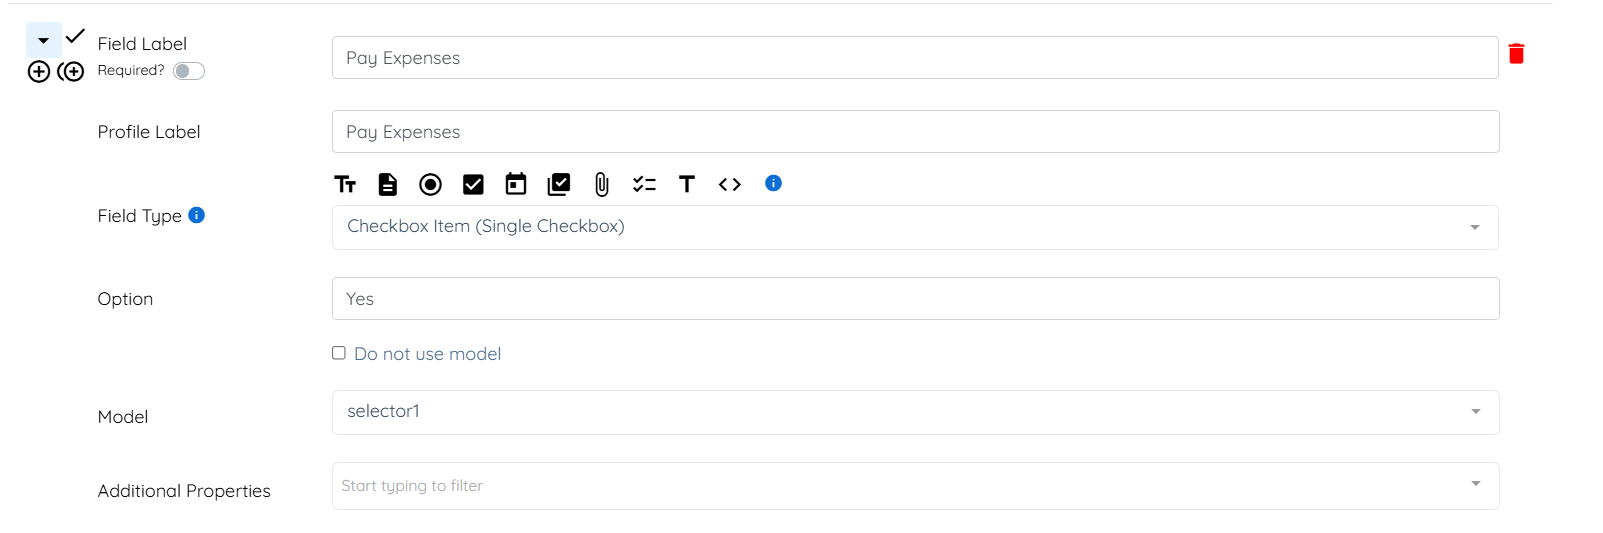
6. Pay Expenses Field
This field indicates whether expenses are covered under the authorization. Create a Pay Expenses field using the Checkbox Item (Single Checkbox) field type. Enter Yes in the Option field. Go with the default model and keep the Required toggle OFF.
7. Display usage in Family Room Field
This field controls whether authorization usage details are visible in the Family Room. Create a Display Usage in Family Room field using the Checkbox Item (Single Checkbox) field type. Enter Yes in the Option field. Go with the default model and keep the Required toggle OFF.

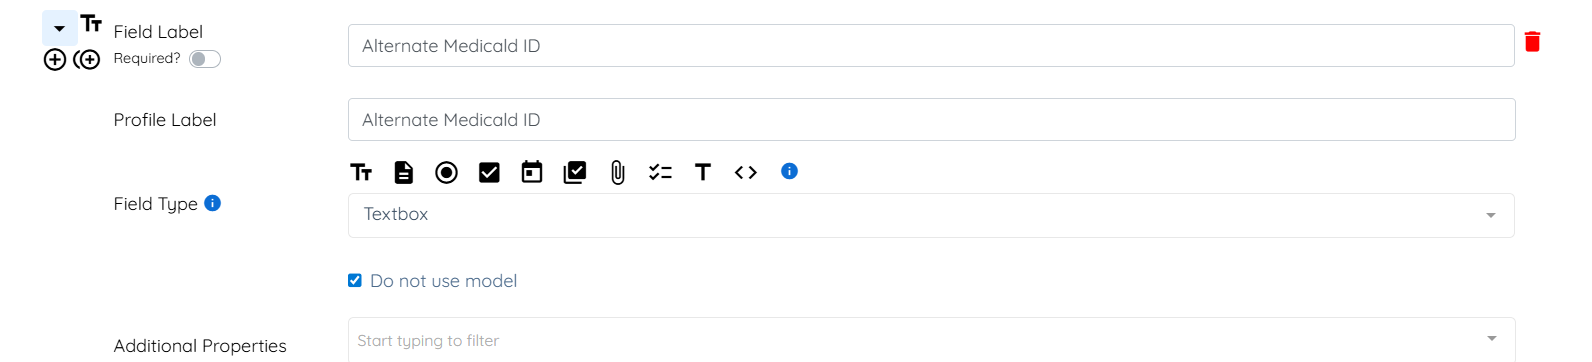
8. Alternate Medicald ID Field
This field can be used to store an alternate identifier if required by the payer. Create an Alternate Medicald ID field using the Textbox field type. Keep the Required toggle OFF.
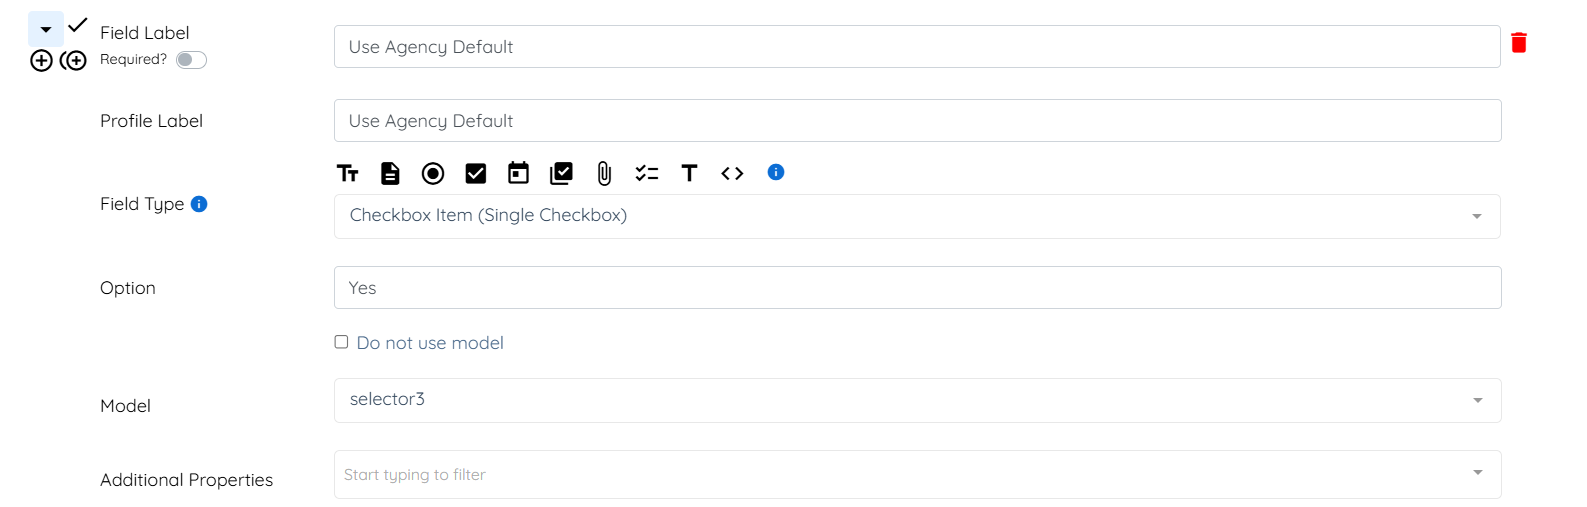
9. Use Agency Default Field
This field allows the system to apply agency-level defaults where applicable. Create a Use Agency Default field using the Checkbox Item (Single Checkbox) field type. Enter Yes in the Option field. Go with the default model and keep the Required toggle OFF.
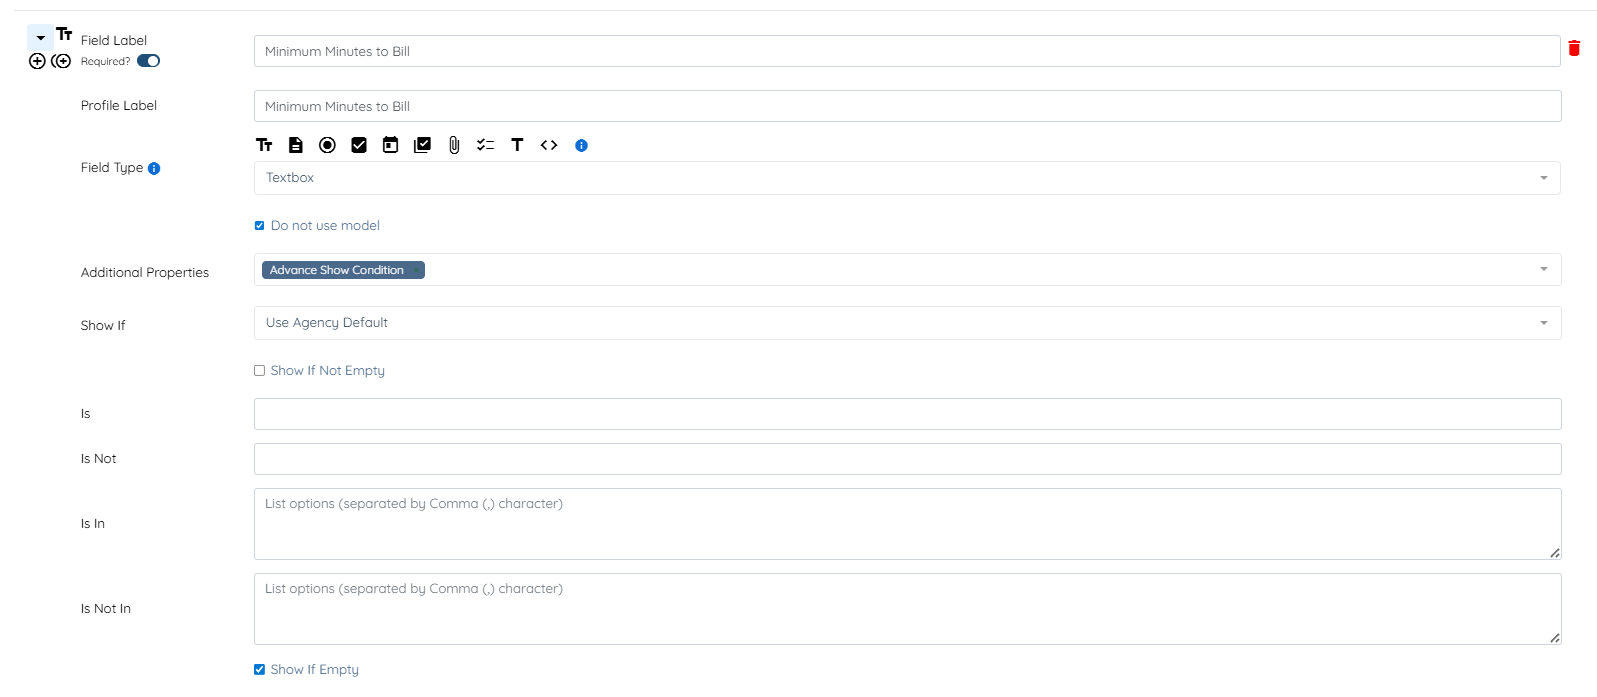
10. Minimum Minutes to Bill Field
This field defines the minimum billable time for shifts under this authorization. Create a Minimum Minutes to Bill field using the Textbox field type. Add Advanced Show Condition property in the Additional Properties. Configure the Show If condition to reference the Use Agency Default field (if applicable). Turn the Required toggle ON.
11. Notes Field
This field allows agencies to record additional information related to the authorization. Create a Notes field using the Textarea field type. Keep the Required toggle OFF.

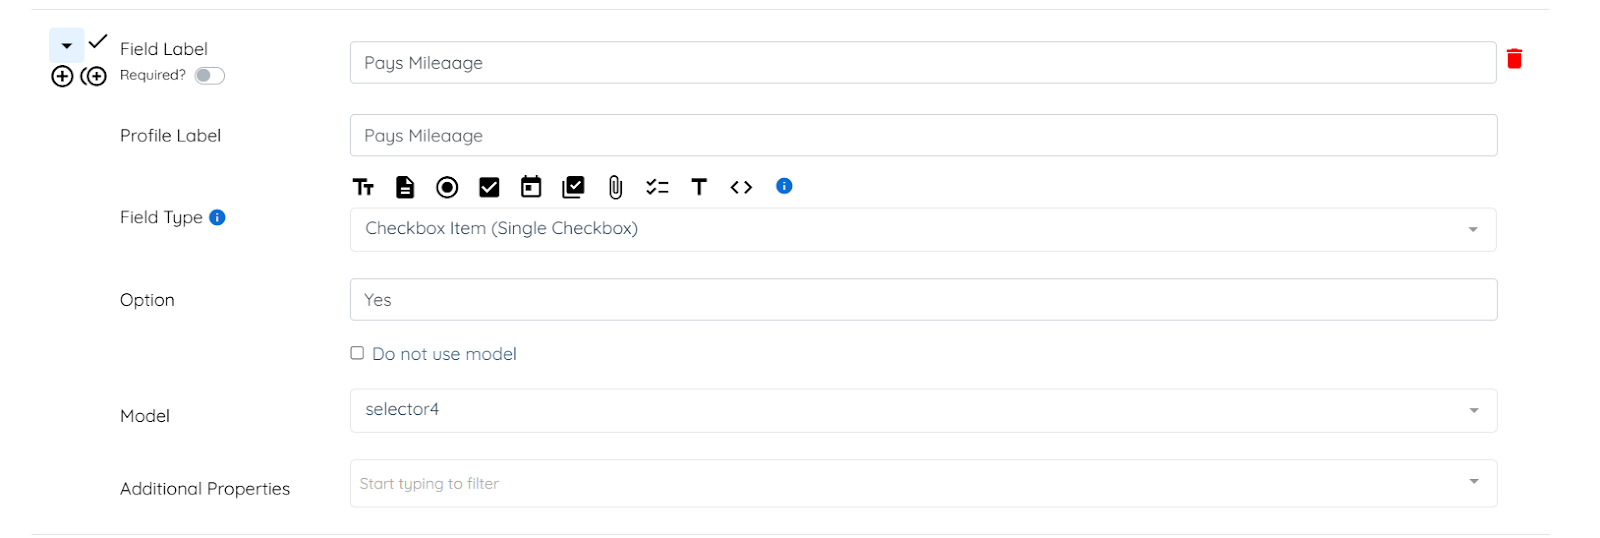
12. Pays Mileage Field
This field indicates whether mileage is covered under the authorization. Create a Pays Mileage field using the Checkbox Item (Single Checkbox) field type. Enter Yes in the Option field. Go with the default model and keep the Required toggle OFF.
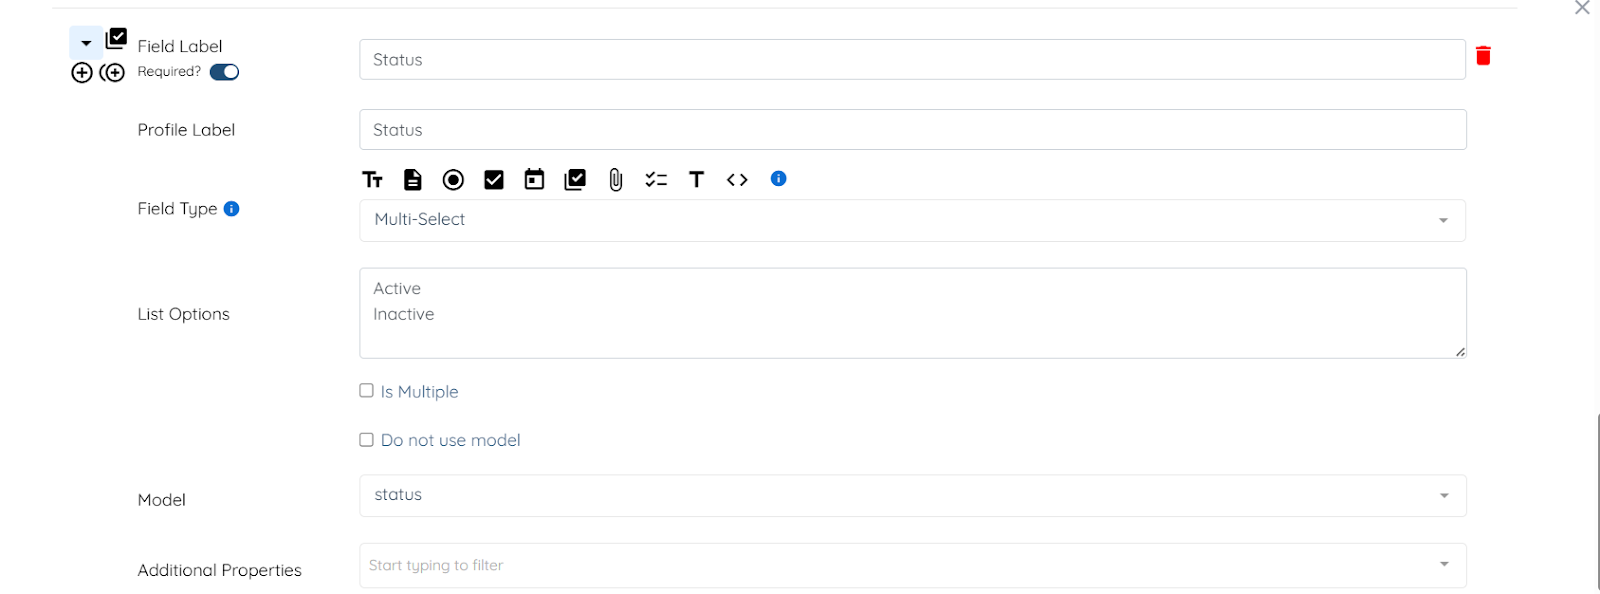
13. Status Field
Only authorizations marked as Active can be used when creating shifts. If set to Inactive, the authorization cannot be selected.
Create a Status field using the Multi-Select field type. Enter Active and Inactive as the List Options. Assign the model status, and turn the Required toggle ON.
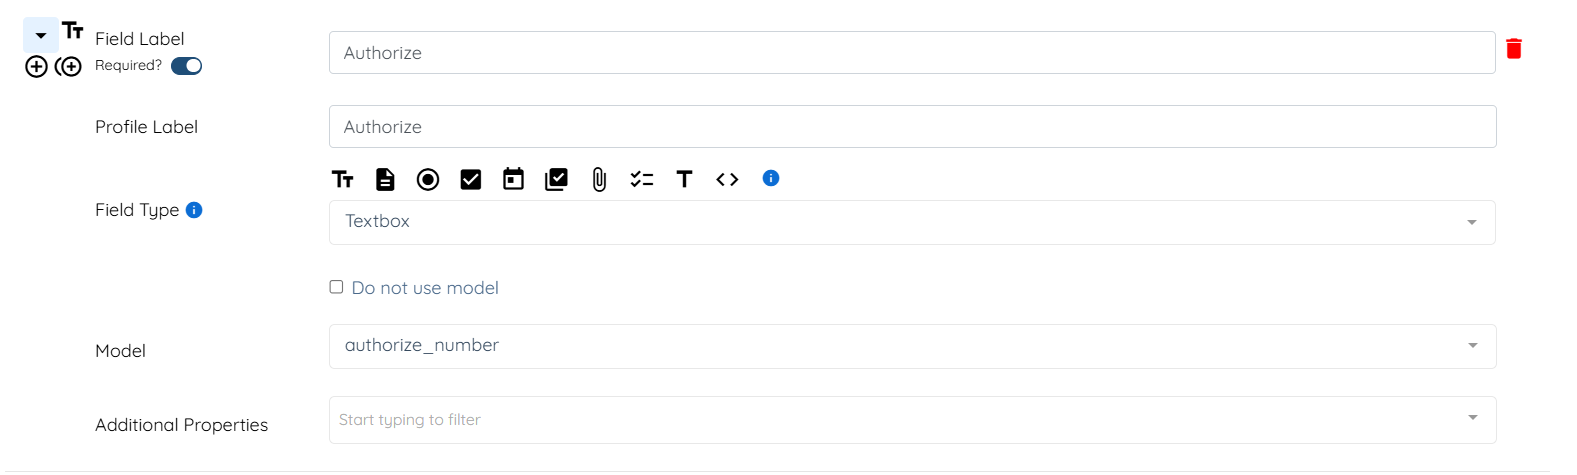
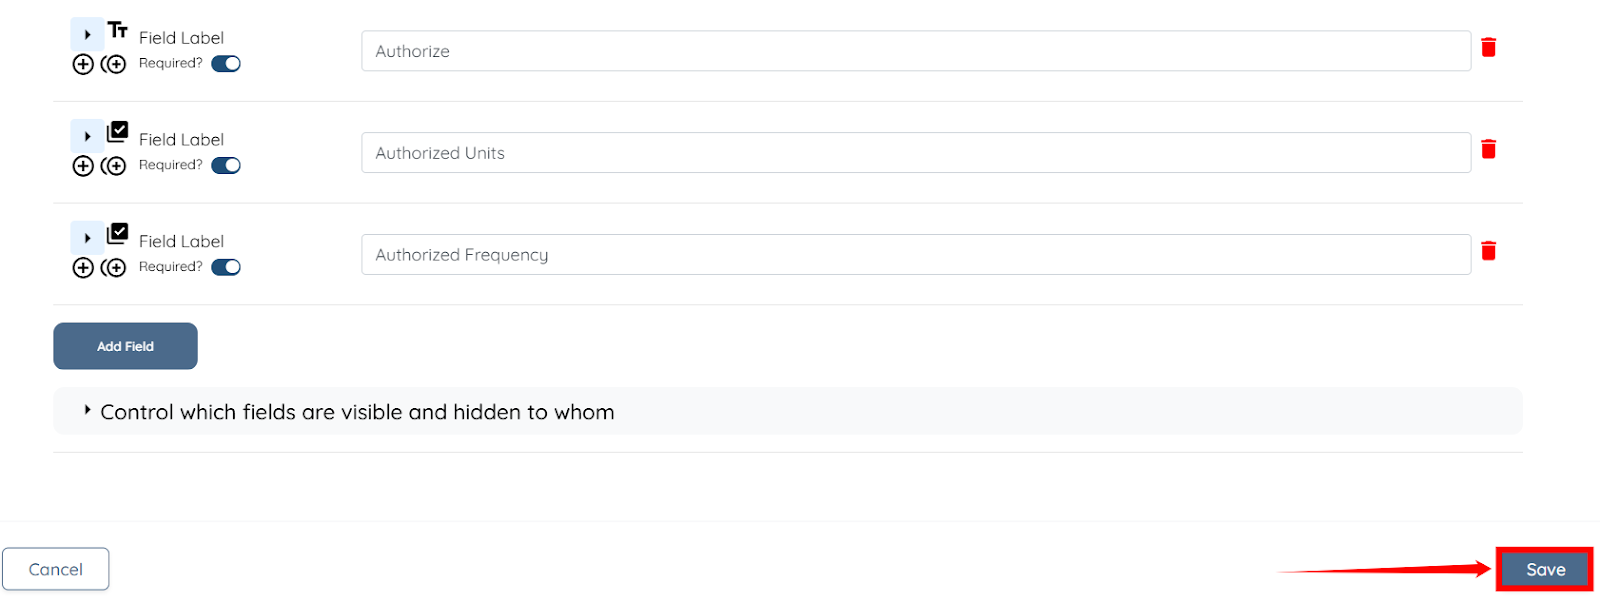
14. Authorize Field
This field defines the number of hours or visits authorized. Create an Authorize field using the Textbox field type. Assign the model authorize_number, and turn the Required toggle ON.
15. Authorized Units Field
This determines whether the authorization is measured in hours or visits. Create an Authorize Units field using the Multi-Select field type. Enter Hours and Visits as List Options. Assign the model authorize_type, and turn the Required toggle ON.

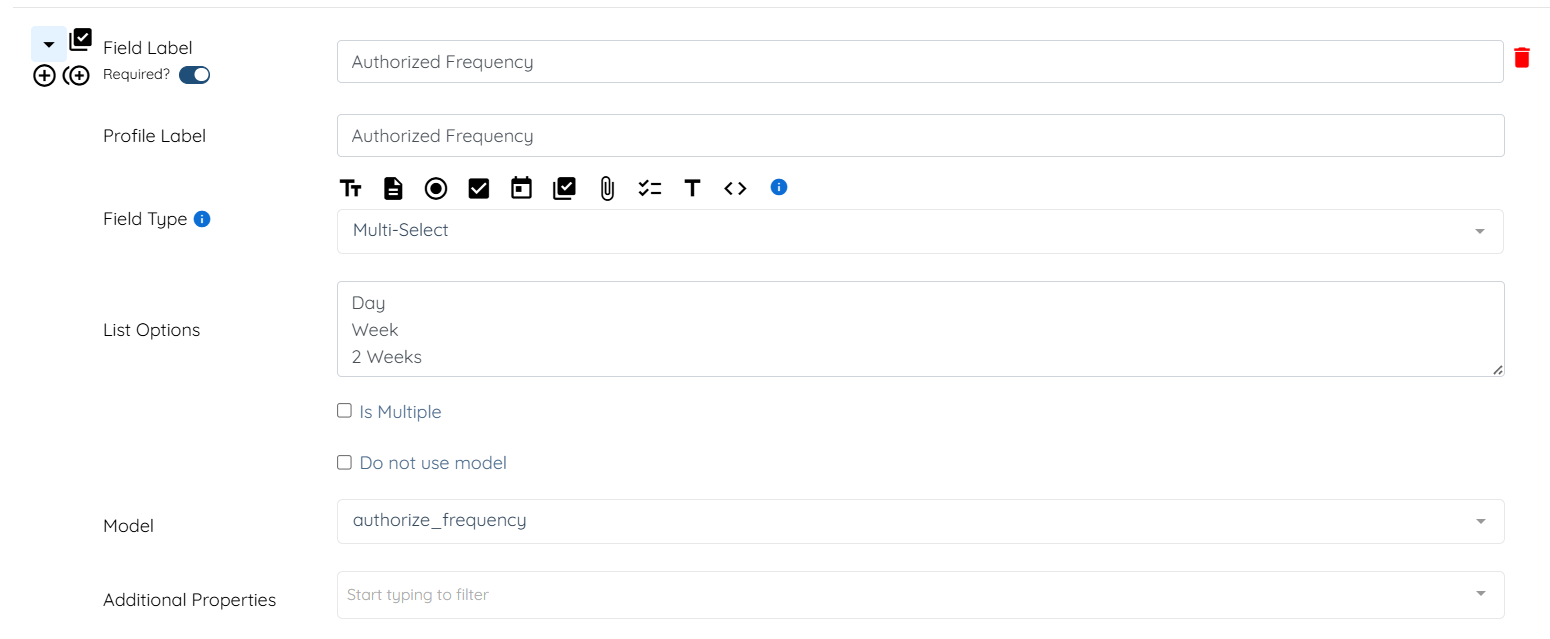
16. Authorize Frequency Field
The frequency determines how often the authorized number resets. The reset cycle begins from the From date.
Create an Authorize Frequency field using the Multi-Select field type. Enter frequency options such as Day, Week, or 2 Weeks in the List Options field. Assign the model authorize_frequency, and turn the Required toggle ON.
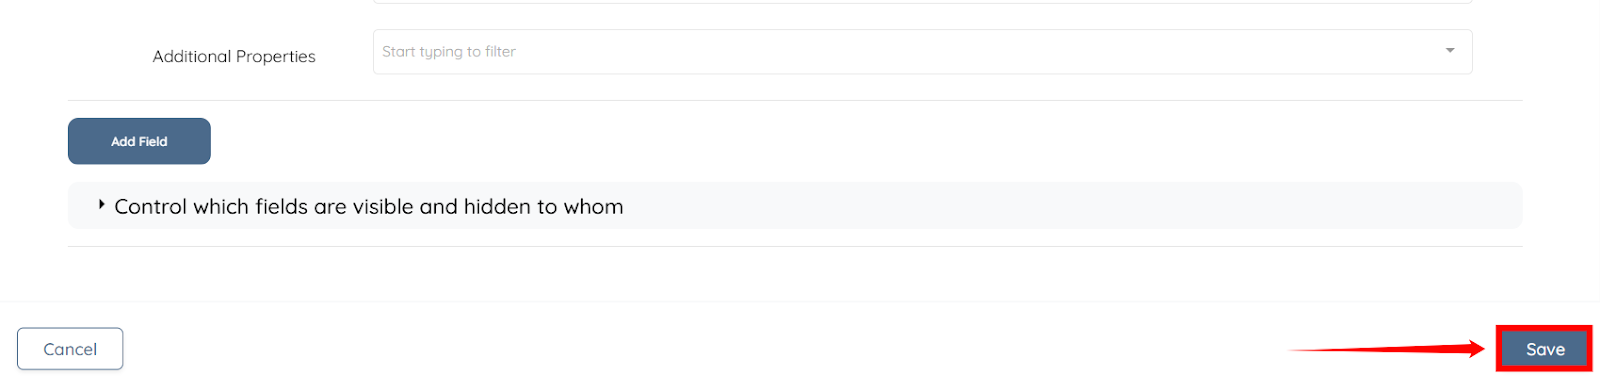
After creating all the fields, click the Save button to confirm the changes.
Once the Authorization Builder is configured, you can create individual payment authorizations for each client.
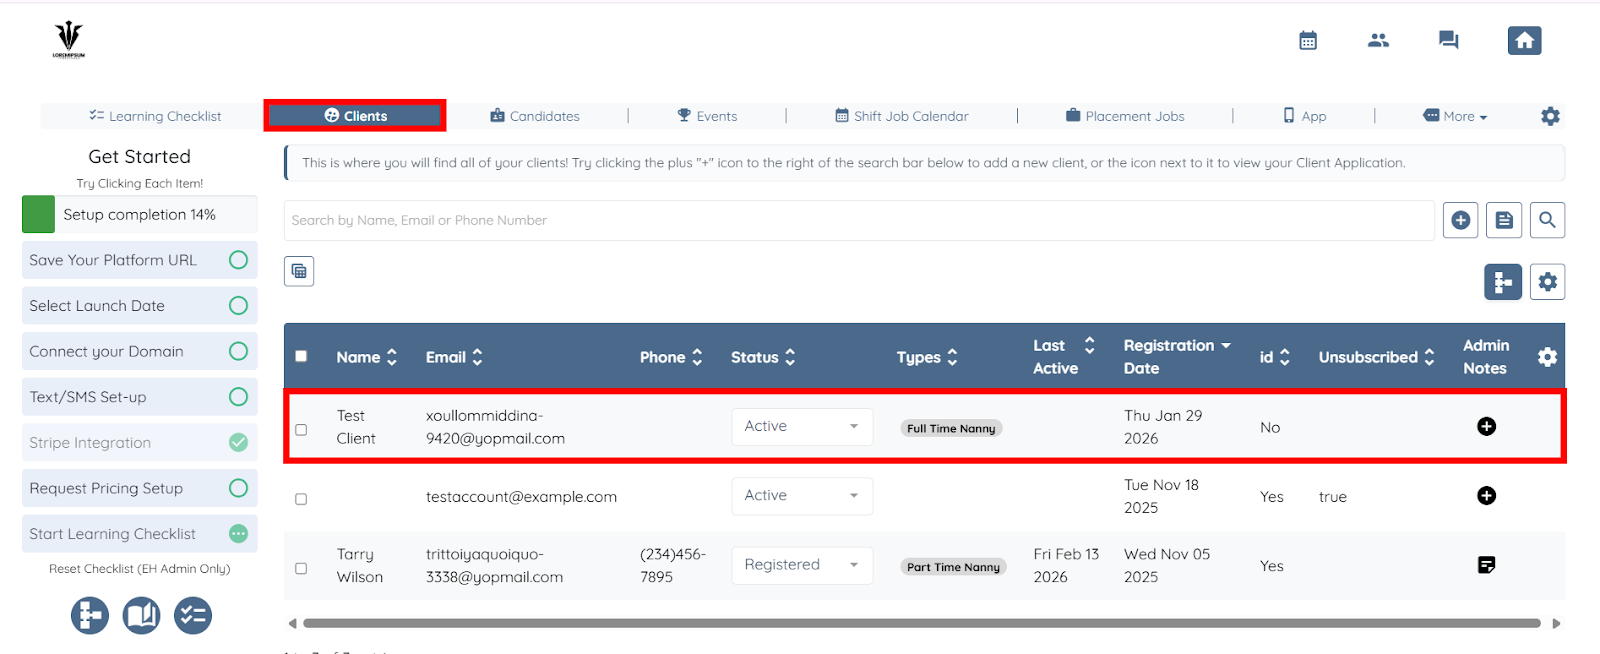
Step 1: On your agent dashboard, click on the client for whom you want to add authorization from the list under the Clients tab.
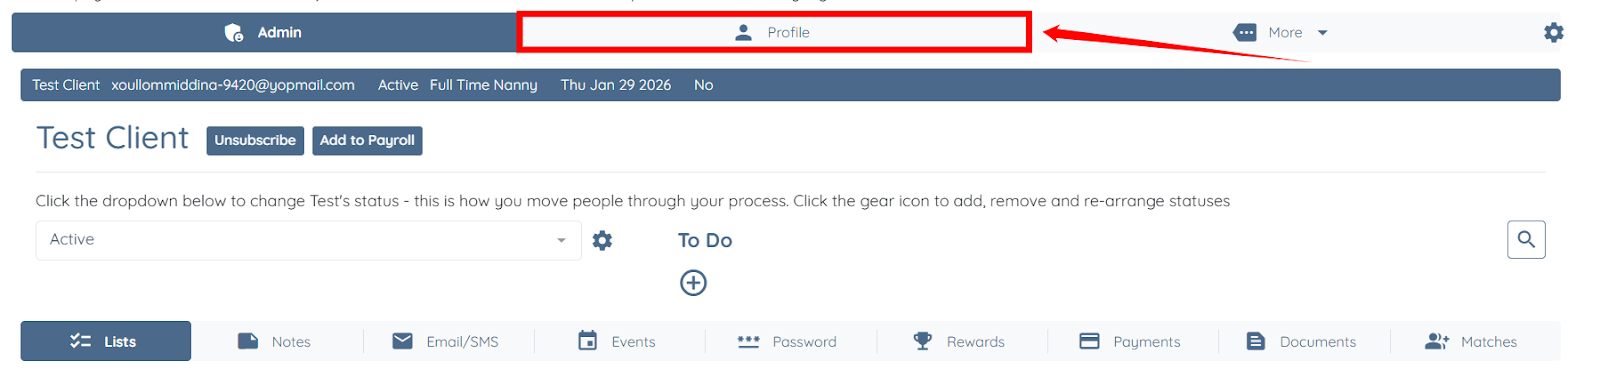
Step 2: Click the Profile tab to open the client profile.
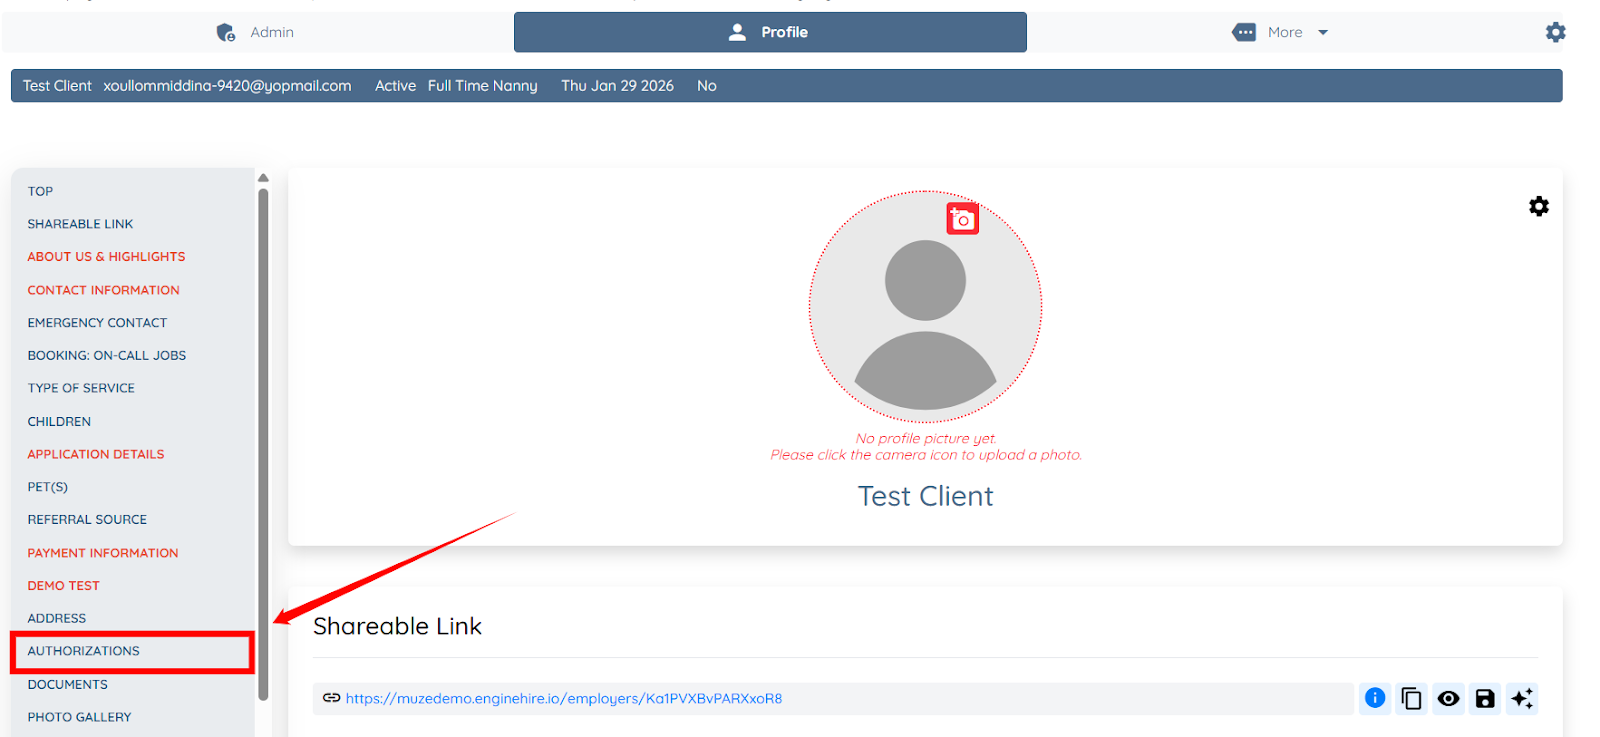
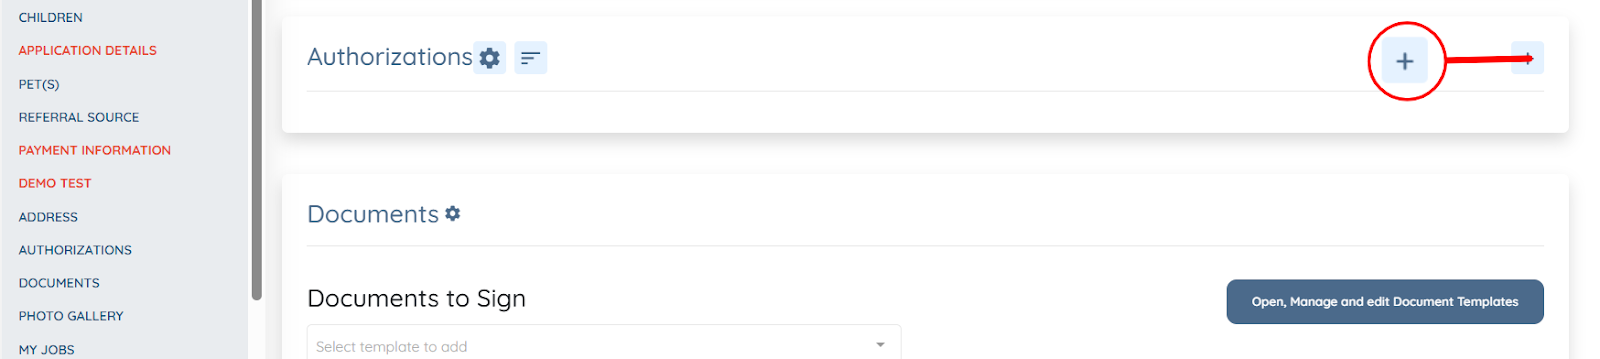
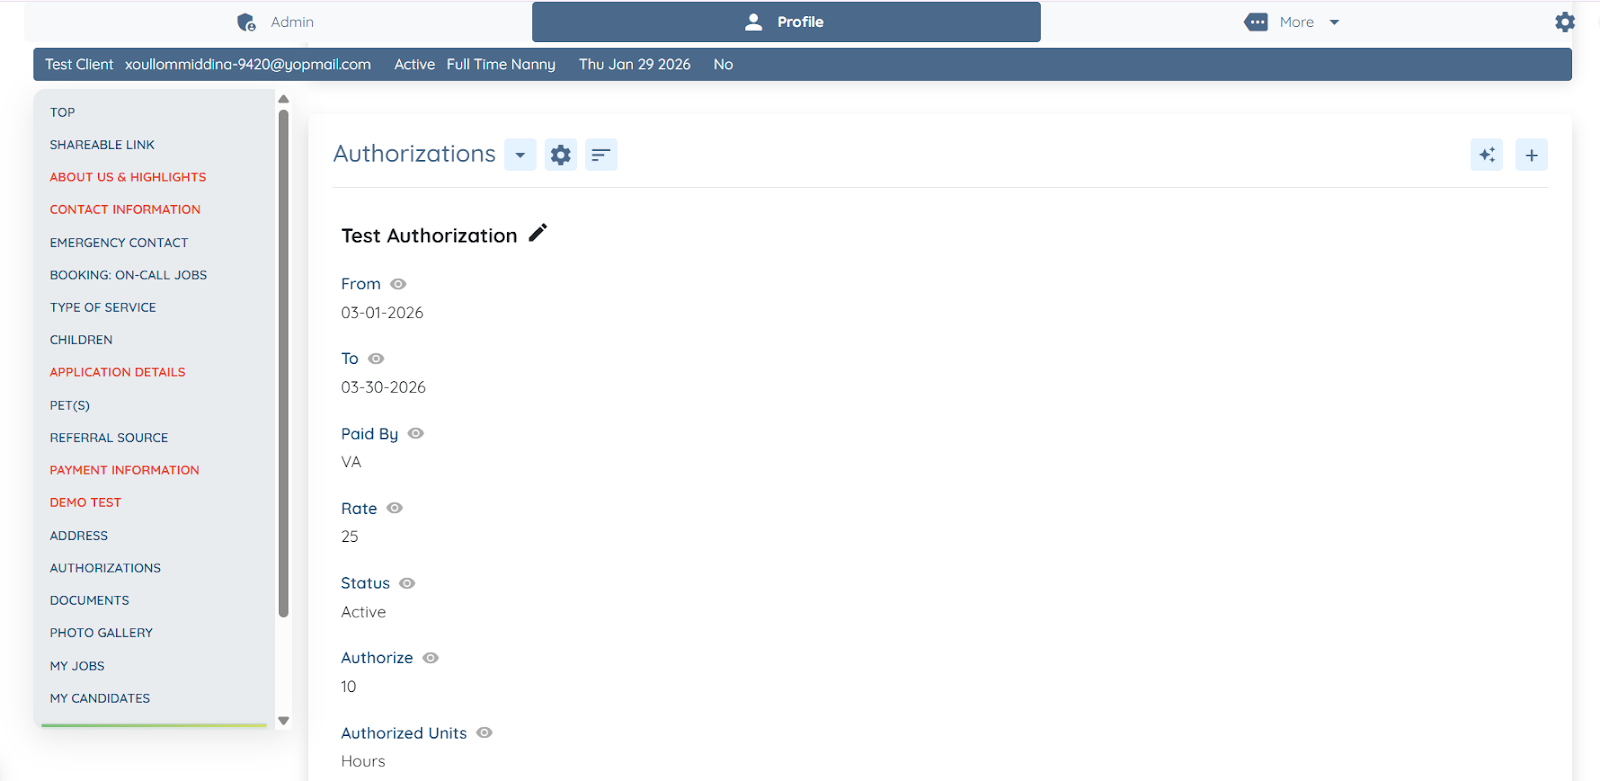
Step 3: Click the Authorizations option in the left-hand navigation sidebar.
Step 4: Click the + button next to the Authorizations header to begin adding a new authorization.
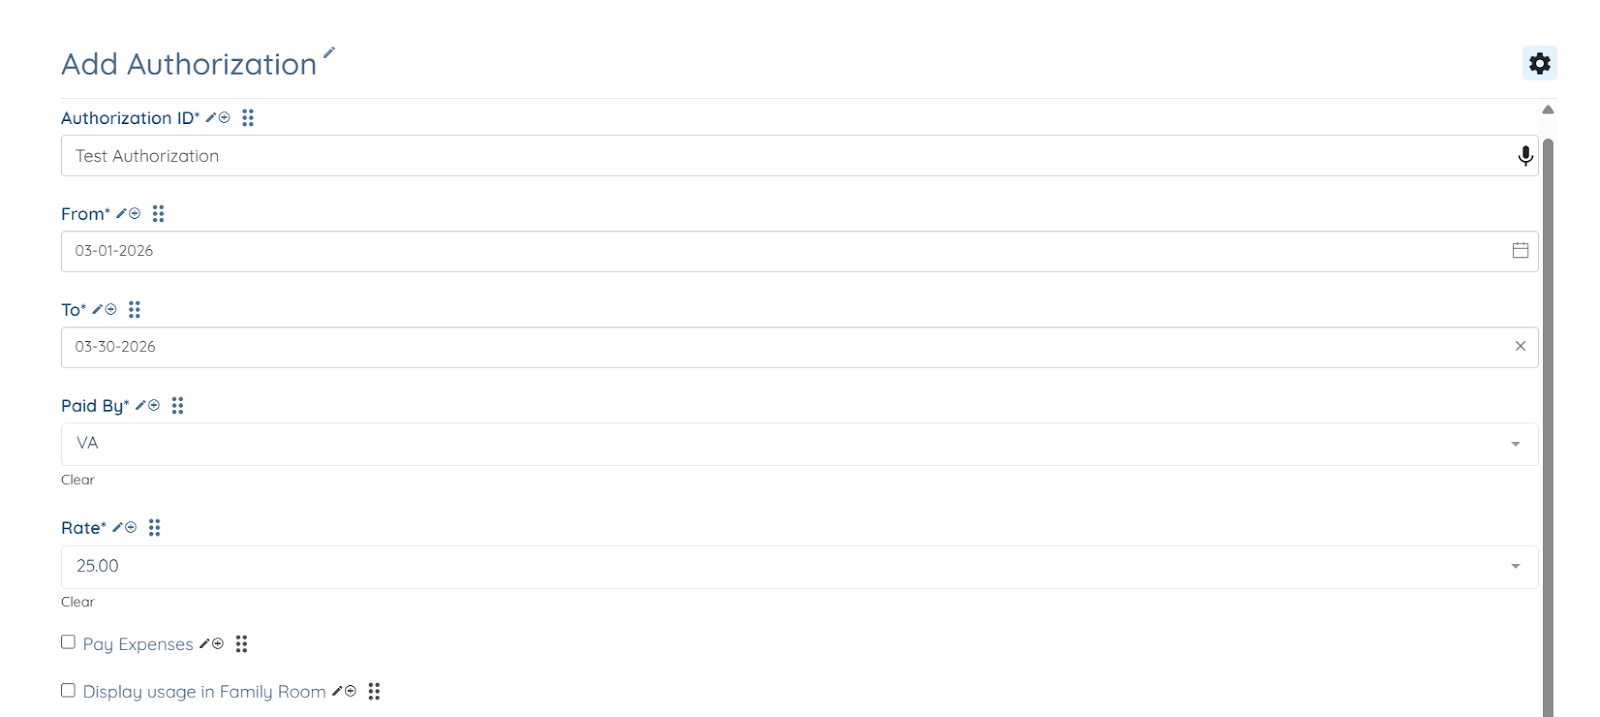
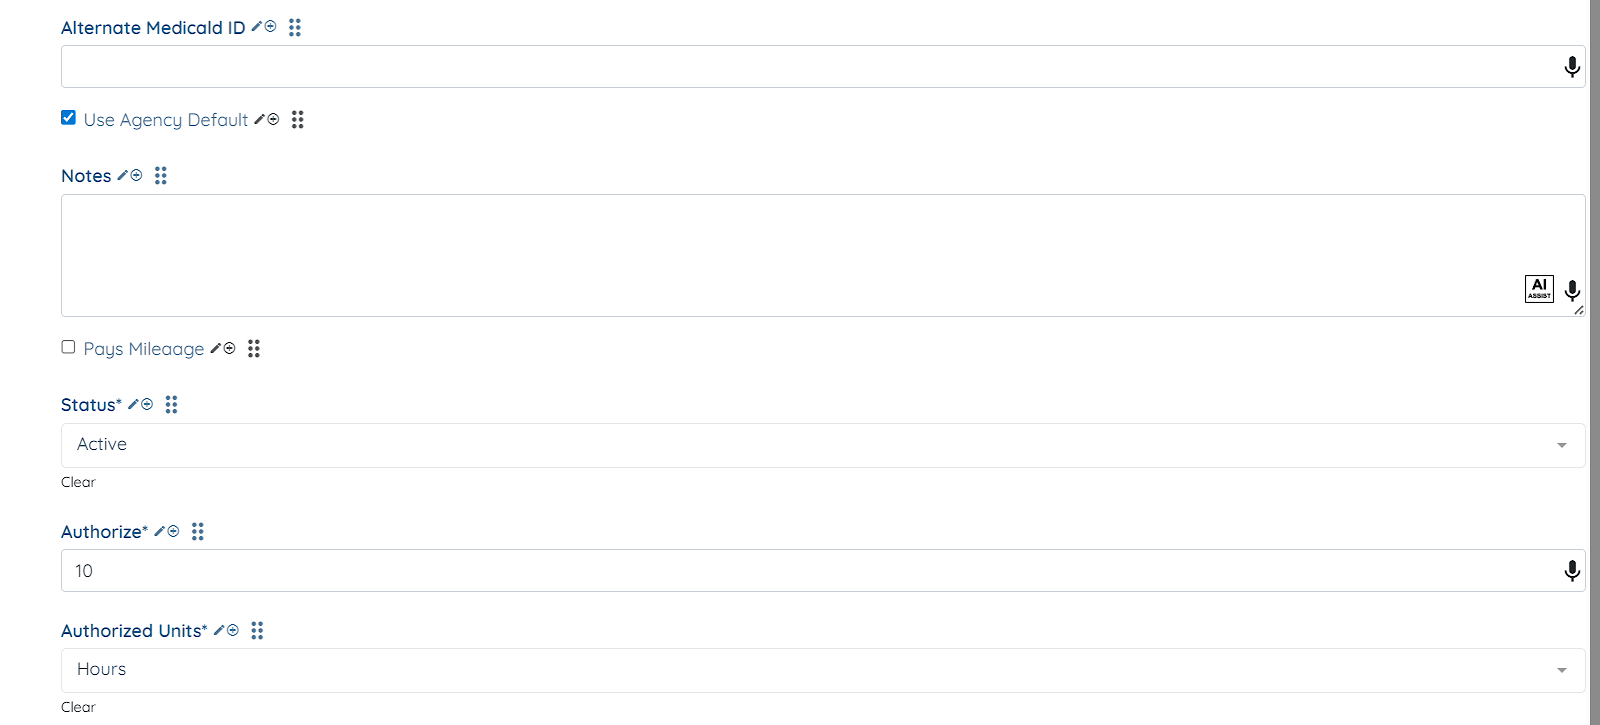
Step 5: Add all the necessary information to add the authorization.
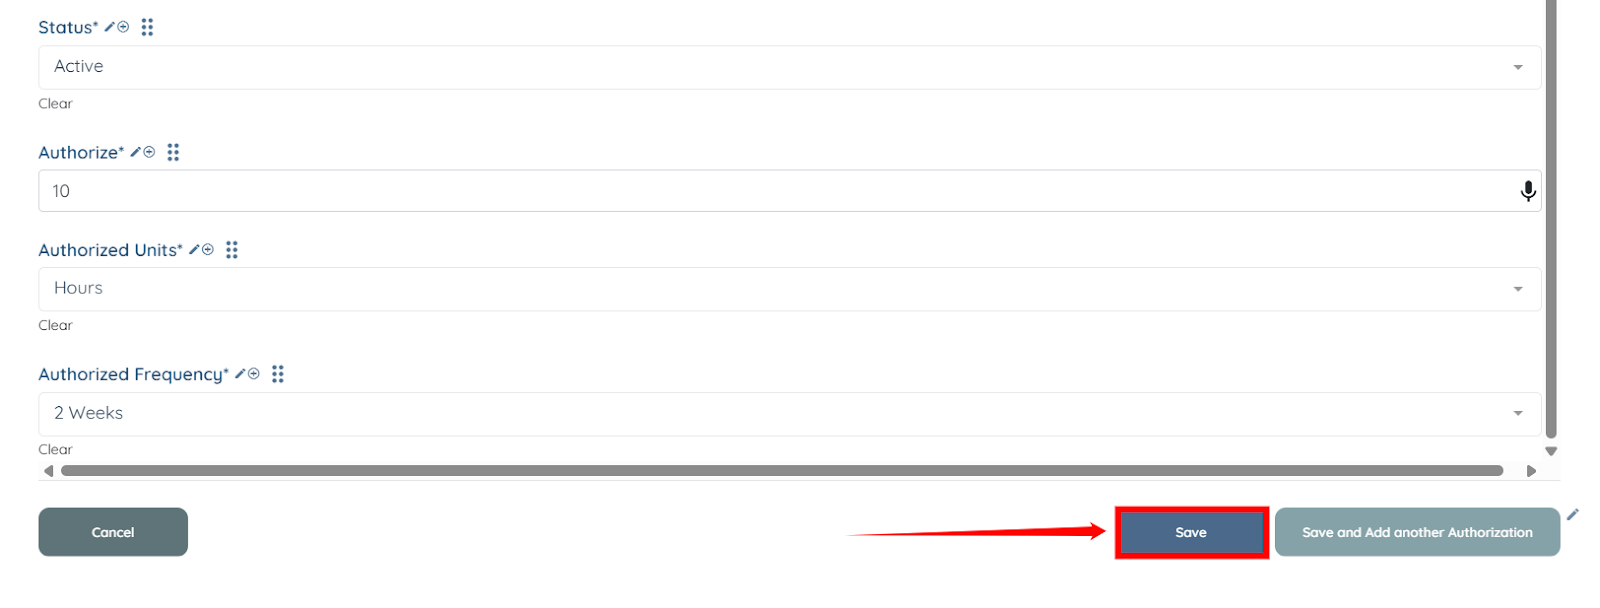
Step 6: Click the Save button to add the authorization.
The Authorization will be successfully added to the selected client.
To allow shift jobs to use payment authorizations, you must add the Payment Authorization Selection field to the booking form. This field connects shift creation to the client’s active authorizations.
Step 1: On your agent dashboard, click Shift Job Calendar in the navigation bar.

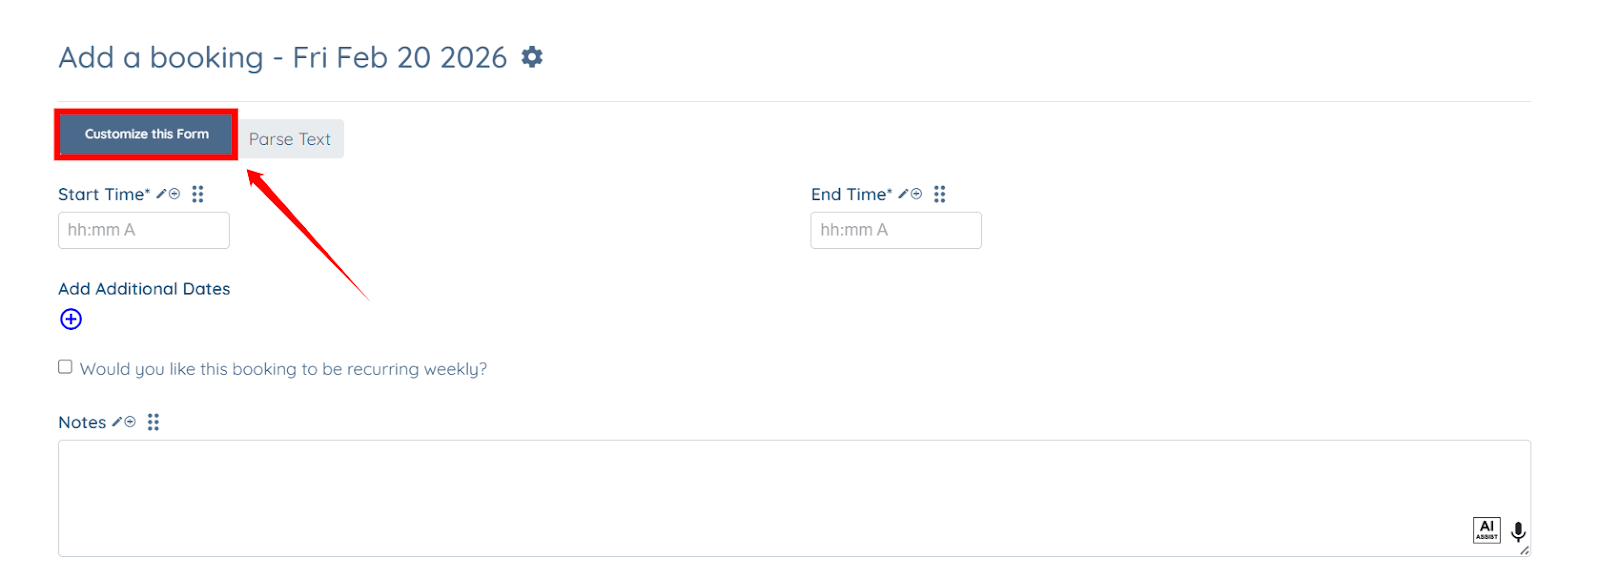
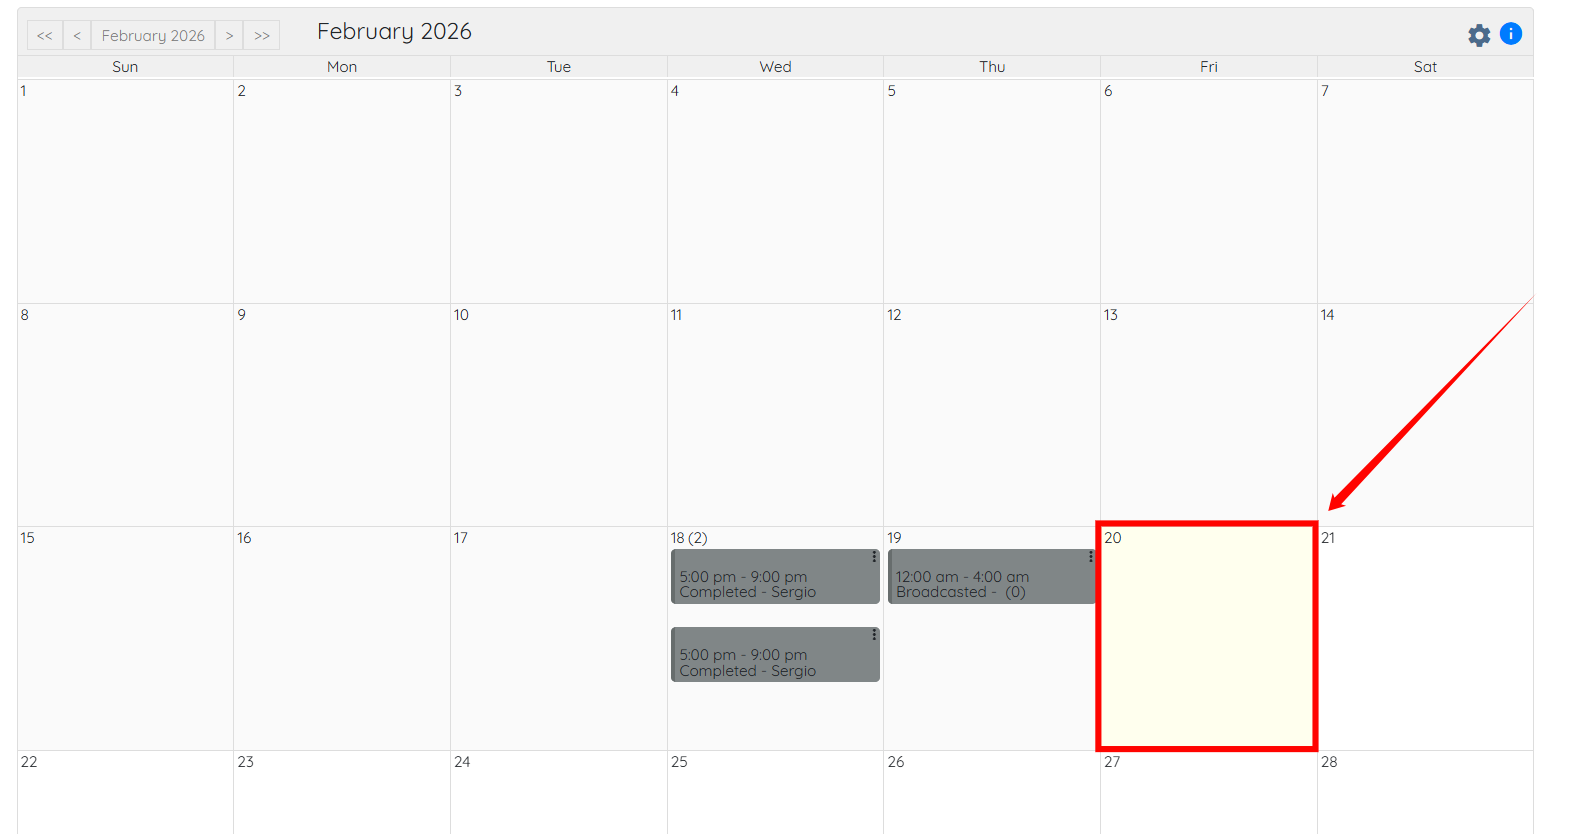
Step 2: Click on any future date to open the booking form.

Step 3: Click the Customize this Form button.
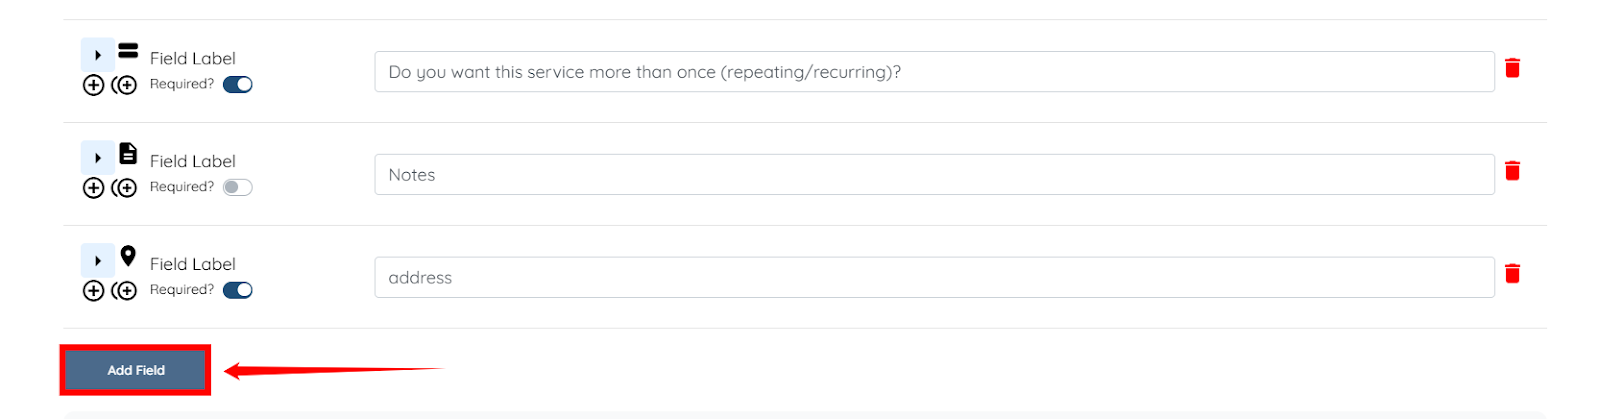
Step 4: Click the Add Field button to start adding a new field.
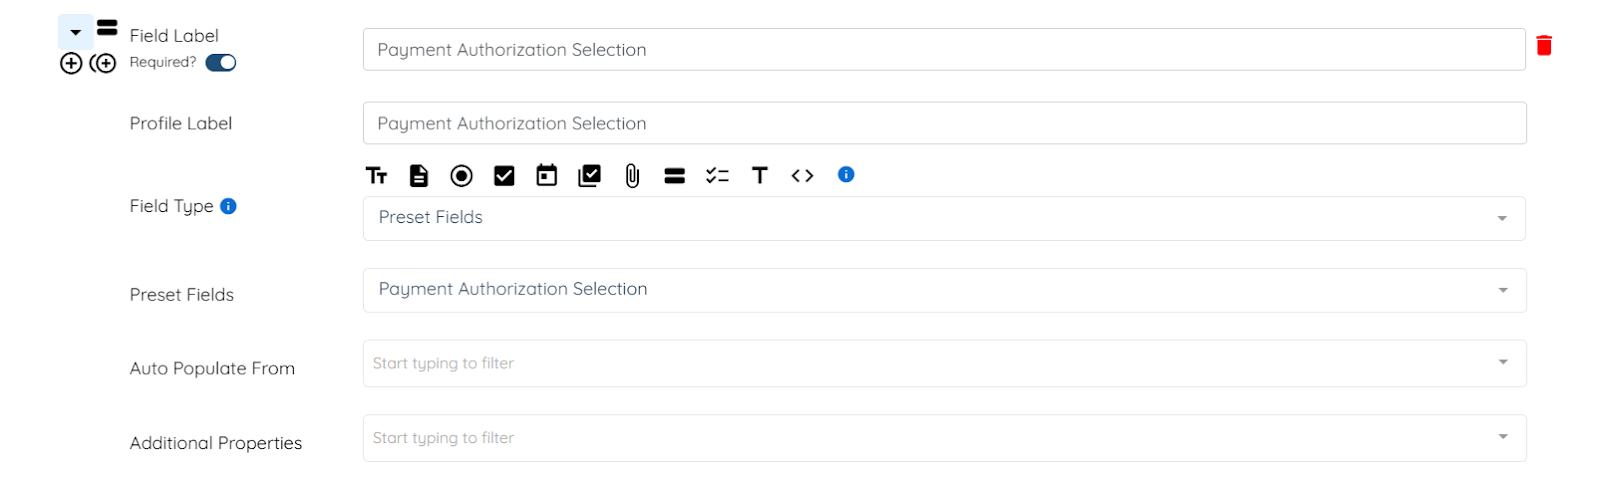
Step 5: Configure the field as follows:
Field Label: Payment Authorization Selection
Profile Label: Payment Authorization Selection
Field Type: Preset Fields
Preset Field: Payment Authorization Selection
Step 6: Click the Save button to confirm the changes.
When creating a shift for a client, the system validates the selected payment authorization before allowing the shift to be saved. The shift date must fall within the authorization’s defined From and To dates. If you attempt to create a shift outside of this date range, the system will display an error and prevent the booking.
The system also checks the Status of the authorization. Only authorizations marked as Active can be used. If an authorization is set to Inactive, it will not be available for selection when creating a shift.
In addition, the system tracks the number of authorized hours or visits used within the configured frequency period. If the total scheduled hours or visits exceed the authorized limit within that frequency window, the system will prevent additional shifts from being created using that authorization.
The authorized usage resets according to the selected frequency. The reset cycle begins from the From (Start) Date, not from the calendar week or month. For example, if an authorization starts on March 1 and is configured for 10 hours every 2 weeks, the 2-week cycle begins on March 1 and resets after that period completes. Any shifts created within that window count toward the authorized total.
For demonstration purposes, assume the following configuration:
Start Date: March 1, 2026
End Date: March 30, 2026
Authorized Hours: 10
Frequency: Every 2 Weeks
Scenario 1: Creating a Shift Outside the Authorization Date Range
If you attempt to create a shift before March 1 or after March 30, the system will display an Invalid Payment Authorization error.
Step 1: Click on any date that falls before the start date of the created authorization under the Shift Job Calendar tab.
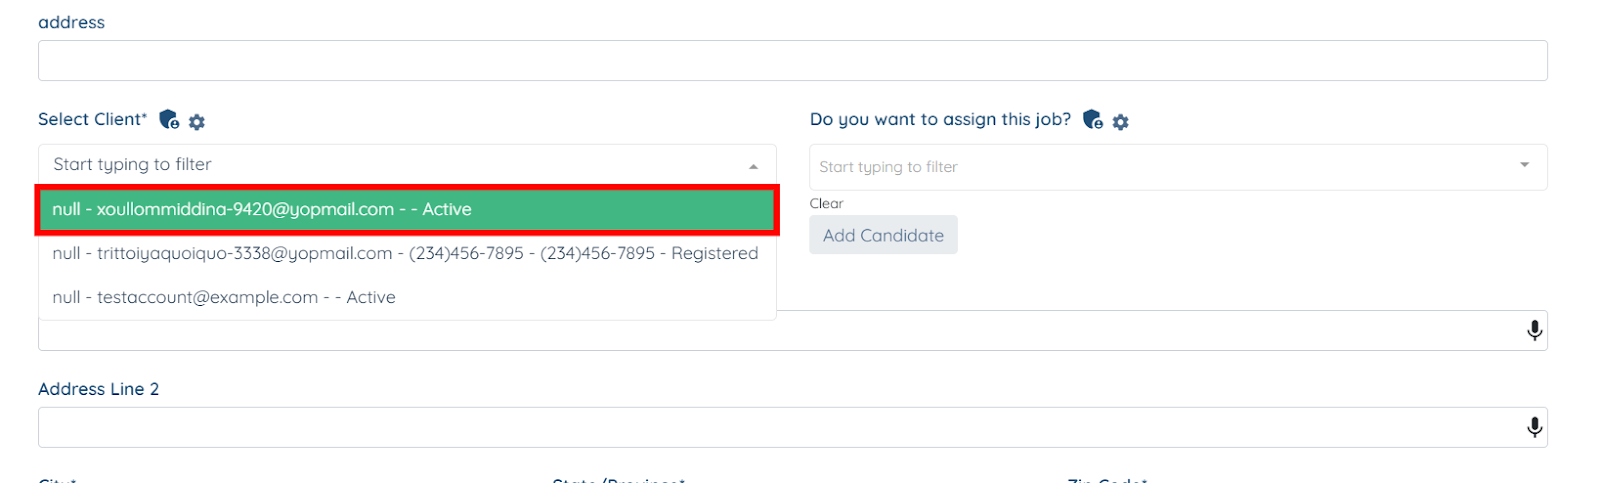
Step 2: Select the client that has the configured authorization.
Step 3: The Payment Authorization Selection field will appear; click on the box as shown in the screenshot below.
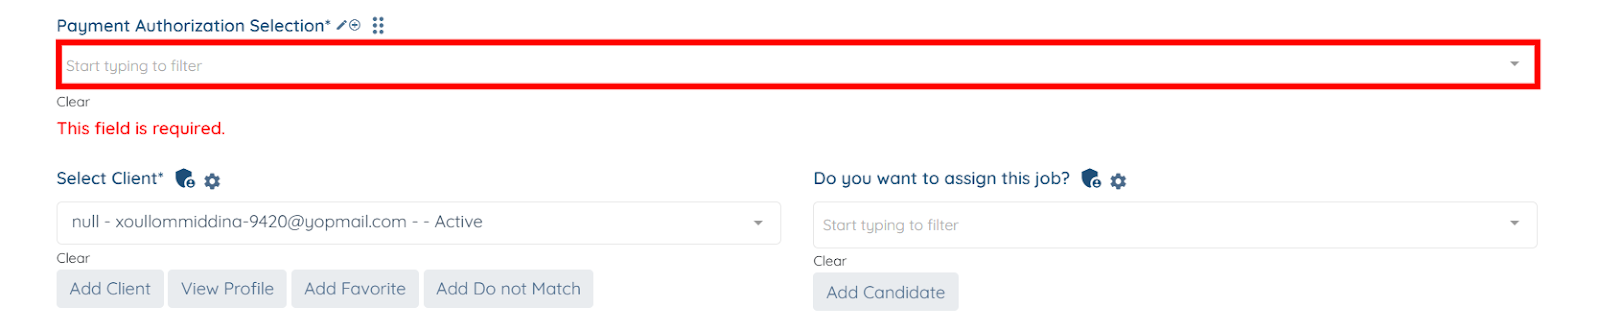
Step 4: Select the payment authorization from the list that you want to use for this shift job.

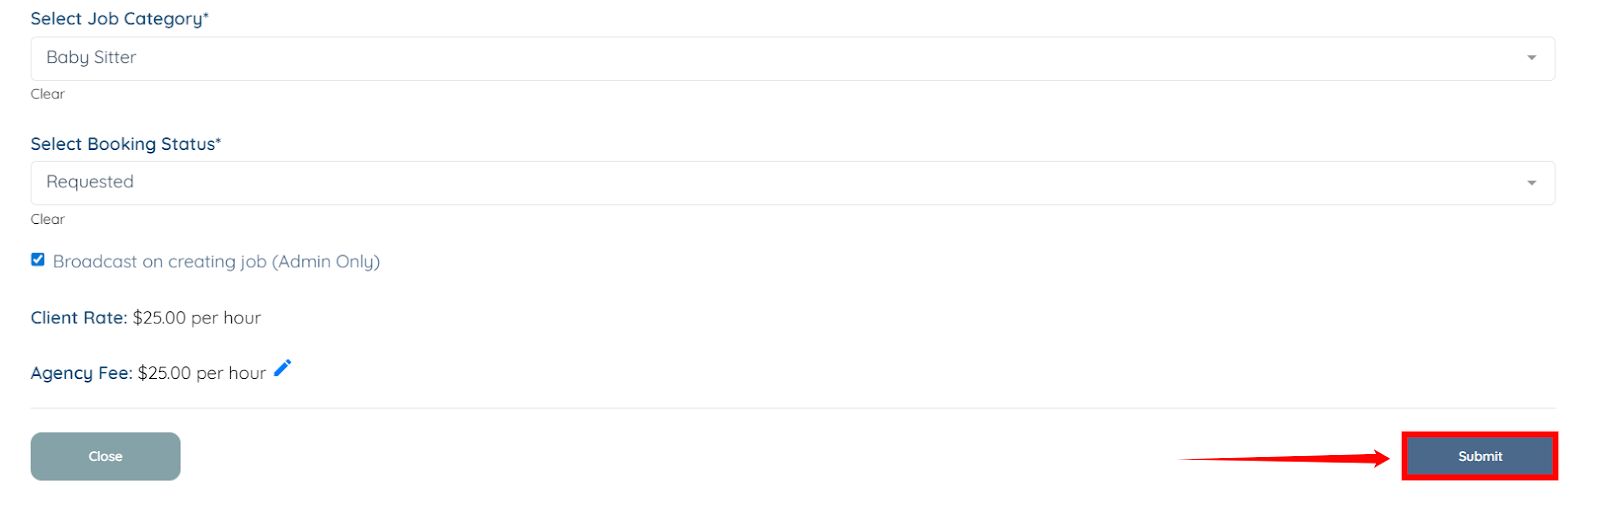
Step 5: Enter all the remaining details for the shift job, and then click the Submit button to proceed.
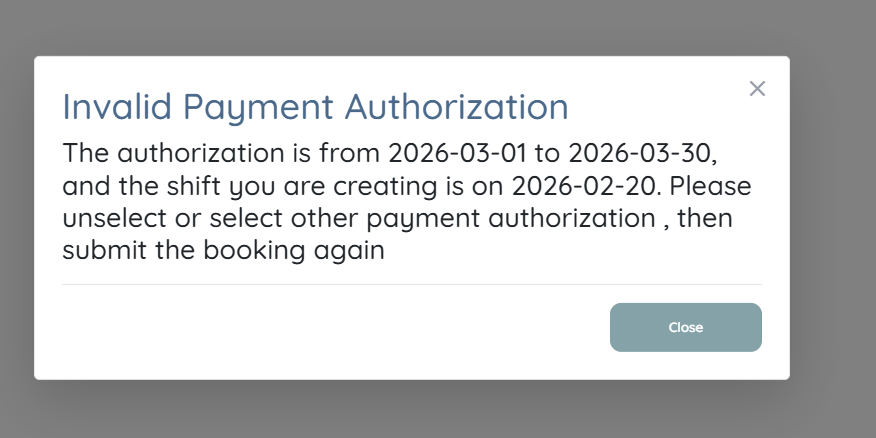
You will get an Invalid Payment Authorization error message because you were trying to create the shift job before the start date of the payment authorization.
Scenario 2: Exceeding Authorized Hours Within a Frequency Window
If you schedule 10 hours within the first 2-week window and attempt to schedule additional hours within the same window, the system will display an error because the authorized limit has been reached.
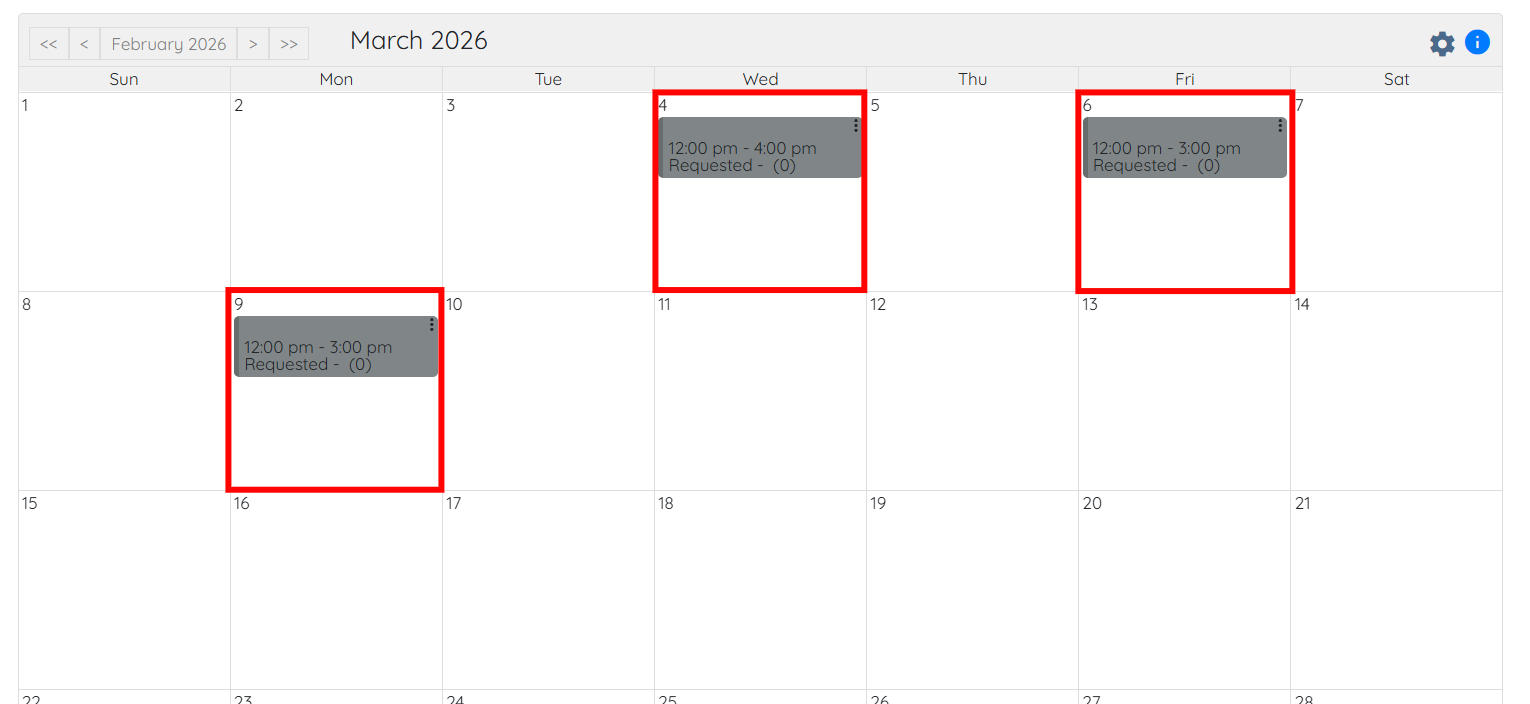
To best explain this scenario, we created three shift jobs within the first two-week window (the configured frequency): the first shift is four hours long, the second shift is three hours long, and the third shift is also three hours long.
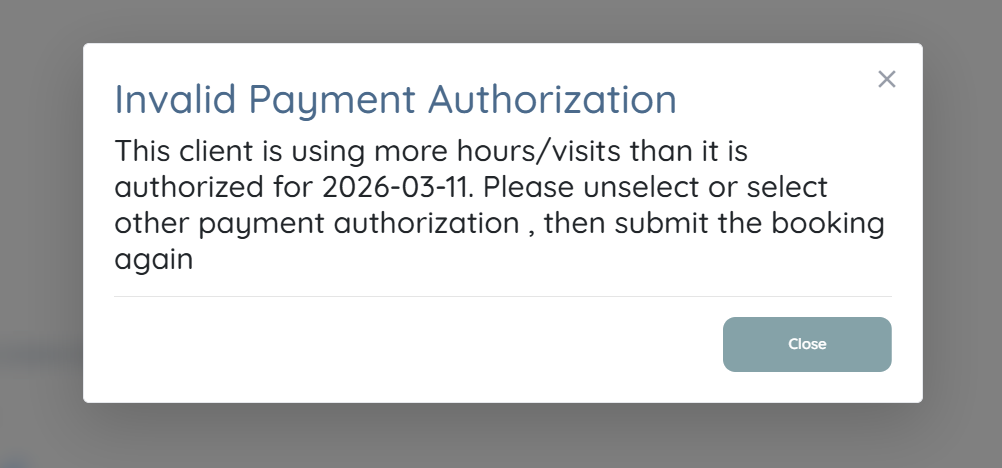
Now, if you attempt to create a new shift job within the same two-week window, for example, on March 11. you will get an error message stating “Invalid Payment Authorization.”
This occurs because you have already consumed the authorized hours (10 hours in this case) within the specified two-week frequency.
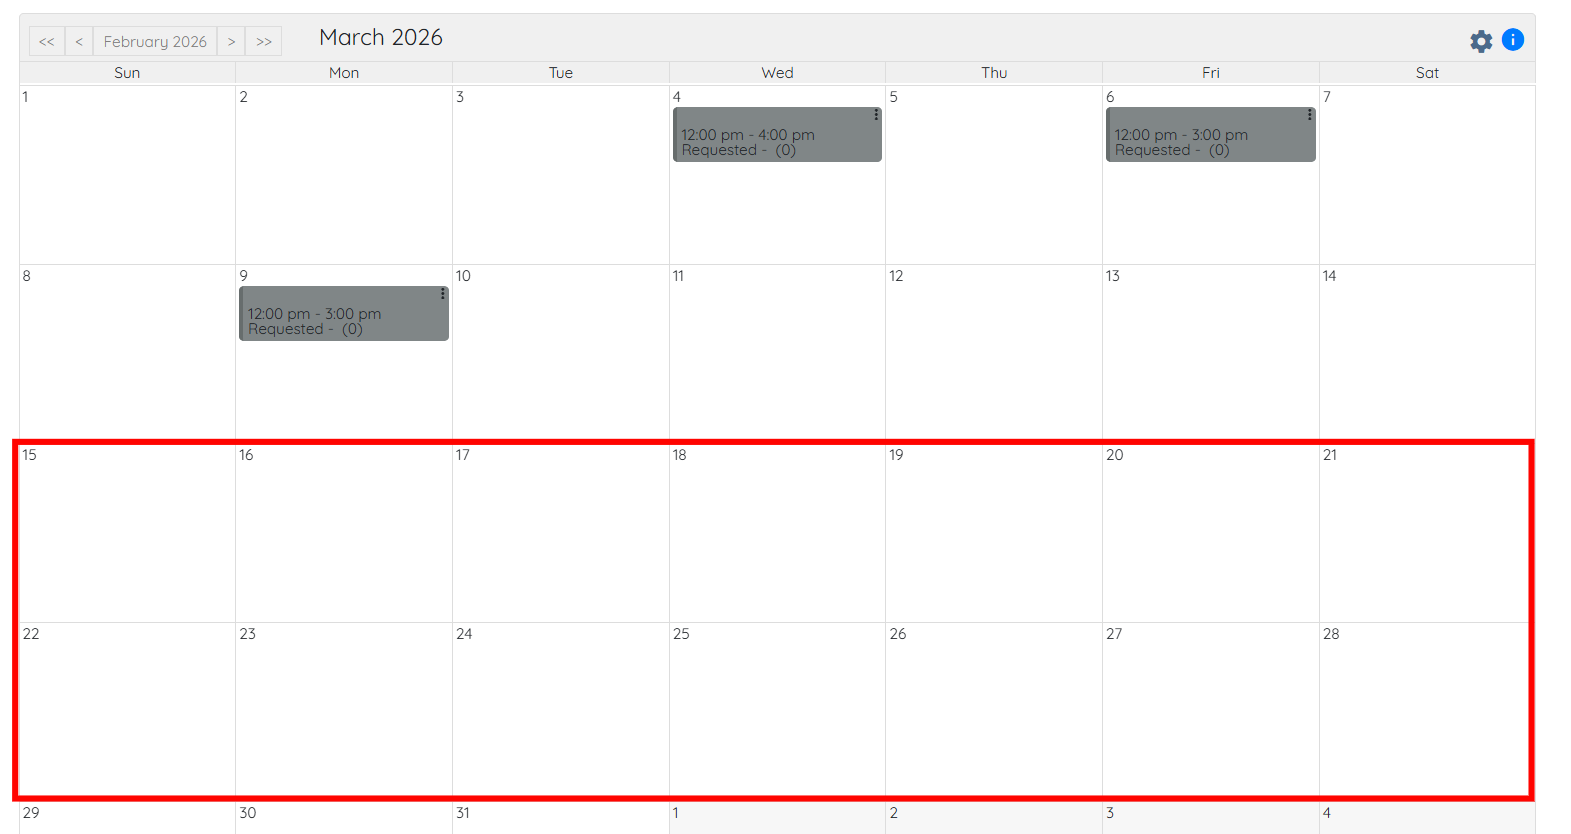
Scenario 3: Creating a Shift in the Next Frequency Window
Once the 2-week period resets, you can create new shifts up to the authorized limit again, provided the authorization is still within its valid date range.
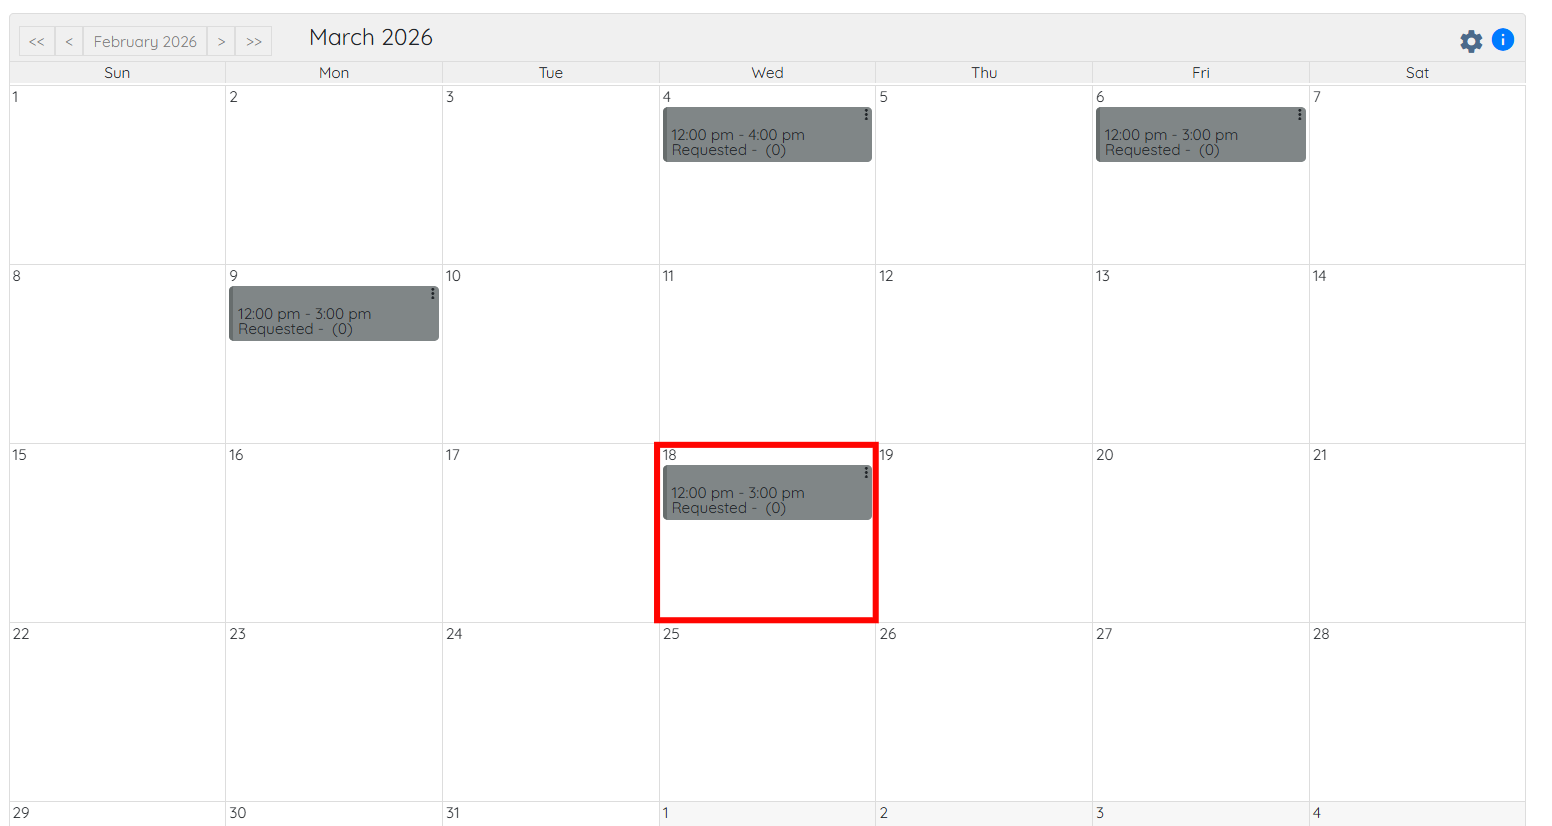
To successfully create a new shift job, you need to plan the shift job within the next two-week period, starting from 15 March and continuing through 28 March.
For example, if you want to create the shift job on 18 March, you can create it successfully as long as you do not expand the hours in the shift job beyond those configured in the payment authorization.
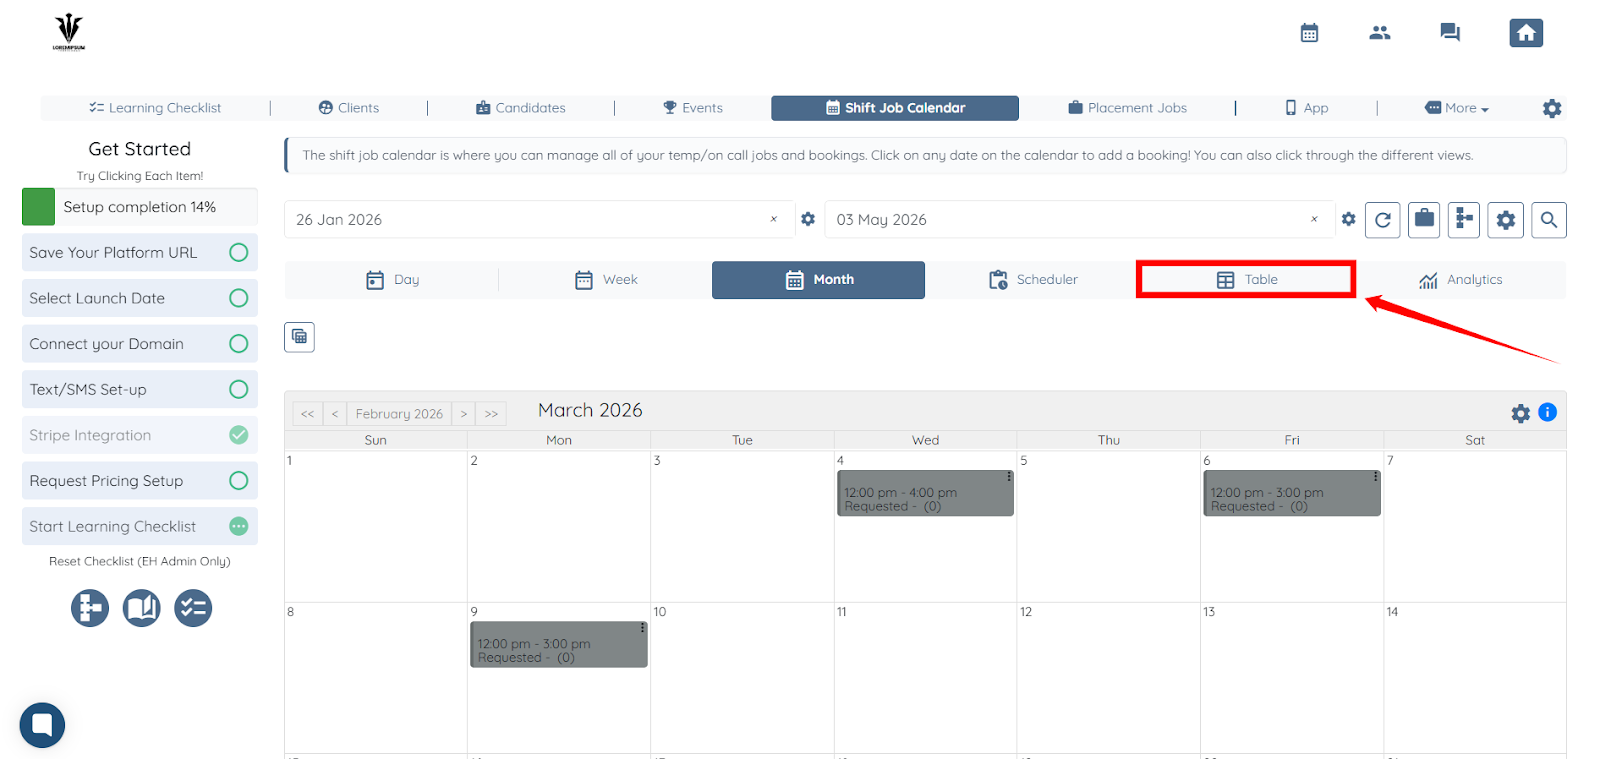
You can add payment authorization details to the Shift Job Calendar table view to monitor usage.
Step 1: In the Shift Job Calendar, click the Table button to open the table view.
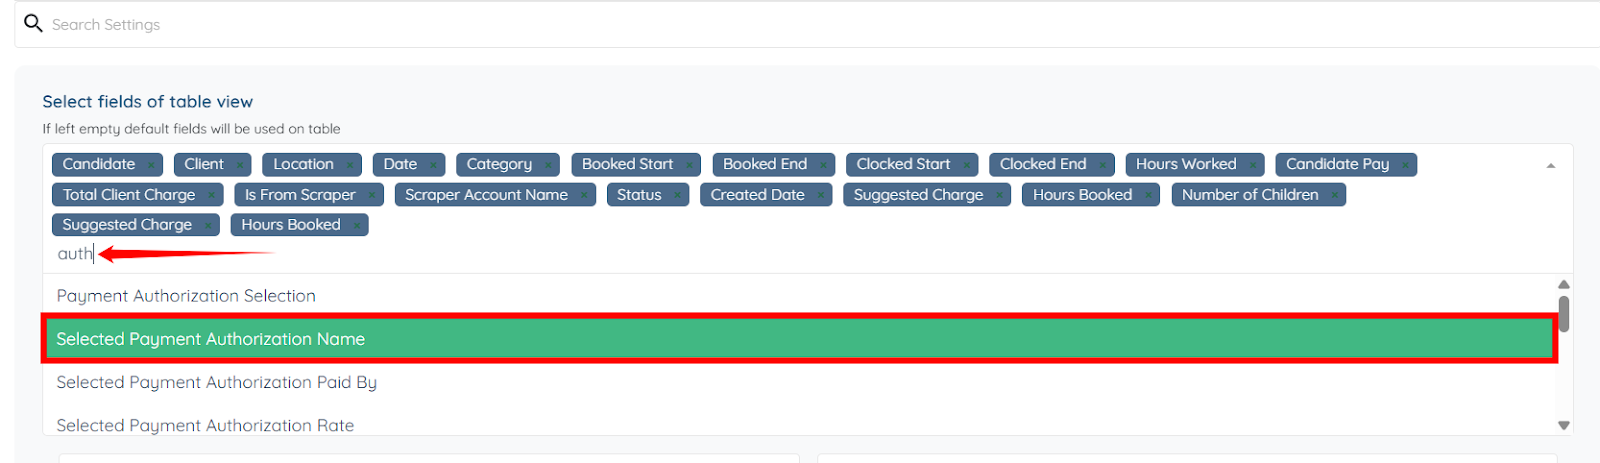
Step 2: Scroll the table to the left, then click the Gear icon as shown below.
Step 3: Search for the authorization fields and select the field you want to add to the table from the dropdown list. The system automatically saves the settings.
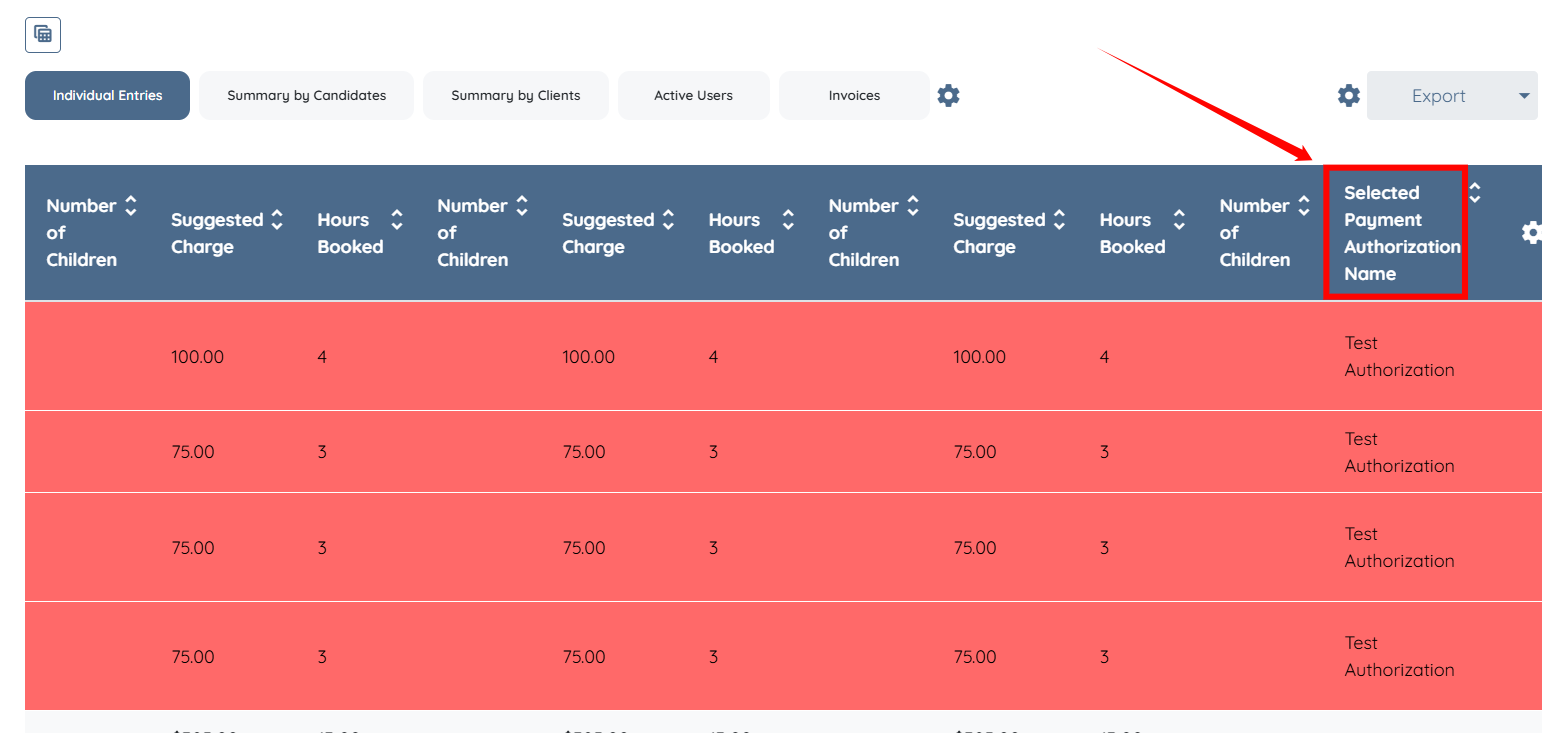
The selected authorization field(s) will be successfully added in the Table view.
Authorization details can also be included when exporting shift data. In the Table view, click the Gear icon before the Export button as shown in the screenshot below.
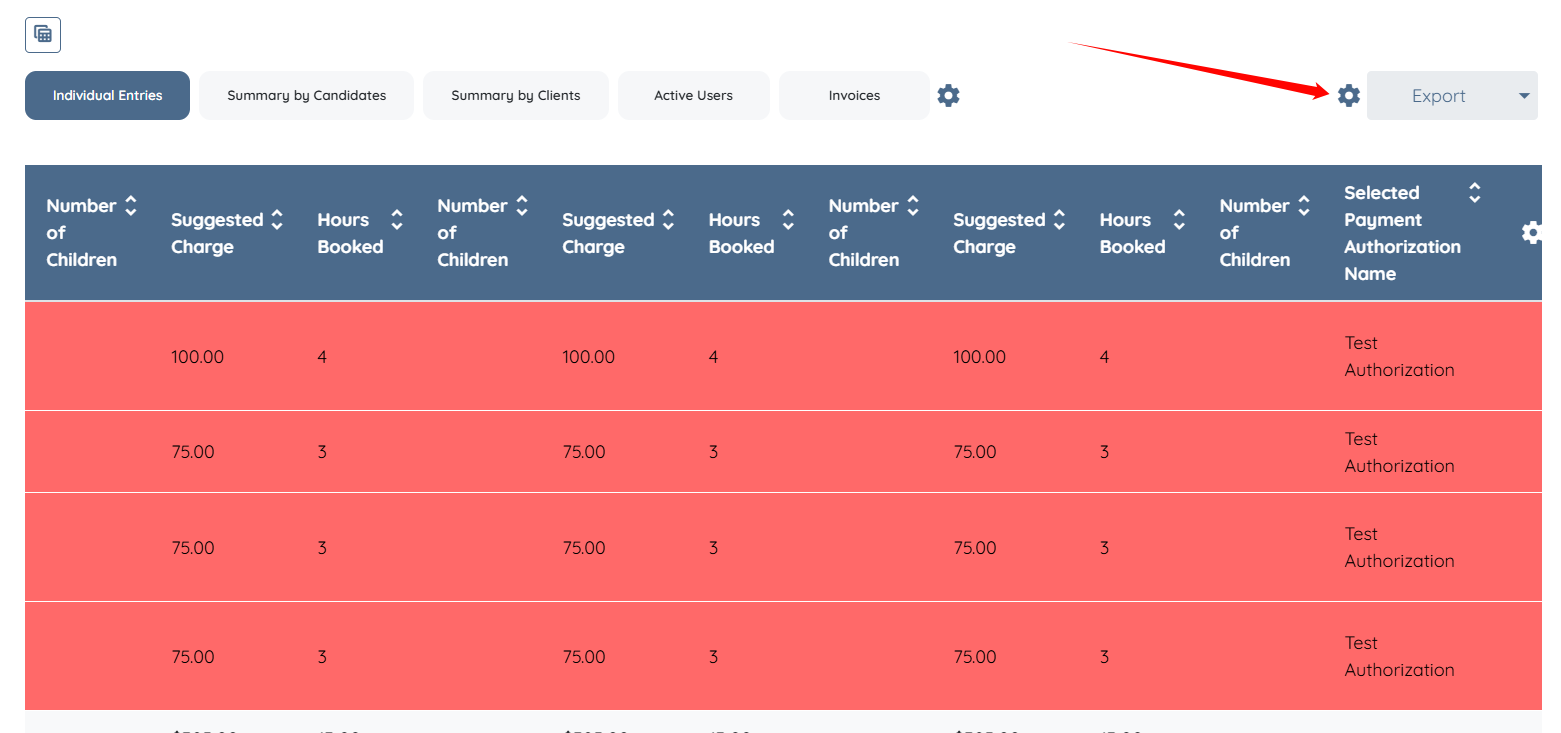
Then, repeat the step 3 as described in the previous section, Add Authorization Fields to Table View, and ensure that the fields are exported successfully.
