
Let’s get started 🚀
Add a new section in the Application and Profile Builder by defining its basic details, including name, type, and usage, before generating fields using AI.
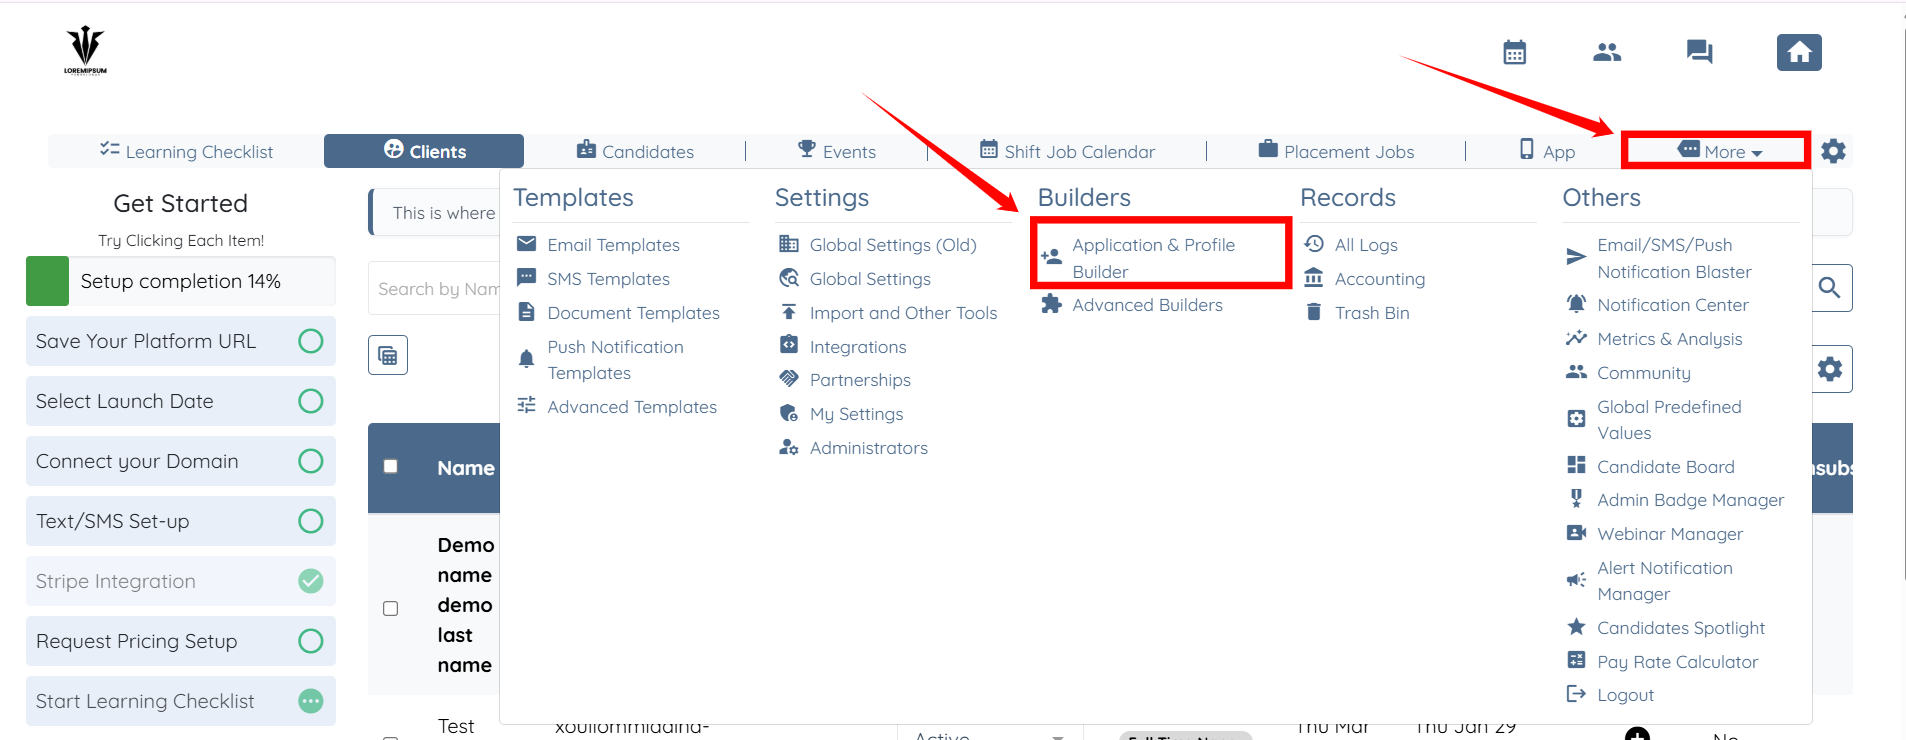
Step 1: Log in to your agent dashboard and More > Application & Profile Builder as shown in the screenshot below.
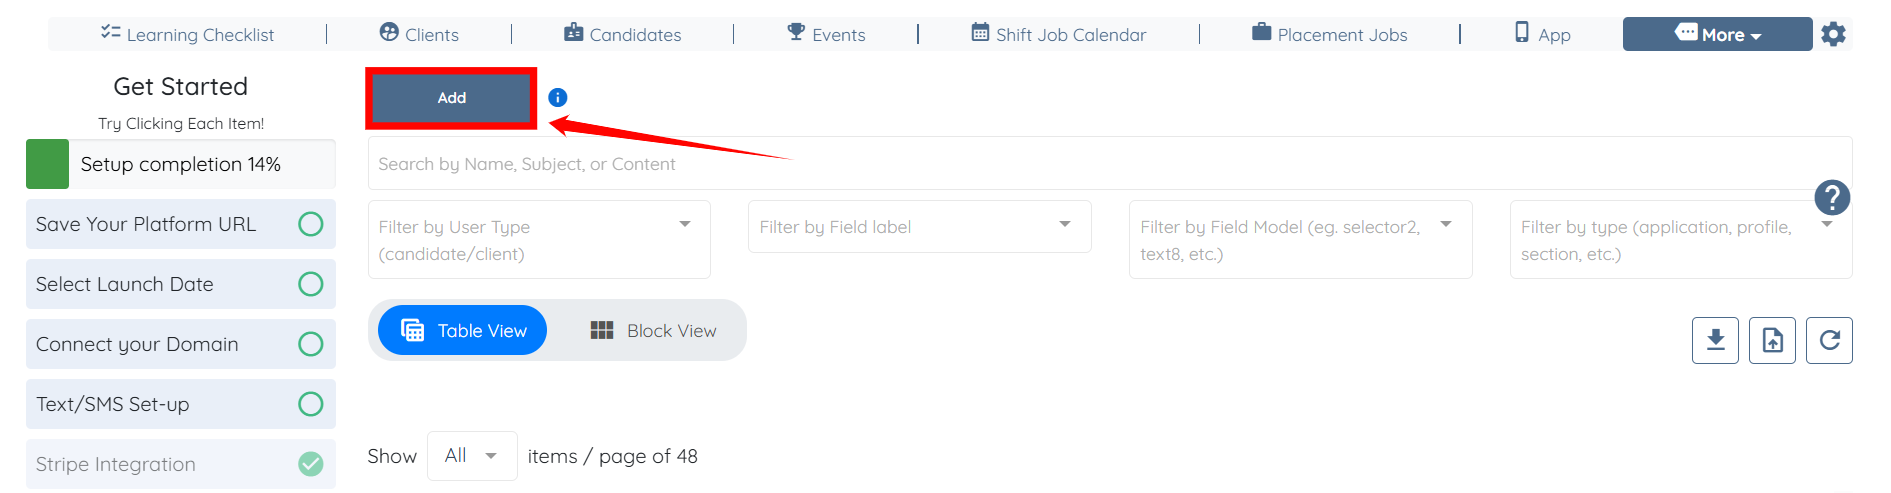
Step 2: Click the Add button to begin adding a new section.
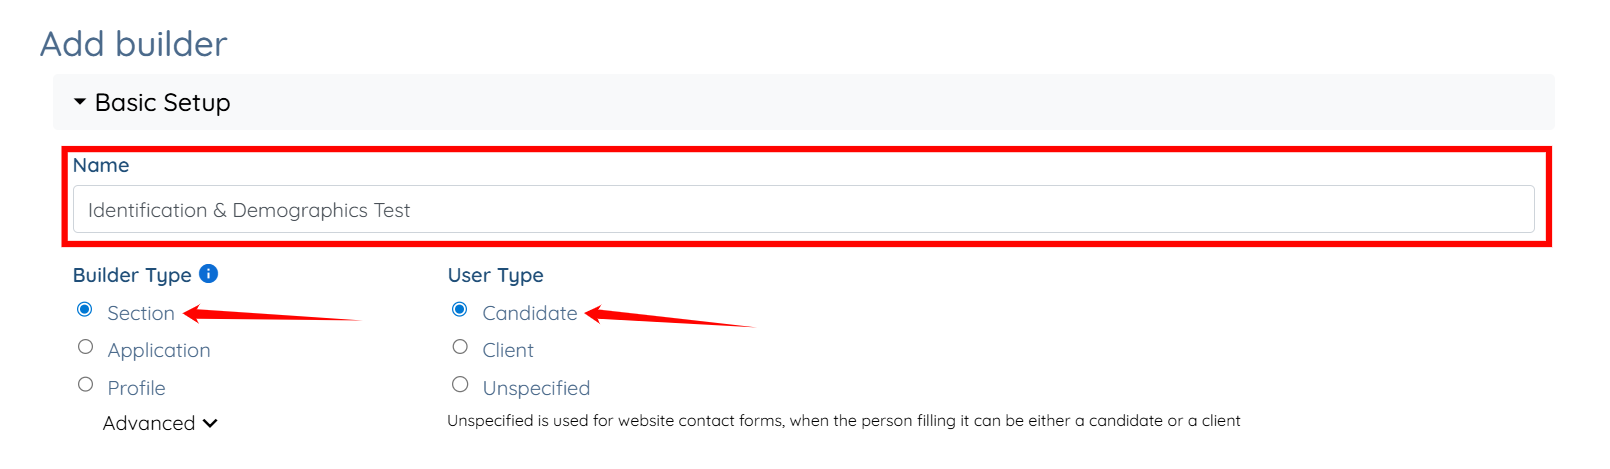
Step 3: Enter a name for your section, select Section as the Builder Type, and choose Candidate as the User Type.
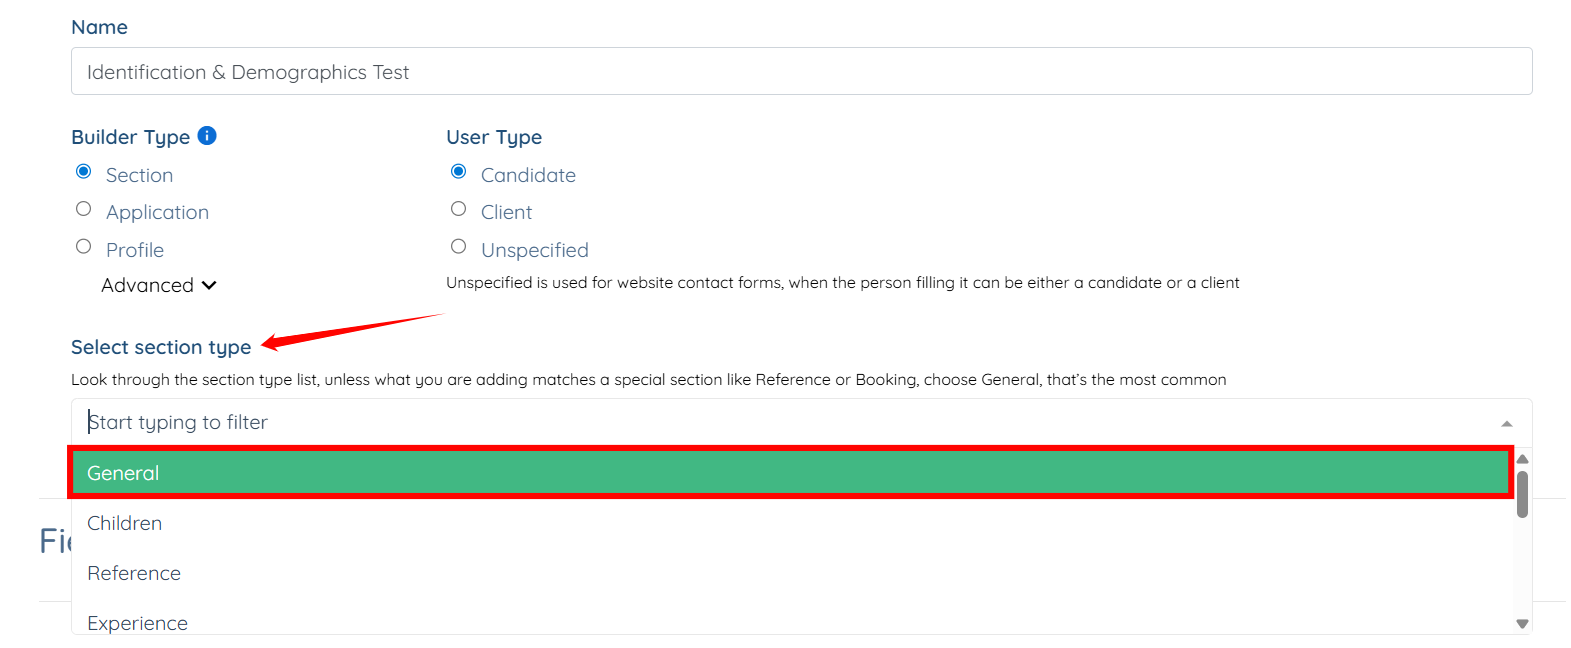
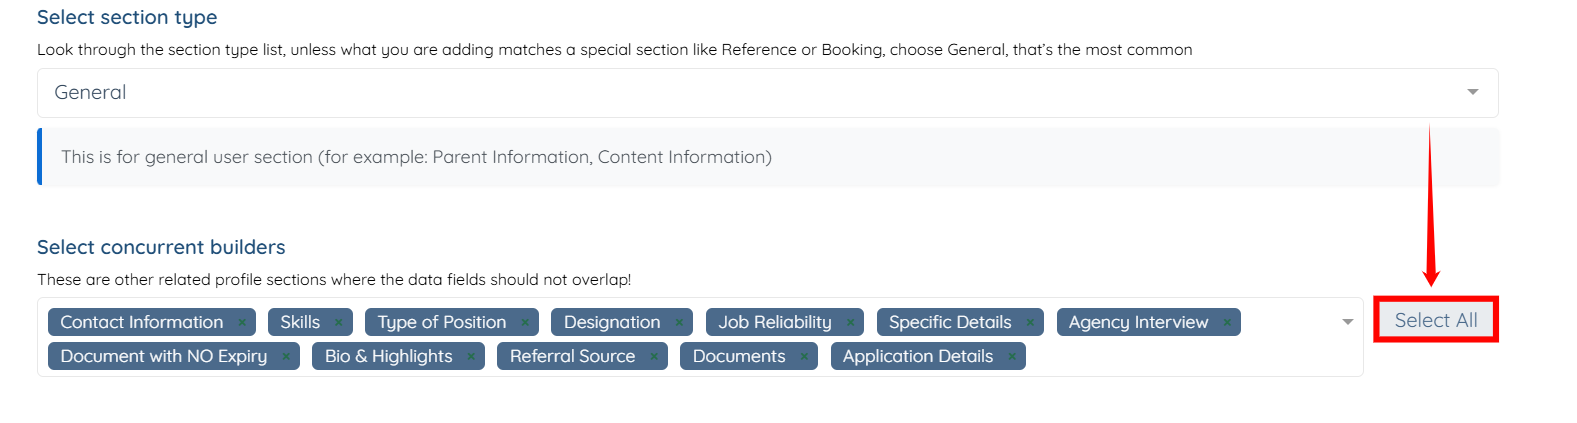
Step 4: Select the section type as required.
Step 5: Click the Select All button to ensure that the data fields do not overlap in the other related profile sections.
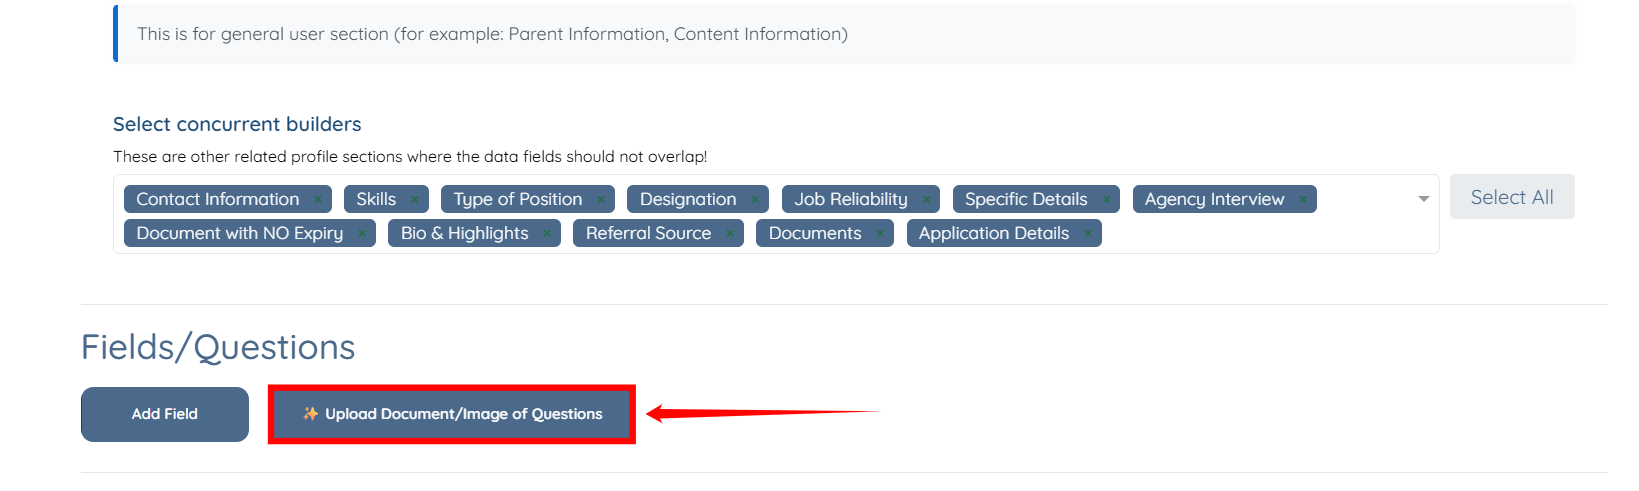
Upload a document or image containing field details to automatically generate fields, with AI mapping them to the appropriate model types.
Step 1: Click the Upload Document/Image of Questions button.
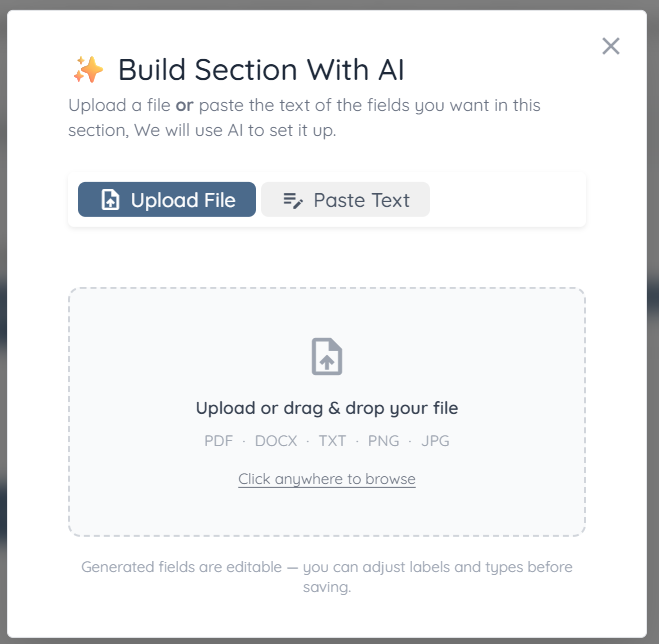
Step 2: The Build Section With AI modal will open, allowing you to upload the file from which you want to generate fields.
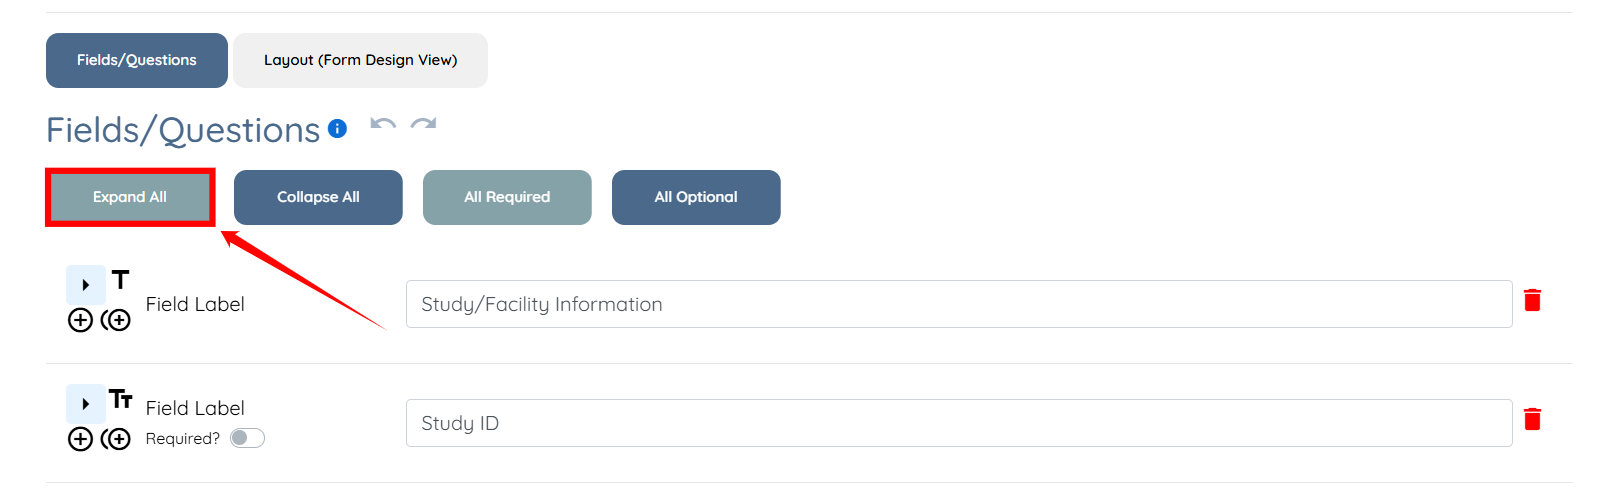
Step 3: After you upload the file, the fields generate automatically. Click the Expand All button to expand and view all field details, including their appropriately mapped model types.
Provide field details directly to generate fields, allowing AI to create and map them based on the provided input.
Step 1: In the Build Section With AI modal, Click the Paste Text button.
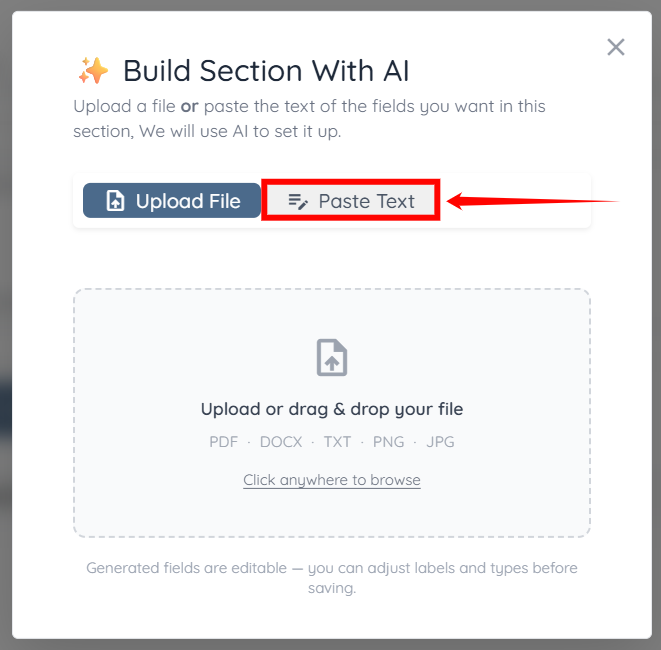
Step 2: Type or paste the field labels you want to create, entering one label per line. For Radio, Checkbox, or Dropdown fields, add the options after a colon. Then, click the Generate Fields button.

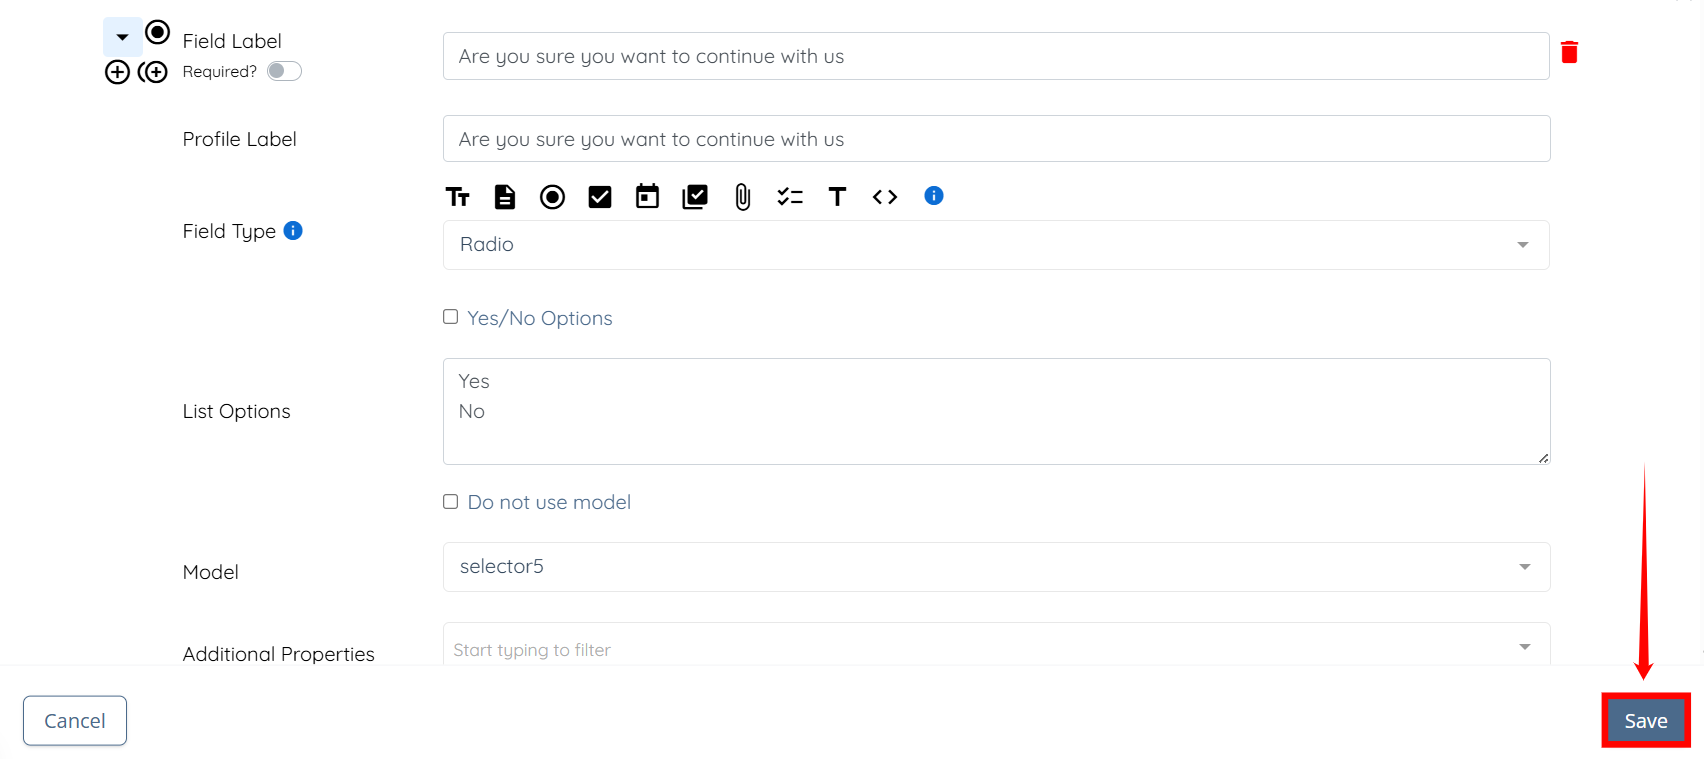
Step 3: The field will be generated automatically. Click the arrow button to expand it and view its details.

Step 4: After checking all the details, click the Save button to proceed.
The section will be created successfully.
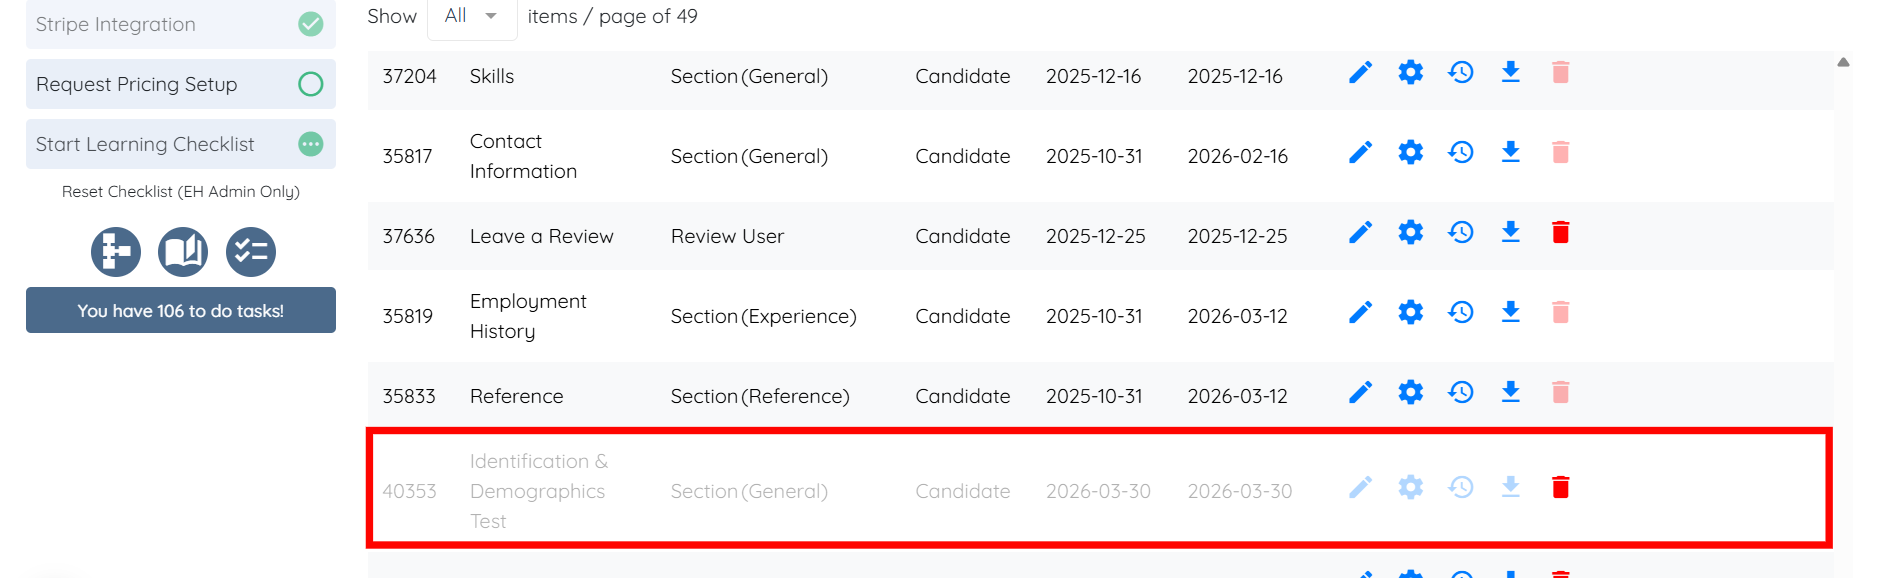
Add the created section to a profile to make it available for users during profile completion.
To learn how to add the section to a profile, refer to the Add the Section to a Profile section.
The section will be added and displayed in the candidate profile.

