Let’s get started 🚀
Create a new section by defining the fields as per the information you want to collect.
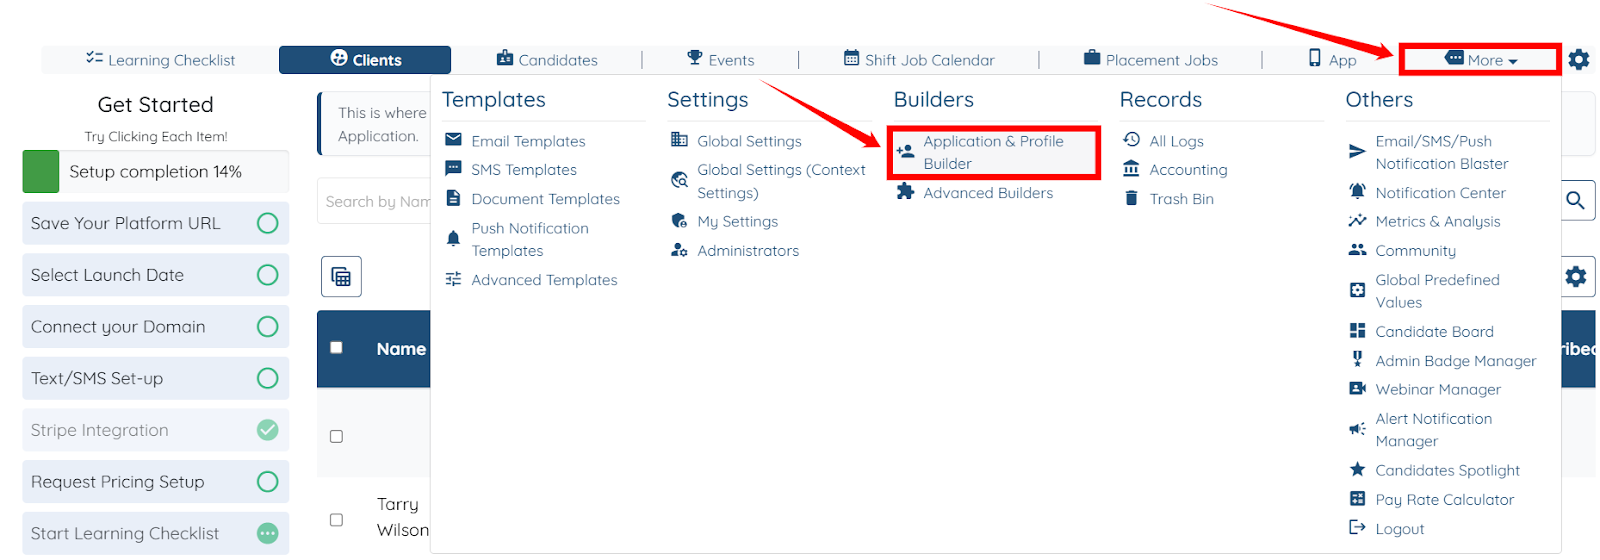
Step 1: Log in to your agent dashboard, then click More > Application & Profile Builder, as shown in the screenshot below.
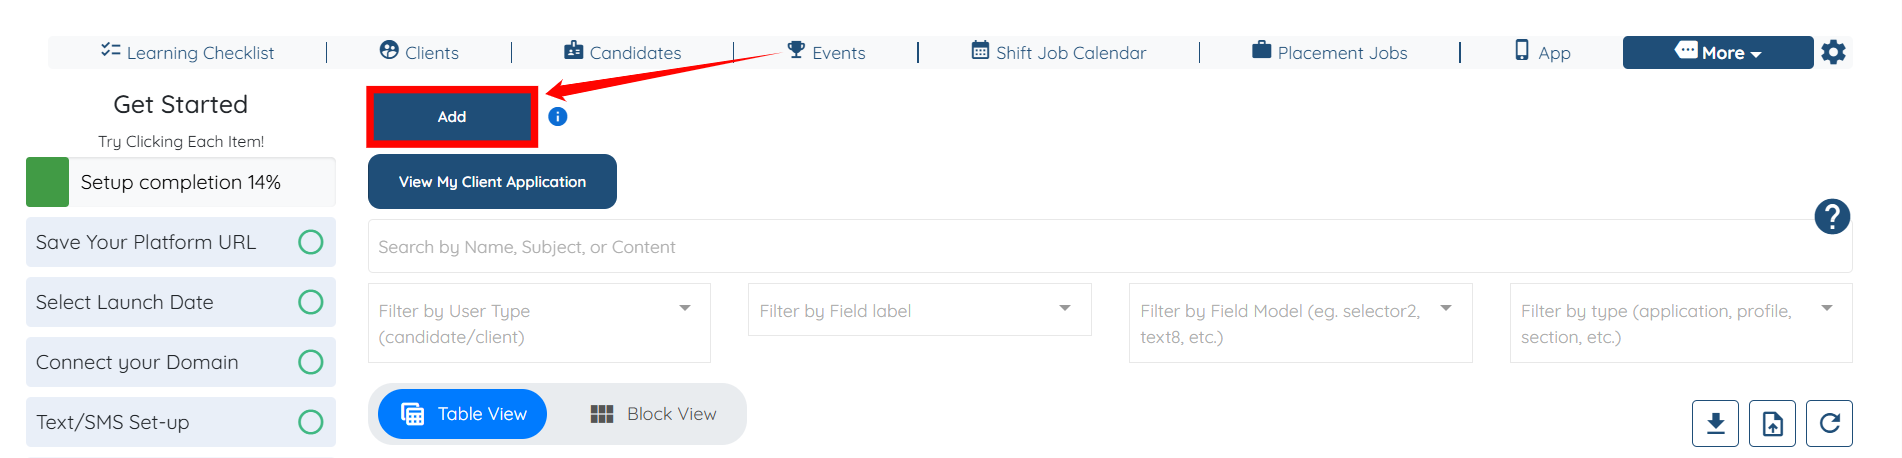
Step 2: Click the Add button to start adding a new section.
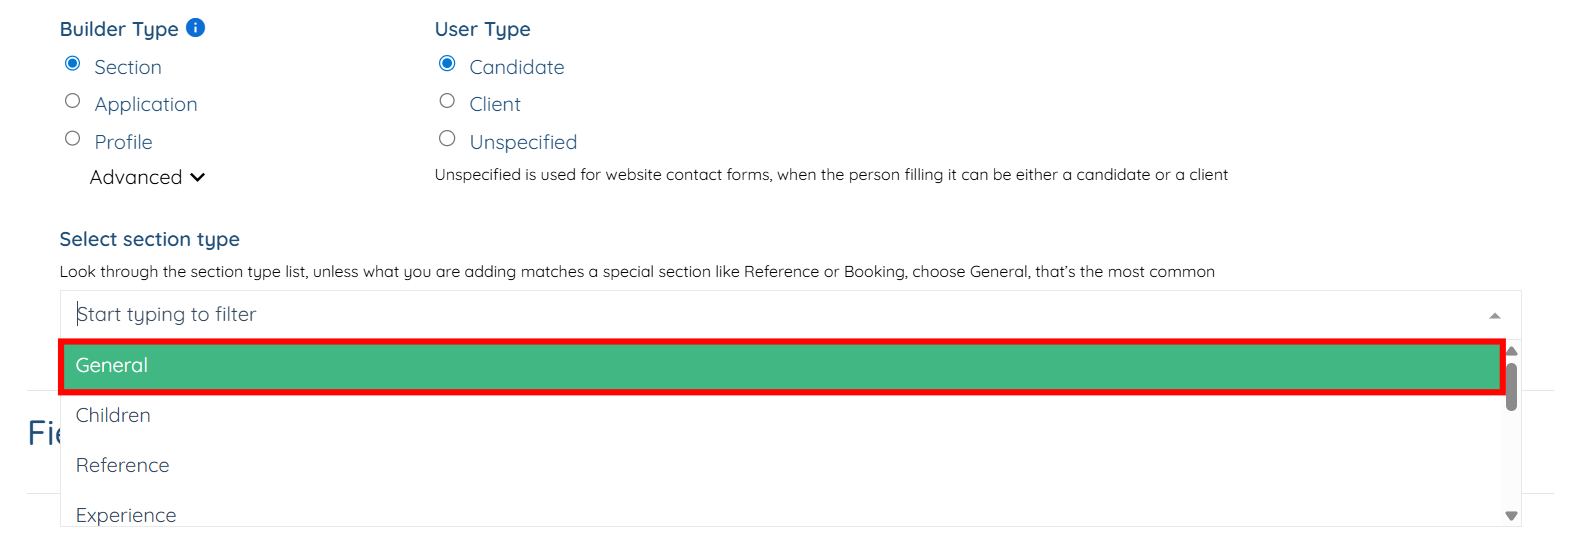
Step 3: Enter a name for your section, then choose Section as the Builder Type and Candidate as the User Type.
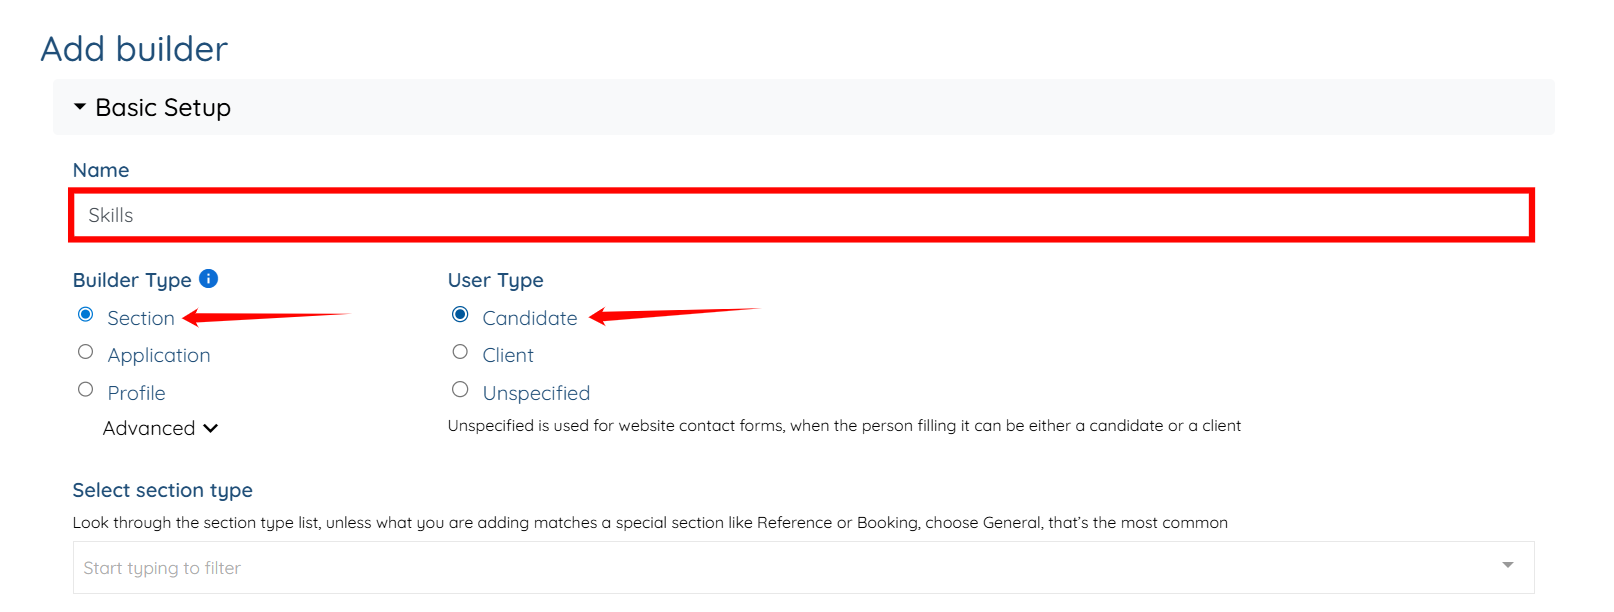
Step 4: Choose the section type as required. If you are not sure, you can select General as the section type.
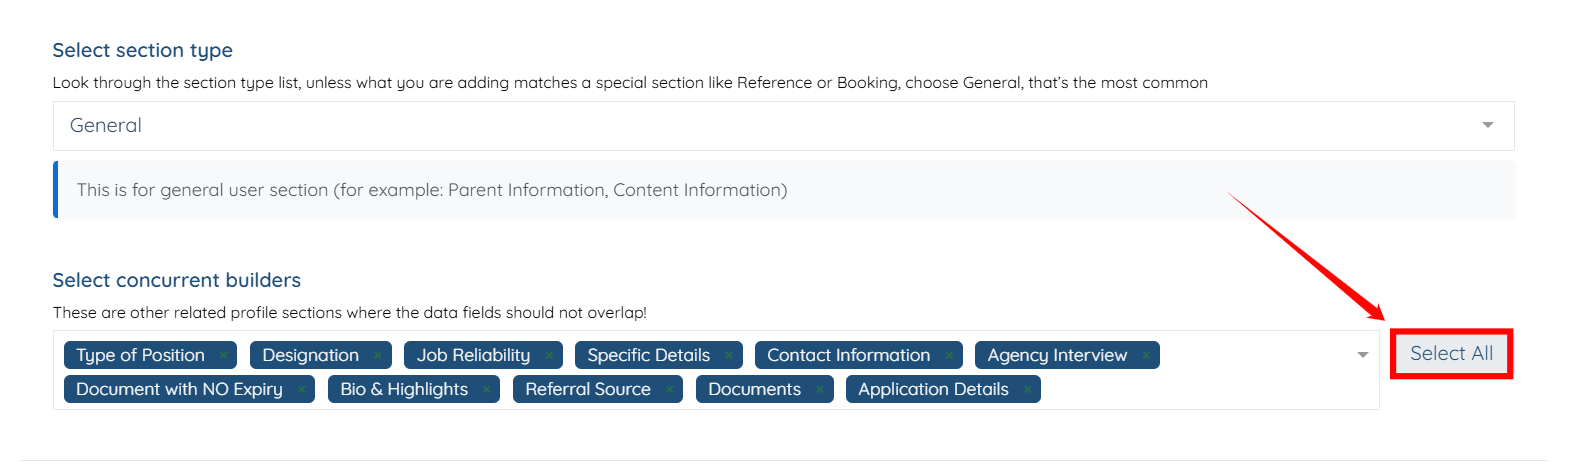
Step 5: Click Select All to include all related profile sections where data fields should not overlap.
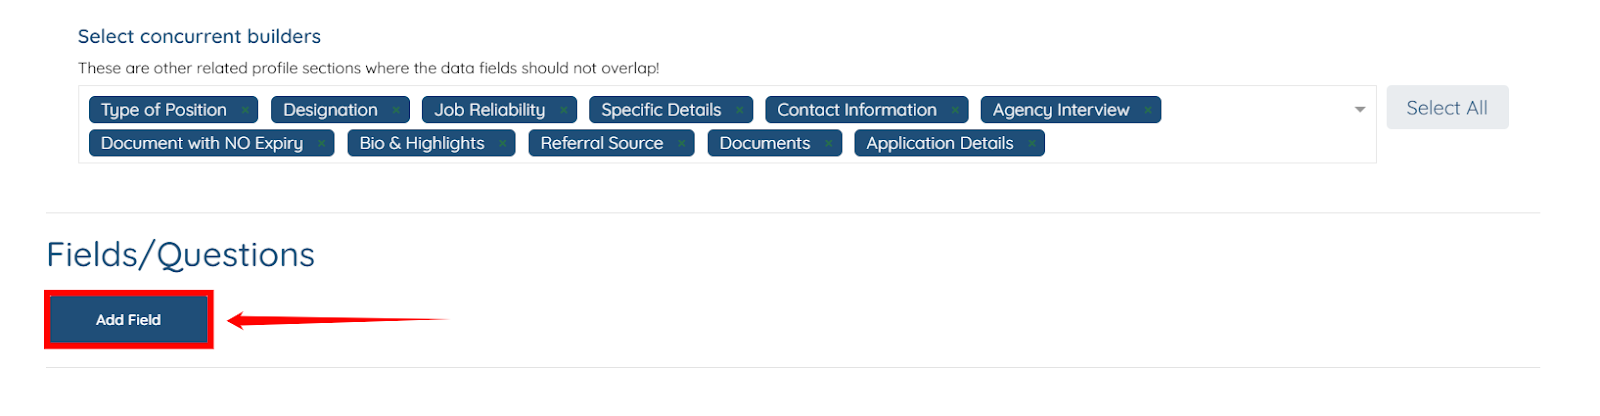
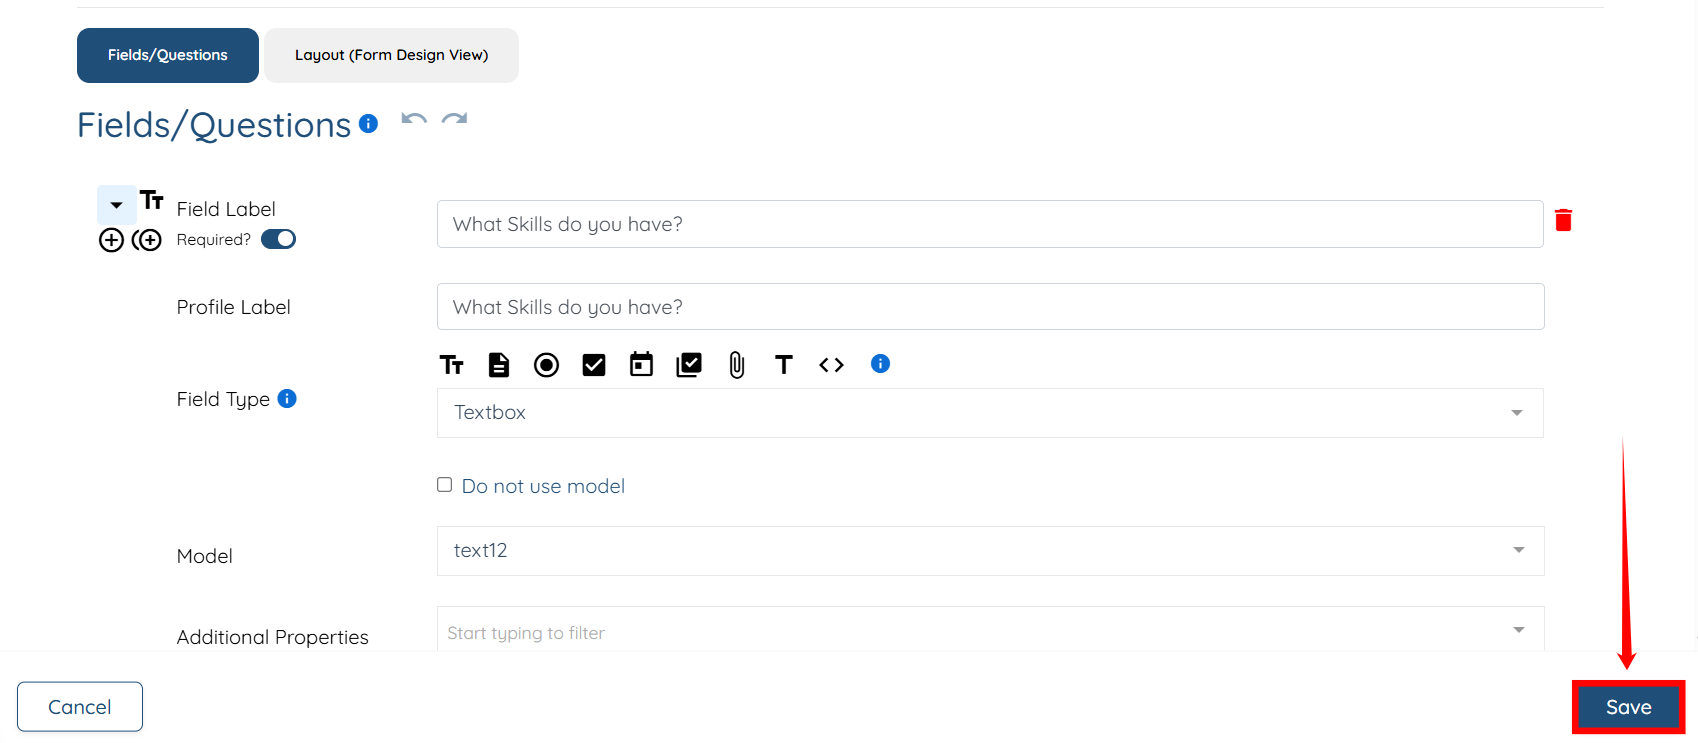
Step 6: Click the Add Field button and add the required questions to your section.
Step 7: After you add the required questions, click the Save button to proceed.
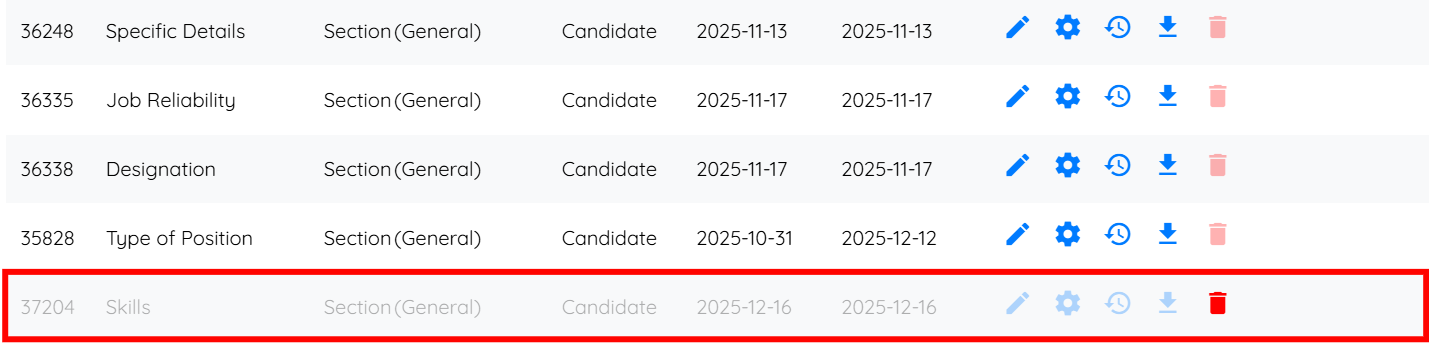
The new section will be created successfully.
Add the newly created section to the candidate profile so that it appears within the profile details.
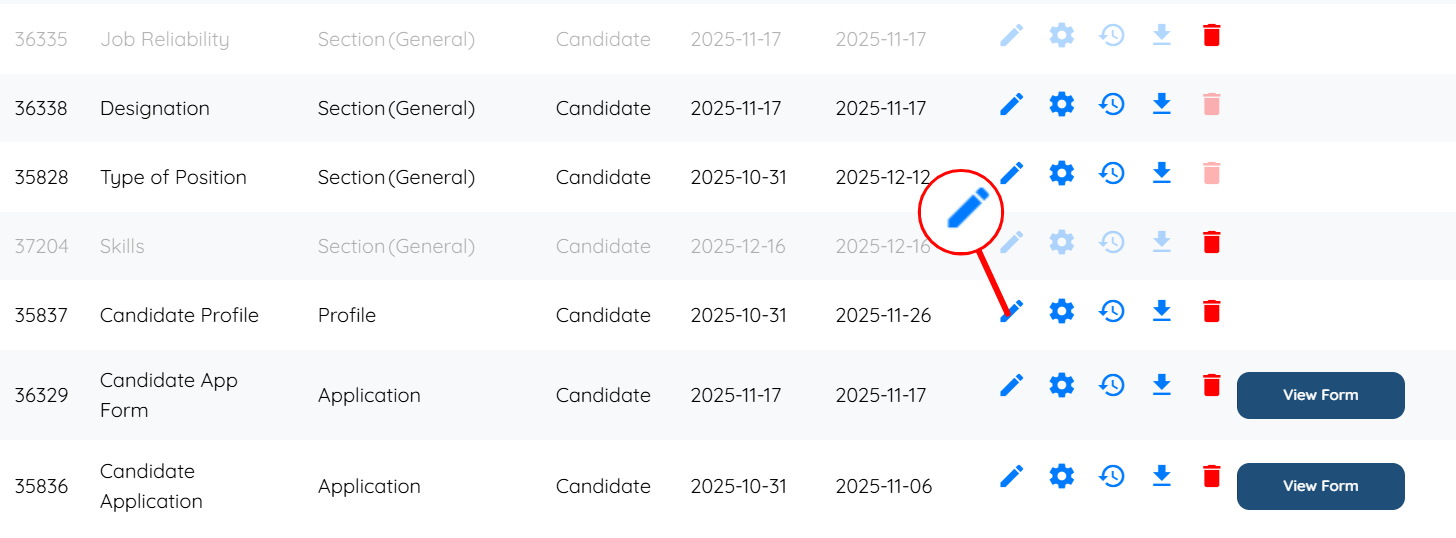
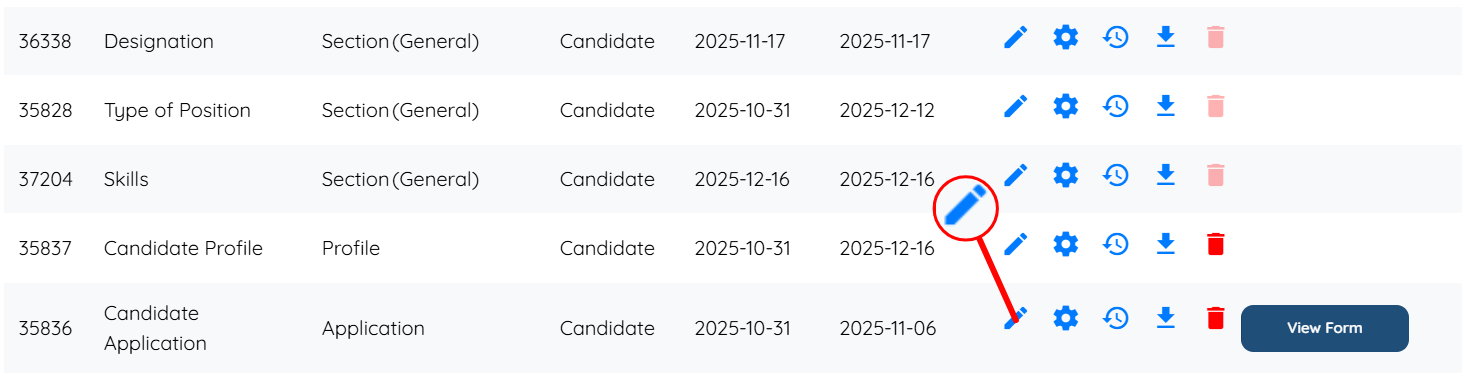
Step 1: Under the Application & Profile Builder, locate the Candidate Profile and click its corresponding pencil icon to open it.
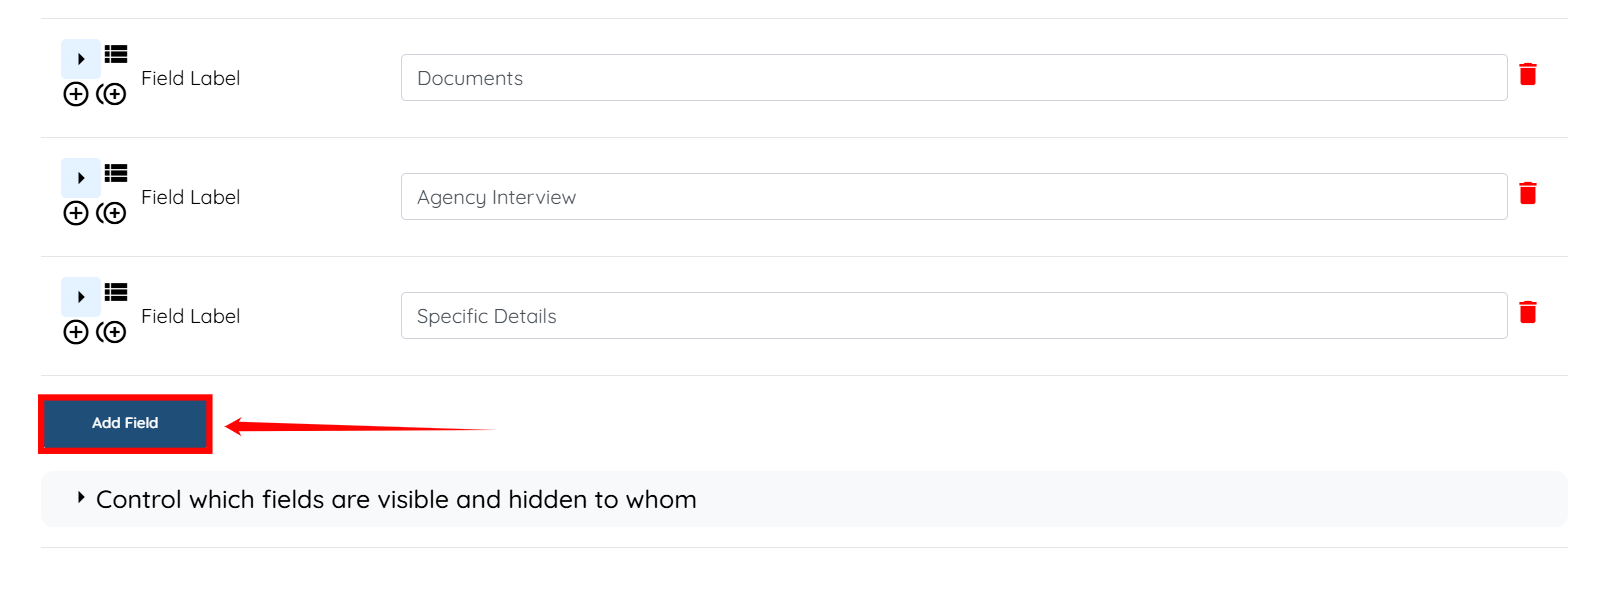
Step 2: Scroll down and click the Add Field button to begin adding the newly created section.
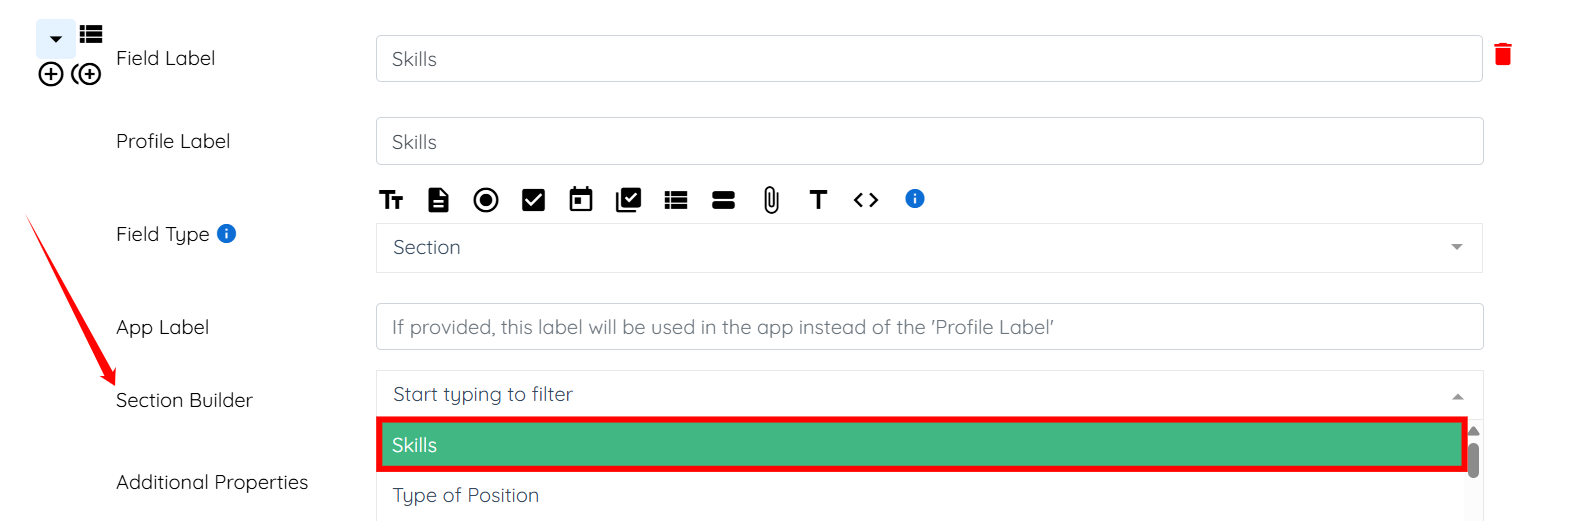
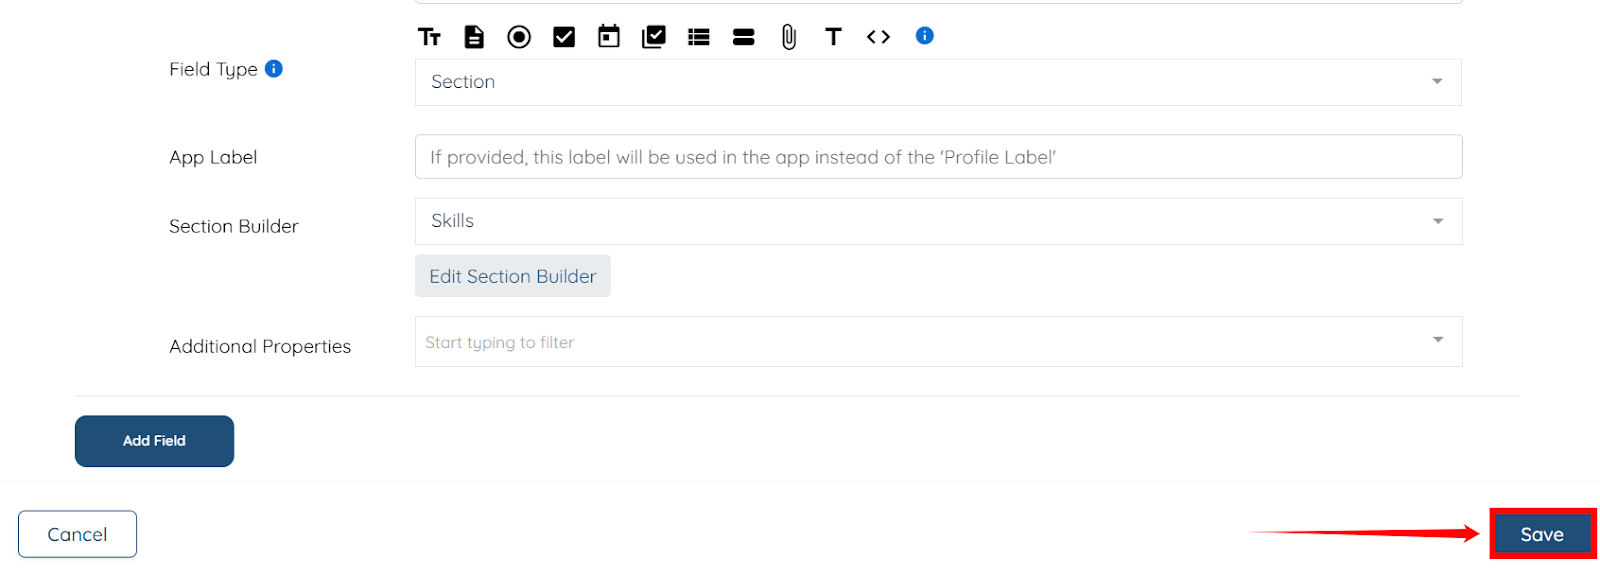
Step 3: Provide the Field Label and Profile Label.

Step 4: Select Section as the Field Type.

Step 5: Select the section you created (in our case, Skills) from the dropdown menu in the Section Builder field.
Step 6: Click the Save button to proceed.
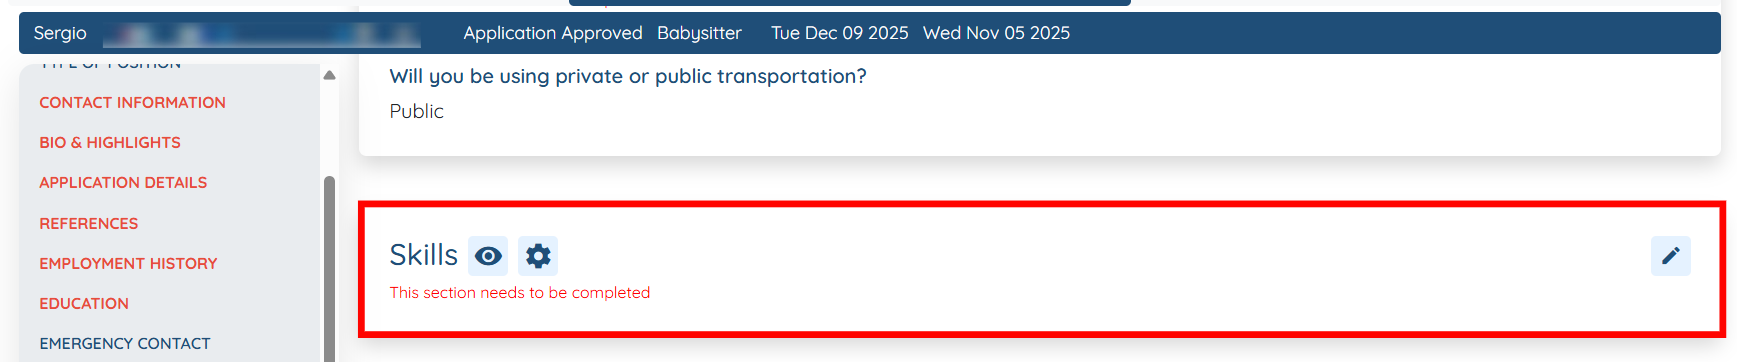
The Skills section will be added successfully to the candidate profile.
Add the newly created section to the application form to collect information from candidates at the time of submission.
Step 1: Under the Application & Profile Builder, locate the Candidate Application Form and click its corresponding pencil icon to open it.
Step 2: Follow the same steps (Steps 2–6 in the Add the Section to a Profile section) to add the section to the Candidate Application form.
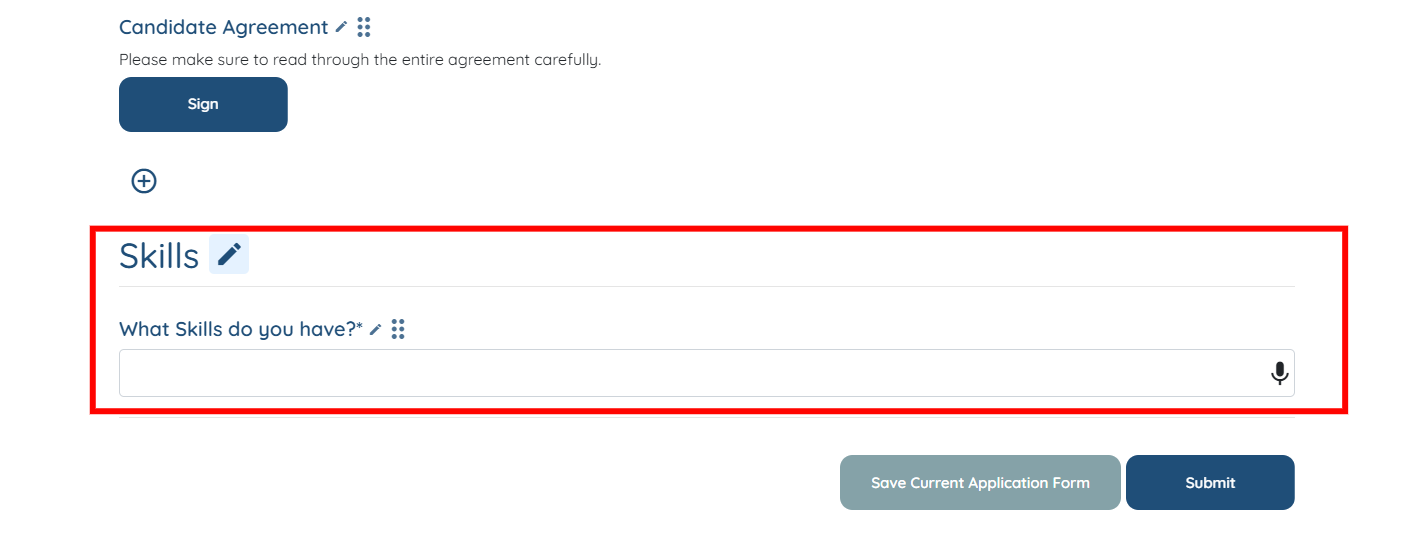
The newly created section will be added successfully to the Candidate Application form.